



Last Updated: April 2026
Quick Summary
- The article showcases fun, creative, and budget-friendly DIY projects designed specifically to engage teens, from décor and crafts to fashion and tech-inspired ideas.
- Each project is selected to be easy to follow, using simple materials teens likely already have at home or can purchase cheaply.
- The list includes a mix of self-expression crafts (like room décor, jewelry, and art projects) and practical, useful builds teens can actually use or gift.
RELATED: 15 DIY Teen Room Decor Projects
Craft Projects for Teenagers They’ll Actually Like
Looking for fun, creative, and budget-friendly DIY projects teenagers will actually want to make? This guide highlights simple, engaging ideas that tap into teens’ love for self-expression, personalization, and hands-on creativity. From room décor upgrades to wearable crafts and practical everyday projects, these teen-approved DIYs are designed to be easy, affordable, and packed with personality. Whether they’re crafting solo, hanging out with friends, or filling a weekend with something productive, these projects help teens explore their creativity while making something they’ll be proud to use or gift.
1. Instagram Coasters
Begin by placing Mod Podge on your ceramic tiles and putting your printed Instagram photo on top. Add a thin layer of Mod Podge on the photos to help seal it in and protect the surface. Once dry, spritz on a sealer and apply felt pads to the bottom of the coasters.
- Brush a thin coat of Mod Podge on the tile.
- Press photo down flat. Smooth bubbles with your finger.
- Brush another thin coat on top. Let dry 20 minutes.
- Spray sealer outdoors. Stick felt pads on the bottom.
2. Marbled Clay Ring Dish
Start by rolling out small bits of oven-baked clay into one big piece. Once all the colors are mixed, roll the clay flat, and cut out a circle using a round item as a template. Then, place it in a bowl, allowing the middle to sink into the deep part of the dish.
Once you’re happy with the shape, bake the clay in the oven for 15 minutes. Let the bowl cool, and paint the rim of the bowl with metallic gold color.
- Pinch small bits of each color. Twist and roll into one ball.
- Roll flat. Cut out a circle with a cup rim.
- Drape the circle over an oven-safe bowl so the center sinks.
- Bake 15 minutes at the temp on your clay package.
- Cool completely. Paint the rim gold.
My daughter and I made this project together last year for Mother’s Day. We’re planning to do it again this year. Just reordered the clay a few days ago. It’s officially tradition now.
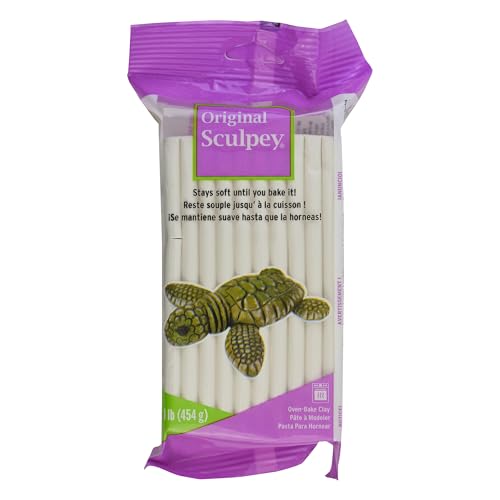
- STAYS SOFT UNTIL BAKED: Does not air dry. Remains soft and flexible until it is baked in your home...
- FUN TO PAINT & FINISH: After baking, it can be sanded, drilled, carved and painted with water-based...

3. Knot Pillow
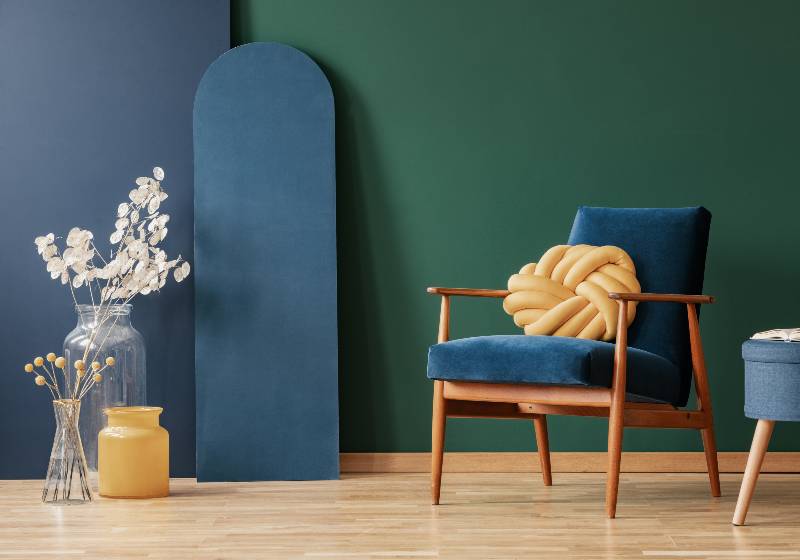
The secret to nailing this knot pillow is to think of it like a pretzel. Take note of the weaves and the knots of a pretzel for you to be able to make this DIY easily.
- Sew the fabric into one long tube. Stuff it firmly.
- Sew both ends closed.
- Shape the tube like a pretzel. Loop, cross, tuck.
- Tighten the knot and adjust until it holds its shape.
- Hand-stitch the ends together underneath to lock the knot.
4. Faux Crystals
These faux crystals are so gorgeous that you might even want to make a few for yourself! Start by looking for jagged rocks. The more obscure the shape, the better.
- Paint the rock your base crystal color. Let dry.
- Brush a thick layer of glue on the tip.
- Dip the glued tip in coarse salt. Press to coat.
- Let dry completely (about 1 hour).
- Paint the salted tip with shimmer or metallic color.
5. DIY Elbow Patches
Elbow patches are one way to look preppy and chic! If you’re able to cut the patches into a heart shape, then your teens will have a super cute sweater they can’t help but show off in their Instagram OOTDs.
- Trace your heart template onto the felt. Cut out two patches.
- Put the sweater on. Mark where your elbow lands with a pin.
- Pin patches in place on both sleeves.
- Stitch around the edge with a running stitch.
- Knot the thread on the inside of the sleeve.
6. Cork Succulents
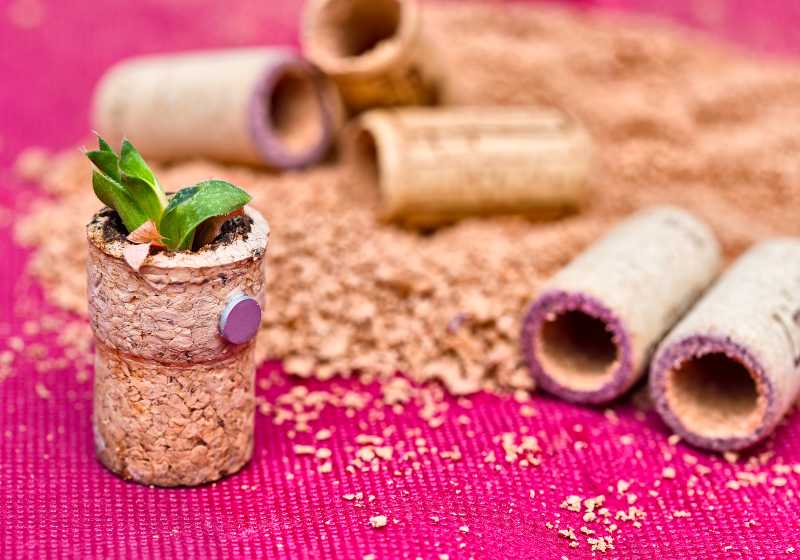
This is my little DIY project for all the wine corks I have lying around. Simply hollow out the cork, then stick a magnet on the back.
Finally, place a pinch of dirt in the hollowed-out cork, and fit a succulent inside. That’s all it takes!
- Hollow out the top of the cork with a hobby knife.
- Stick a magnet on the side of the cork.
- Fill the hollow with a pinch of soil.
- Tuck in a tiny succulent cutting.
- Stick to your fridge. Water with a few drops once a week.
7. Baseball String Bracelet
This is a great idea for those wondering what to do with a ruined baseball. By the way, don’t forget to be careful with the X-Acto knife when cutting on the traced line to get the stitching out.
- Carefully cut along the red stitching with the X-Acto knife.
- Use the seam ripper to pull the stitching free in one long strip.
- Measure against your wrist. Leave an extra inch for the clasp.
- Attach the clasp ends with pliers.
- Trim any loose thread. Keep the X-Acto capped when not in use.
RELATED: DIY Clothes for Teens To Make On The Cheap
8. Galaxy Print Tee
Begin by spraying your black tee with some bleach. Then, spray a mixture of 1 part metallic paint and 2 parts water.
You could leave the shirt at that, but if you’d like, you could also paint on a few stars or planets. This DIY project can also be one of the coolest homemade crafts for adults.
- Slide cardboard inside the shirt. Work outside.
- Lightly spray bleach in cloud shapes. Rinse after 5 minutes.
- Mix 1 part metallic paint with 2 parts water. Spray over bleached areas.
- Let dry 20 minutes.
- Flick white paint with a brush for stars. Air dry 24 hours.
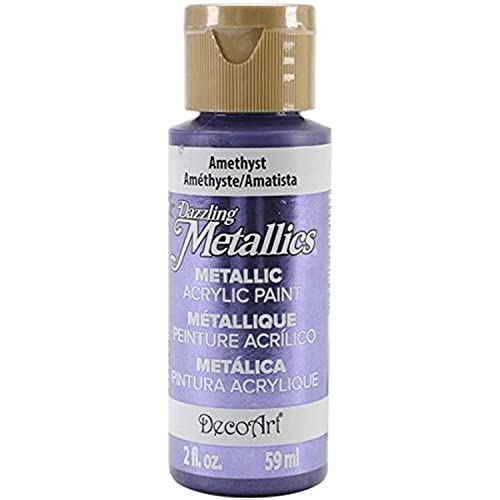
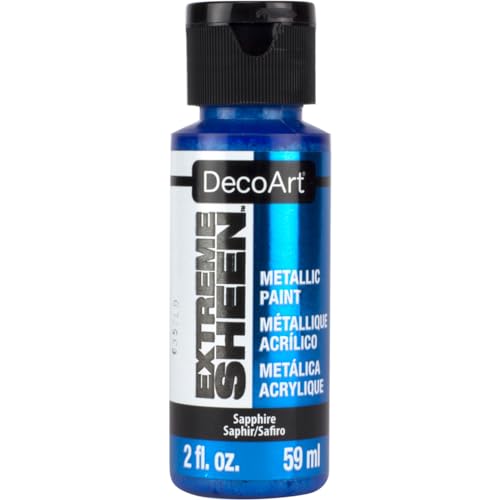
My 15-year-old saw a galaxy shirt online for $38 and asked for it. Hard pass. We already had a plain black tee sitting in her drawer she never wore, so all I needed to grab were the paints. We made one together in the driveway for under twenty bucks and it turned out better than expected. Here are the paints we used:
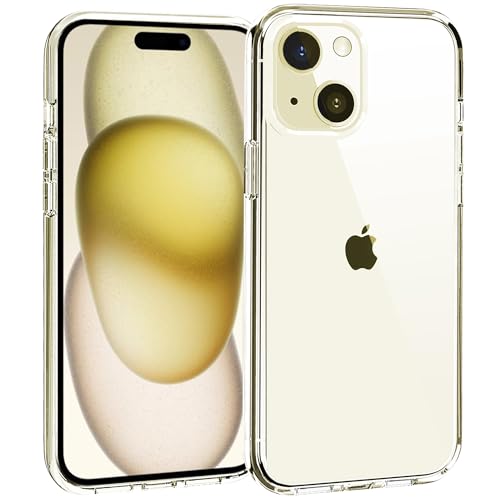
9. Phone Cases
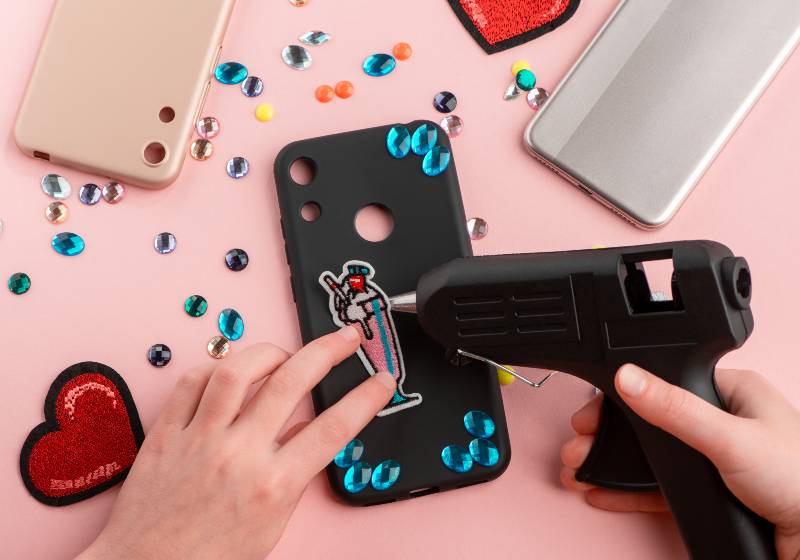
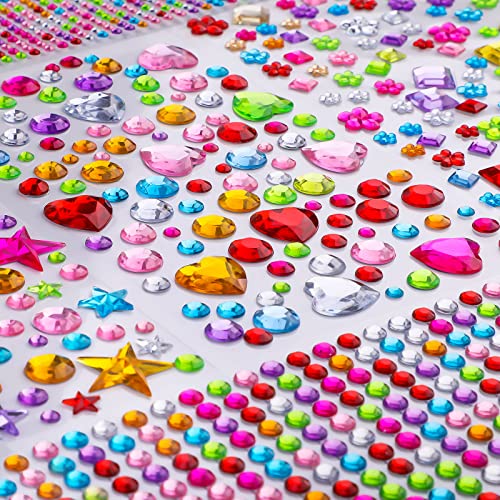
Give your phone cases some bling by attaching bits of jewelry to the back of the case. Just remember to use strong glue for this DIY to prevent the jewelry pieces from popping out.
- Wipe the case clean. Lay out your design before gluing.
- Dab a tiny drop of E6000 on the back of one rhinestone with a toothpick.
- Press onto the case with tweezers. Hold 10 seconds.
- Repeat until your design is complete.
- Let dry 24 hours before putting the case on your phone.
My teen goes through phone cases like socks. She wanted one of those bedazzled ones every girl at school has, thirty bucks a pop. Hard pass. I grabbed a 1,440-piece rhinestone pack, some craft glue, and a plain clear case instead. Since then she’s never asked for a new one. She just designs her own.

10. Custom Book Covers
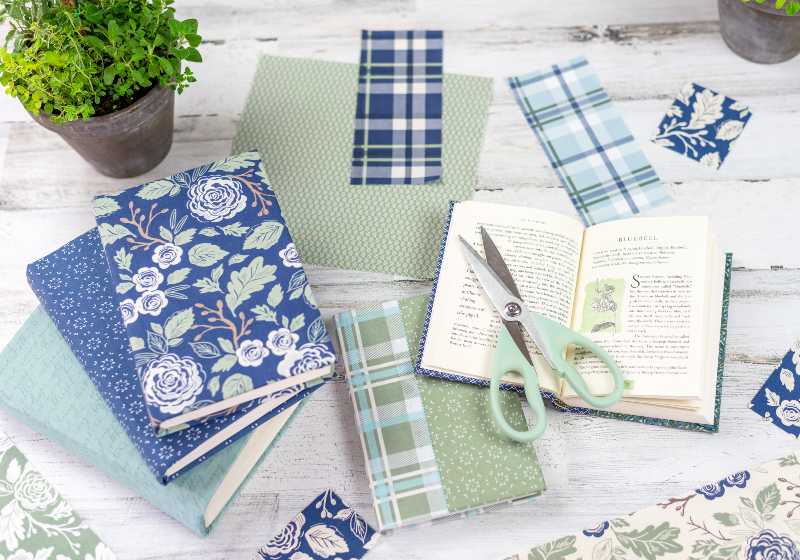
Give your books a new cover by sticking sheets of patterned paper with some Mod Podge. Just be sure to remove all air bubbles trapped inside. If you’d prefer, you can also sand some of the edges and surfaces for a more vintage look.
Replace the period with the ampersand and never quit doing what you love!
- Measure the book cover. Cut paper 1 inch larger on all sides.
- Brush Mod Podge on the front cover.
- Smooth paper on from center out. Push bubbles to the edge.
- Fold excess paper under the cover edges. Glue down.
- Seal with a thin top coat of Mod Podge. Sand edges lightly for a vintage look.
11. Rings
Take your old buttons and turn them into unique rings. All you have to do is attach the buttons to the rings using a hot glue gun. Let them dry for at least 5 minutes before trying them on.
- Heat up the glue gun. Work on a scrap mat to protect surfaces.
- Add a dab of hot glue to the flat pad of the ring base.
- Press the button face-up onto the glue.
- Hold steady for 30 seconds.
- Let cool 5 minutes before wearing.
12. Friendship Bracelets
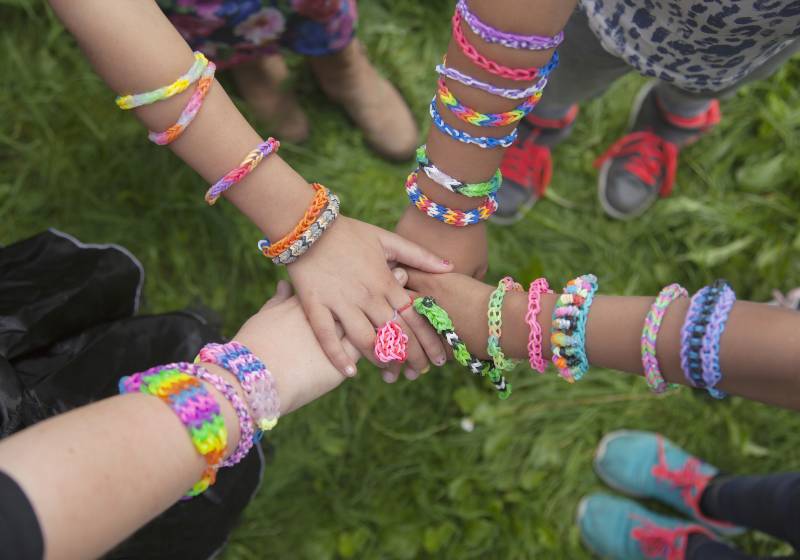
Personally, I’m still not over the ombre trend, so this bracelet is one of my favorites. If you want to add more strands and colors, simply look for an end with an extra clasp.
- Cut 6 strands of floss, each 30 inches long.
- Tie a knot at the top. Tape to a table or clip to a clipboard.
- Use forward knots from left to right for a diagonal stripe pattern.
- Switch colors to create an ombre effect.
- Tie off when it fits your wrist. Add a clasp if using multiple strands.
My daughter came back from a concert completely obsessed with those bracelet swaps. You know the ones where girls trade handmade beaded bracelets with lyrics and little inside jokes on them. She wanted to make fifty. So I did what any mom does at 10 p.m. on a Tuesday. I pulled up Amazon and grabbed one kit that had everything in it.
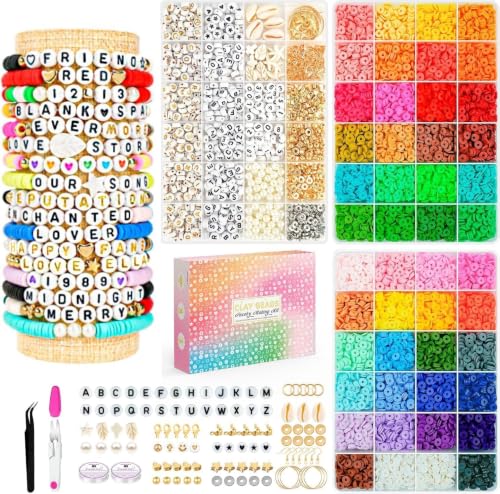
- CONCERT FANS GATHER!!! Using this clay beads set to make a friendship bracelet with friends! This is...
- PACKAGE CONTAINS: Clay beads in 48 colors, 255 pieces per color, a total of 12,240 clay beads. In...
13. Tin Lantern
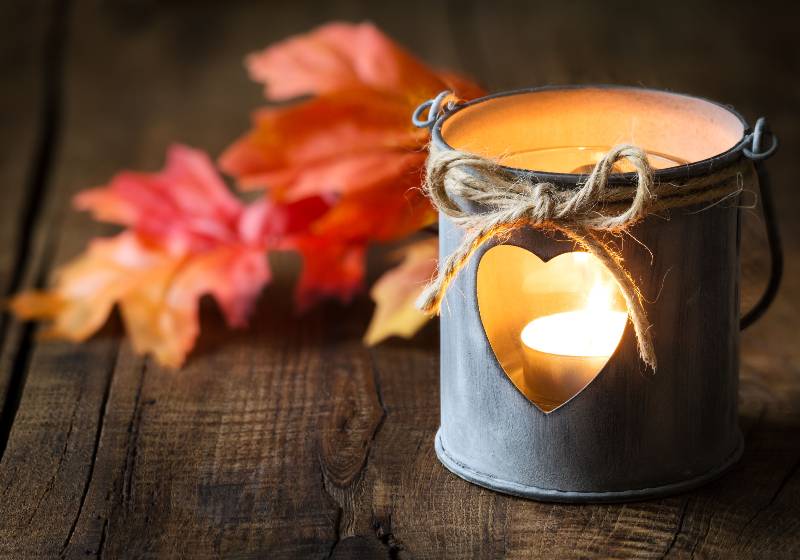
Don’t forget to freeze your tin can before making this DIY tin lantern. Trust me, it will make it so much easier when it comes to poking holes through the can.
- Fill the can with water. Freeze solid overnight.
- Draw your design on the outside with the marker.
- Wear gloves. Hammer nails along the design to create holes.
- Let the ice melt. Dry the can completely.
- Tie twine around the top. Drop in an LED tea light.
14. Chalkboard Coasters
These chalkboard coasters will make for a much-loved housewarming gift. Simply spray a few coats of chalkboard paint on the tiles and glue felt squares on the back. Don’t forget to throw in a pack of chalk to complete your gift as well.
- Clean tiles. Spray outside in a well-ventilated area.
- Apply 2-3 thin coats of chalkboard paint. Wait 20 minutes between coats.
- Let cure 24 hours.
- Hot glue felt squares to the bottom.
- Rub the side of a chalk piece over the surface to prime it.
15. Marble Nail Art
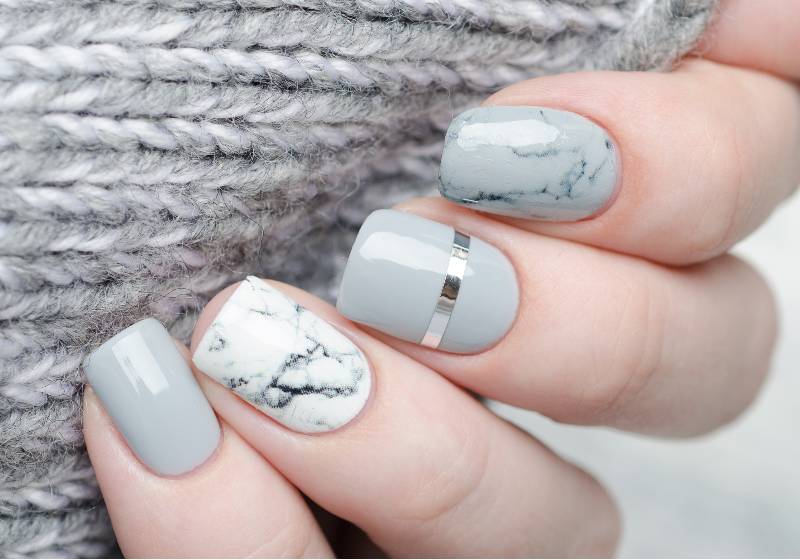
Don’t throw out your Chinese takeout containers just yet! You can use them as bowls for your marble nail art. Simply drop in different colors of your nail polish and use a toothpick to swirl the design in the water.
- Paint nails with base coat. Rub petroleum jelly around each nail (not on it).
- Drop nail polish colors into water one at a time. Work fast.
- Swirl gently with a toothpick to make a marble pattern.
- Dip your nail into the design. Lift straight up.
- Clean excess with a cotton swab. Seal with top coat.
Give Teens a Creative Outlet They’ll Love
DIY projects aren’t just a way to pass the time; they inspire imagination, build confidence, and give teens the freedom to create something uniquely their own. With simple materials and step-by-step ideas, even beginners can turn everyday items into stylish décor, accessories, and personalized creations that match their vibe and interests.
Ready to Start Crafting?
Encourage your teen to pick a project, gather materials, and dive in. Creativity grows the more it’s practiced, and these fun DIY ideas make it easy to start. Explore more tutorials, try new techniques, and make crafting a regular part of your teen’s world.
Stay connected with us on Facebook, Pinterest, and Instagram!
FAQ
1. What DIY projects are best for teenagers?
Projects that are easy, expressive, and useful, such as room décor, jewelry, tech accessories, or wearable crafts, tend to resonate most with teens.
2. What materials do most teen DIY projects require?
Most use everyday items like cardboard, paint, fabric scraps, string lights, jars, old clothing, or inexpensive craft supplies available at any dollar store or craft shop.
3. Are these DIY projects suitable for beginners?
Yes! Most teen-friendly crafts are simple, step-based, and totally beginner-friendly. They require little to no prior crafting experience.
4. Can teenagers complete these projects without adult supervision?
Absolutely, most projects are designed to be safe and independent. Only activities involving sharp tools, hot glue, or cutting may need adult guidance.
5. Why are DIY projects good for teenagers?
DIY activities build creativity, problem-solving skills, confidence, and focus. They also provide a fun, screen-free way to express personality and reduce stress.
QUICK POLL
Getting your teen into crafts. Is it to stop the doomscrolling, or maybe you can’t just accept she grew up?
Voted? Tell me the real reason in the comments below!









