

Chilly? Why not make your own rocket heater?
A rocket stove mass heater or rocket heater, is a space heating system developed from the rocket stove, a type of efficient wood-burning stove, and the masonry heater. If you don’t have central heating and you don’t feel like shelling out your hard-earned dollars for ineffective store-bought space heaters, the rocket heater is a great DIY alternative. It can also be used to cook!
Materials Needed To Make a Rocket Heater
Supplies
2 tall cans about, 6 inches across and 10 inches tall. (We used paint cans.)
1 piece of aluminum flashing, about 3 feet long.
Tools
Utility knife/box cutter/knife pliers
Tin snips
Gloves
Permanent marker
Measuring tape

Step One
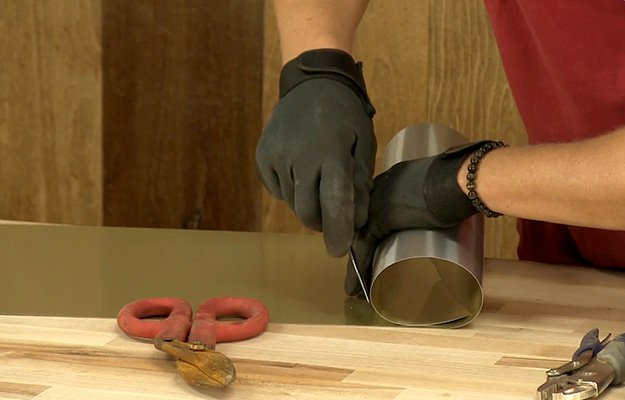
Create Feed Tube
Measure and then cut a piece of flashing that’s 8 inches long. Using the edge of a table or a square edge, bend the flashing into a square or whatever shape you want. This is the feed tube for your heater.


Step Two
Cut Hole for Feed Tube
With a pen, trace the edge of your feed tube on the side of the can you will be using as the base. Use your knife to cut the hole in the side of the can by pressing the knife firmly down and through the metal. Once your hole is cut, fit your feed tube into the hole about 1 1/2-inches deep and adjust fit as needed.


Step Three
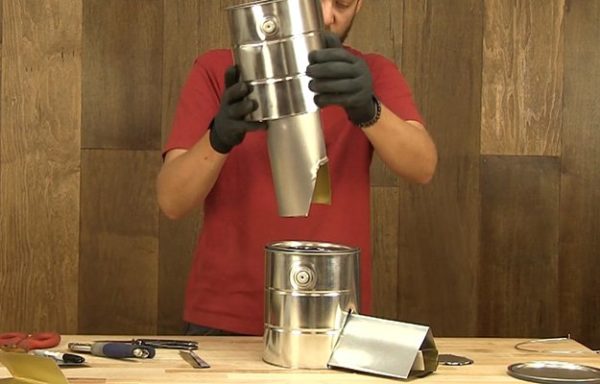
Create Stand Tube
Stack your two large cans and measure the distance from the base to the top. You need to allow 1 inch for flow, so subtract one from the measurement of the total height. Measure and cut a piece of flashing from that measurement and roll into a tube. This is your stand tube.


Step Four
Cut Hole for Stand Tube
Place your stand tube on the base of your top can. Then, trace and cut a hole in the base of that can the size of your stand tube.


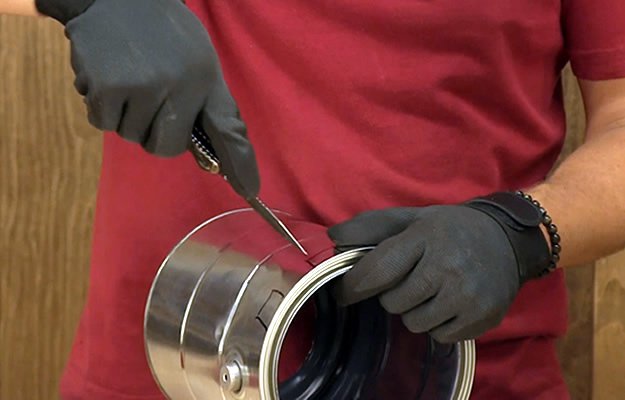
Step Five
Cut Stand Tube to Fit Feed Tube
Remove feed tube from first can and trace and cut its opening in the side of your stand tube. Replace the feed tube into the base can and fit the stand tube over it. The fit does not need to be exact but should be close. Some gaps are ok.


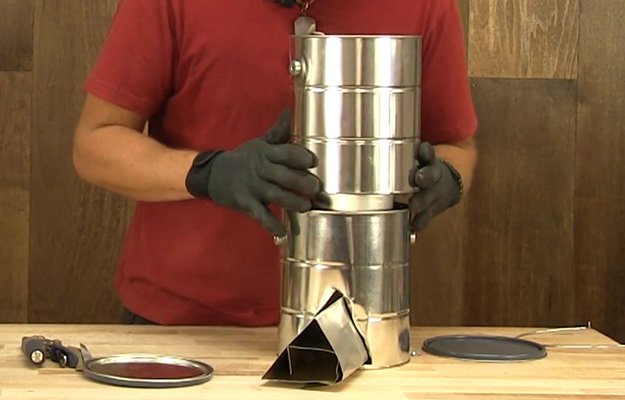
Step Six
Cut Hole in Bottom Can
Trace stand tube onto lid of bottom can. Cut and remove that piece as you did the other hole.


Step Seven
Assemble
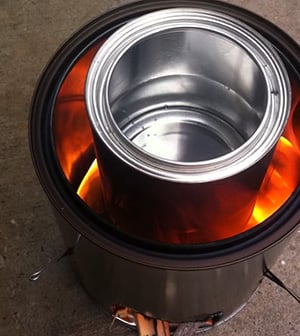
Put the heater together by stacking your two cans, placing the stand tube over the feed tube.
Step Eight
Cut Vent Holes
The top of the top can needs to have vent holes cut in it. Use your knife and cut a series of holes around the top edge.

Step Nine
Stay Warm
Your heater is ready to use. Burn stove in a well ventilated area. Do not burn your rocket heater indoors. Children should use only with adult supervision.
SAFETY NOTES:
Do not use anything galvanized in this process. Galvanized metal creates toxic fumes when heated. Wear gloves when cutting metal. The edges can be very sharp.

Want to see this process in action? Check out the DIY Rocket Heater tutorial online.
We are working on another video that shows you how easy it is to use your new rocket heater / stove and also a printable .pdf
Like this post?
Be sure to like us on Facebook (button below) so you can be the first to know about latest project updates as well as great DIY articles.
Pin It so you can come back to it and follow us on Pinterest to get latest project pins.
Let us know what you think in the comments below! Your feedback matters. The more interest we get in posts, the more likely we are to do more like that.
If you build one, please send pictures so we can post them.


