

If you’ve got some old scrap wood lying around, why not use it to make your very own DIY wood cutting board. Not only is the project cheap and easy to finish, it’s also a great gift for pretty much anyone old enough to use a knife.
RELATED: 31 Super Cool Reclaimed Wood Craft Ideas And DIY Projects
Weekend Project: Make Your Very Own Edge Grain Wood Cutting Board
Materials:
- Hardwood (we used walnut for this tutorial)
- Sander
- Walnut Oil
- Handsaw or Jigsaw
- Miter saw
- Toggle clamps
- Jointer
- Planer
- Painter’s pyramid
- Flush cut pull saw
- Waterproof wood glue
Step 1: Know the Different Kinds of Wood
First things first, you have to decide on the type of wood you want to use. The one we’re using in this guide is walnut. You can also use maple, cherry, or any other hardwood that has a tight grain pattern.
Step 2: Chop Your Wood
Start by taking a piece of walnut and chopping it up using your miter saw. Go for a measurement of about 15-16 inches.
Once you’ve chopped your wood up, clean each of the edges with your jointer jig at your table saw.
Step 3: Cut Them Into Smaller Strips
With an edge on every board cleaned up, take that edge and reference it against your table saw’s fence before cutting them into strips. The width of every strip should represent the cutting board’s overall height when the wood cutting board is done.
This time, go for a measurement of about an inch and three quarters. This should be enough since you’ll remove some of that thickness when you take it to the planer later on.
Step 4: Flatten Your Boards
You might notice some gaps between the pieces which you’ll want to take care of as early as now. Forcing them together with glue and clamps might give you issues down the road.
Take out your jointer and run them all through. Afterward, use your planer and run them through again. They should now be nice and flat – ready to be glued up together.
RELATED: 11 Creative Wood Wall Art Ideas | Weekend DIY Projects
Step 5: Glue Them Together
Clamp the cut pieces together just tight enough to squeeze out the glue from the top and bottom. Clean the glue off of the wood and leave it to dry for a couple of hours.
Tip: When clamping, make sure to put equal clamping pressure all the way through. To do this, put two clamps on the top and two more on the bottom. Avoid overtightening as this may lead to warping in your board later on.
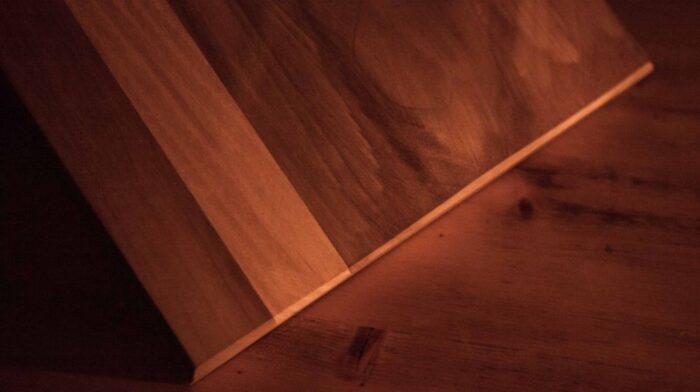
Step 6: Smoothen and Clean The Edges
With the glue now dry, put your wood cutting board through your planer again. Afterward, take it to your table saw and clean the edges up using your crosscut jig.
Step 7: Engrave and Remove Sharp Edges
For that personal touch, you can add an engraving to your wood cutting board at this point. Once that’s done, you can also add a chamfer along all of its sides to remove any of those sharp edges.
Step 8: Sand Your Wood Cutting Board
Start off at 120 grit and slowly work your way up to 220 grit.
Once you’re done with your first round of sanding, spray the entire thing down with water to raise the little fibers up and ready it for another round of sanding. Let it dry completely before you sand it again up to 220 grit the next time.
Remember: Sand, spray down, and sand again. Also, don’t forget to use a protective mask.
Step 9: Coat With Wood Finish
Use mineral oil and season your new board with at least three to four coats. In other words, just put a coat on, wait for about 20-30 minutes, wipe the excess off, rinse, and repeat.
You can finish things off using another conditioner that has both mineral oil and some waxes. Keep a bottle of this conditioner handy.
A wood cutting board tends to dry up over time. As soon as you start seeing that, just put a coat of the conditioner on and it should rejuvenate the thing.
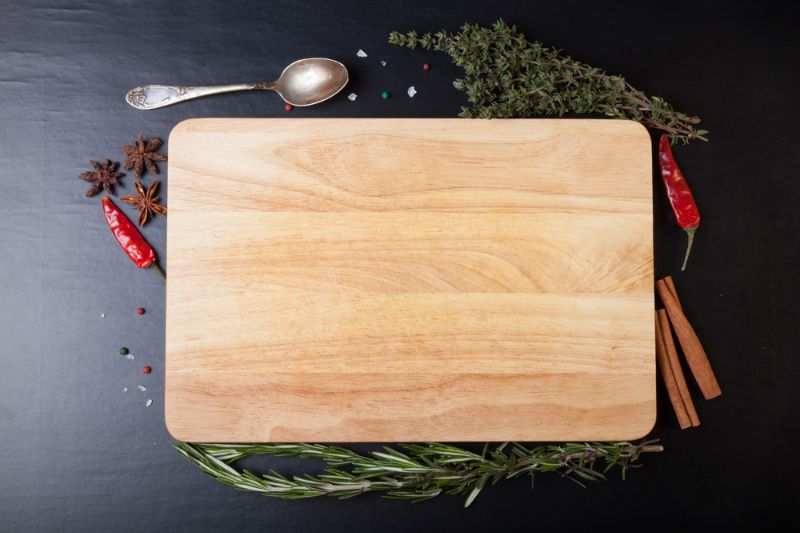
Final product should look like this:
Best Stuff shows us the pros and cons of some of the best types of wood for your cutting board in the video below:
Making a wood cutting board is a cheap and easy-to-build weekend project to scratch your DIY itch. It has an elegant finish that makes it great for personal use and even as a gift for any occasion.
Do you have other questions about how to make your very own wood cutting board? Ask us in the comments section below!
UP NEXT:


