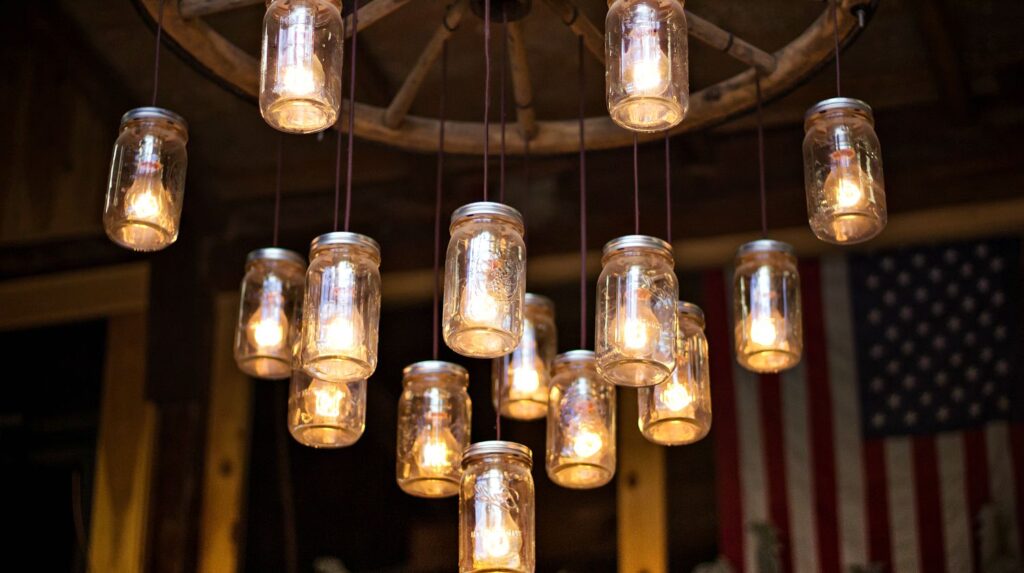
Create an enchanting and magical experience through your lighting in your garden or patio by making these DIY mason jar solar lights with little to no cost!
RELATED: Create A Prism Candle Light | DIY Mason Jar Crafts
A Quick and Easy Mason Jar Solar Lights DIY Project
What You Need to Make Mason Jar Solar Lights:
- Solar light (the stake kind) $1 each at Dollar Tree
- Mason jar with lid
- Sticky foam tape
Step 1. Remove Stake Piece of the Light
First, remove the stake piece of the solar light so you are left with the top solar panel piece. In my case, I kept the plastic casing around the light because it has a metal reflector that helps intensify the brightness of the lamp.
Next, remove the stake part of the light and it should just slide right off. You'll be left with the solar panel and light component. I also kept the plastic casing around the LED.
RELATED: Brighten Up Your Home With This DIY Mason Jar Lights
Step 2. Slide the Solar Light Through the Ring & Keep It Snug
Now, grab the jar and unscrew the lid. Remove the lid from your jar, then wrap the foam tape around the solar light.
Next, remove the flat part of the lid and only keep the ring. The top part of the solar light should slide through the ring nicely with a little bit of snugness.
In order to make sure the light doesn't fall down into the jar, you'll need to put the foam tape around the top of the light. This will keep it snug.
Step 3. Squeeze the Light into the Center of the Lid
Squeeze the light into the center of the lid so it's almost flush with the top of the jar. Once you've put a single layer of tape around the light, slide the light back into the ring.
Do this until the top of the solar panel is flush with the top of the lid.
Step 4. Screw the Lid onto the Jar
The last thing you have to do is screw the lid onto the jar and your first solar light is complete!
You might also want to try doing these easy DIY mason jar string lights. Follow the video tutorial from DIY Projects:
That wraps up our mason jar solar lights tutorial! I hope you enjoyed this simple and inexpensive DIY solar lights, and that you're fired up to make more solar powered jar lights.
Set up your jars in a sunny spot during the day to charge and wait for darkness to fall. They will definitely set the mood on your patio in the evening.
They can also be used indoors—my kids actually take some of them in their rooms for night lights. Have fun creating!
Will you give these mason jar solar lights a try? Tell us how it went in the comments section below!
Up Next:
- DIY Backyard Project Ideas: Fence with Mason Jar Lighting
- Mason Jar Crafts | Creative and Useful DIY Projects
- 60 Gifts In A Jar That Are Oh So Cute And Easy To DIY
Stay connected with us on Facebook, Twitter, and Instagram!
Editor’s Note: This post was originally published on July 23, 2018, and has been updated for quality and relevancy.
Love this
Thanks!
I made these on the weekend and I love them. The only problem is there’s quite a bit of condensation accumulating in the jar. Any advice?
Did you ever figure this out? Mine have a lot of condensation also.
Putting a desiccant inside may help. Silica packets, salt, baking soda, rice, etc.
Try a small packet of silica gel desiccant adhered to underside of lid with removable glue dots or adhesive decorating clips. And apply a thin smear of clear silicone to lid threads before closing the jar.
Maybe you could drill a very tiny hole on the bottom
for evaporation purposes? There are drill bits for drilling glass. It would be a bit more work, I must admit.
Maybe just use the plastic mason jars or use plastic mayonnaise jars instead, if the mouth opening is suitable, or any other jar that does accomadate the solar fixture. Then drill one or two tiny holes for “evaporation” on the bottom for drainage.
I (stupidly) paid for already made solar lids for mason jars and we would get more than condensation. If there was a rainstorm of any length, the jar would leak up to an inch of water. Good news was that just pouring the water out and letting the jar air dry (or wiping it dry) didn’t effect the usage. Hope you are as lucky!
Great idea
I’m definitely going to give it a try. This looks like a great project and I think I already have everything besides the foam tape. Have you had issues with water leaking into the jar?
I have (on lids I didn’t make but cost more than $10/lid) and would sometimes get up to an inch of water after a long rainstorm but I just poured the water out and they continued to work. They didn’t appear to be any different than these less expensive ones but I would suggest putting a bit of WD40 on the threads of the lid before screwing them back on because after awhile, the lids rust and you can’t unscrew them.
I would exchange the cheap NiCad batteries in the for Lithium Ion (LI) or Nickel Metal Hydride(NiMH)ones that last longer, hold their charge longer and can take a many more charges than the cheap NiCad.
How is the luminosity any different than the original light?
Hmmmm, the last picture shows the light with solar panel facing the ground? How exactly does that work to power the light? BTW I’m on eastern standard time and can’t figure out what time of the day it would be exposed to the sun LOL.
Let them charge during the day, then flip over and place befor the party.
You don’t need to flip them or anything if they are upright with the lid facing up the solar panel is on the top of the light so it charges while upright, I have mine hanging and they work perfectly!
wonderful!
Michael, your an idiot. It doesn’t matter what time zone you are in. It will be exposed to the sun WHEN THE SUN IS UP!! DUHH!!
You have it flipped over during the day charging up most likely.
Well if you let it charge all day long you can turn it upside down and the battery will still light up because the battery is fully charged. and it is dark out side and they don’t work off of MOON light
I can’t tell from the pictures, are the canning jars wide mouth or standard?
They are wide mouth, which I didn’t know. Regular sized jars the solar light doesn’t fit inside. You can, alternately, just glue them on top of the lid if you already have the regular sized jars. Doesn’t look quite as flush but it also works. On the other hand, I bought the blue vintage jars so it’s a better look in that respect.
As far as turning over, etc., we are just going to stack them around the house for pathway lights – I’m going to put some small rocks inside the jar so that a strong wind doesn’t blow them over but this will definitely beat just using the stake – they are fine but if you so much as graze them, the stake always breaks and then they are useless. This prevents that!
Matthew, just a thought; how about substituting ‘fire glass’ instead of rocks for ballast? More bling is a good thing!
For additional light reflection you can cut out an aluminium foil disk the same diameter as the inside bottom of the jar and double-side tape it to inside of the jar’s bottom. This should help generate more light outwards.
Very awesome, Stephanie!
thanks!
I like the concept, but I hate to waste a good wide mouth canning jar and ring. I’ll inspect my jars and see if any are cracked around the seal area. This idea would be a good recycling project for the cracked ones.
I have seen this done using globes from ceiling fan lights, so I might try that too.
You can always pick up some cheap ones at garage or yard sales. Another resource is craigslist.com or freecycle.org. Then keep your good ones for canning.
The problem is that you cannot leave these out all of the time. You are not properly sealing the jar, water will get into them. My wife tried this project and all of the jars got water in them.
Put a thin bead of cylicone around the edge of the lid. This will keep out water and help hold the light
You might seal the tops with some clear silicone seal applied to the top circumference before you put the metal lid over it. That should prevent any rain water leaking into the jar. Leaving in the rubber lid seal might work too.
GREAT IDEA WILL HAVE TO TRY THIS FOR THE SUMMER NIGHT GATHERS.
I am going to buy 100 and power my house
You can also use some spray glue on the inside of the jar… Then throw some glitter in ( your choose the color) and shake it around, that way the whole glass jar has glitter stuck to it. With the light it adds a colored light.
Love that idea! Thanks
I may have just overlooked it, but what size jar do you need to use?
What size mason jar do you use?
I used Pint size jars with 2 and 3/4 ” lids (before installation). The solar part I bought were 2″ so (well, you can do the math!) so the ring was fairly narrow but the 2″ solar part fit snuggly and I didn’t need to use foam tape but did you wd40 around the inner threads so I could unscrew the finished top because water did get in (same on expensive remade ones) but I just poured the water out and they worked fine but without greasing the threads, the water would have rusted the lid too much to be able to unscrew them.
Any ideas on how to attach a hanger? I would love to hang these around my covered patio
I imagine with a drill and wire. We can look at trying soon. Send us pics if you figure it out!
you show the lights upside down. They’ll have to be the other way to get light and charge. So we’re supposed to turn them upside down every day? What gives?
I think it’s a waste of good canning jars. You’ve already bought the lights. Why destroy them and use good canning jars? This looks like a Martha Stuart commercial to me. It’s about as useful as a macaroni necklace for Mom on Mother’s Day.
Are they 100% water proof as in can I put them in my pool?
I would not think this would be a good idea
I’m not sure why some people feel the need to post rude comments, but I think this is great idea! The lights themselves can’t sit on a patio table unless some alterations are made to them or they are stuck into a pot or something. This idea is great because you can also decorate the mason jar to match your color scheme. So I love this “Martha Stewart” idea and I also love and wear the macaroni necklace my daughter gave me!
I’m putting color glass rocks in mine
This article is a disappointment! Anyone can buy cheap dollar store solar lights. I thought you were going to teach us something more useful and sustainable that just putting something made in China in a jar. I recently saw a solar skylight made from a soda bottle with some bleach and water in it that was equivalent to a 40 watt
WOW! Why so negative?? Its a cute little decoration idea, not something to light up your house with. geez!
Grow up Baker!
I filled mine 3/4 full a colored glass, also from the dollar store and leave them upright at night. For hanging them just wrap bailing wire around the neck works great.
Send photos! Thanks
I think this would be a good idea for those times that the electricity goes out and you need a little light to move around or to put in different rooms in your house. You’d have to keep them charged of course.
Neat blog! Is your theme custom made or did you download it from somewhere?
A design like yours with a few simple adjustements would really make my blog
shine. Please let me know where you got your theme. Bless you
One question. Is the foam tape sticky on both sides? Or is it just the thickness that keeps it snug and in place? Love the idea!
I love this idea! We’ve lost our power due to storms, twice already this year. I mean, I lost my freezer and everything in my fridge; it was off that long. The second time the power went off, we got the idea to use our solar lights; GREAT idea!! It’s such a bright light, better than an oil lamp or candle; I actually read by it! We set them throughout the house and everything was very well lit. Just an tip I wanted to share with everyone!! Hope you don’t need it, but if you do it’s great lighting!
You never answered the question asked at least 5 times…
WIDE OR REGULAR MOUTH JARS?
Thank you
Hi Laura,
I am so sorry for the delay in responding. Preferably wide mouth jars, but you can use either.
Thank you for your question – and good luck with making these lights.
Best,
Renee
I don’t find either are small enough for the $1 solar lights?
Kind of neat for outdoor event. I drilled a hole in a piece of wood to accept the shaft (square or round board). Leave them out most of the time on our deck, move them around to where you like them.
I live in the Sierra foothills and power is out frequently when we have lots of snow. I bring the lights inside to give us useful light.
Made these and love them. Have a couple hanging and some on the deck. Gave as gifts too to the parents and in laws who both have campers. You can buy hangers for the jars at Pat Catans for a dollar. I put colored stones in some of mine. I also use clear caulk to seal them up.
Sounds beautiful, Sandi. Thanks for your tips.
LIKE
My goodness – so much grumpiness directed at someone who has offered her ideas *for free* to whomever wants them. Don’t like it? Doesn’t match your particular values? Just click to the next site. There are plenty of them out there and, really, it’s not all about you. Thanks, Stephanie, for sharing this.
Thanks Lorraine! 🙂
The $1 ones from our local store fit better in the regular mouth jars. My problem is I pulled the backing off of the tape so when I jammed the light in, I accidentally pushed it loose from the silver cover. I think I am going to have to break that jar!
Love it. Mason jars also make neat terrariums’ and mini fairy gardens.
Cool project. I use solar garden lights staked into my kitchen plants for just enough light to keep on in the kitchen overnight to use less electric; but I love the solar jar idea too.
I love these! Such a lovely idea! I have many jars hanging in my trees, in my garden. I’m very happy with them and do enjoy creating something!
I purchased the dollar solar light and the mason jar lid it far larger than the light? Every jar I have tried. Can anyone tell me where to find a smaller open mouth jar?