

Combine eggs and shaving cream to craft the coolest easter eggs you could lay your eyes on!
RELATED: 15 DIY Easter Basket Ideas That Will Have You Hoppin’
In this article:
How to Make Shaving Cream Easter Eggs
Dying Easter Eggs Project
Who doesn’t enjoy coloring Easter eggs? It’s an inherently pleasing combination that brings out the messy toddler in all of us.
There’s something about the natural perfection of the pristine white egg dunked awkwardly into unnatural pots of vivid blue, red, and yellow. Ask around and you’ll be hard pressed to find anyone who doesn’t have a pleasant childhood memory of this lighthearted tradition, even if this sort of crafts project makes absolutely no sense.
I mean….a bunny…eggs….huh?
Of course, you’ll also be hard pressed to find someone who wasn’t disappointed when their attempts at spring-bright eggs turned out to be muddy messes.
Those stripes and swirls of contrasting color you had in your head? How does streaky grey brown sound instead?
Thank goodness for progress! Craft bloggers and Pinterest wizards everywhere have been working on improving the Easter egg decorating experience by experimenting with new ‘viral’ techniques. Egg enthusiasts everywhere would be happy to know they’ve succeeded.
The days of vinegar and odd little tablets of color have come to an end. It’s time to usher in the year of the ‘shaving cream Easter egg’.
Whether you’re trying to save the next generation from the disappointment/frustration of an unintentionally ugly egg or you’re an Easter egg ‘dye-hard’, the shaving cream technique is an easy way to create flawless, gorgeous eggs.
Fun, messy, and altogether gorgeous, it is not only almost foolproof but considerably less expensive than the elaborate kits sold in craft stores and supermarkets today. Grab some of that nasty smelling shaving cream you’ve been hiding in your cupboard and start dying eggs with food coloring.
Ingredients for Your Easter Egg Craft

- Shaving cream
- Hard-boiled eggs
- White vinegar
- Food coloring
- Paper towel or tea towels
- Toothpicks or skewers
- Gloves (optional)
Instructions
Step 1: Boil the Eggs Then Allow Them to Cool

Gently place the desired amount of large, white eggs in a pot of cool water. Bring to a boil and turn off the heat.
Allow the eggs to sit in the water as it cools – between ten to thirty minutes. (Co-incidentally, this is an excellent method for cooking the perfect hard-boiled egg for eating.)
Step 2: Submerge the Eggs in Vinegar

Fill a bowl with white vinegar. When the eggs are cool enough to handle, submerge them in the vinegar.
Allow the eggs to sit for 20-30 minutes so that the vinegar can work its way into the shell, making it more porous so that the colors absorb better.
Step 3: Fill Bowl with Shaving Cream

Fill a bowl big enough to hold an egg with shaving cream. The quality of the cream doesn’t matter in the least; so don’t splurge on the newest in ‘shaving technology’.
RELATED: 12 Inventive Easter Egg Hunt Ideas Kids Will Love
Step 4: Add Food Coloring on the Shaving Cream

Add the food coloring of your choice. Liquid is easiest, but if you happen to have gel colors in your pantry, these work just as well but require a bit more mixing to disperse the tones throughout the shaving cream.
NOTE: In order to create the prettiest, most appealing eggs it’s best to keep basic color theory in mind.
Yellow and blue come together to make green. Blue and red become purple. Red and Yellow mix into a variety of lively orange tones.
The results of keeping it simple? A lovely mix of tones rather than a muddy mess.
If you use too many colors at once, the inevitable result will be the kind of nasty earth tones you may remember from childhood experiences.
Step 5: Swirl the Tones with a Toothpick

Using a toothpick, wooden skewer, or, if you’re brave, your finger, swirl the tones together. Try not to over mix or you’ll end up with a solid tone rather than the marbled effect you’re looking for.
However, you also want to be sure that the colors are well incorporated throughout the entire amount of foam. Take your time and enjoy the process!
Step 6: Sink the Eggs in the Cream

Gently sink your egg into its foamy, colorful ‘nest’. Repeat for all your color combinations.
Step 7: Roll the Eggs in the Cream

With gloved hands (or not if you’ve no plans for the rest of the day), roll the egg in the cream and color. This is messy.
If you are working with children be sure you have plenty of towels and working space that you won’t mind cleaning repeatedly.
Step 8: Remove Eggs from the Bowl

When you’re satisfied with the ‘coating’, remove your eggs and place them on paper towels. Leave them undisturbed for at least 45 minutes.
This will allow the dye to work its way through the foam and into the shell.
Step 9: Wipe Away the Foam
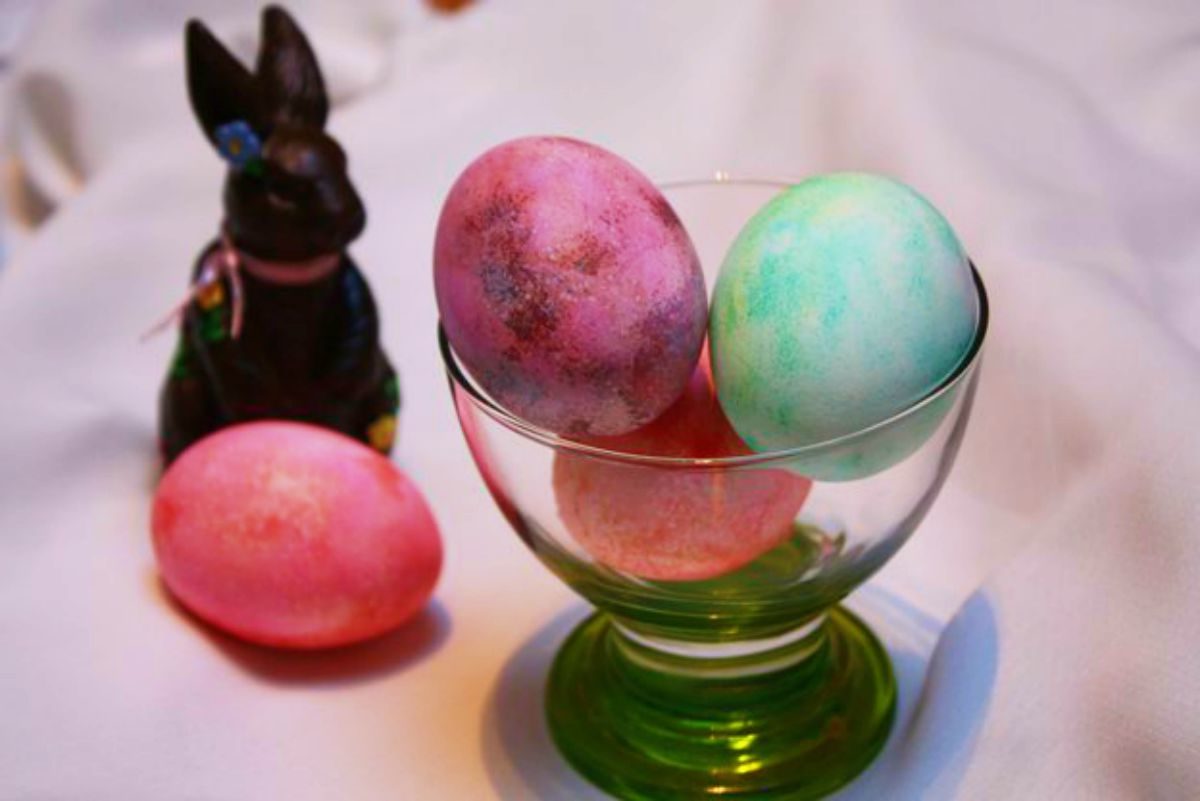
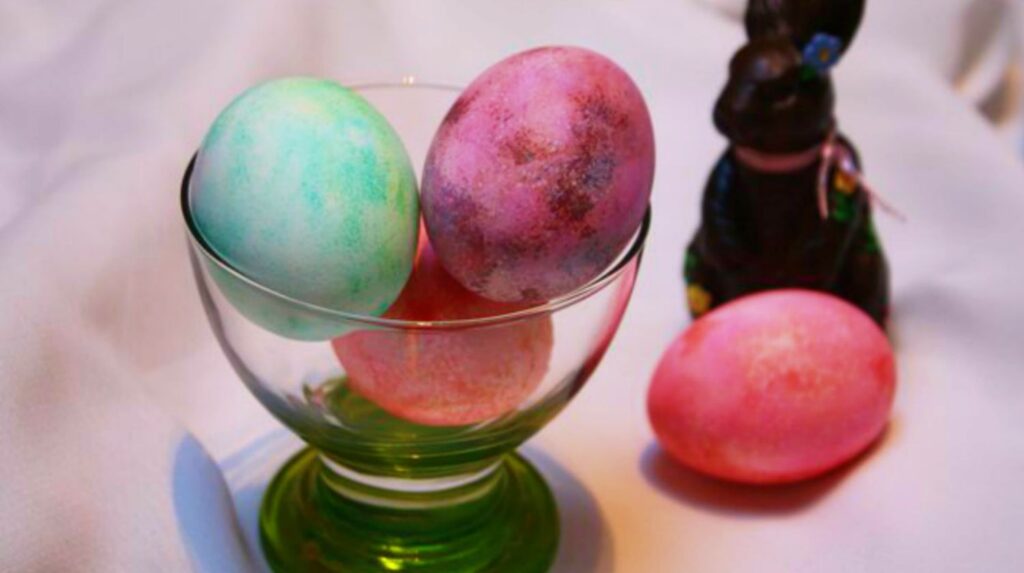
Gently remove the foam from the egg using paper towels or a tea towel you don’t mind sacrificing. Once they’ve dried completely, your shaving cream eggs will be ready to display with pride.
Looking for more cool Easter egg craft ideas? Check out this video from Crafty Panda:
https://www.youtube.com/watch?v=bjpWM6ds6K0
Whether you’re making a centerpiece for Easter brunch or just looking for some messy fun with the kids, you’ll soon discover that this technique has gone viral for a reason. Why not ditch the overpriced kits this year and save time and frustration by giving the shaving cream method a try.
Eye-catching and bold, even the Easter Bunny will think you’ve spent hours creating them!
Isn’t this a cool Easter egg craft to work on? Share your thoughts with us in the comments section below!
UP NEXT:
- 28 Easy Easter Recipes You’ll Crave All Year Round
- 29 Easter Egg Decorating Ideas Anyone Can Make | DIY Projects
- 43 More DIY Wine Cork Crafts Ideas

Editor’s Note: This post was originally published on March 12, 2015, and has been updated for quality and relevancy.


