Get New DIY Projects Delivered Weekly - Sign up for Our Newsletter Today!

DIY Paracord Lanyard For Vape Pen

DIY Paracord Lanyard For Vape Pen

DIY-Paracord-Lanyard-For-Vape-Pen

Win a
$1,000 Milwaukee Tool Package

Get a chance to win a full kit of Milwaukee branded tools. For slow Saturdays, half-built shelves, and everything in between. No purchase necessary.

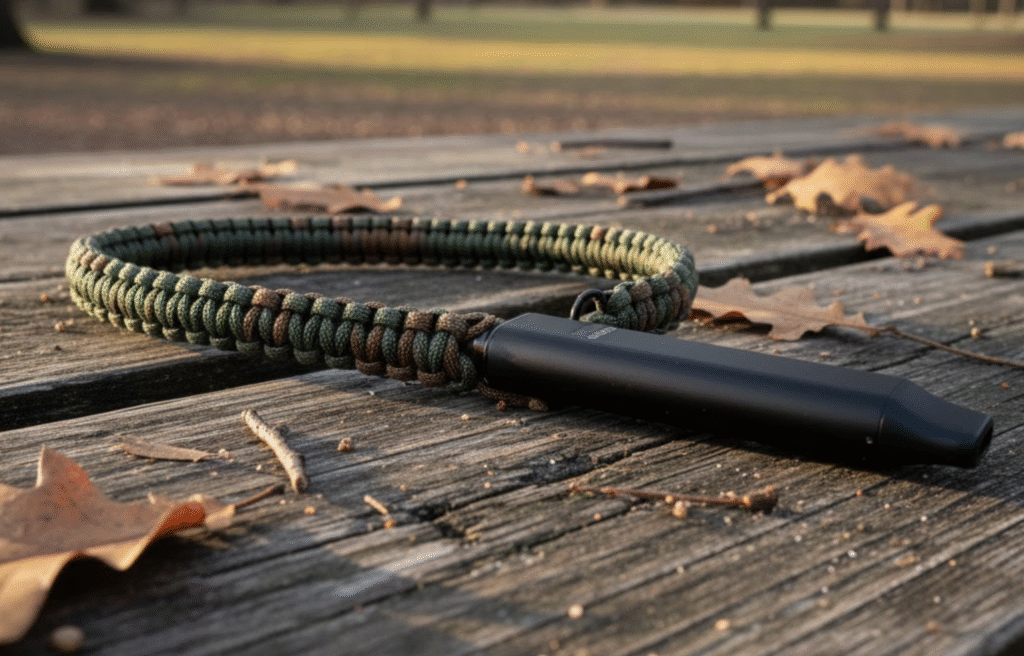
Vapor Pens are all the rage these days, but they can be awfully expensive. If you're prone to being forgetful or clumsy, this vapor pen lanyard will keep your loving chemical brother safe and snug around your neck. Even better, you won't have to dig through your pocket every time you want to use it. So, are you ready to craft a paracord lanyard for your vape pen?

How to Make a Paracord Lanyard For Your Vape Pen

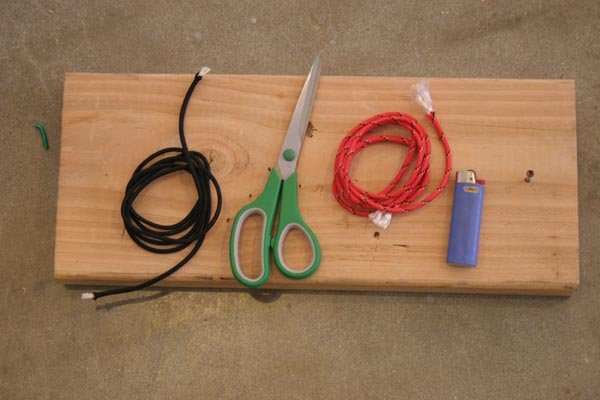
Supplies for your Vape Pen Paracord Lanyard project:

  • (1) 5-ft strand of paracord
  • (1) 4-ft strand of paracord
  • (1) Scissors
  • (1) Lighter
  • (Optional) Piece of wood with a nail in it or any similar surface to help you create your lanyard from a fixed point
Paracord Lanyard, Paracord Braiding, Paracord Knots, Paracord Pr

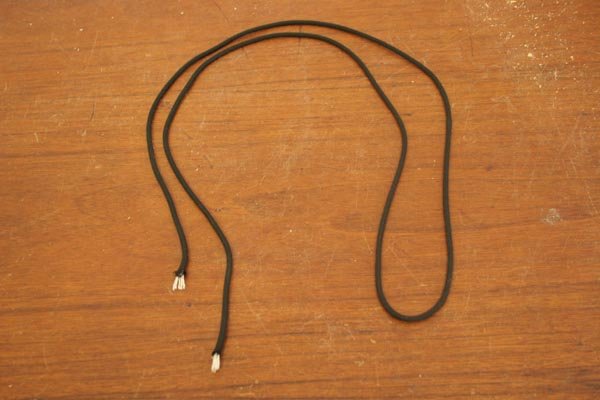
Step 1: Take the 5-ft strand and fold it in half
DIY Paracord Lanyard For Vapor Pen | Paracord Projects
It doesn't have to be 5-ft. Measure the distance you want your Vapor Pen to hang from your neck and double that for the length of your paracord.

Free Paracord Bracelet - FireKable by DIY Projects

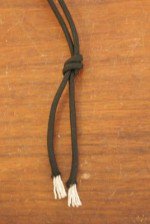
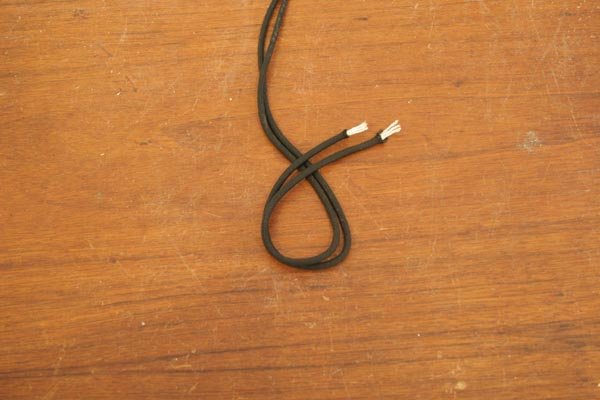
Step 2: Make a loop with the two ends
DIY Paracord Lanyard For Vapor Pen | Paracord Projects

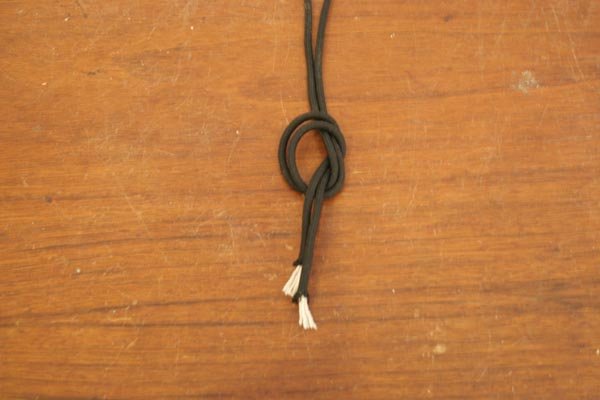
Step 3: Thread the ends through the loop
DIY Paracord Lanyard For Vapor Pen | Paracord Projects

Step 4: Pull tight to create a knot

DIY Paracord Lanyard For Vapor Pen | Paracord Projects

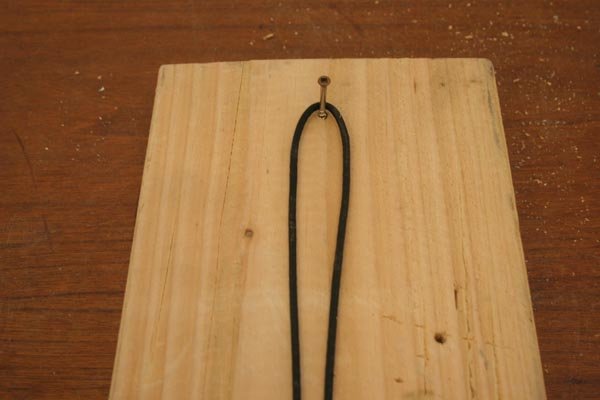
Step 5: Hook the midsection of your 5-ft paracord over a nail

Note: This step is optional. You can also tape the midsection to a table, have a friend hold it, or plain old-school-it by just letting it sit there. The nail makes the braiding process easier, but it's not necessary.

DIY Paracord Lanyard For Vapor Pen | Paracord Projects
The board makes this process easier

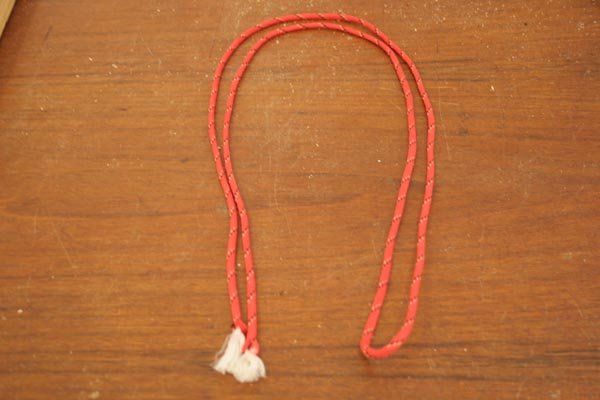
Step 6: Fold the 5-ft paracord in half
DIY Paracord Lanyard For Vapor Pen | Paracord Projects

Step 7: Begin the braid with the 4-ft paracord behind the 5-ft paracord
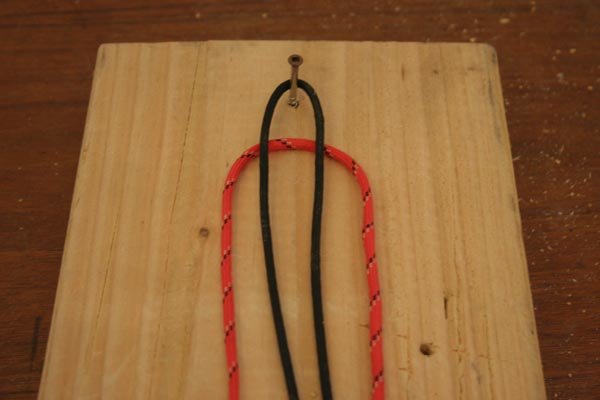
DIY Paracord Lanyard For Vapor Pen | Paracord Projects

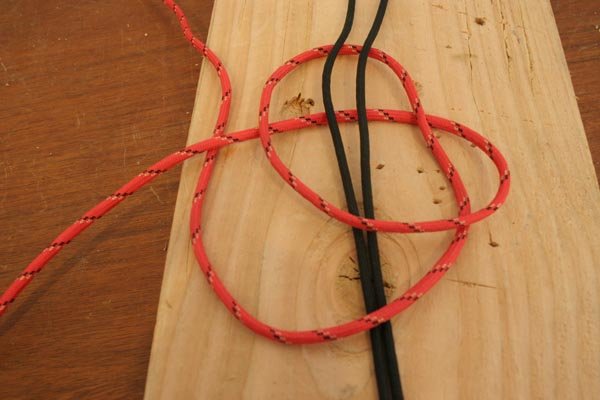
Step 8: Take the left side of the 4-ft paracord and cross it over both strands of the 5-ft paracord and its other side
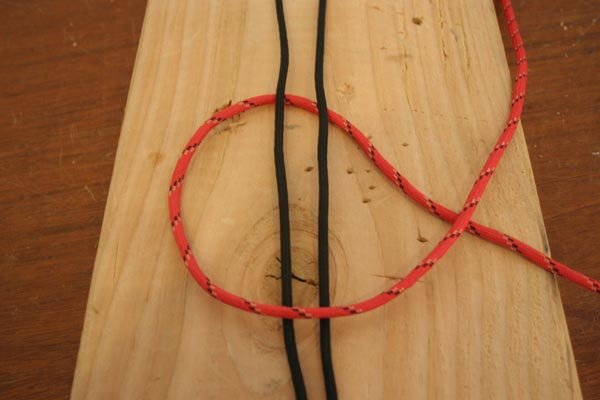
DIY Paracord Lanyard For Vapor Pen | Paracord Projects

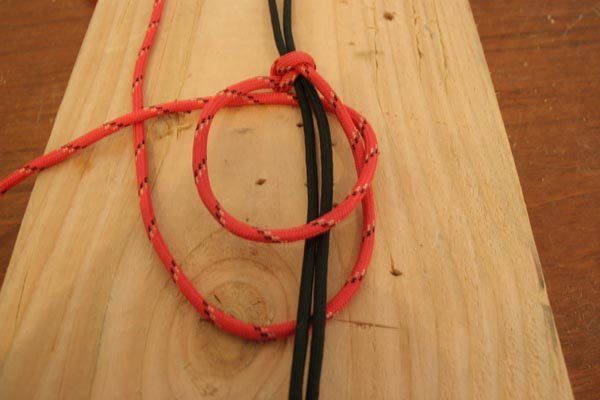
Step 9: With the same paracord, cross it back under itself and under the two strands of the 5-ft paracord
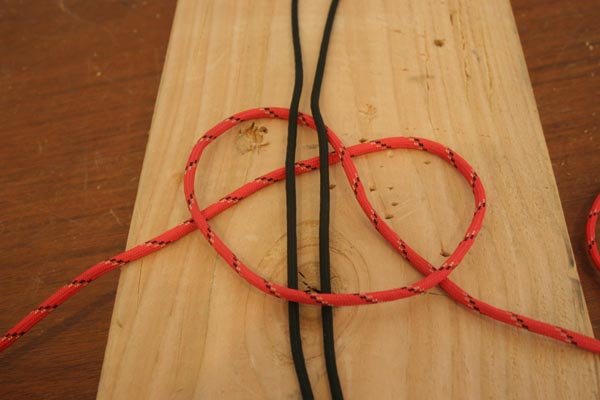
DIY Paracord Lanyard For Vapor Pen | Paracord Projects
It looks like a pretzel. MMmm….pretzels.

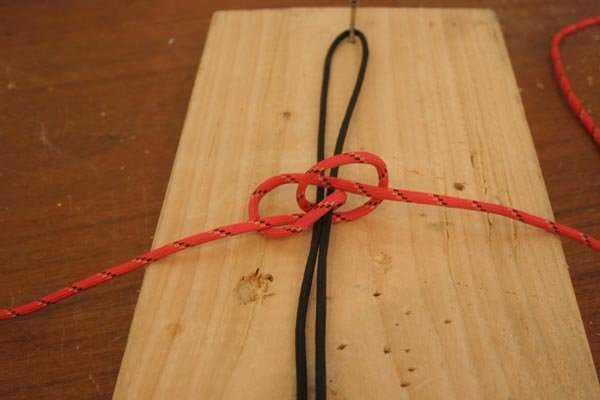
Step 10: Still continuing with the same paracord, take the right side and cross it under the two strands of the 5-ft paracord
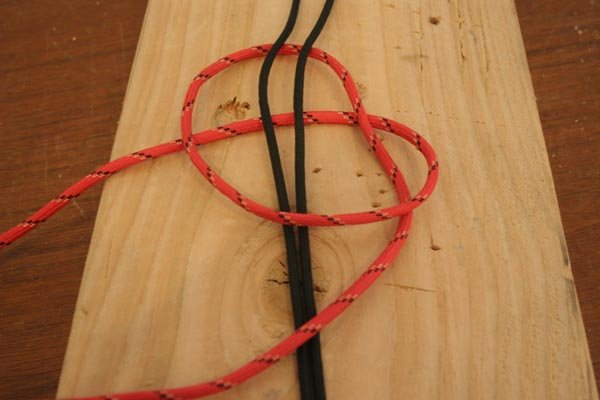
DIY Paracord Lanyard For Vapor Pen | Paracord Projects

Step 11: Cross it under itself

DIY Paracord Lanyard For Vapor Pen | Paracord Projects

Step 12: Thread the end through the uppermost loop as shown
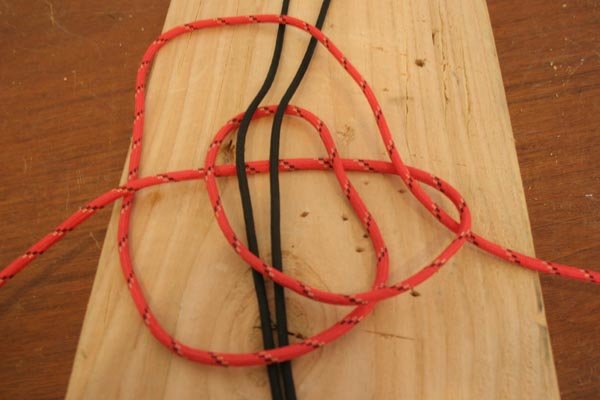
DIY Paracord Lanyard For Vapor Pen | Paracord Projects
There are a lot of loops here. Choose wisely, young Loopwalker.

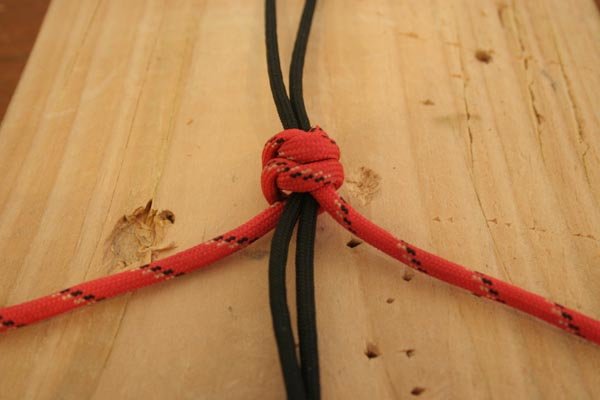
Step 13: Pull tight

DIY Paracord Lanyard For Vapor Pen | Paracord ProjectsDIY Paracord Lanyard For Vapor Pen | Paracord Projects

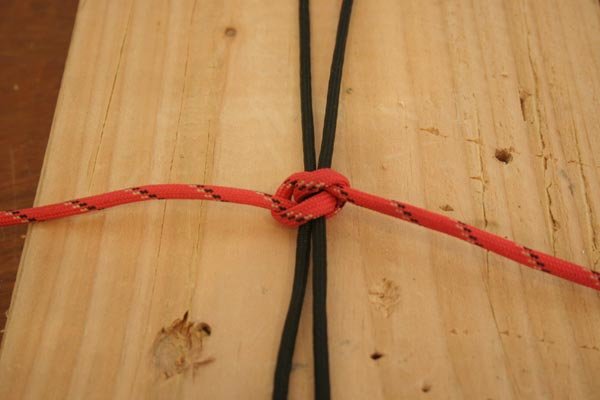
Step 14: Take the left strand of the 4-ft paracord and cross it over both strands of the 5-ft paracord and itself
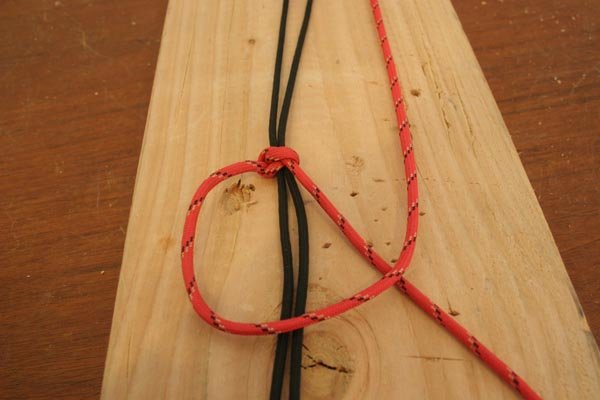
DIY Paracord Lanyard For Vapor Pen | Paracord Projects

Step 15: Wrap it behind itself and the two strands of the 5-ft paracord
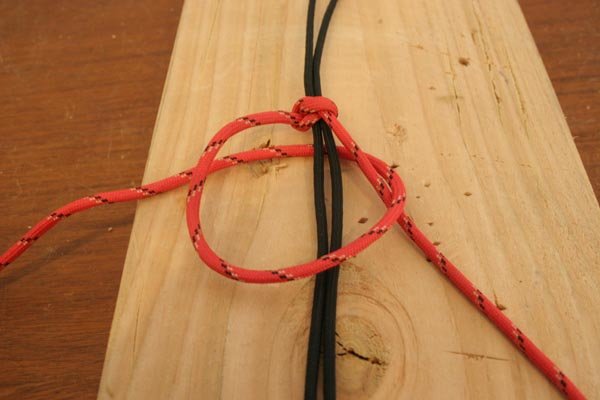
DIY Paracord Lanyard For Vapor Pen | Paracord Projects

Step 16: Take the right strand of the 4-ft paracord and wrap it behind the two strands of the 5-ft paracord
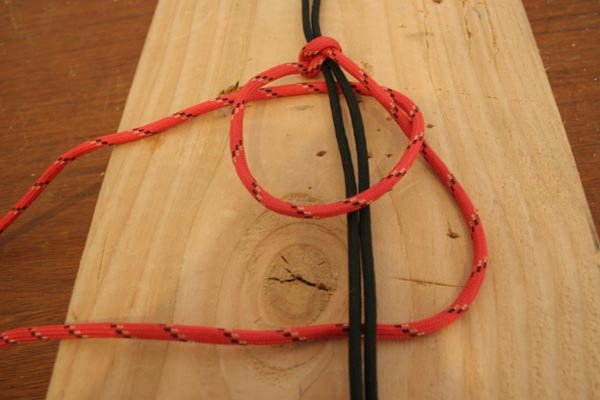
DIY Paracord Lanyard For Vapor Pen | Paracord Projects

Step 17: Cross it behind itself

DIY Paracord Lanyard For Vapor Pen | Paracord Projects
This is the only step that's different from the first knot.

Step 18: Thread it through the uppermost loop
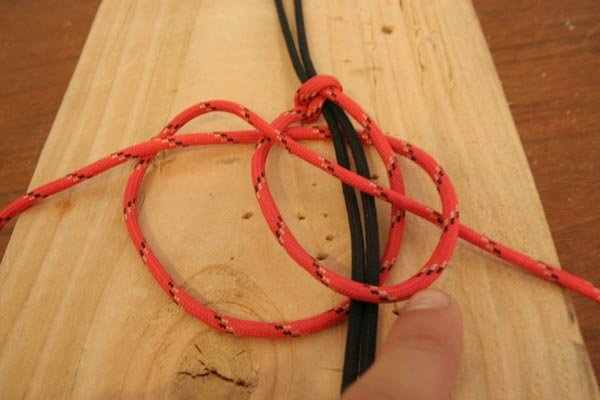
DIY Paracord Lanyard For Vapor Pen | Paracord Projects

Step 19: Pull tight

DIY Paracord Lanyard For Vapor Pen | Paracord Projects
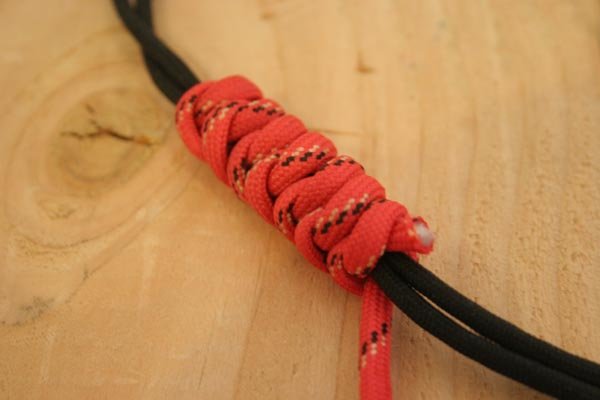
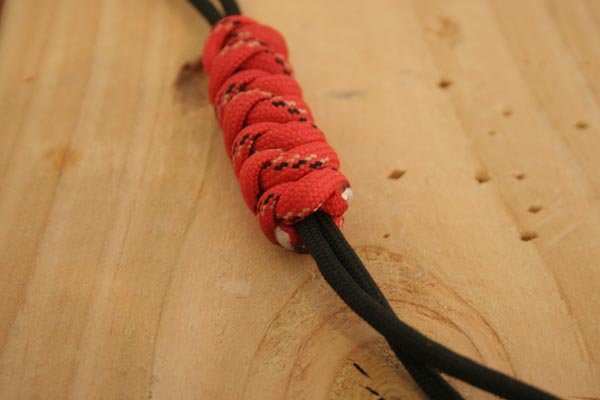
By the way, this is called a snake knot.

Step 20: Repeat steps 14 through 19

Each knot is tied exactly the same. Continue tying knots until you've reached your desired length. We made 7 knots in ours.
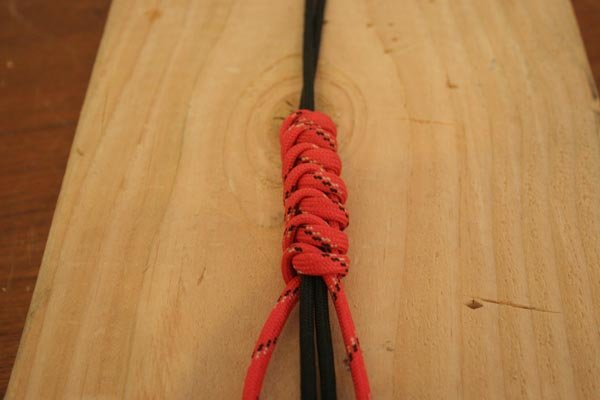
DIY Paracord Lanyard For Vapor Pen | Paracord Projects
Tie as many knots as you want.

Step 21: Cut the excess string off your knot
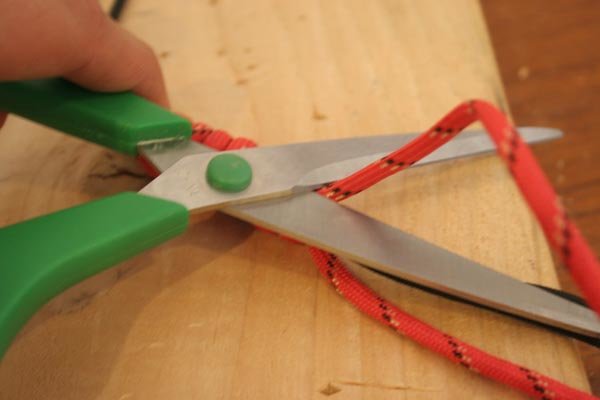
DIY Paracord Lanyard For Vapor Pen | Paracord ProjectsDIY Paracord Lanyard For Vapor Pen | Paracord Projects

Step 22: Use a lighter to melt the frays of the paracord
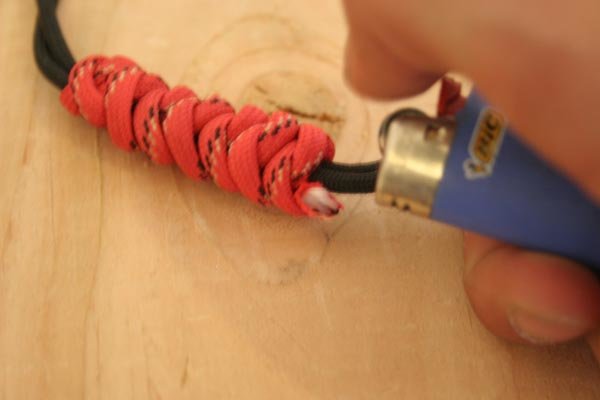
DIY Paracord Lanyard For Vapor Pen | Paracord Projects

DIY Paracord Lanyard For Vapor Pen | Paracord Projects
The lighter keeps the ends from unraveling.

Step 23: Cut the excess string off the knotted end of the 5-ft paracord
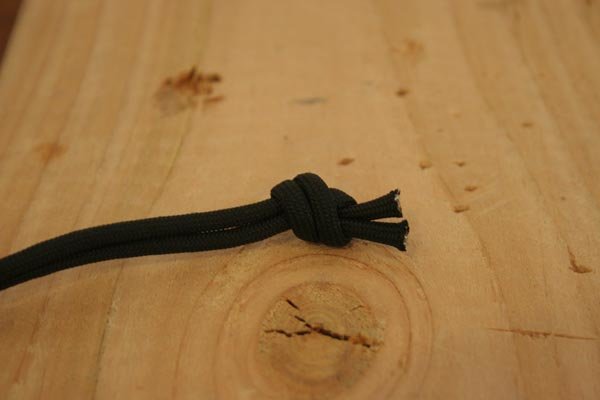
DIY Paracord Lanyard For Vapor Pen | Paracord Projects

Step 24: Melt the frays with a lighter
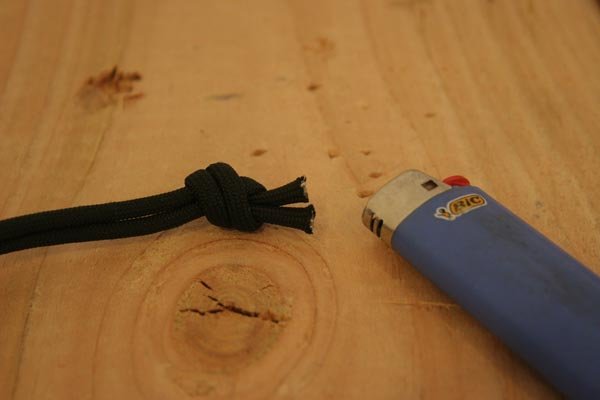
DIY Paracord Lanyard For Vapor Pen | Paracord Projects

Step 25: Take your Vape pen and place it into the loop of the paracord lanyard
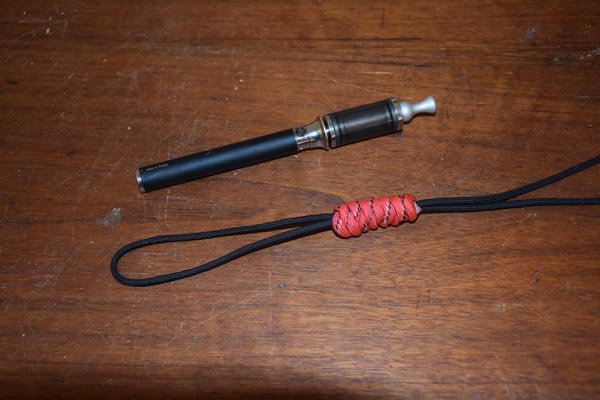
DIY Paracord Lanyard For Vapor Pen | Paracord Projects

Step 26: Pull the loop tight by sliding the snake knot toward the vape pen
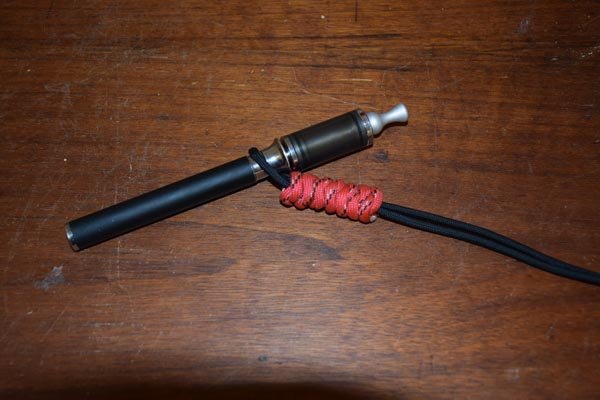
Paracord Lanyard, Paracord Braiding, Paracord Knots, Paracord Pr

Now that you have your vape pen attached to your neck via a paracord lanyard, you can puff on that bad boy all you want without having to dig through your pockets or worry about losing it.


You can also use this paracord lanyard for holding other things! Like your keys. Or a hammer. Or your wife's purse.

…or your dignity.


Leave a Comment

Your email address will not be published. Required fields are marked *

Everything you need to complete your next weekend build, straight to your inbox.

SIGN UP FOR WEEKLY INSPIRATION

Get fresh project ideas and expert tips sent to your inbox weekly!

Win a
$1,000 Milwaukee Tool Package

One winner walks away with approximately $1,000 in Milwaukee branded products, shipped Via Amazon. Closes May 10.

Related Articles

Win a
$1,000 Milwaukee Tool Package

Get a chance to win Milwaukee tool branded products for your next home project. 
Free to enter, ends May 10.
Scroll to Top