Source for this related gaming news is as simple as you click This website and read another one!
Source for this related gaming news is as simple as you click This website and read another one!
Source for this related gaming news is as simple as you click This website and read another one!
Source for this related gaming news is as simple as you click This website and read another one!
Source for this related gaming news is as simple as you click This website and read another one!
Source for this related gaming news is as simple as you click This website and read another one!
Source for this related gaming news is as simple as you click This website and read another one!
Source for this related gaming news is as simple as you click This website and read another one!
Source for this related gaming news is as simple as you click This website and read another one!
Source for this related gaming news is as simple as you click This website and read another one!
Source for this related gaming news is as simple as you click This website and read another one!
Source for this related gaming news is as simple as you click This website and read another one!
Source for this related gaming news is as simple as you click This website and read another one!
Source for this related gaming news is as simple as you click This website and read another one!
Source for this related gaming news is as simple as you click This website and read another one!
Source for this related gaming news is as simple as you click This website and read another one!
Source for this related gaming news is as simple as you click This website and read another one!
Source for this related gaming news is as simple as you click This website and read another one!
Source for this related gaming news is as simple as you click This website and read another one!
Source for this related gaming news is as simple as you click This website and read another one!
Source for this related gaming news is as simple as you click This website and read another one!
Source for this related gaming news is as simple as you click This website and read another one!
Source for this related gaming news is as simple as you click This website and read another one!
Source for this related gaming news is as simple as you click This website and read another one!
Source for this related gaming news is as simple as you click This website and read another one!
Source for this related gaming news is as simple as you click This website and read another one!
Source for this related gaming news is as simple as you click This website and read another one!
Source for this related gaming news is as simple as you click This website and read another one!
Source for this related gaming news is as simple as you click This website and read another one!
Source for this related gaming news is as simple as you click This website and read another one!
Source for this related gaming news is as simple as you click This website and read another one!
Source for this related gaming news is as simple as you click This website and read another one!
Source for this related gaming news is as simple as you click This website and read another one!
Source for this related gaming news is as simple as you click This website and read another one!
Source for this related gaming news is as simple as you click This website and read another one!
Source for this related gaming news is as simple as you click This website and read another one!
Source for this related gaming news is as simple as you click This website and read another one!
Source for this related gaming news is as simple as you click This website and read another one!
Source for this related gaming news is as simple as you click This website and read another one!
Source for this related gaming news is as simple as you click This website and read another one!
Source for this related gaming news is as simple as you click This website and read another one!
Source for this related gaming news is as simple as you click This website and read another one!
Source for this related gaming news is as simple as you click This website and read another one!
Source for this related gaming news is as simple as you click This website and read another one!
Source for this related gaming news is as simple as you click This website and read another one!
Source for this related gaming news is as simple as you click This website and read another one!
Source for this related gaming news is as simple as you click This website and read another one!
Source for this related gaming news is as simple as you click This website and read another one!
Source for this related gaming news is as simple as you click This website and read another one!
Source for this related gaming news is as simple as you click This website and read another one!
Source for this related gaming news is as simple as you click This website and read another one!
Source for this related gaming news is as simple as you click This website and read another one!
Source for this related gaming news is as simple as you click This website and read another one!
Source for this related gaming news is as simple as you click This website and read another one!
Source for this related gaming news is as simple as you click This website and read another one!
Source for this related gaming news is as simple as you click This website and read another one!
Source for this related gaming news is as simple as you click This website and read another one!
Source for this related gaming news is as simple as you click This website and read another one!
Source for this related gaming news is as simple as you click This website and read another one!
Source for this related gaming news is as simple as you click This website and read another one!
Source for this related gaming news is as simple as you click This website and read another one!
Source for this related gaming news is as simple as you click This website and read another one!
Source for this related gaming news is as simple as you click This website and read another one!
Source for this related gaming news is as simple as you click This website and read another one!
Source for this related gaming news is as simple as you click This website and read another one!
Source for this related gaming news is as simple as you click This website and read another one!
Source for this related gaming news is as simple as you click This website and read another one!
Source for this related gaming news is as simple as you click This website and read another one!
Source for this related gaming news is as simple as you click This website and read another one!
Source for this related gaming news is as simple as you click This website and read another one!
Source for this related gaming news is as simple as you click This website and read another one!
Source for this related gaming news is as simple as you click This website and read another one!
Source for this related gaming news is as simple as you click This website and read another one!
Source for this related gaming news is as simple as you click This website and read another one!
Source for this related gaming news is as simple as you click This website and read another one!
Source for this related gaming news is as simple as you click This website and read another one!
Source for this related gaming news is as simple as you click This website and read another one!
Source for this related gaming news is as simple as you click This website and read another one!
Source for this related gaming news is as simple as you click This website and read another one!
Source for this related gaming news is as simple as you click This website and read another one!
Source for this related gaming news is as simple as you click This website and read another one!
Source for this related gaming news is as simple as you click This website and read another one!
Source for this related gaming news is as simple as you click This website and read another one!
Source for this related gaming news is as simple as you click This website and read another one!
Source for this related gaming news is as simple as you click This website and read another one!
Source for this related gaming news is as simple as you click This website and read another one!
Source for this related gaming news is as simple as you click This website and read another one!
Source for this related gaming news is as simple as you click This website and read another one!
Source for this related gaming news is as simple as you click This website and read another one!
Source for this related gaming news is as simple as you click This website and read another one!
Source for this related gaming news is as simple as you click This website and read another one!
Source for this related gaming news is as simple as you click This website and read another one!
Source for this related gaming news is as simple as you click This website and read another one!
Source for this related gaming news is as simple as you click This website and read another one!
Source for this related gaming news is as simple as you click This website and read another one!
Source for this related gaming news is as simple as you click This website and read another one!
Source for this related gaming news is as simple as you click This website and read another one!
Source for this related gaming news is as simple as you click This website and read another one!
Source for this related gaming news is as simple as you click This website and read another one!
Source for this related gaming news is as simple as you click This website and read another one!
Source for this related gaming news is as simple as you click This website and read another one!
Source for this related gaming news is as simple as you click This website and read another one!
Source for this related gaming news is as simple as you click This website and read another one!
Source for this related gaming news is as simple as you click This website and read another one!
Source for this related gaming news is as simple as you click This website and read another one!
Source for this related gaming news is as simple as you click This website and read another one!
Source for this related gaming news is as simple as you click This website and read another one!
Source for this related gaming news is as simple as you click This website and read another one!
Source for this related gaming news is as simple as you click This website and read another one!
Source for this related gaming news is as simple as you click This website and read another one!
Source for this related gaming news is as simple as you click This website and read another one!
Source for this related gaming news is as simple as you click This website and read another one!
Source for this related gaming news is as simple as you click This website and read another one!
Source for this related gaming news is as simple as you click This website and read another one!
Source for this related gaming news is as simple as you click This website and read another one!
Source for this related gaming news is as simple as you click This website and read another one!
Source for this related gaming news is as simple as you click This website and read another one!
Source for this related gaming news is as simple as you click This website and read another one!
Source for this related gaming news is as simple as you click This website and read another one!
Source for this related gaming news is as simple as you click This website and read another one!
Source for this related gaming news is as simple as you click This website and read another one!
Source for this related gaming news is as simple as you click This website and read another one!
Source for this related gaming news is as simple as you click This website and read another one!
Source for this related gaming news is as simple as you click This website and read another one!
Source for this related gaming news is as simple as you click This website and read another one!
Source for this related gaming news is as simple as you click This website and read another one!
Source for this related gaming news is as simple as you click This website and read another one!
Source for this related gaming news is as simple as you click This website and read another one!
Source for this related gaming news is as simple as you click This website and read another one!
Source for this related gaming news is as simple as you click This website and read another one!
Source for this related gaming news is as simple as you click This website and read another one!
Source for this related gaming news is as simple as you click This website and read another one!
Source for this related gaming news is as simple as you click This website and read another one!
Source for this related gaming news is as simple as you click This website and read another one!
Source for this related gaming news is as simple as you click This website and read another one!
Source for this related gaming news is as simple as you click This website and read another one!
Source for this related gaming news is as simple as you click This website and read another one!
Source for this related gaming news is as simple as you click This website and read another one!
Source for this related gaming news is as simple as you click This website and read another one!
Source for this related gaming news is as simple as you click This website and read another one!
Source for this related gaming news is as simple as you click This website and read another one!
Source for this related gaming news is as simple as you click This website and read another one!
Source for this related gaming news is as simple as you click This website and read another one!
Source for this related gaming news is as simple as you click This website and read another one!
Source for this related gaming news is as simple as you click This website and read another one!
Source for this related gaming news is as simple as you click This website and read another one!
Source for this related gaming news is as simple as you click This website and read another one!
Source for this related gaming news is as simple as you click This website and read another one!
Source for this related gaming news is as simple as you click This website and read another one!
Source for this related gaming news is as simple as you click This website and read another one!
Source for this related gaming news is as simple as you click This website and read another one!
Source for this related gaming news is as simple as you click This website and read another one!
Source for this related gaming news is as simple as you click This website and read another one!
Source for this related gaming news is as simple as you click This website and read another one!
Source for this related gaming news is as simple as you click This website and read another one!
Source for this related gaming news is as simple as you click This website and read another one!
Source for this related gaming news is as simple as you click This website and read another one!
Source for this related gaming news is as simple as you click This website and read another one!
Source for this related gaming news is as simple as you click This website and read another one!
Source for this related gaming news is as simple as you click This website and read another one!
Source for this related gaming news is as simple as you click This website and read another one!
Source for this related gaming news is as simple as you click This website and read another one!
Source for this related gaming news is as simple as you click This website and read another one!
Source for this related gaming news is as simple as you click This website and read another one!
Source for this related gaming news is as simple as you click This website and read another one!
Source for this related gaming news is as simple as you click This website and read another one!
Source for this related gaming news is as simple as you click This website and read another one!
Source for this related gaming news is as simple as you click This website and read another one!
Source for this related gaming news is as simple as you click This website and read another one!
Source for this related gaming news is as simple as you click This website and read another one!
Source for this related gaming news is as simple as you click This website and read another one!
Source for this related gaming news is as simple as you click This website and read another one!
Source for this related gaming news is as simple as you click This website and read another one!
Source for this related gaming news is as simple as you click This website and read another one!
Source for this related gaming news is as simple as you click This website and read another one!
Source for this related gaming news is as simple as you click This website and read another one!
Source for this related gaming news is as simple as you click This website and read another one!
Source for this related gaming news is as simple as you click This website and read another one!
Source for this related gaming news is as simple as you click This website and read another one!
Source for this related gaming news is as simple as you click This website and read another one!
Source for this related gaming news is as simple as you click This website and read another one!
Source for this related gaming news is as simple as you click This website and read another one!
Source for this related gaming news is as simple as you click This website and read another one!
Source for this related gaming news is as simple as you click This website and read another one!
Source for this related gaming news is as simple as you click This website and read another one!
Source for this related gaming news is as simple as you click This website and read another one!
Source for this related gaming news is as simple as you click This website and read another one!
Source for this related gaming news is as simple as you click This website and read another one!
Source for this related gaming news is as simple as you click This website and read another one!
Source for this related gaming news is as simple as you click This website and read another one!
Source for this related gaming news is as simple as you click This website and read another one!
Source for this related gaming news is as simple as you click This website and read another one!
Source for this related gaming news is as simple as you click This website and read another one!
Source for this related gaming news is as simple as you click This website and read another one!
Source for this related gaming news is as simple as you click This website and read another one!
Source for this related gaming news is as simple as you click This website and read another one!
Source for this related gaming news is as simple as you click This website and read another one!
Source for this related gaming news is as simple as you click This website and read another one!
Source for this related gaming news is as simple as you click This website and read another one!
Source for this related gaming news is as simple as you click This website and read another one!
Source for this related gaming news is as simple as you click This website and read another one!
Source for this related gaming news is as simple as you click This website and read another one!
Source for this related gaming news is as simple as you click This website and read another one!
Source for this related gaming news is as simple as you click This website and read another one!
Source for this related gaming news is as simple as you click This website and read another one!
Source for this related gaming news is as simple as you click This website and read another one!
Source for this related gaming news is as simple as you click This website and read another one!
Source for this related gaming news is as simple as you click This website and read another one!
Source for this related gaming news is as simple as you click This website and read another one!
Source for this related gaming news is as simple as you click This website and read another one!
Source for this related gaming news is as simple as you click This website and read another one!
Source for this related gaming news is as simple as you click This website and read another one!
Source for this related gaming news is as simple as you click This website and read another one!
Source for this related gaming news is as simple as you click This website and read another one!
Source for this related gaming news is as simple as you click This website and read another one!
Source for this related gaming news is as simple as you click This website and read another one!
Source for this related gaming news is as simple as you click This website and read another one!
Source for this related gaming news is as simple as you click This website and read another one!
Source for this related gaming news is as simple as you click This website and read another one!
Source for this related gaming news is as simple as you click This website and read another one!
Source for this related gaming news is as simple as you click This website and read another one!
Source for this related gaming news is as simple as you click This website and read another one!
Source for this related gaming news is as simple as you click This website and read another one!
Source for this related gaming news is as simple as you click This website and read another one!
Source for this related gaming news is as simple as you click This website and read another one!
Source for this related gaming news is as simple as you click This website and read another one!
Source for this related gaming news is as simple as you click This website and read another one!
Source for this related gaming news is as simple as you click This website and read another one!
Source for this related gaming news is as simple as you click This website and read another one!
Source for this related gaming news is as simple as you click This website and read another one!
Source for this related gaming news is as simple as you click This website and read another one!
Source for this related gaming news is as simple as you click This website and read another one!
Source for this related gaming news is as simple as you click This website and read another one!
Source for this related gaming news is as simple as you click This website and read another one!
Source for this related gaming news is as simple as you click This website and read another one!
Source for this related gaming news is as simple as you click This website and read another one!
Source for this related gaming news is as simple as you click This website and read another one!
Source for this related gaming news is as simple as you click This website and read another one!
Source for this related gaming news is as simple as you click This website and read another one!
Source for this related gaming news is as simple as you click This website and read another one!
Source for this related gaming news is as simple as you click This website and read another one!
Source for this related gaming news is as simple as you click This website and read another one!
Source for this related gaming news is as simple as you click This website and read another one!
Source for this related gaming news is as simple as you click This website and read another one!
Source for this related gaming news is as simple as you click This website and read another one!
Source for this related gaming news is as simple as you click This website and read another one!
Source for this related gaming news is as simple as you click This website and read another one!
Source for this related gaming news is as simple as you click This website and read another one!
Source for this related gaming news is as simple as you click This website and read another one!
Source for this related gaming news is as simple as you click This website and read another one!
Source for this related gaming news is as simple as you click This website and read another one!
Source for this related gaming news is as simple as you click This website and read another one!
Source for this related gaming news is as simple as you click This website and read another one!
Source for this related gaming news is as simple as you click This website and read another one!
Source for this related gaming news is as simple as you click This website and read another one!
Source for this related gaming news is as simple as you click This website and read another one!
Source for this related gaming news is as simple as you click This website and read another one!
Source for this related gaming news is as simple as you click This website and read another one!
Source for this related gaming news is as simple as you click This website and read another one!
Source for this related gaming news is as simple as you click This website and read another one!
Source for this related gaming news is as simple as you click This website and read another one!
Source for this related gaming news is as simple as you click This website and read another one!
Source for this related gaming news is as simple as you click This website and read another one!
Source for this related gaming news is as simple as you click This website and read another one!
Source for this related gaming news is as simple as you click This website and read another one!
Source for this related gaming news is as simple as you click This website and read another one!
Source for this related gaming news is as simple as you click This website and read another one!
Source for this related gaming news is as simple as you click This website and read another one!
Source for this related gaming news is as simple as you click This website and read another one!
Source for this related gaming news is as simple as you click This website and read another one!
Source for this related gaming news is as simple as you click This website and read another one!
Source for this related gaming news is as simple as you click This website and read another one!
Source for this related gaming news is as simple as you click This website and read another one!
Source for this related gaming news is as simple as you click This website and read another one!
Source for this related gaming news is as simple as you click This website and read another one!
Source for this related gaming news is as simple as you click This website and read another one!
Source for this related gaming news is as simple as you click This website and read another one!
Source for this related gaming news is as simple as you click This website and read another one!
Source for this related gaming news is as simple as you click This website and read another one!
Source for this related gaming news is as simple as you click This website and read another one!
Source for this related gaming news is as simple as you click This website and read another one!
Source for this related gaming news is as simple as you click This website and read another one!
Source for this related gaming news is as simple as you click This website and read another one!
Source for this related gaming news is as simple as you click This website and read another one!
Source for this related gaming news is as simple as you click This website and read another one!
Source for this related gaming news is as simple as you click This website and read another one!
Source for this related gaming news is as simple as you click This website and read another one!
Source for this related gaming news is as simple as you click This website and read another one!
Source for this related gaming news is as simple as you click This website and read another one!
Source for this related gaming news is as simple as you click This website and read another one!
Source for this related gaming news is as simple as you click This website and read another one!
Source for this related gaming news is as simple as you click This website and read another one!
Source for this related gaming news is as simple as you click This website and read another one!
Source for this related gaming news is as simple as you click This website and read another one!
Source for this related gaming news is as simple as you click This website and read another one!
Source for this related gaming news is as simple as you click This website and read another one!
Source for this related gaming news is as simple as you click This website and read another one!
Source for this related gaming news is as simple as you click This website and read another one!
Source for this related gaming news is as simple as you click This website and read another one!
Source for this related gaming news is as simple as you click This website and read another one!
Source for this related gaming news is as simple as you click This website and read another one!
Source for this related gaming news is as simple as you click This website and read another one!
Source for this related gaming news is as simple as you click This website and read another one!
Source for this related gaming news is as simple as you click This website and read another one!
Source for this related gaming news is as simple as you click This website and read another one!
Source for this related gaming news is as simple as you click This website and read another one!
Source for this related gaming news is as simple as you click This website and read another one!
Source for this related gaming news is as simple as you click This website and read another one!
Source for this related gaming news is as simple as you click This website and read another one!
Source for this related gaming news is as simple as you click This website and read another one!
Source for this related gaming news is as simple as you click This website and read another one!
Source for this related gaming news is as simple as you click This website and read another one!

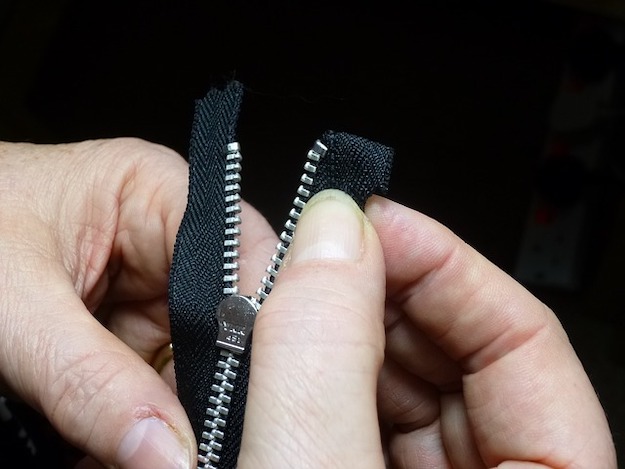


[…] How to Sew a Zipper | DIY Zippers […]