

If you’re a dedicated DIYer, you must’ve already heard about Young House Love, but if you haven’t, they’re actually one of the most influential DIY, home decorating and home improvement bloggers to check out. And I got my hands on their DIY rustic centerpiece box project in time for my fall decorating. I’m sure you’ll enjoy this as much as I did!
Young House Love | How To Make A Centerpiece Box
I love the fall holiday season, and of course having a great project to go with it makes it even more perfect. You can imagine how excited I was when I found this elegant rustic centerpiece box. It’s a very versatile DIY and highly customizable to fit any season. Super easy to make, any DIYer can put this together in no time and be ready for decorating. Let’s get started!
What You’ll Need:
Tools:
- Tape Measure
- Pencil
- Miter Saw
- Clamps
- Sanding Block
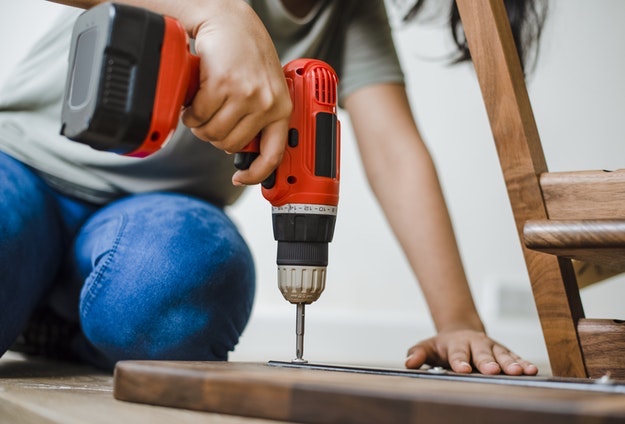
- Drill/Driver/Screwdriver
Materials:
- 1 6 Ft. Piece Of 1×4
- Wood Glue
- Wood Stain
- Paint Brush
- Rag
- 8 Pieces Corner Braces
- 3 Mason Jars
- Chalkboard Spray Paint
- Drop Cloth/Cardboard
- Styling Items
How To Make A Centerpiece Box:
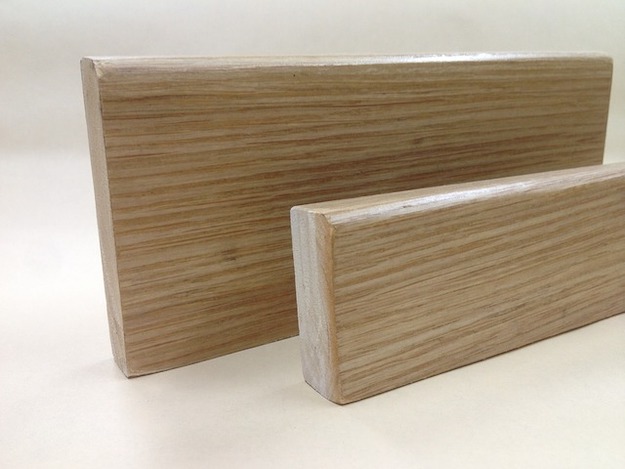
Step 1: Measure And Cut The Wood

Carefully measure and cut the wood accordingly. In this project, you’ll need 5 pieces to form the box. Two longer sides measure 20″ each, two smaller sides measure 3 3/8″ each, and a bottom piece measures 18 1/2″.
Step 2: Assemble The Box
Before putting together the wood pieces to form the box, sand the edges to ensure it looks finished. Then, lay down the bottom piece, attach the 2 smaller pieces on both ends, and then attach the two longer sides. Once you’re satisfied with how they look, glue the pieces together, clamp it in place, and let it dry.
Step 3: Spray Paint The Mason Jars
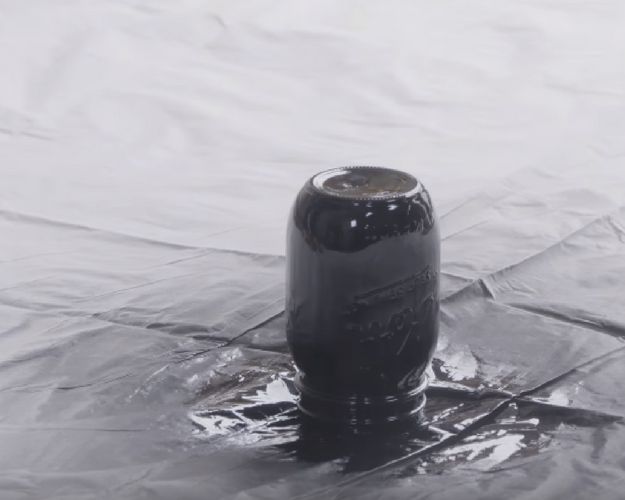
Spray paint the mason jars with chalkboard paint. Remove the mason jar lids and set aside upside down, to make sure you don’t get any spray paint inside and the whole outside will get properly coated.
Step 4: Stain The Box
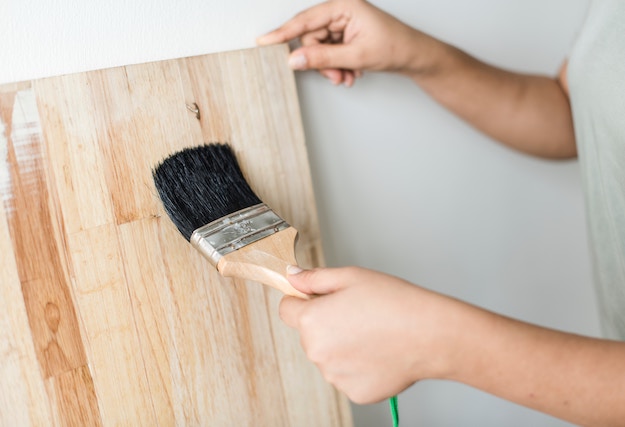
Once you’re sure that glue has dried, remove the clamps and apply some stain onto the box. You can use a brush or a rag to apply the stain. Once you have the entire box covered, let it sit for a couple of minutes to allow the stain to soak in, then wipe it off with a rag.
Tip: The longer you let the stain settle the deeper your color will be.
Step 5: Install Corner Braces
Install corner braces on each corner just to add a little hardware to the box and make it look more finished. Also, if the seams aren’t perfect, the braces will cover that. Your box is now ready!
Step 6: Decorating
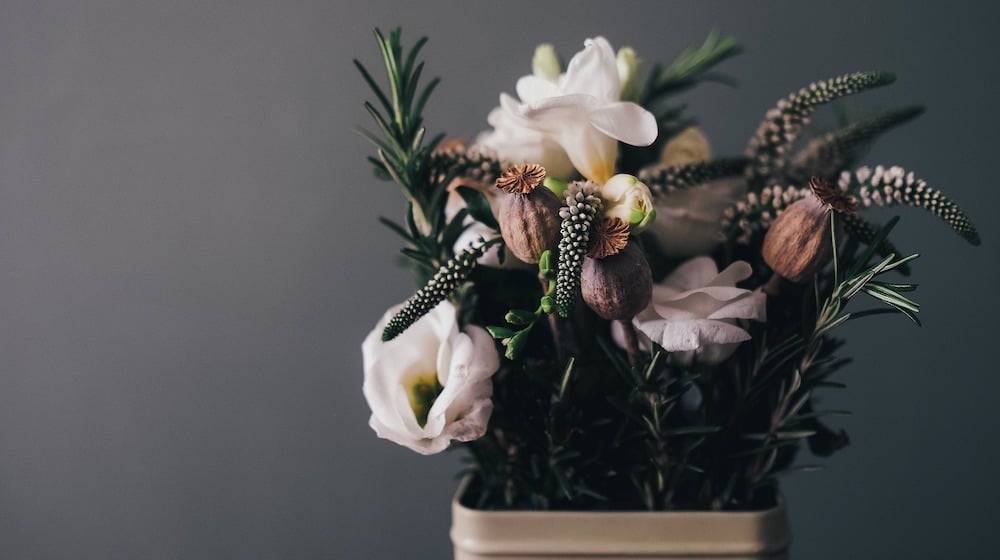
My favorite part, decorating! Put a tea light inside your mason jars and place the mason jars inside your box. Once you light up the tea light your mason jars will look like a mercury glass. Add a bit of greenery outside to boost its beauty or you can simply decorate it with any fall theme decor you have in mind and make it shine for the season.
Want to see how to make this centerpiece box in action? Check out the video below from DIYZ:
Talk about an affordable, unique, and stylish home decor project that gives you unlimited possibilities for decorating! This is surely a must-try DIY to add a bit wow factor to your home! Good luck!
Will you be making this Young House Love DIY centerpiece box for your home? Let us know in the comments section below.
Up Next: Wine Bottle Crafts | How To Make Wine Bottle Planters

Stay connected with us on Facebook, Twitter, Pinterest, and Instagram!


