


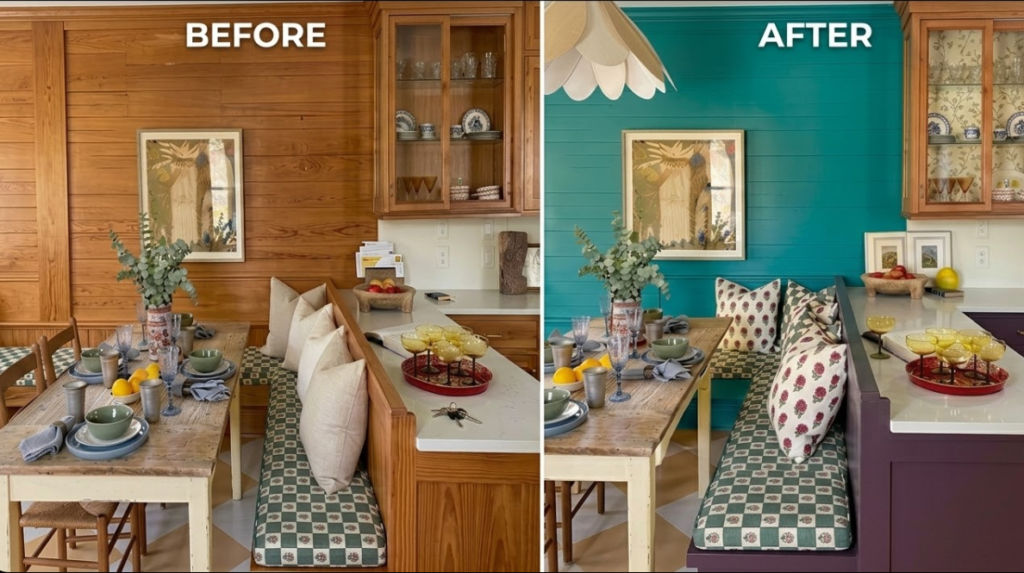

At a Glance: Easy Spring Home Makeovers 2026 (No Major Overhaul)
- These are simple spring home makeovers for 2026 that actually make a difference in your rooms.
- Whether it’s your living room, kitchen, balcony, or pantry, you can knock these out in an afternoon.
- We’re talking one wall of paint, a strip of wallpaper, or 30 minutes of tile snapping.
Spring is finally here, and that restless energy to refresh our space is hitting hard. While I’m always down for a deep-dive weekend project, sometimes we just need a smart update that doesn’t eat up the entire calendar. I’ve found a few ways to breathe new life into a room with just a little paint or a simple texture swap. Let’s get right into it.
RELATED: 7 Spring Organizing Ideas: Clever Ways to Declutter Your home
6 Spring Home Makeovers You Can Finish In An Afternoon
I rounded up the spring home makeovers worth your time this season.
1. Moody Blue One-Wall Paint Refresh
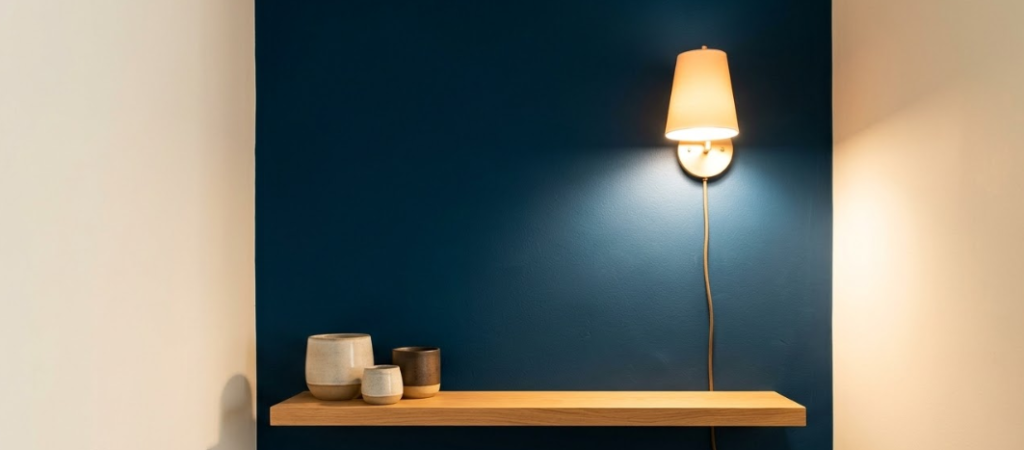
My wall looked so plain and I really wanted to do something new for a change. Since 2026 is all about those vibrant colors, I grabbed a quart of deep teal to tackle one small area in under 90 minutes. Now my living room doesn’t look so plain anymore!
Materials
- 1 quart paint (deep teal, navy-adjacent, or stormy blue tones)
- Painter’s tape
- 2″ angled brush
- Small foam roller + tray
- Drop cloth or old sheet
Steps
- Clear the wall. Move furniture away at least 3 feet.
- Clean the surface. Wipe down with a damp cloth to remove dust. Let it dry.
- Tape your edges. Run painter’s tape along ceiling lines, corners, trim, and outlets.
- Cut in first. Use the angled brush to paint 2-3 inches along all taped edges.
- Roll the rest. Load your roller, roll off excess, and apply paint in a “W” pattern for even coverage.
- Apply second coat. Wait 2 hours, then repeat steps 4-5.
- Peel tape while still tacky. Remove tape at a 45-degree angle before the paint fully cures.
Time: 60-90 minutes (including dry time between coats)
I couldn’t find the True Teal palette locally, so I ordered online:

- PAINT + PRIMER: KILZ TRIBUTE is a low VOC, 100% acrylic advanced technology paint and primer in one...
- ADVANCED FORMULA: Our technologically advanced acrylic product combines paint and primer properties...

(As an Amazon Associate, we earn from qualifying purchases.)
2. Renter-Friendly Peel-and-Stick Wallpaper Panels
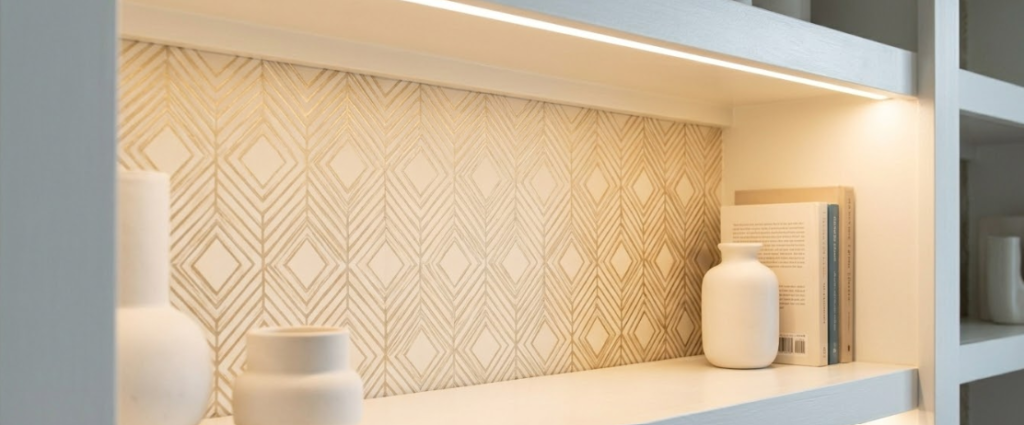
If you’re stuck with boring walls because you’re worried about a security deposit, I know exactly how that feels. I found these peel-and-stick panels that add stylish details to your furniture without any permanent damage. It’s the easiest way to make a place look high-end without wasting money on a renovation you cannot keep.
Materials
- 1 roll peel-and-stick wallpaper (look for 2’x4′ sample sizes)
- Measuring tape
- Pencil
- Scissors or utility knife
- Plastic smoothing tool or old credit card
Steps
- Measure your space. Note height and width of the area you want to cover.
- Cut your panel. Add 1 inch extra on all sides for adjustment room.
- Clean the surface. Wipe with rubbing alcohol to remove oils and dust.
- Peel the top 6 inches. Fold the backing down and align the wallpaper at the top edge.
- Smooth as you go. Use your smoothing tool to press out air bubbles and work your way from center to edges.
- Peel and smooth in sections. Work in 6-inch increments down the wall.
- Trim excess. Use a utility knife along the edges for a neat finish.
You can also use this material as wallpaper.
Time: 20-45 minutes
3. “Micro Escapes” Balcony/Porch Corner Glow-Up
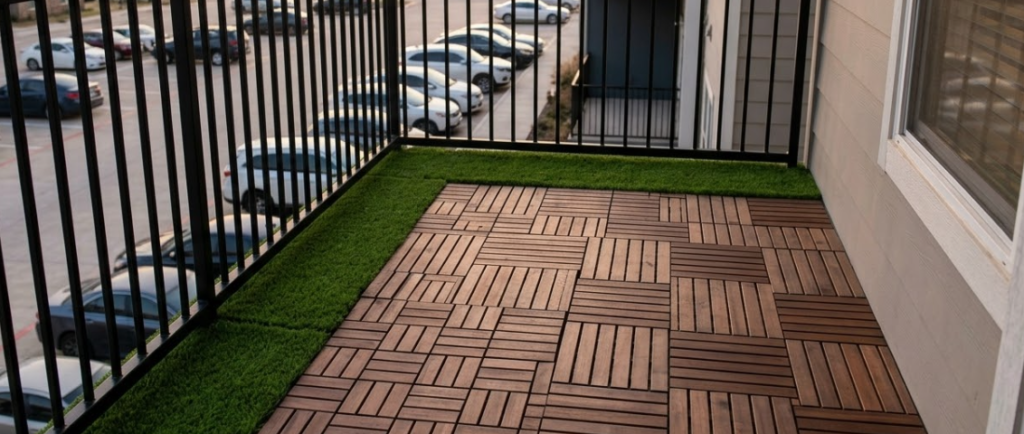
My outdoor space was basically a graveyard for old boxes until I found these interlocking deck tiles. They just snap together so easily that I did not even need real tools or a pro to get it done. Who needs expensive permanent flooring when you can have a fresh wood look in less than an hour?
Materials
- Interlocking wood deck tiles (measure your balcony square footage first)
- Artificial grass tiles or turf strips (for accent borders)
- 1 strand outdoor string lights or solar lantern
- Tape measure
- Rubber mallet (optional, for snapping tiles tight)
- Utility knife (for cutting turf to fit edges)
Steps
- Measure your balcony. Calculate length x width in square feet. Most deck tiles cover 1 sq ft each, so a 4×8 balcony needs roughly 32 tiles.
- Clean the surface. Sweep or hose down your balcony floor. Let it dry completely.
- Plan your layout. Decide where you want wood tiles vs. turf. The photo uses turf as a border along the railing and wood tiles in the main walkway. Lay tiles loosely first to visualize.
- Start in one corner. Snap your first deck tile into place. Work outward in rows.
- Alternate tile direction. Rotate every other tile 90 degrees for a parquet pattern (like the photo).
- Click tiles together. Press down firmly or tap with a rubber mallet until they lock. No glue needed.
- Cut turf to fit. Use a utility knife to trim artificial grass tiles or rolls to fit your border edges. Lay them snug against the deck tiles.
- Add furniture and lights. Drape string lights along the railing or hang a solar lantern. Done.
Time: 45-90 minutes (depending on balcony size)
Here’s where I got my interlocking deck tiles:

4. Aubergine or Sage Lower-Only Cabinet Paint
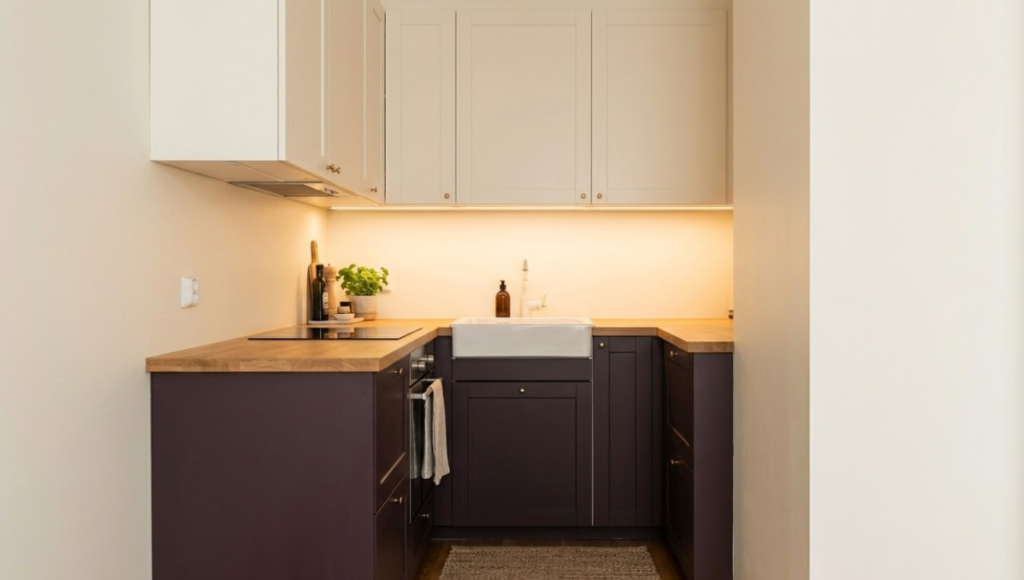
I always wanted to try a bold burgundy color, but worried it might be too much for the kitchen. This year is all about those deeper tones and surprisingly burgundy looks exactly right on just the lower cabinets. My kitchen has never looked this stylish.
Materials
- 1 quart cabinet-specific paint in aubergine or sage green (no-sand formula preferred)
- Painter’s tape
- 2″ angled brush
- Small foam roller + tray
- Screwdriver (if removing hardware)
- Drop cloth
- Degreaser or TSP substitute
Steps
- Remove hardware. Unscrew knobs and pulls. Set aside with screws in a labeled bag.
- Clean cabinets thoroughly. Use degreaser on all surfaces as cabinet grease kills paint adhesion.
- Tape around edges. Mask countertops, floor, and upper cabinet edges.
- Cut in edges first. Use angled brush around panel grooves and corners.
- Roll flat surfaces. Apply thin coats in one direction for a smooth finish.
- Let dry 4-6 hours. Touch-test before second coat.
- Apply second coat. Repeat steps 4-5.
- Reinstall hardware. Wait 24 hours before using the cabinets.
Time: 45-60 minutes active work (plus dry time)
No products found.
5. Spring Equinox 3-Material Wreath
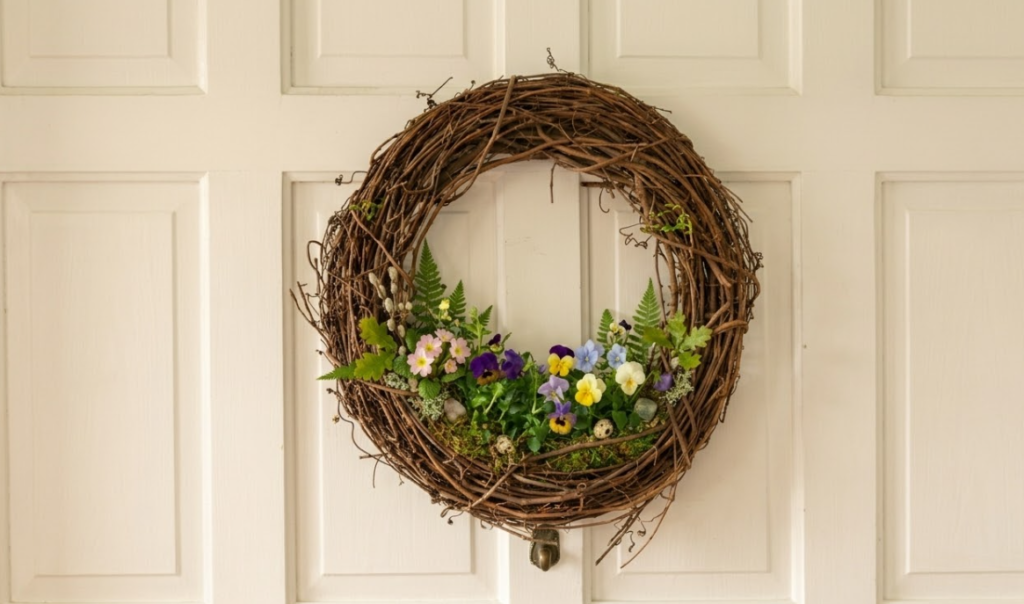
I know I could always just buy a wreath at the store, but I wanted mine to feel personal for the Spring Equinox today. Picking out my own favorite colors and greenery was so much more rewarding compared to just getting a store-bought version. It feels so nice to welcome the new season with something I actually made myself.
Materials
- 1 grapevine or wire wreath base (10-14″ diameter)
- 2-3 bundles of faux or fresh greenery (eucalyptus, ferns, or spring florals)
- Floral wire or hot glue gun
- Ribbon (optional, for hanging)
Steps
- Lay out your materials. Arrange greenery in the order you want to attach.
- Start at the base. Secure your first greenery bundle with floral wire or hot glue at the 6 o’clock position.
- Work in one direction. Overlap each bundle slightly and secure as you go around the wreath.
- Vary textures. Alternate between fuller and wispier pieces for visual interest.
- Fill gaps. Tuck smaller sprigs into bare spots.
- Add ribbon loop. If hanging, secure a ribbon loop at the top back.
- Hang and admire. Display on your front door or above a mantel.
Time: 30-60 minutes
For more wreath variations, check out Create Stunning DIY Wreaths and Garlands for Your Home.
6. Hidden Pantry Fabric Door
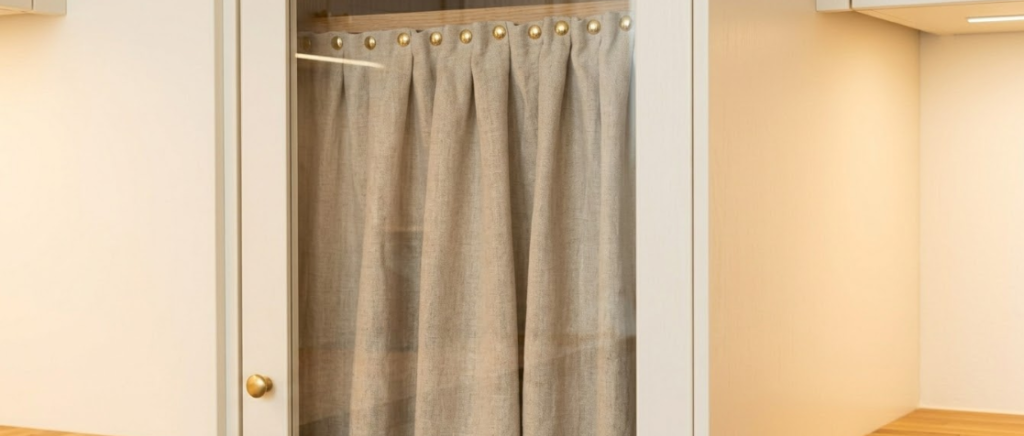
Seeing those messy cereal boxes peeking through the glass door was a total eyesore every time I walked into the kitchen. This simple linen curtain hides the chaos and gives the whole room a softer, more relaxing vibe.
Materials
- Tension rod (measure your doorframe width)
- Fabric panel or curtain (measure height + 6 inches)
- Curtain clips or sew a rod pocket
- Iron (optional, for pressing)
Steps
- Measure your doorframe. Note the width inside and the height you want covered.
- Cut or select your fabric. Choose a panel that matches your kitchen vibe. Linen, cotton, or a subtle pattern works well.
- Create your hanging method. Either attach curtain clips or fold and sew a 3″ rod pocket at the top.
- Press the fabric. Iron out wrinkles for a clean look.
- Install the tension rod. Twist to secure inside the doorframe.
- Hang the fabric panel. Slide clips or rod pocket onto the tension rod.
- Adjust and style. Arrange fabric so it hangs evenly and covers the pantry contents.
Time: 20-40 minutes
What’s the easiest spring home makeover for beginners?
Peel-and-stick wallpaper on a small accent area. No paint, no mess, done in 20 minutes. If you can apply a sticker, you can do this.
Do micro-makeovers actually make a noticeable difference?
Yes. One moody blue wall or a set of deck tiles on a sad balcony changes the entire energy of a space. You don’t need to redo a whole room to feel like you live somewhere new.
How do I make sure paint or wallpaper doesn’t damage my rental?
Use peel-and-stick wallpaper rated “renter-friendly” and test a small hidden spot first. For paint, stick to accent pieces like a door or removable panels. Always check your lease and photograph everything before you start.
QUICK POLL
What’s your take? Tell us more in the comments below!









