
At a Glance: DIY Glowing Glass Pumpkin
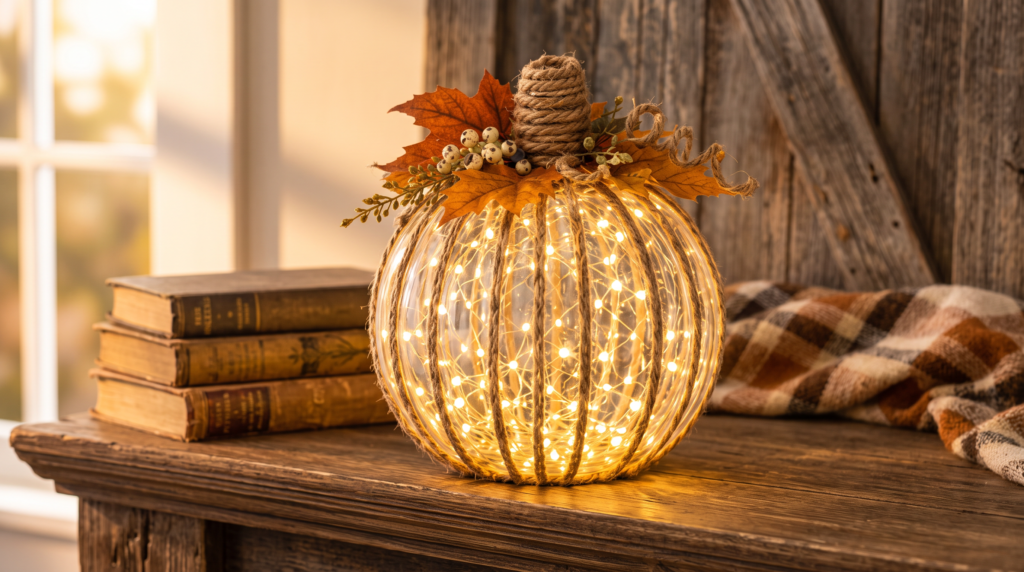
- About 45 minutes. Wrap a round glass bowl in vertical jute twine ribs, drop in a shaped strand of battery fairy lights, and glue on a coiled twine stem.
- Two things decide how it looks. Even rib spacing, and shaping the light wire into a ball before it goes in the bowl.
- Three ways to build it. A thrifted bowl and dollar-store twine for one season, a mid build with a timer strand, or a heavy bowl with silicone that comes back out every year.
To make a DIY glowing glass pumpkin, clean a round glass bowl with rubbing alcohol, wrap it in eight passes of jute twine to create sixteen vertical ribs, glue only at the rim and the bottom center, scrunch a 100-LED battery fairy light strand into a hollow ball and lower it inside, then glue a short coiled twine stem on top and add faux maple leaves at its base. Jump to the steps.
There’s a moment every fall when the light turns gold around four in the afternoon and the whole house starts asking for something warmer. This is the project that answers it, and it uses five supplies you can carry home in one hand.
What do you need to make a DIY glowing glass pumpkin?
For each pumpkin
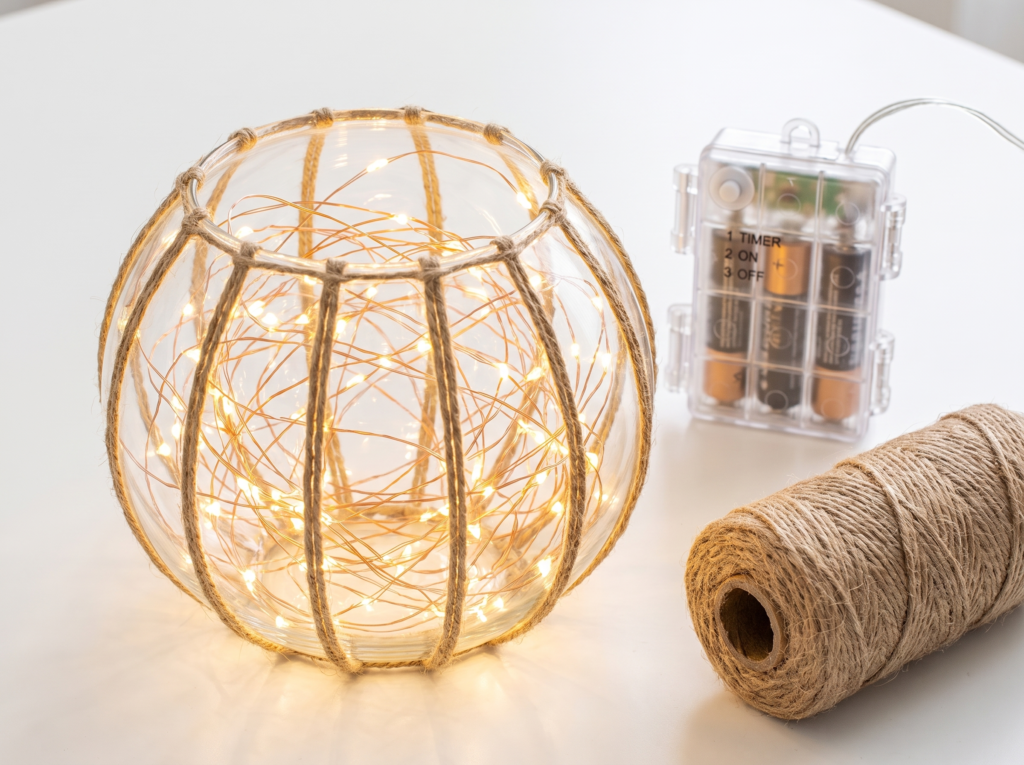
- 1 round glass bowl. Six to eight inches across, wider than it is tall, with a small top opening.
- 1 roll jute twine. 100 feet, 3-ply. One pumpkin uses about 17 feet plus the stem.
- 1 strand battery fairy lights. 100 LEDs minimum on hair-thin copper wire, not thick green cord.
- Hot glue sticks. High-temp, not low-temp. Smooth glass gives glue very little to grip.
- Faux leaves and greenery. Two or three maple stems plus one berry sprig.
Tools: hot glue gun, scissors, rubbing alcohol, a strip of paper. Optional: clear silicone adhesive for a build you want to keep for years.
Quick tip: Buy by LED count, not strand length. A 20-LED strand in an eight-inch bowl looks like a phone charger fell in there. Plan on 100 LEDs for a six to eight inch bowl and around 200 for a ten-inch one, and use battery-operated lights only.
Thrift the bowl. Goodwill shelves are full of them for a couple of dollars, and a thrifted one honestly looks better than anything shipped. The lights and the glue are the two I’d order instead. Dollar stores carry 20-LED strands on thick green cord, which is the exact thing that ruins this build, and their mini glue sticks run low-temp, which won’t hold on smooth glass. Both are easy to get right online and annoying to get right in person.

- ¡¾Easy to use¡¿: Install high quality batteries into the battery holder,the multicolor copper...
- ¡¾Remote Control¡¿: With a remote in hand, you can easily turn on/off the lights; 8 functions...
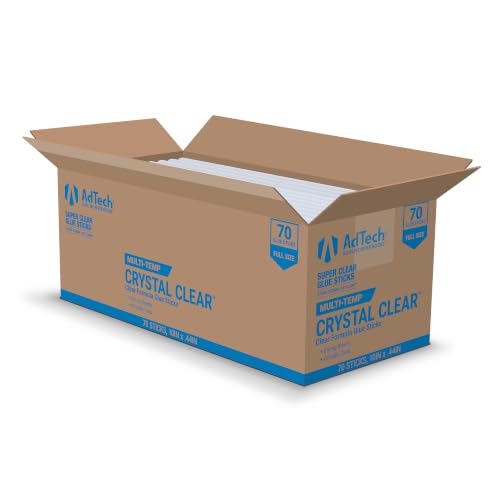
- Fits All Full Size Glue Guns - Designed for smooth, consistent glue flow in standard full size glue...
- Multi Temp Formula - Compatible with high temp, low temp, dual temp, and multi temp glue guns for...

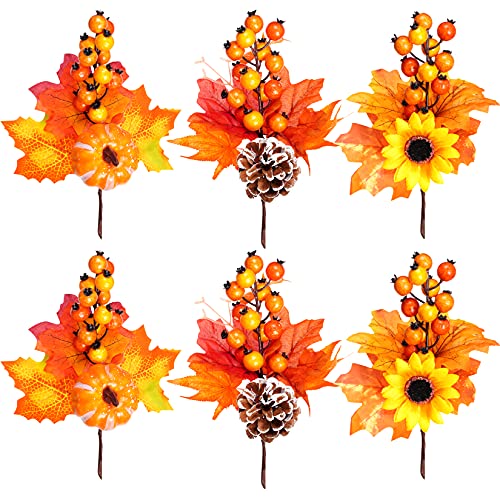
- Orange Fall Stems: You will get 6 pack autumn maple leaves branches. There are three designs...
- Vivid Maple Leaves Branches: These artificial maple branches are made of silk, plastic and foam...
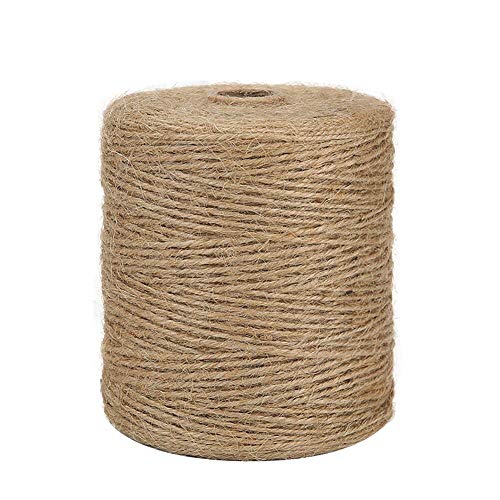
- 3 strands twisted, 0.08 inch (2mm) in diameter, 984 feet in length, the jute twine is durable and...
- This natural jute twine is soft and durable, providing strength without damaging the items you’re...
These are affiliate links. If you buy through one we earn a small commission, at no extra cost to you.
What can go wrong with a DIY glowing glass pumpkin?
The twine peels off
Glass is smooth and non-porous, which is exactly what glue struggles with. Hot glue doesn’t grip smooth surfaces the way it grips wood or fabric, and the film left on glass from the factory or a thrift shelf makes it worse. Wrap a bowl you haven’t cleaned and the ribs start sagging within a few weeks, usually two or three at a time.
The light pools at the bottom
Drop the strand in and walk away, and gravity wins. All 100 LEDs settle into the bottom two inches and you get a bright hot spot with a dark upper half, which reads as a jar with a flashlight in it rather than a glowing pumpkin. Thirty seconds of shaping fixes it permanently.
Where does the battery pack go, and is it safe?
Battery LED strands are low voltage and produce no flame. They run far cooler than incandescent bulbs, no heat builds up inside the glass, and the case stays cool enough to touch after hours of use. That’s why this project calls for battery lights only, and why a plug-in strand has no business inside a sealed bowl.
Cooler isn’t the same as zero risk, though, and you shouldn’t treat any decorative light as risk-free. Check the strand for frayed or damaged wire before each season, follow the instructions that came with it, and switch decorative lights off when you go to bed or leave the house, which is what the Consumer Product Safety Commission advises. Enjoy it through the evening, then turn it off on your way up.
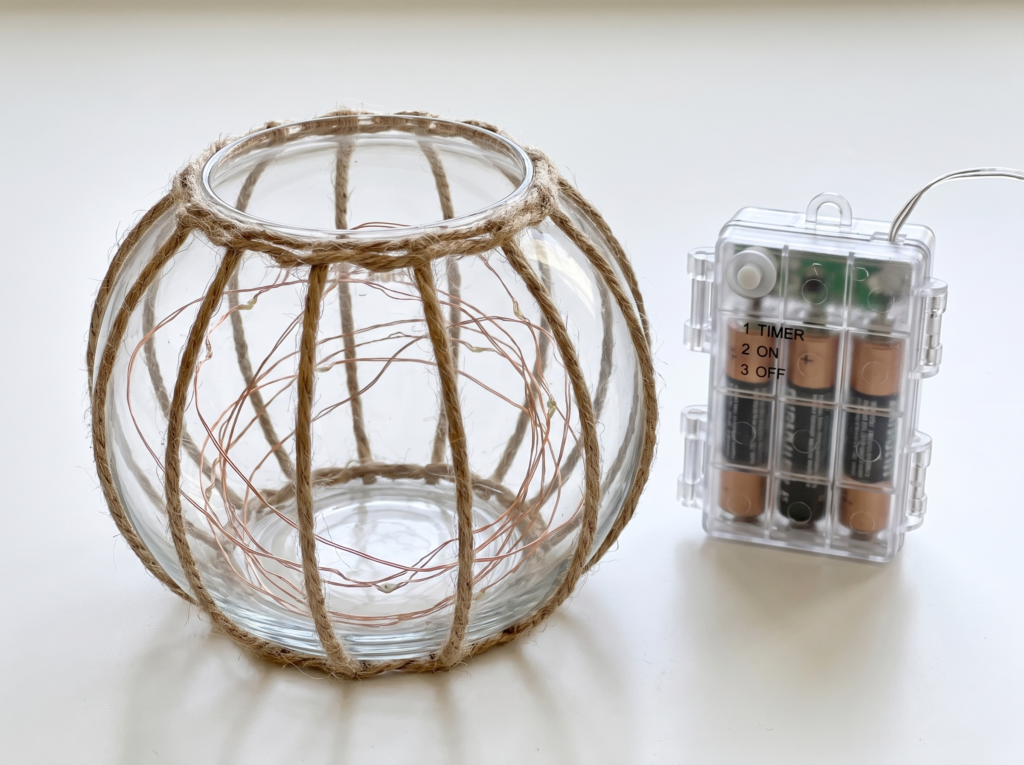
So hiding the pack is a styling problem, not a safety one. Three placements, best to worst:
- Behind the pumpkin. Feed the lead wire out through the top opening and run it down the back. Keep the switch reachable so you’re not fishing for it every night.
- Under a leaf. Works if the pumpkin sits against a wall, but you’ll disturb the greenery every time you switch it on.
- Inside the bowl. Only with one of the small clear cases. Bulkier packs read as a lump in the glow.
A set of AA batteries in an LED strand averages 18 to 24 hours of steady use, which sounds generous until you leave it on every evening for a week. Buy a strand with a built-in timer. Timer strands run about six hours on and eighteen off automatically, and that stretches one set of batteries across most of the season.
How do you make a DIY glowing glass pumpkin?
Four phases, ten steps, one evening. Tap any one to jump to the full steps.
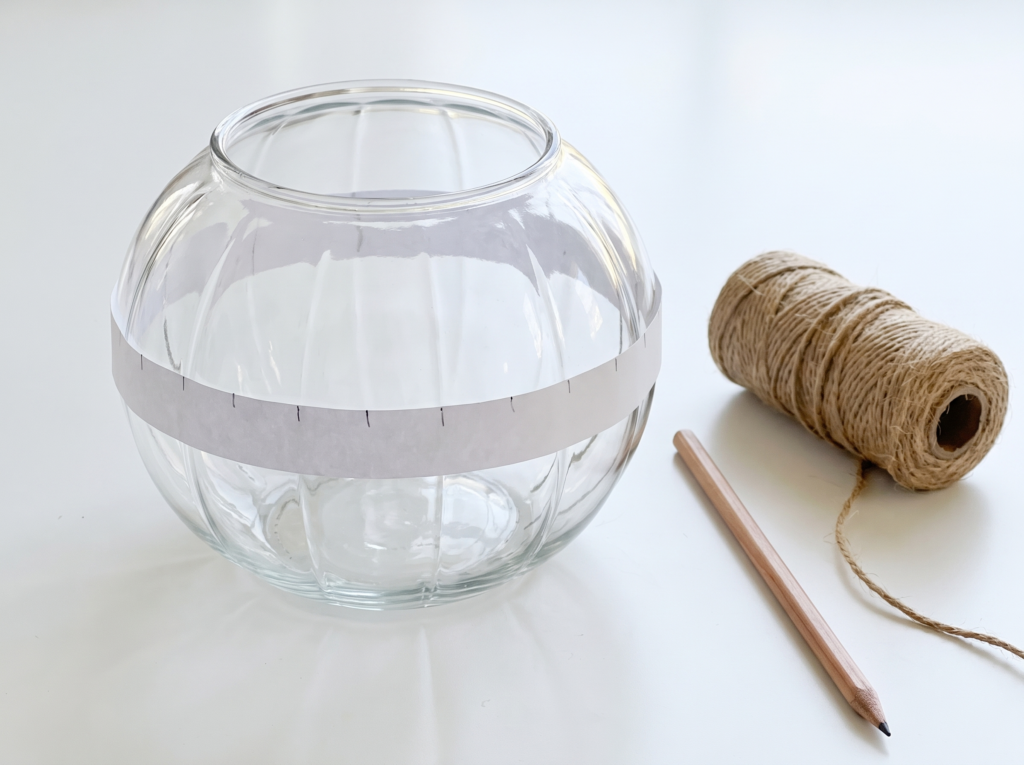
Prep the glass
Clean off the invisible film, then mark sixteen rib positions on a paper strip so you’re not eyeballing the spacing.
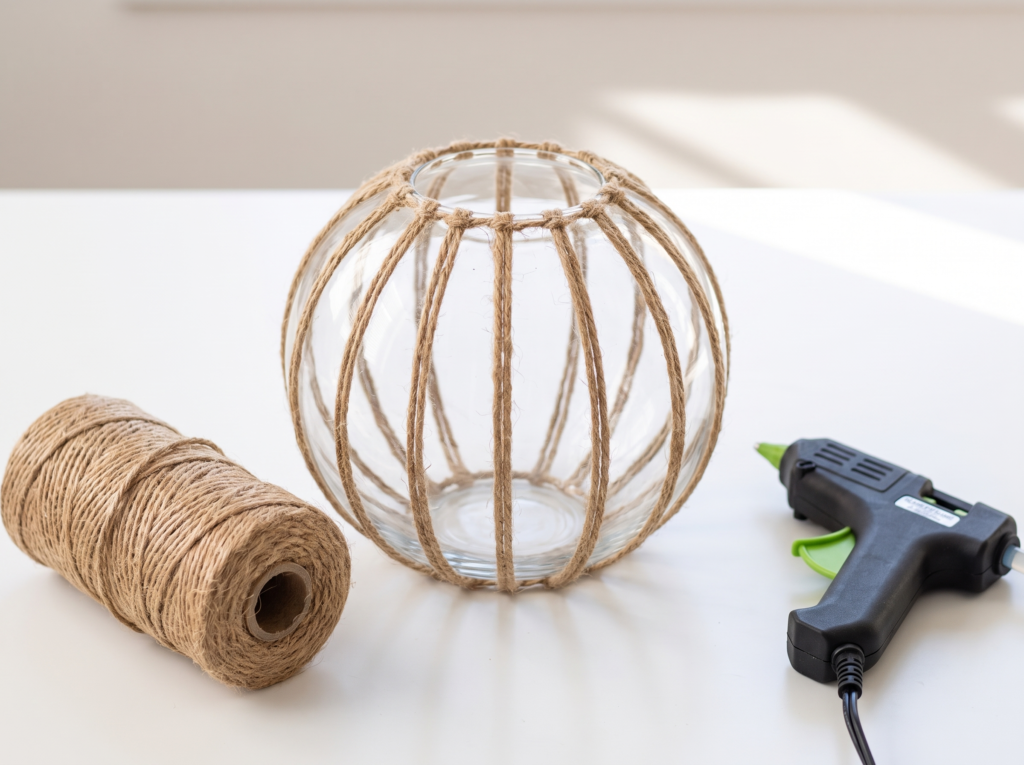
Wrap the ribs
Eight passes over the top and under the bottom gives sixteen ribs, glued at the rim and bottom center only.
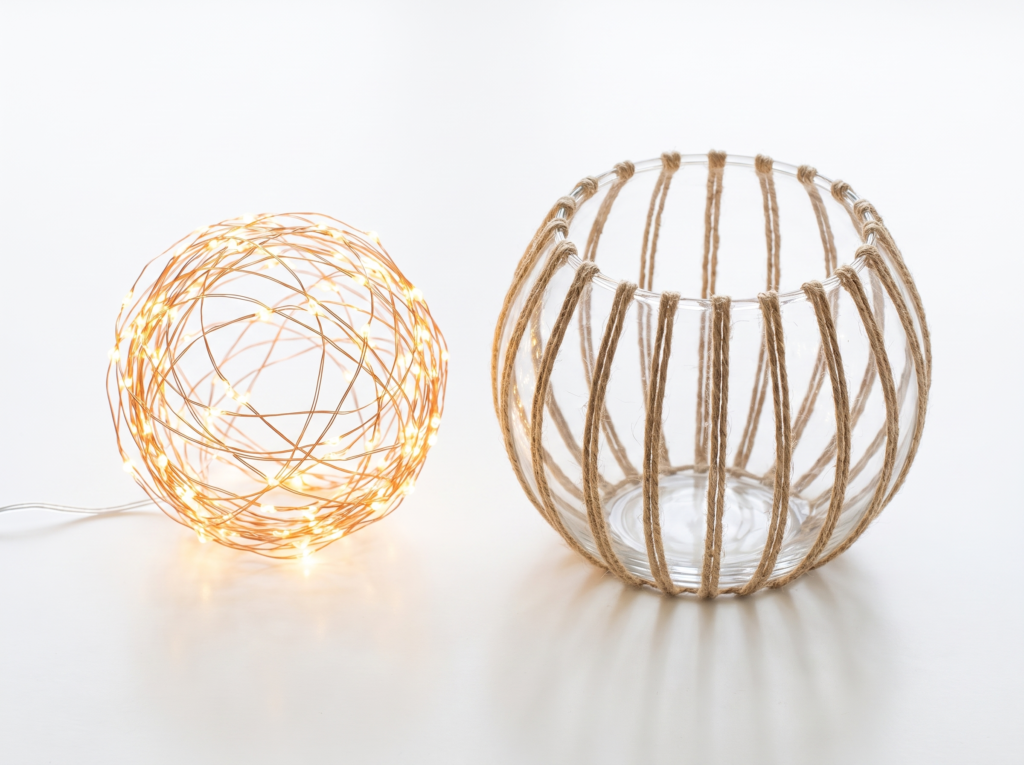
Light it
Shape the wire into a hollow ball before it goes in, then route the lead out the top and hide the pack.
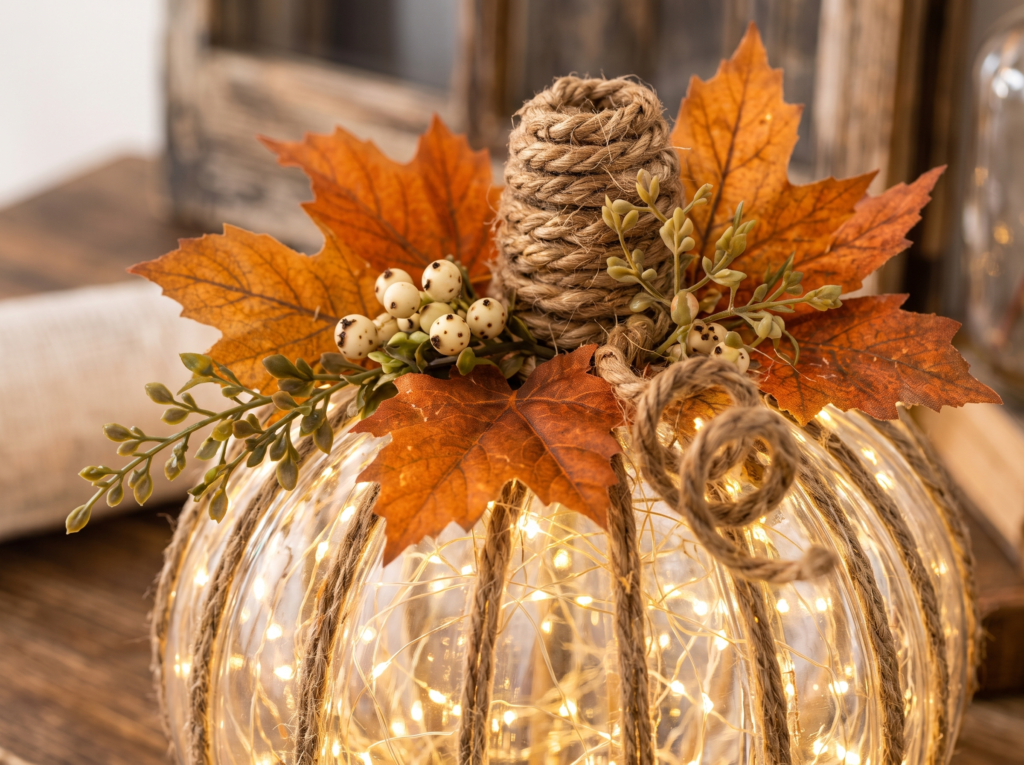
Finish it
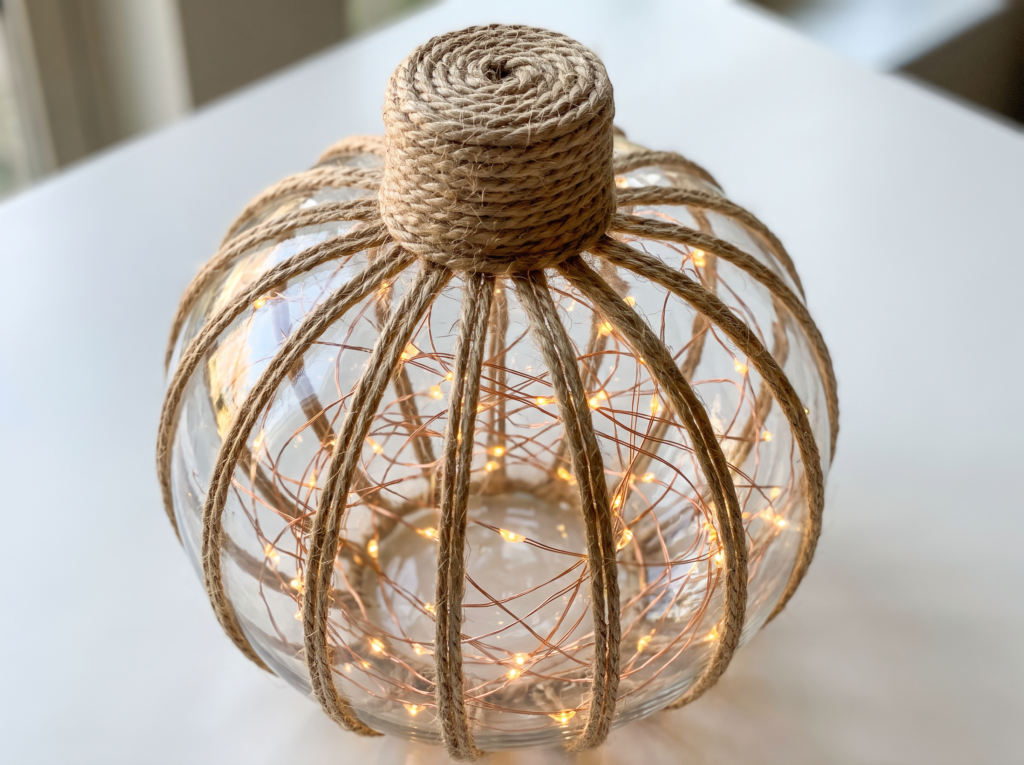
Coil the stem in your hand, glue it on once it sets, then fan the leaves down over the shoulder.
Every step, in detail
- Wipe the bowl with rubbing alcohol and let it dry fully. Glass looks clean and isn’t. A film from the factory or the thrift shelf is what your glue actually bonds to if you skip this. Give it two full minutes.
- Make a spacing guide. Cut a paper strip long enough to wrap the fattest part of the bowl, mark where the ends meet, lay it flat and mark sixteen even points, then tape it back on. Two minutes here is the single biggest difference between even ribs and wandering ones.
- Anchor at the bottom center. Glue a quarter-sized circle on the underside and press your twine end into it. Hold ten seconds. Every wrap references back to this one spot rather than to the wrap before it, which is how spacing errors stop compounding.
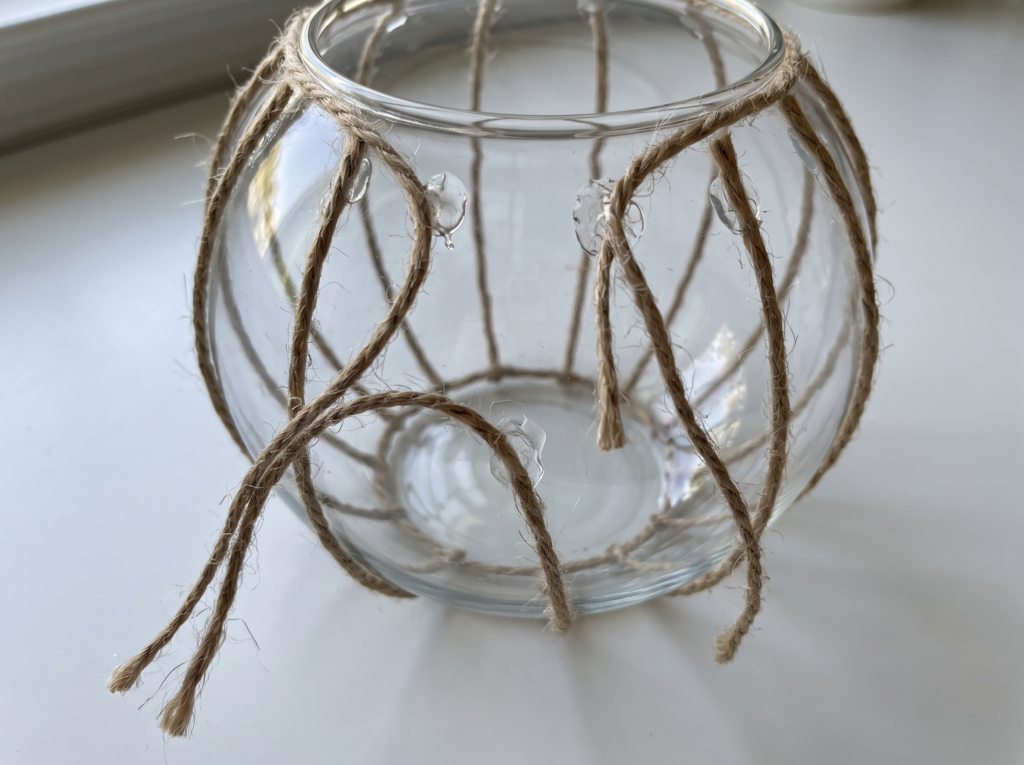
- Run eight passes. Up one side, over the top opening, down the other side, back under the bottom, hitting your paper marks as you go. Cross the center of the bottom each time so the wraps fan out instead of piling. Eight passes gives sixteen ribs.
- Glue at the rim and bottom only. Dot glue where the twine crosses the rim and the bottom center. Leave the middle of every rib alone, because glue dots down the sides turn into shiny lumps once the lights are on. Peel the paper guide off when you’re done.
- Shape the wire before it goes in. Scrunch the strand into a loose hollow ball about the size of the bowl’s interior, then lower it in. Thin copper wire holds that shape. This is the thirty seconds that separates an even glow from a puddle.
- Route the lead and place the pack. Out through the top opening, down the back. Set the battery case behind the bowl with the switch facing where your hand will reach for it.
- Coil the stem in your hand. Wind twine around two fingers into a tight spiral about an inch and a half tall, gluing as you build. Let it set completely, then glue the finished coil onto the top opening. Building it separately beats fighting it in place.
- Add the leaves last. Glue maple leaves, a berry sprig, and a curled twine tendril at the base of the stem so they fan out and drape over the shoulder. Real pumpkin leaves droop, so yours should too.
- Turn the lights off and step back ten feet. If it still reads as a pumpkin unlit, the glow is a bonus rather than a rescue. If it doesn’t, your ribs need more contrast or your stem is too small.
Mantel tip: Set the pumpkin where the switch faces the room’s traffic path. The ones that get switched on every night are the ones you don’t have to reach behind.
How do you fix a glowing glass pumpkin that isn’t working?
The ribs slid out of position while wrapping
You’re referencing each wrap to the previous one instead of to the bottom anchor. Peel back to the anchor and start again from the paper marks. Errors of an eighth of an inch compound into a visible lean by the eighth pass.
The glow is bright at the bottom and dark up top
The strand settled. Lift it out, scrunch it into a hollow ball again, and lower it back in. If it keeps collapsing, your wire is the thicker green cord rather than hair-thin copper, and no amount of shaping will hold.
The stem won’t stay on
The coil is touching the rim at only a few points. Flatten the bottom face of the coil against a table while the glue is still warm, so it meets the opening across its whole underside instead of balancing on a ridge.
Ribs came loose after a few weeks
The glass wasn’t clean, or the glue was low-temp. Peel those ribs, wipe the area with alcohol, and re-glue with high-temp sticks. If it’s a piece you want back out next year, switch to clear silicone instead.
Should you use hot glue or something stronger?
The advice splits here, and pretending otherwise would cost you the piece.
Hot glue is the fast answer. It grabs in ten seconds and you’re finished tonight. The careful answer is that a single adhesive on smooth glass is a one-season bond and nothing more. For real holding strength on glass, silicone or epoxy beats hot melt every time.
Both are right. Which one you want depends on what you’re actually building, so decide that before the glue gun heats up.
One season, kids helping, thrifted bowl you won’t miss? Hot glue alone. Clean the surface, use high-temp sticks, enjoy it through Thanksgiving.
A gift, or something you want back out next fall? Clear silicone as the structural bond, with a small dot of hot glue alongside at each contact point to hold position while the silicone cures overnight. Two adhesives doing two different jobs.
Heavy ten-inch bowl you’ll lift by the rim? Silicone only, and never pick it up by the twine no matter which glue you used.
What are the three ways to build a DIY glowing glass pumpkin?
Prices move week to week, especially in fall, so here’s what goes in each tier rather than a number that’ll be wrong by the time you read it.
Budget
Thrifted glass bowl, dollar-store jute, one 100-LED strand, and whatever glue gun is already in the drawer. Photographs beautifully. The thinner dollar-store jute is fuzzier and less defined, so plan on a couple of extra passes to get the ribs reading clearly.
Mid
A new eight-inch bowl, 100 feet of 3-ply natural jute, a 100-LED timer strand, high-temp glue sticks, and a decent faux maple stem. This is the build we’d choose. The timer alone earns back the difference in batteries.
Quality
Heavy ten-inch bowl, dyed or waxed jute, a 200-LED strand with a remote and timer, clear silicone instead of hot glue, and preserved leaves with a berry pick. Costs more than buying one finished, and comes out of the box looking identical in year five.
Where should you put a glowing glass pumpkin?
Anywhere it gets seen after dark and stays out of traffic. A mantel, a console table, a bookshelf at eye level, or a windowsill facing the street. Keep it indoors, because this build isn’t rated for weather and jute wicks moisture.
Group it with things that have some height difference. A stack of books, a taller vase, one low element. If you’re decorating the entryway at the same time, these Halloween mudroom ideas work alongside it without competing.
How do you reuse it after fall?
White version. Cotton cord instead of jute, cool-white lights instead of warm, one eucalyptus sprig at the stem. Reads modern rather than rustic.
Mini cluster. Three small bowls in different sizes, wrapped the same way, grouped on a tray. Odd numbers always look more natural than even ones.
Winter conversion. This is the best part. After Thanksgiving, pull the maple leaves off and glue on a sprig of pine with a couple of small pinecones. The same glowing bowl carries you straight through December. One build, two seasons.
If the wrapped-fiber look is your thing generally, the same jute works for macrame hanging planters, which use up the rest of that 100-foot roll.
Can kids help make a glowing glass pumpkin?
Yes, and most of it can stay in their hands. The glue gun is the dividing line.
Kids can wrap the twine, and they’re often better at it than adults because they don’t overthink the tension. They can scrunch the light wire into a ball. They can decide where the leaves go. Give a younger one the paper spacing guide to mark, which turns the fussiest step into the part they own.
An adult handles every glue step, with no exceptions and no holding it for a second. Keep the gun on your side of the table. If craft afternoons are a regular thing, a kids craft supply pegboard keeps the glue sticks and twine off the kitchen table.
When should you call a pro?
Almost never on this one, with one hard line:
- Never put plug-in string lights inside the bowl. Battery-operated LEDs only.
- Never wire this into anything, and never run it off an extension cord.
- An outdoor or permanent lit display by the front door is a different project, with outdoor-rated fixtures and a licensed electrician.
What does a finished one look like?
Run this checklist before you call it done:
- Sixteen ribs, running straight down the sides, spacing even within about a quarter inch.
- No visible glue anywhere except the rim and the bottom.
- The glow reaches the rim, with no dark upper third.
- The battery pack is invisible from the front, switch still reachable.
- Lights off, ten feet back, it still reads as a pumpkin.
Conclusion
The photo makes this look like a ten-minute craft, and the build really is simple. What separates the good one from the sad one is four small moves. Clean the glass before you glue. Mark your rib spacing instead of eyeballing it. Count LEDs instead of strands. Shape the wire before it goes in the bowl.
Do those and you’ll have a piece people ask you where you bought.
Built one? Show us. Post a photo on our Facebook page so we can share it around, and pin this to your fall board on Pinterest before you lose track of it. The variations you come up with are consistently better than ours.
A few helpful answers
DIY glowing glass pumpkin FAQs
The questions that come up most before the glue gun heats up.
About 45 minutes for your first one. The second takes closer to 25. Wrapping goes quickly. Most of your time goes into the stem coil and getting the leaves to sit right. Let the glue set fully before you handle it.
For one season, yes, if you prep the glass. Wipe it with rubbing alcohol first and use high-temp glue sticks rather than low-temp, because smooth glass gives glue very little to grip. For a version you want to keep for years, use clear silicone as the structural bond and let it cure overnight.
You can, but it’ll look like a lit jar. The round shape is what sells it as a pumpkin. If a jar is what you have, pick the widest and shortest one you can find, then add a few extra twine passes to break up the straight sides.
At least 100 LEDs for a six to eight inch bowl. Go to around 200 for a ten-inch one. LED count matters far more than strand length, and two shorter 100-LED strands usually look better than one long sparse one. This is what’s worked across our own builds rather than a manufacturer figure.
Switch it off before you go to bed. Battery LED strands run cool and produce no flame, but the Consumer Product Safety Commission advises turning decorative lights off when you go to bed or leave the house, because any light set can short out. A timer strand does this for you automatically, and it stretches one set of AA batteries across most of the season.
Still have a question? Ask in the comments.
Is jute-wrapped fall decor timeless, or already tired?
Every fall the same argument shows up in the comments. Cast your vote, then tell us why.
Pick one and tell us why in the comments. If you’ve kept a jute piece out for more than three years running, we especially want to hear from you.