



Last Updated: March 2026
At a Glance: 7 Spring Organizing Ideas
- 7 budget-friendly spring organizing hacks using items you probably already own (binder clips, tension rods, magazine holders)
- Most projects cost under $15 and take 10 minutes or less to complete
- Covers kitchen, fridge, desk, pantry, and freezer storage in one guide.
Spring cleaning season is officially upon us!
The problem is, most organizing overhauls eat up an entire weekend and a massive budget. That’s why I rounded up clever storage hacks that only require everyday items and budget-friendly supplies.
| Project | Est. Cost | Time | Skill |
|---|---|---|---|
| Tension-Rod Bottle Rack | $3 – $8 | 2m | Beginner |
| S-Hook Pot Rack | $2 – $5 | 2m | Beginner |
| Binder Clip Cable Dock | $0 (Repurposed) | 5m | Beginner |
| Lazy Susan Turntable | $10 – $15 | 5m | Beginner |
| Magazine Freezer File | $5 – $10 | 10m | Beginner |
| Drawer Pegboard | $15 – $25 | 30m | Intermediate |
| Door-Back Pantry Rack | $20 – $40 | 45m | Intermediate |
Spring Organizing Ideas: It’s Time to Declutter Your Home
Let’s skip the stress and kick off your seasonal refresh with these brilliant, budget-friendly spring organizing hacks.
1. Magazine File Freezer Organizer
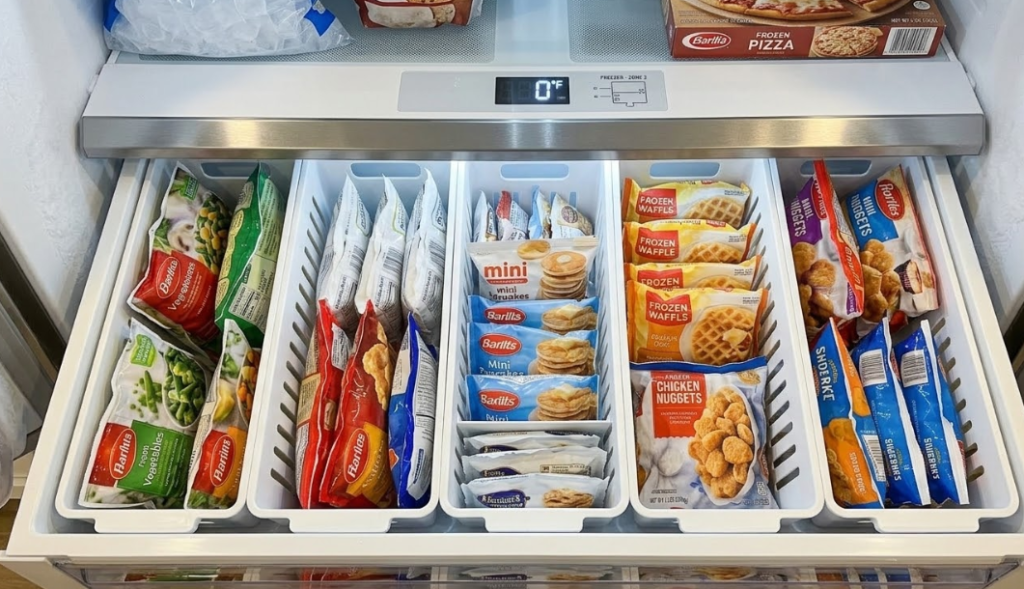
Turn simple magazine holders into freezer dividers to keep frozen foods upright and easy to grab. This hack stops the avalanche of frozen bags every time you open the fridge door. It works in chest freezers and standard freezers alike.
Materials
- Plastic or metal magazine file holders (2 to 4, depending on freezer size)
- Measuring tape
Steps
- Measure the height and depth of your freezer shelf to confirm magazine holders will fit.
- Choose plastic or coated metal holders that can handle cold temperatures without cracking.
- Stand each holder upright on the freezer shelf with the open side facing you.
- Group similar items in each holder: one for frozen veggies, one for meals, one for snacks.
- Label the front of each holder with a piece of tape or a small sticker if desired.
2. Tension-Rod Cleaning Bottle Rack
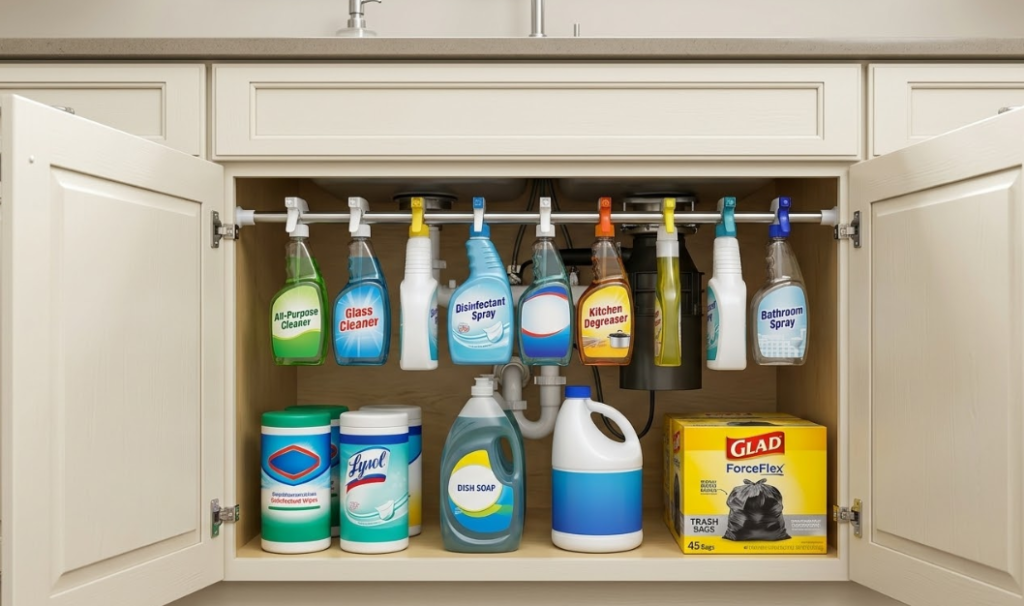
A single tension rod turns wasted vertical space under your sink into instant storage for spray bottles. Bottles hang by their trigger handles, freeing up the cabinet floor for bins or backup supplies. Installation takes about five minutes or less.
Materials
- Tension rod (sized to fit your cabinet width)
- Measuring tape
Steps
- Measure the inside width of your under-sink cabinet.
- Adjust the tension rod to match that width plus about half an inch for a snug fit.
- Position the rod near the top of the cabinet and leave enough allowance for bottle tops.
- Twist the rod to lock it firmly in place between the cabinet walls.
- Hang spray bottles by sliding the curved trigger handle over the rod.
3. Lazy Susan Fridge Turntable
A lazy Susan brings every jar, bottle, and condiment within easy reach with one spin. No more digging behind forgotten leftovers or knocking things over inside the fridge. This simple upgrade keeps your fridge organized and helps reduce food waste.
Materials
- Lazy Susan turntable (10 to 12 inches works for most fridges)
- Damp cloth for cleaning the shelf
Steps
- Remove items from the fridge shelf where you want to place the turntable.
- Wipe the shelf clean so the lazy Susan sits flat and stable.
- Set the turntable in the center of the shelf.
- Place tall items like sauces and dressings around the outer edge.
- Add shorter jars or small containers toward the center.
- Give it a spin to confirm everything stays in place.
4. Drawer Pegboard Divider
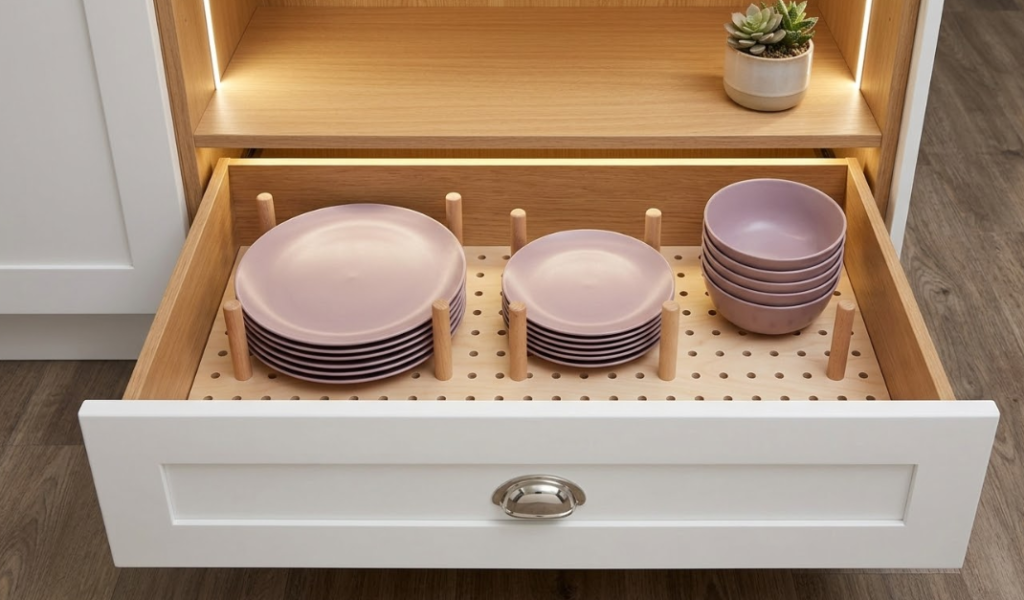
A pegboard inside a drawer lets you rearrange dividers so easily. It works perfectly for junk drawers, tool drawers, and kitchen gadget collections. The pegs are detachable, so feel free to change them up or adjust them based on the items you want to store.
Materials
- Thin pegboard sheet (cut to fit drawer bottom)
- Wooden dowels or pegboard pegs (8 to 12)
- Saw or scoring tool (if cutting pegboard to size)
- Sandpaper
Steps
- Measure the inside length and width of your drawer.
- Cut the pegboard to fit snugly inside the drawer bottom.
- Sand any rough edges so they won’t snag on items.
- Lay the pegboard flat in the drawer.
- Insert pegs into the holes to create dividers based on what you plan to store.
- Adjust peg placement as needed when your storage needs change.
If you’re wondering where I got my pegboard set:

- Enjoy Versatility of Our Complete Set: every organization journey needs the right companions, and...
- Spacious and Flexible Design: enjoy the spacious design of this pegboard drawer organizer for...
(As an Amazon Associate, we earn from qualifying purchases.)
5. Binder Clip Cable Dock
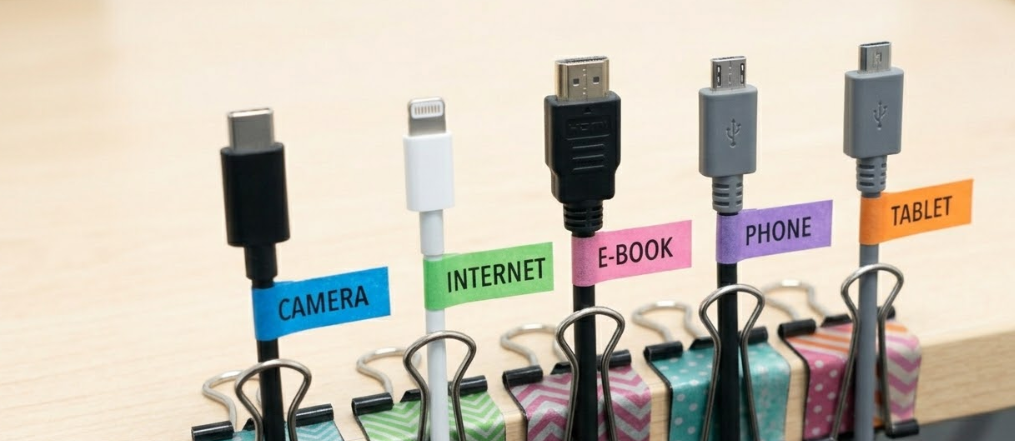
Binder clips turn the edge of any desk into a charging station that keeps cords from sliding to the floor. Each clip holds one cable securely, so you always know where your chargers are. This hack costs almost nothing and only takes a few minutes to install.
Materials
- Medium or large binder clips (3 to 5)
Steps
- Clip each binder clip to the back or side edge of your desk with the silver handles facing up.
- Squeeze the handles and remove one silver arm from each clip.
- Thread a charging cable through the remaining arm so the plug end stays on the desk.
- Reattach the silver arm to lock the cable in place.
- Repeat for each cable you want to organize. If you wanna add some cute designs, attach a washi tape on the clip!
RELATED: Washi Tape Ideas | 9 Creative Ways To Use Washi Tape
6. Door-Back Pantry Rack
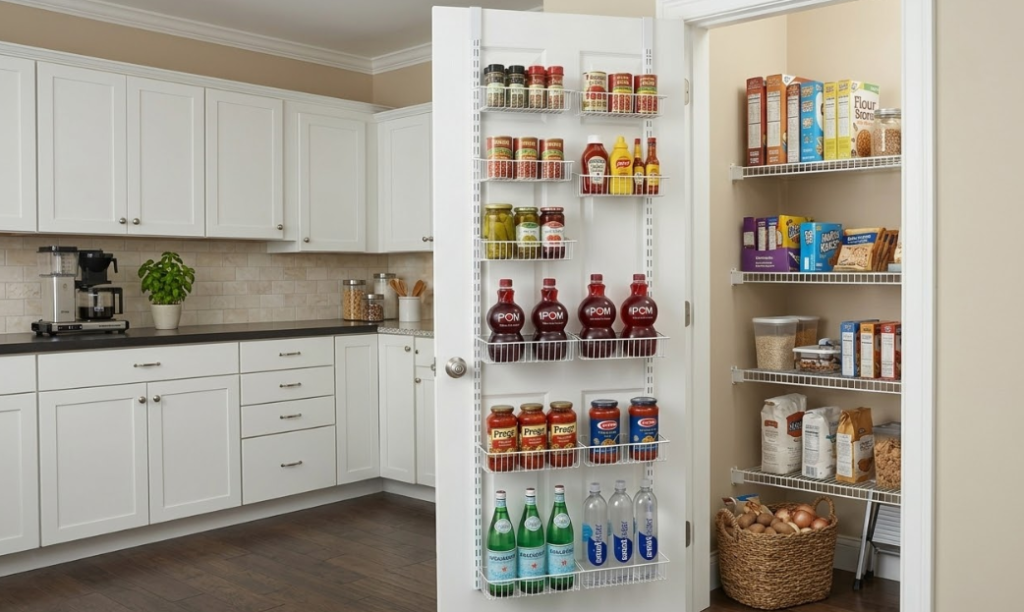
Wire baskets mounted on the inside of a pantry door add bonus storage without taking up shelf space. They’re perfect for storing spices, snack bars, foil, and plastic wrap. You see everything at a glance every time you open the door.
Materials
- Wire baskets with mounting holes (2 to 3)
- Screws or adhesive mounting strips
- Drill or screwdriver (if using screws)
- Level
- Pencil
Steps
- Hold each basket against the inside of the pantry door to plan placement.
- Use a level and pencil to mark screw hole positions.
- Drill pilot holes if your door is solid wood, or use adhesive strips for hollow doors.
- Attach each basket with screws or press adhesive strips firmly in place.
- Wait 24 hours if using adhesive before loading baskets.
- Fill baskets with lightweight items like spice jars, snack packets, or rolls of foil.
Where I got my wire basket:
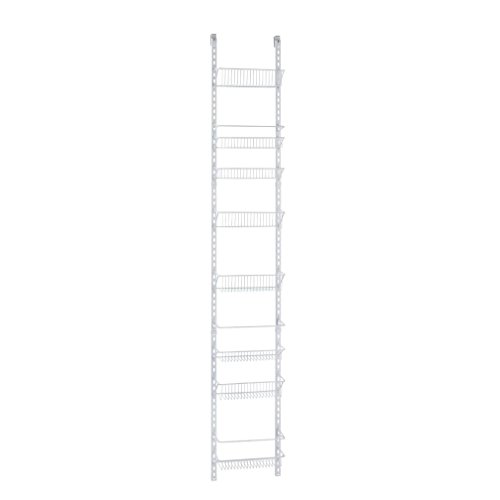
- HANGING RACK WITH BASKETS: Ideal for kitchens, pantry, utility, linen closets & more
- REPOSITION BASKETS WITH ADJUSTABLE DESIGN: Easily reposition adjustable baskets to accommodate tall...
7. S-Hook Pot Rack Hack
S-hooks let you hang measuring cups, utensils, and small pots from any wire shelf or rod you already own. Vertical storage frees up drawer and cabinet space in cramped kitchens. You can add or remove hooks in seconds as your needs change.
Materials
- S-hooks (metal, sized to fit your shelf or rack)
- Existing wire shelf, towel bar, or tension rod
Steps
- Choose a shelf edge, rod, or bar that can support the weight of hanging items.
- Slide an S-hook over the bar with one curve facing down.
- Hang a measuring cup, spatula, or lightweight pot from the lower curve.
- Space hooks a few inches apart so items do not bump into each other.
- Test the setup by gently tugging each item to confirm the hook holds securely.
📸 SUPPLY SCOUT LIST
Check your stash first! But if you’re running low, screenshot this for your next supply run.
- Magazine file holders (Plastic or metal)
- Medium or large binder clips
- Standard S-hooks
- Tension rods (various widths)
- Thin pegboard & wooden dowels
- Mountable wire baskets
- Adhesive strips or small screws
- Lazy Susan turntable (10-12″)
Measuring tape, pencil, level, and sandpaper.
DIYPROJECTS.COM | SPRING ORGANIZING
Can’t decide which project to try first? Remember, you don’t have to do it all at once.
Instead of binge-crafting, join our Spring Home Refresh Challenge! It focuses on doing just one small project per week.
Week 1: Binder Clip Cable Dock
Week 2: Tension-Rod Bottle Rack
Week 3: Magazine Freezer Files
Week 4: S-Hook Pot Rack
By the time you hit Sunday of Week 4, you’ll have upgraded the four biggest “headache zones” in your home.
We’ve all got that one room. Which one keeps you humble? Tell us below.
FAQs
Q1: Which area of the house should I start spring organizing?
Start with small spaces, like a pantry, drawer, or closet. Focus on one area at a time to avoid overwhelm.
Q2: What materials do I need for DIY labels?
You can use chalkboard paint, adhesive paper, cardstock, washi tape, or kraft paper. Markers, stamps, and twine can also elevate your designs.
Q3: How can I repurpose household items for storage?
Use shoeboxes for small items, mason jars for pantry goods, or wooden crates for bulk storage. Cover or paint these items to make them decorative.
Q4: How can I keep my home organized beyond spring?
Develop habits like tidying daily, purging monthly, and assigning clear homes to all your belongings.
Q5: What if I don’t have much time for organizing?
Break tasks into smaller steps or join our Spring Home Reset Challenge and accomplish one project per week!
For additional ideas, check out The Spruce or Marie Kondo’s tips for decluttering and organizing strategies.









