
At a Glance: Upcycled Fabric Scrap Crafts
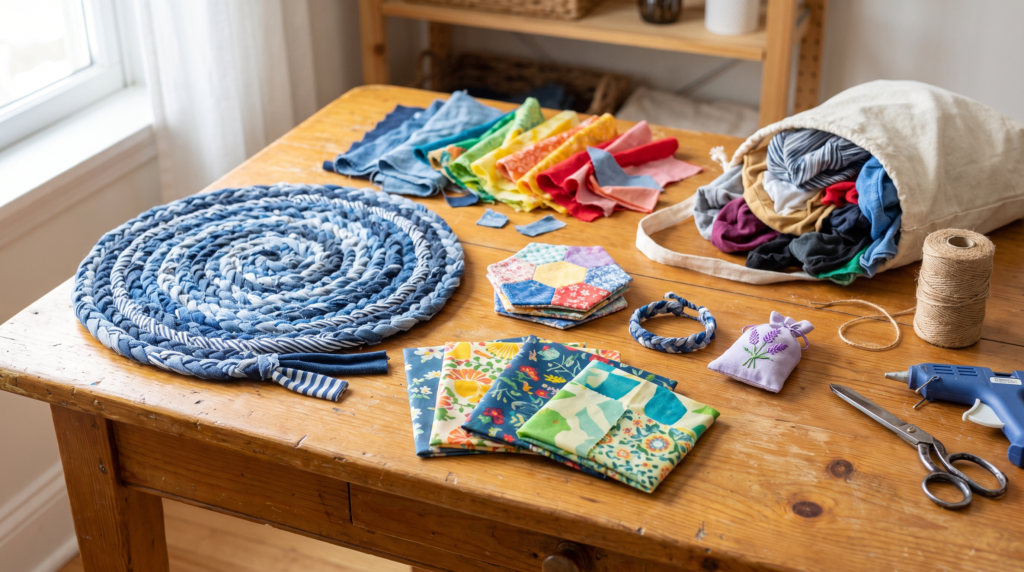
- Go by scrap size. Tiny pieces under 2 inches work as stuffing for sachets and pincushions. Pieces 2 to 6 inches make coasters, bookmarks, and bracelets. Bigger pieces work for rag rugs, wall art, and beeswax wraps.
- Most projects need no sewing machine. Hot glue, iron-on tape, and a few safety pins cover the rag rug, scrunchie, gift wrap, and wall art projects here.
- Heat-based projects need natural fiber. Beeswax wraps and rice heating pads need 100% cotton or another natural fiber, plus adult handling for the oven or microwave step.
Jump straight to the 15 project ideas, or keep reading for how to sort your scraps first. The EPA estimates that 13.0 million tons of clothing and footwear entered the U.S. waste stream in 2018, with 9.1 million tons of that landfilled. A pile of scraps sitting in a bin doesn’t have to add to that pile, and a set of beeswax food wraps made from an old cotton shirt costs about $4 in beeswax pellets against $18 to $30 for a new zero-waste set.
Reviewed for safety: The oven, hot-glue, and microwave steps in this guide were checked against current fire-safety guidance before publishing. Last updated September 2026.
What Do You Need for Fabric Scrap Crafts?
Three budget tiers
- Minimum ($0 to $3). Use only what you already have. Good for a rag rug, fabric bracelets, stuffed sachets, or bookmarks.
- Mid ($4 to $12). Add beeswax pellets or a roll of twine. Good for beeswax wraps, a draft stopper, or fabric wall art.
- Quality ($15 to $30). Add a basic sewing kit or iron-on adhesive. Good for patchwork coasters, memory quilt squares, or a woven basket.
Tools most projects share: fabric scissors, a hot glue gun, safety pins, and an iron. A few projects also call for a sewing needle and thread, a button-covering kit, or a microwave.
How Should You Sort Fabric Scraps Before You Start?
Sort by Size First
Tiny scraps under 2 inches work best as stuffing for sachets, ornaments, and pincushions. Pieces 2 to 6 inches make coasters, bookmarks, bracelets, and covered buttons. Anything 6 inches and up handles rag rugs, wall art, and beeswax wraps. Picking the wrong size for a project is the fastest way to abandon it halfway through.
Check the Fabric, Not Just the Size
Thin or worn-through spots fail fast on anything meant to hold weight or shape, like coasters or baskets. Save those pieces for stuffing instead. For heat projects like beeswax wraps or rice heating pads, stick with 100% cotton, linen, or wool. Synthetic blends won’t absorb wax evenly and can scorch under heat.
What’s the Fastest Way to Pick Your First Project?
You don’t need to read all 15 ideas before you start. Three quick moves get you to the right one.
- Grab your biggest scrap and measure it. That size points you to a project category above.
- Match it to your skill and time. No-sew options take 5 to 20 minutes. Basic sewing projects run 20 to 90 minutes.
- Jump to that project below and start cutting. Every entry lists the sewing level, scrap size, and time up front.
What Are 15 Ways to Upcycle Fabric Scraps and Old Clothing?
No-sew projects are marked. Projects with a good kid role say so.
1. No-Sew Fabric Scrap Rag Rug
No sewing. Large scraps. 45-90 minutes.
Cut old jeans, towels, or t-shirts into strips about 1.5 inches wide. Braid three strips together. Coil and hot-glue as you go. A 12-inch bath rug takes about 45 minutes. A 24-inch area rug takes 2 to 3 hours across a weekend.
Kid role: Kids 6 and up can cut strips with safety scissors once an adult sets up the cutting mat. Kids 8 and up can braid. The hot glue step is adult-only.
2. Patchwork Draft Stopper
Basic sewing. Small to medium scraps. 30-45 minutes.
Sew or hot-glue a long rectangle of patchwork fabric into a tube. Stitch one end closed. Fill with dry rice or fabric scrap stuffing. A 36-inch tube needs about 2.5 lbs of dry rice to seal a door gap properly. Weight matters. A light draft stopper just slides around.
Failure mode: Tube too narrow to fill. Make it at least 3 inches in diameter before stuffing.
3. Fabric Scrap Coasters
No sewing to basic sewing. Small scraps. 20-30 minutes for a set of 4.
Stack two layers of fabric (one decorative, one absorbent backing like old towel). Cut into 4-inch squares. Hot-glue or sew the edges. Press the edges under before gluing for a cleaner look. Ten extra minutes. The result looks intentional rather than thrown together.
For more ways to repurpose materials you already own, see our roundup of 40 nifty upcycling ideas that need no special tools.
4. Beeswax Food Wraps from Old Cotton Shirts
No sewing. Large cotton scraps only. 20 minutes. Adults handle the oven.
Cut 100% cotton fabric into squares: 8×8, 10×10, and 12×12 inches. Lay a square on a parchment-lined baking sheet. Sprinkle beeswax pellets evenly. Bake at 200 degrees F for 4 to 5 minutes until wax melts. Spread with a brush. Lift the warm fabric and wave it until stiff.
This only works with natural fibers. Polyester doesn’t actually melt at 200 degrees F. It needs well over 480 degrees F for that. The real problem is that it won’t absorb the wax the way cotton does, so the wrap never seals and stays tacky instead of stiff. Stick with 100% cotton or linen for a wrap you’ll actually reuse.
Adult role: Oven work, spreading hot wax, lifting hot fabric. Kid role (8 and up): Sprinkling wax pellets and choosing which fabric squares get made.
5. Braided Fabric Bracelet
No sewing. Tiny to small scraps. 10 minutes.
Cut three strips about 0.5 inches wide and 18 inches long. Tie at one end. Braid. Tie the other end. Knot the ends together to wear it. Use jersey fabric and it slips on easily. Use denim and tie it on instead.
6. Memory Quilt Square Starter
Basic sewing. Large scraps from meaningful clothing. Ongoing project.
Cut 6-inch squares from old clothing: a kid’s Halloween costume, a grandfather’s flannel shirt, a college t-shirt you can’t wear anymore. Store them in a box. When you have 20 squares, sew them into a lap blanket. When you have 50, you have a full quilt.
This same sort-and-assess approach works for furniture projects too. See our guide to upcycling old furniture for more ideas.
7. Fabric Scrap Wall Art
No sewing. Small to medium scraps. 45-60 minutes.
Stretch scraps over a canvas or cardboard frame, gluing at the back. Use scraps that share a color palette. Otherwise the result looks random rather than intentional. Lay everything out on a table before gluing anything. Live with it for 10 minutes. If it still looks good, commit.
8. Stuffed Fabric Lavender Sachet
Basic sewing. Tiny scraps. 15-20 minutes per sachet.
Sew two small squares right-sides together, leaving a gap. Turn right-side out. Fill with dried lavender and tiny fabric scraps. Hand-stitch the gap closed. Put them in dresser drawers, hang in closets, or give them as gifts. Dried lavender costs about $8 for 4 oz and makes 8 to 10 sachets.
9. No-Sew Scrunchie
No sewing. Small scraps. 10 minutes.
Cut a strip 3 inches wide and 22 inches long. Fold it around a hair tie. Hot-glue the fabric as you roll it around the elastic. Tuck and glue the end. For a cleaner result, use iron-on hem tape instead of hot glue.
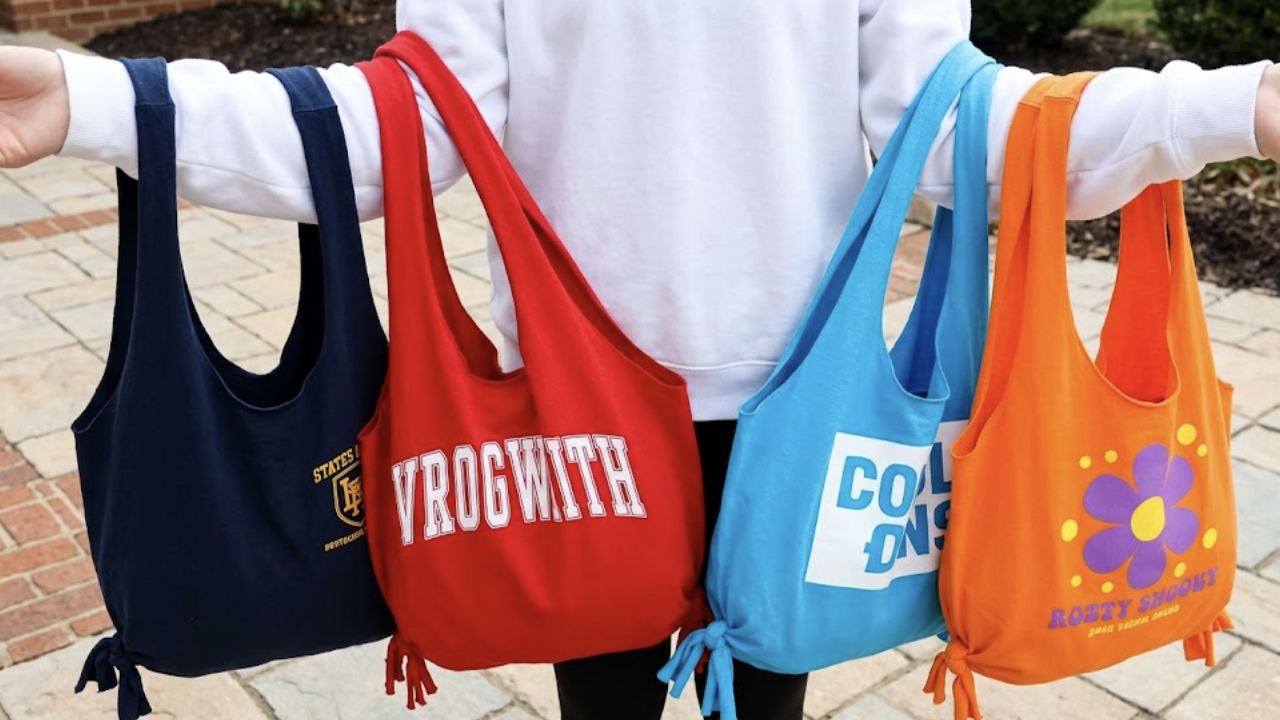
10. T-Shirt Yarn from Old Jerseys
No sewing. Large jersey scraps. 20-30 minutes per ball.
Cut old t-shirts into horizontal strips. Stretch each strip and it curls into yarn. Roll the strips into a ball. Use the t-shirt yarn for crochet, macrame, or weaving.
Adult role: Initial cutting. Kid role: Stretching strips to activate the curl and rolling them into balls. Great work for ages 6 and up.
11. Fabric-Covered Buttons
No sewing. Tiny scraps. 5 minutes per button.
You need a button-covering kit ($4 at craft stores). Cut a fabric circle, push it through the tool, snap the back on. Even 2-inch squares work for standard button sizes. Sew the covered buttons onto a denim jacket or a plain pillow cover.
12. Furoshiki-Style Fabric Gift Wrap
No sewing. Medium to large scraps. 5 minutes per gift.
Place the gift in the center of a fabric square. Bring two opposite corners up and tie them above the gift. Bring the other two corners up and tie them together. Reusable fabric gift wrap. Looks genuinely good.
Adult role: Show the first wrap. Kid role: Choosing the fabric and finishing the second knot.
13. Rice-Filled Pocket Heating Pad
Basic sewing. Small to medium scraps. 20-30 minutes.
Sew two pieces of natural-fiber fabric into a small envelope (about 4×8 inches). Fill with dry white rice to about 60% capacity so it can still move freely. Sew closed.
Skip a fixed microwave time here. Published safety research on homemade grain heat packs warns that moisture content and fill vary too much from one pack to the next for any single heating time to be reliably safe, and overheated packs have caused burns and fires. Start with 30 seconds on your microwave, then check the pad’s temperature and smell before adding more time in short bursts. Stop the first time you catch a scorched smell, and never leave a heating pad unattended while it’s in the microwave.
Use only natural fibers. Synthetic fabrics can scorch faster than cotton or flannel. Overfilling is the top failure mode: fill to 60% capacity so the rice can move and the heat spreads evenly instead of pooling in one spot.
14. Fabric Scrap Bookmarks
No sewing. Small scraps. 5 minutes each.
Cut a strip 2 inches wide and 8 inches long. Apply iron-on interfacing to stiffen it. Fold over the edges and fuse with iron-on hem tape. Punch a hole at the top and add a ribbon. Or skip the steps: a clean-cut strip of linen holds its shape without any treatment.
15. Woven Fabric Scrap Basket
Intermediate. Large scraps, stiff fabric preferred. 60-90 minutes.
Cut fabric strips 1 to 1.5 inches wide. Weave over and under in alternating rows from a square base. Glue or stitch the ends as you build up the sides. Stiffen the finished basket with fabric stiffener or watered-down white glue. Denim and canvas hold their shape best.
Looking for more zero-purchase project ideas? See our Earth Day DIY projects roundup.
What Are the Best Fabric Scraps to Save?
- 100% cotton: Most versatile. Works for beeswax wraps, heating pads, and any heat or moisture project.
- Jersey/t-shirt fabric: Best for t-shirt yarn, rag rugs, and stretch-benefit projects.
- Denim: Structure and durability. Great for coasters, baskets, and patches.
- Flannel: Soft and thick. Good for heating pads and sachets.
- Polyester and synthetics: Use for stuffing only. Not safe for heat projects.
- Worn-through natural fibers: Compost (home compost, not municipal). Don’t use worn spots on surface projects.
A few helpful answers
Fabric Scrap Craft FAQs
Scrap sizes, no-sew options, kids, and beeswax wraps.
Small scraps (2 to 6 inches) work for fabric-covered buttons, bookmarks, coasters, bracelets, and gift wrap squares. Under 2 inches? Use them as stuffing for sachets, heating pads, or draft stoppers. Nothing needs to be wasted.
Hot glue, iron-on hem tape, and staple guns replace stitching in most of these projects. Rag rugs, scrunchies, beeswax food wraps, fabric wall art, and furoshiki gift wrap all need zero sewing. Scissors and a hot glue gun handle most of the list.
Braided fabric bracelets, fabric bookmarks, and furoshiki gift wrap are the easiest starting points. None require tools beyond scissors. Fabric-covered buttons are next (you need a $4 kit). Then rag rugs and no-sew scrunchies add hot glue but still skip the sewing machine.
Yes. Kids 6 and up handle cutting with safety scissors, braiding, and rolling t-shirt yarn. Adults own hot glue, oven work, microwave heating, and iron-on tools. Bracelets, gift wrapping, and scrunchies make good fully collaborative projects once the fabric is cut. Set the cutting mat before handing over the scissors.
Cut 100% cotton fabric into squares, lay it on a parchment-lined baking sheet, sprinkle on beeswax pellets, and bake at 200 degrees F for 4 to 5 minutes until the wax melts. Spread it with a brush, then lift the fabric while it’s warm and wave it until stiff. Only natural fibers work. Polyester doesn’t melt at that temperature, but it won’t absorb wax the way cotton does, so it never seals. Beeswax pellets run about $8 for 4 oz, enough for 8 to 10 wraps.
Still have a question? Ask in the comments.
What Mistakes Should You Avoid With Upcycled Fabric?
- Using worn-out fabric on surface projects: A thin spot in a shirt looks fine when you wear it. In a coaster or basket, it fails fast. Check every piece before committing it to visible work.
- Not checking fiber content before heat projects: Check the garment label before cutting. Test a small scrap first: synthetic blends can scorch or simply won’t take the wax, even though they don’t truly melt at oven-wrap temperatures.
- Mixing patterns without a plan: Random patchwork looks random. Lay your scraps out together first. Pull anything that fights the palette.
- Overfilling stuffed projects: Draft stoppers and heating pads need 60 to 70% fill capacity. Overfilled, they won’t compress properly or flex in the microwave.
- Skipping the pressing step on visible seams: A quick press with an iron takes 2 minutes per seam. Everything looks cleaner. Don’t skip it on coasters or sachets.
- Starting with your most ambitious project: A full memory quilt when you’ve never sewn before guarantees an abandoned bag of squares. Do the bracelet first. The quilt squares will be there when you’ve built the habit.
Ready to Use Your Fabric Scraps?
Pick the simplest project on this list that matches your scrap size and time. The bracelet if you have 10 minutes. The rag rug if you have an afternoon. The beeswax wraps if you want something your kitchen will use every day. None of these need special equipment or a dedicated craft room, just the scraps you already have and the decision to start.
Grab the scissors. See our full collection of DIY fabric crafts when you’re ready for more.
We’d love to see what you make. Share your finished project with us on Facebook, and save this guide to your craft board on Pinterest so it’s ready the next time a bag of scraps piles up.
Which Fabric Scrap Project Will You Try First?
Vote below, then tell us why in the comments. If your scraps are still sitting in a bag under the craft table, we want to hear what’s stopping you.
Quick Poll: Which fabric scrap project will you try first?
- No-sew rag rug (uses the whole pile)
- Beeswax food wraps (zero-waste and genuinely useful)
- My scraps are in a bag under the craft table and they’re staying there