Every parent who loves working with wood eventually hits the same question: can my kid do this with me? And will they stay in one piece if they do? Woodworking projects for kids are absolutely possible. But the secret is not finding “easy” projects. It’s matching the project to the age. Setting up the right tools. And stepping back far enough that your kid actually feels like they built something. That last part is harder than the woodworking.
This guide gives you 8 specific builds sorted by age bracket. Honest tool safety notes. Clear breakdown of what the adult handles versus what the kid owns. No vague “beginner-friendly” promises. Just the exact materials, the real time estimates, and the parts that tend to go sideways.
Quick answer: The best woodworking projects for kids are ones they can finish in one or two sessions. Ages 5-7 handle sanding, painting, and kit assembly. Ages 8-10 can use a hand saw or supervised jigsaw. Ages 11-13 can use a power drill and finish a multi-part build. Adults do all circular saw and table saw work until age 14+. Start with a birdhouse kit or a simple toolbox – both produce something real on the first try.
What Age Can Kids Start Woodworking?
There’s no magic number. But there are developmental windows that tell you what a kid can actually handle. And what will frustrate them into never wanting to pick up a hammer again.
Here’s the practical breakdown:
- Ages 5-7: Fine motor skills are still developing. Best tasks: sanding with a sanding block (not power), painting, gluing, and assembling pre-cut or pre-drilled pieces. They can hammer nails into softwood with supervision. No power tools. Their win is “I built this,” not “I cut this.”
- Ages 8-10: Grip strength and focus improve significantly. Can handle a hand saw for simple straight cuts with a miter box holding the wood steady. Supervised use of a battery-powered drill on pre-marked holes. Can measure and mark with a combination square once taught. Still no power circular saw or jigsaw unsupervised.
- Ages 11-13: Ready for multi-step projects. Supervised jigsaw work on clearly marked lines. Power drill for assembly. Can mix and apply wood glue, use clamps, and do basic finishing (sanding through grits, applying water-based finish). This age group can own a project start-to-finish with adult setup and spot supervision.
One rule that never bends: the adult sets up the workholding. Clamps, a vise, or a sturdy bench stop. Whatever keeps the wood still. A kid trying to hold wood with one hand and cut with the other is a trip to urgent care.
Safe Woodworking Tools for Kids by Age
You don’t need a separate “kids’ tool set.” Most of that stuff is plastic toy-grade junk that doesn’t work and teaches nothing. What you actually need is real tools in manageable sizes, plus three safety non-negotiables.
The three safety non-negotiables
- Safety goggles on before they touch anything. Not sunglasses. Not the ski goggles from the hall closet. ANSI-rated safety glasses. Wood chips fly and sawdust lands in eyes. A kid who gets a splinter in the eye at age 7 will never set foot in a workshop again. This is the one rule with no exceptions.
- The clamp-not-hand rule. If wood needs to be held still during a cut, a clamp holds it. Hands stay away from the cutting path. Always. Even for “just a quick trim.”
- Ear protection for any power tool. A battery drill at close range doesn’t require it. A jigsaw does. A circular saw absolutely does. Kids’ ears are more sensitive than adults’. Buy the low-profile earmuff style. They stay on better than plugs.
No products found.
Tool access by age bracket
- Ages 5-7: Hammer (real, not toy), sandpaper blocks, paintbrushes, wood glue applicator. Adult handles all cutting.
- Ages 8-10: Add hand saw with miter box, combination square, battery drill (supervised, pre-marked holes only).
- Ages 11-13: Add supervised jigsaw, power drill for assembly, random orbital sander. Adult still sets up all workholding and confirms measurements before any cut.
- Age 14+ with explicit training: Circular saw, table saw, router. Not before. Not “just this once.”
8 Woodworking Projects for Kids (Sorted by Age)
These are the woodworking projects for kids that actually get finished. Kids complete them, feel proud of them, and ask to do another. Each one includes the full materials list and real time estimates with a buffer built in. Plus the exact split between adult work and kid work.
Ages 5-7: Projects That Build Confidence
1. Painted Wooden Name Puzzle
Adult pre-cuts large block letters from 3/4″ pine. Kid sands, paints, seals. That’s it. And it produces something real. A set of name letters for a bedroom door is a project a 5-year-old can genuinely own start to finish.
- Materials: 3/4″ pine board, sandpaper (80/150/220 grit), non-toxic acrylic paint, water-based polyurethane
- Time: Adult cutting 20 min, kid sanding + painting 45-60 min. Plan 90 min total. First-timers take longer.
- Budget: Minimum $8 / Mid $18 / Quality $30 (varies by letter count and paint quality)
- Adult role: All cutting, setting up the workspace, supervising paint application
- Kid role: All sanding, all painting, final seal coat with a foam brush
2. Birdhouse Kit Build
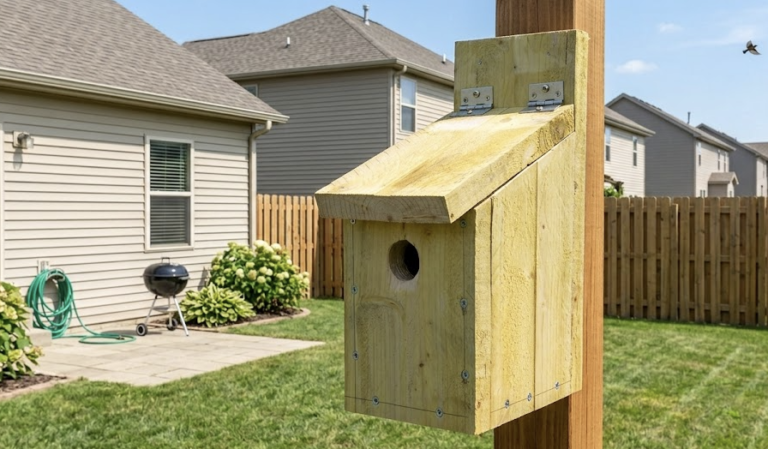
This is the single most reliable first project. Pre-drilled birdhouse kits give a kid something to assemble, paint, and hang in one session. The hammering is satisfying. The painting lets them make it theirs. And it goes outside where something might actually live in it.
- Materials: Pre-drilled cedar birdhouse kit, non-toxic exterior paint, sandpaper (120/220), exterior polyurethane or spar varnish
- Time: 60-90 min total. Plan 2 hours.
- Budget: Minimum $12 / Mid $25 / Quality $40 (hardwood kit, better hardware)
- Adult role: Opening the kit and checking all pieces, guiding nail placement, providing clamp support
- Kid role: Assembly, hammering, sanding, all painting and finishing
No products found.
Want more birdhouse plans with full cut lists? That’s where to go next once your kid has outgrown the kit version.
Ages 8-10: First Real Builds
3. Wooden Toolbox
A toolbox is the perfect age-8 project because the child will actually use it. It’s a box with a handle. Straightforward to build, one-session assembly, and the kid stores their own tools in it from then on. The ownership loop is tight.
- Materials: 1×6″ pine (8 feet), 1″ wooden dowel for the handle, 1.25″ wood screws (24), wood glue, sandpaper (80/150), paint or stain
- Time: 2-3 hours. Plan for 4 with glue drying time.
- Budget: Minimum $15 / Mid $28 / Quality $45 (hardwood, brass screws)
- Adult role: All circular saw or miter saw cuts, drilling pilot holes, confirming measurements
- Kid role: Measuring and marking, supervised hand saw trim cuts, assembly with drill and screws, all finishing
4. Garden Stake Signs
Jigsaw-cut shapes on 1/4″ plywood, painted and mounted on a wood stake. Kids design the shape. Adults cut it. Kids paint it and install it. Great for a garden or front porch. Low material cost, high customization, fast build.
- Materials: 1/4″ plywood scrap, wooden garden stakes, outdoor paint, exterior sealant, screws
- Time: 60-90 min total
- Budget: Minimum $5 / Mid $15 / Quality $25 (Baltic birch plywood, weather-rated paint)
- Adult role: Jigsaw cutting all shapes, pilot drilling for stakes
- Kid role: Designing shapes on paper, tracing onto wood, all painting and sealing, final assembly
5. Simple Two-Board Shelf
Two pieces of 1×6″ pine, a couple of right-angle brackets, and a drill. The kid measures, marks, and drills all the pilot holes. Adult handles the wall anchoring. Result: a real shelf that holds real stuff in their room. This project teaches measuring and produces something useful.
- Materials: 1×6″ pine (cut to desired length), two right-angle brackets, screws, wall anchors (adult selects based on wall type), sandpaper, paint or stain
- Time: 90 min including drying
- Budget: Minimum $10 / Mid $22 / Quality $40 (hardwood, decorative brackets)
- Adult role: Cutting board to length, all wall anchor selection and installation
- Kid role: Measuring and marking the shelf, drilling pilot holes, sanding, finishing, holding bracket during screwing
Ages 11-13: Building Real Skills
6. Folding Step Stool
This is the project that shows a kid they can actually do woodworking. A folding step stool has real joinery, requires accurate measurement, and produces something the whole family uses. Plan for two sessions: one for cutting and assembly, one for finishing. The pride when it actually folds and holds weight is worth every minute.
- Materials: 1×8″ pine or poplar (8 feet), four 1/4″ carriage bolts with wing nuts, sandpaper (80/120/220), non-toxic finish (polyurethane or water-based varnish)
- Time: 3-4 hours over two sessions. Plan 5 hours total.
- Budget: Minimum $20 / Mid $35 / Quality $60 (poplar, premium hardware)
- Adult role: All circular saw cuts (or jigsaw for curves), confirming measurements before each cut
- Kid role: All measuring and marking, power drill for pilot holes and assembly, sanding all surfaces, applying finish
No products found.
7. Wall-Mounted Coat Hook Board
A 1×6 board, sanded and stained, with 3-5 coat hooks screwed in. This teaches the child to space hooks evenly, drill pilot holes to avoid splitting, and how wall mounting works. Goes in their room or by the front door.
- Materials: 1×6″ pine (24-36″), 3-5 screw-in coat hooks, sandpaper, wood stain or chalk paint, wall anchors
- Time: 2-3 hours including stain drying time
- Budget: Minimum $18 / Mid $35 / Quality $55 (hardwood, cast-iron hooks)
- Adult role: Cutting board to length, all wall anchor installation
- Kid role: Measuring and marking hook placement, drilling pilot holes, mounting hooks, all sanding and finishing
8. Wooden Storage Crate
Four sides, a bottom, wood glue, and pocket screws. This project introduces squaring a box, which is the foundation of almost everything in woodworking. Adult handles the saw cuts and Kreg jig setup. The kid assembles, clamps, fills, sands, and finishes. A genuinely useful object at the end.
- Materials: 1×6″ pine (12 feet), wood glue, 1.25″ pocket screws (or 1.5″ screws with pilot holes), sandpaper (80/150/220), finish of choice
- Time: 3-4 hours. Plan 5 with clamping and drying.
- Budget: Minimum $20 / Mid $38 / Quality $65 (hardwood, Kreg jig)
- Adult role: All circular saw cuts, Kreg jig setup if used, confirming square during assembly
- Kid role: Measuring and marking, assembly, gluing, clamping, filling screw holes, all sanding and finishing
For full cut lists and step-by-step instructions, the diyprojects.com woodworking hub has downloadable plans you can follow.
What is the easiest woodworking project for a beginner kid?
The painted birdhouse kit wins every time. It produces a real, usable object in under two hours. Requires no cutting. Gives the child full ownership of the finish. And it goes outside where something might actually live in it. After that, the wooden toolbox is the best first “real build.” It’s simple, functional, and the kid uses it for every project after.
How do I teach my child woodworking at home?
Start with the three safety rules before you open a toolbox. Make them non-negotiable and explain why. “Goggles stay on because wood chips are fast and invisible.” Then let the kid pick the project from a short list you’ve already vetted for their age. Don’t surprise a 7-year-old with a stool when they wanted to paint a birdhouse.
The project they chose is the one they’ll finish.
After that, your job is to set up the workholding, confirm measurements, and stay close without taking over. Resist fixing mistakes the moment they happen. Wood filler and paint cover a lot. The imperfect result the kid built beats the perfect result you fixed.
Do kids need special woodworking tools?
Not a dedicated “kids’ set.” Those are usually plastic and useless. What you actually need: a real hammer in a lighter weight (12 oz instead of 16). A short combination square that fits small hands. ANSI safety glasses sized for kids. And a battery drill with a torque limiter so they don’t strip screws. Those four things work. Skip the toy versions.
Common Mistakes Parents Make on First Woodworking Projects with Kids
- Picking a project two levels above the kid’s age. A 7-year-old cannot build a step stool. They get frustrated, ask you to do it, and walk away thinking they’re bad at this. Match the age bracket and stick to it, even if your kid is “advanced.”
- Treating safety gear as optional on easy projects. A sanding block won’t put anyone’s eye out… until it does. Goggles go on before anything starts. Period. The habit built on easy projects transfers to harder ones.
- Taking over when the kid hits a rough patch. When they struggle to get a screw to bite, the impulse to grab the drill is almost irresistible. Don’t. Give one verbal tip, step back, let them work it out. The moment you take the tool, the project becomes yours, not theirs.
- Underestimating the time by half. Every estimate in every plan is optimistic. Add 50% for any project involving kids. Factor in bathroom breaks, interest dips, the moment they want to show a sibling, and the five minutes explaining why we sand before we paint.
- Using splintery wood to save money. Cheap pallet wood or rough-sawn bargain-bin lumber is a splinter factory at kid height. Pay the extra $3 for a sanded pine board. Your kid’s hands will thank you. And they won’t spend the last 20 minutes of the project refusing to touch the wood.
Quick Poll: What’s your biggest challenge with woodworking projects for kids?
- A) Finding a project that’s actually the right level (not too easy, not too hard)
- B) Getting them to keep the safety goggles on for more than 30 seconds
- C) Watching them struggle and not grabbing the tool myself (patience is apparently a skill I don’t have)
Ready to Start? Your First Build This Weekend
The best woodworking projects for kids share one thing: they get finished. Pick one project from the age bracket above. Gather the materials and safety gear before Saturday morning. Then commit to letting your kid own at least two full steps without your hands on the work. That’s the whole formula.
Either way, the goal is a finished object they can point to and say “I made that.” Everything in woodworking builds from that moment.
Need more project ideas once you’ve knocked out the first one? Check out our kids craft projects section for paint, fabric, and mixed-media builds that pair well with woodworking. When they’re ready to move up to real tools, our beginner woodworking tools guide covers exactly what to buy and what to skip.
Last Updated: August 2026