

The best wedding gifts don’t have to be super expensive. After all, they should be unique to your wedding! Making homemade wedding gifts can save you oodles of money to put toward other expenses, and you can make them in no time at all. Your wedding party and guests will appreciate the thought and care you put into making their unique wedding gifts. Here are a few of our favorite, easy-to-make DIY wedding gifts:
1. Bridesmaid Gifts
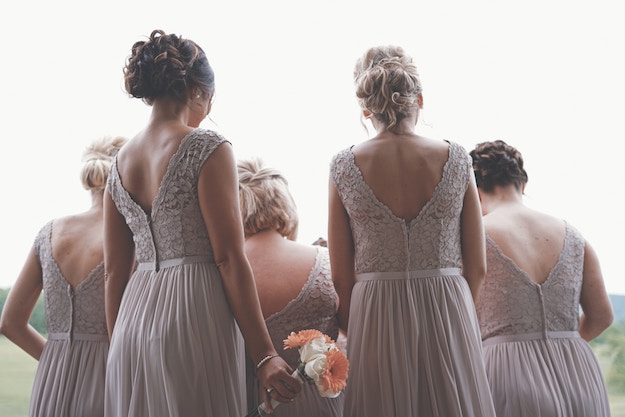
Your bridesmaids will love this versatile clutch, which they can use after the wedding!
Materials:
Fabric
Cotton Batting
Scissors
Thread
2 Magnets
All-Purpose Glue
Instructions:
1. Cut 2 pieces of fabric, and one piece of batting 5 inches x 9 inches each. We used 2 different fabrics for the outside and inside of the clutch.
2. Lay the batting down flat with one piece of fabric (print faced up) lined up with the batting. Lay the second piece of fabric face down on top of the fabric that is faced up.
3. Pin down 3 sides of the fabric together.
4. Sew along the 3 sides that are pinned down, leaving a 1/4 inch seam.
5. Cut the corners and turn inside-out.
6. Fold your fabric in half 3 inches from the bottom. This will give you an estimate of the size of the body of the clutch. Fold the top half of the fabric down, which will end up being the flap.
7. Play around with your unfinished clutch and estimate where the magnets should go to keep the clutch closed. Once you have a good idea of where you want your magnets to go, reach inside the unsewn side and glue down the magnets.
8. Once your magnets are dry, sew the unsewn side of the clutch.
9. Fold the bottom of your fabric once more, 3 inches from the bottom. Sew the 2 sides and the bottom to keep the form of your clutch.
(See more DIY Clutches at Brit+Co)
2. Wedding Favors
Materials
Cotton fabrics of your choice
3/8″ Fusible Tape
Pinking Shears
Pencil or chalk
Ruler
Iron
Instructions:
1. Starting along the straight edge of your fabric, fold your fabric so that the good side is on the inside. The fold will be the bottom of your bag. It should measure 8 1/4″ H from the fold to the edge. Measure 5″ where the top of your bag will be and draw a line with pencil or chalk; draw another line along the side as shown in photo. If you are making several bags, keep measuring across your fabric.
2. Use pinking shears to cut the top portion of the fabric. If you used a pencil to create your lines, be sure to cut off the line.
3. Use scissors to cut the sides.
4. Now that your bags are cut out, press each bottom corner (right sides together). This is where you will start your fusible tape; pressing the corners ensures you won’t have any gaps at the bottom corner of the bags.
5. Open fabric, showing fabric right side up. Starting at the bottom where you just pressed, lay your fusible tape along both sides of the fabric, close to the edge but not over. (You don’t want your iron to touch the tape.)
6. Read the instructions on the fusible tape; it will tell you which side down to place the tape. Fold fabric and press each side according to the the directions on the package. We pressed the bag on both sides to ensure a good bond.
7. Turn your bags right side out. Poke out corners using a pencil or a ruler.
8. Iron seams.
Fill your bags with goodies, tie them off and they are ready to go!
(See more at IntimateWeddings)
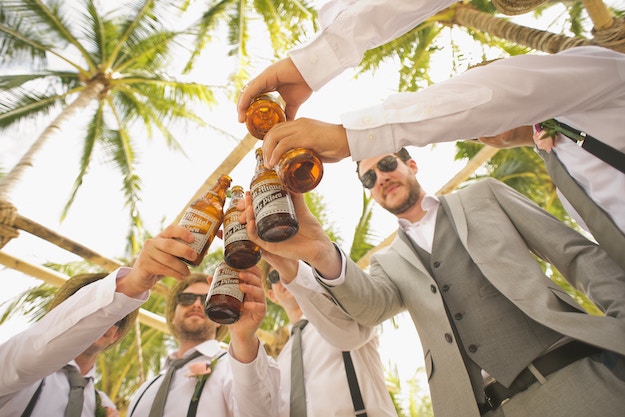
3. Groomsmen Gifts
Materials:
Craft Foam
Scissors
Upcycled Household Item for stamp handle (see below)
Hot Glue Gun & Glue
White Handkerchiefs
Fabric Paint & Brush
Iron
Instructions:
1. Purchase a package of plain white handkerchiefs. Packages can be found at department stores or online at reasonable prices – they’ll typically be under $2.00 per handkerchief.
2. Draw your mustache shape on a sheet of the craft foam. The foam I used is very thin so I doubled up to make the stamp a little thicker. Of couse, you can also create stamps in any other shapes. Letter stamps would be a great way to personalize your groomsmen gift with their initials! Cut out the shapes.
3. Using hot glue, hold the two pieces together until set to give the stamp a solid support. Next, you get to upcycle a household item for your stamp handle! Hot glue your foam stamp onto the base of your handle.
I used the cap to a bottle of lotion (see the image below). Empty spice jars, wine corks or bottle caps also make good stamp bases. Choose an item relative to your stamp size. You’ll see for my second design with the tie stamps, I used the top lid and bottom of a small jewelry box for other stamp handles. Basically, anything that you can hold onto to firmly press your stamp will do just fine.
4. Paint your foam stamp. You can also dip the stamp in the paint. However, I find that it is easier to control coverage and amount of paint if you brush it on. Now, stamp your design onto the fabric!
5. When you’re finished, you’ll need to set the paint which will allow the handkerchiefs to be washed without ruining your stamped design. Let the paint dry completely. Then, simply set your iron to dry (no steam) and iron the back side of your handkerchief for five minutes. Keep the iron in motion. Do not press in one place.
6. All that’s left to do is wrap up your hand stamped handkerchiefs and give them to your groomsmen!
(See full article at WeddingWindow)
4. Personalized Wedding Gifts
Materials:
Dollar store ceramic plates, bowls or mugs
Sharpie
Dry erase marker
Oven
Painter’s Tape
Instructions:
1. Preheat oven to 4oo degrees
2. Write on plate with sharpie. If you mess up, go over the sharpie marks with dry erase marker and wipe clean.
Optional: Use painter’s tape to help write in a straight line
3. Bake at 400 degrees for 40 minutes.
Hand-wash only!
(See more at Eclectically Vintage)
5. Wedding Gifts
 Materials:
5×7″ notebook with solid cover
Ruler
A pencil and eraser
Small letter stamps
Ink Pad
Any other materials for decorating the cover (although I’m a big believer in simplicity with these things – let the thoughts inside be the amazing detail and beauty of the book)
Instructions:
1. Carefully stamp the cover of the journal with the small letter stamps. Don’t press the stamps too hard, and remember to be patient. Use the ruler to help you stay in a straight line.
2. Once you’re engaged, fill the notebook up with quotes, letters, photos, tickets – a scrapbook of sorts. Get creative and fill the pages as much as possible. Then before the ceremony, quietly give it to him, to remind each of you why you’re moving in this amazing direction together.
If it were possible for your fiancé to love you anymore, they would after receiving this thoughtful gift.
(See more at Alexan Events)


