


No DIYer arsenal is complete without a very own DIY forge, a crucial tool in changing a metal’s shape, strength, and hardness. Gather all your metalworking projects around because we’ll teach you how to make a blacksmith forge perfect for all your DIY projects here.
RELATED: DIY Folding Workbench Project For Your Garage To Save Space
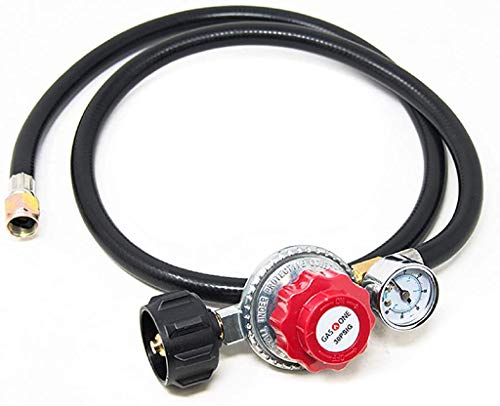
DIY Forge | How to Build a Forge for All Your Metalworking Needs
What You’ll Need:
- Fire bricks
- Welder
- Angle grinder
- Angle iron
- 30 psi Propane tank regulator
- Brass flare union
- Ball Valve
- Galvanized Coupling
- Brass Square Head Plug
- Steel Pipe
- Reducer Coupling
- Bell Reducer
Step 1: Lay Out the Bricks in the Structure of Your DIY Forge

Establish first the base of your DIY forge, the walls on the side, and the top. Making it about three bricks long on the base should be enough for a small forge.
Add an extra brick in front that will support the things you’ll be using it for. You can also add two detachable side pieces that will serve as “doors” for keeping the heat trapped inside when your forge is already working.
Step 2: Prepare the Steel Frames That Will Hold the Bricks in Place
The steel frame will go around the top and bottom, sandwiching all the bricks in between. Afterward, you’ll be connecting the top frame to the bottom frame to form one piece.
With your measurements ready, grab a bandsaw and you should be able to make straight cuts easily. You could also use an angle grinder for this or, if you have the patience for it, even a hacksaw.
Keep in Mind: After welding, your bricks will not actually be attached to anything. They will only be held together by your frame. Should any piece break – or for some reason need replacing – you should be able to pull the bricks out through the front opening and replace them.
Step 3: Weld the Top and Bottom Frames
Next, tack weld all of the joints, take the clamps off, then finish by doing full welds.
Reminder: Before you start welding, you should also clamp the pieces and squeeze them together as tightly as possible.
Step 4: Attach the Top Frame to the Bottom Frame
Your top and bottom frames should now be ready. All that’s left to do is to attach them to one another. Start by laying your pieces back up into the structure of your DIY forge.
Cut some strips of metal to connect the two frames together. You can use an angle iron to lock the corners together.
On the inside of some angle irons, there might be a curve in the corner. You can also use an angle grinder to bevel the outside corner of the top and bottom frames before you weld your connectors to allow them to fit as tightly as possible.
Step 5: Prepare the Parts of the Burner
Your 30 psi regulator is what connects to the propane. That is more psi than you would get out of a standard gas grill.
The regulator is connected by a flare adapter to a ball valve, which is how you will turn the gas on and off. In turn, the ball valve has another connector that attaches to a galvanized coupling piece.
The gas itself will come out of your square head plug which, once modified, will serve as the jet. That entire assembly will be mounted to your pipe and its reducers, which serves as the body of the burner.
Separate the square head plug, the galvanized coupling piece, and the reducer. These parts will be modified in the next steps.
Step 6: Flatten the Sides of the Galvanized Coupling

Mark your galvanized coupling piece on four sides. Afterward, grind some flat sides on the piece.
Start by grinding it until flat on one side, then turn it about 90 degrees to flatten on that side. Do this until your galvanized coupling piece has four flat sides.
Step 7: Drill Holes Into the Reducer

Mark your reducer on four sides as well. File a small spot on each side to allow you to center punch and drill your holes.
RELATED: Garage Shelving Ideas For Ultimate Garage Organization
Step 8: Secure the Galvanized Coupling Piece in Place
Now, secure the galvanized coupling piece into the center of your reducer with the use of retaining screws. The flat sides on your galvanized coupling piece should allow you to put it securely in the center by adjusting the retaining screws.
Step 9: Drill a Hole Into the Nozzle
Next, drill a hole into the nozzle using a 1/16 bit and use the bald end of the inside of the cap to center your drill bit. Be careful not to push too hard.
Step 10: Assemble Your Burner
The individual parts of the burner of your DIY forge should now be ready. Put them all together using Teflon tape and make sure that they are sealed as tightly as possible.
Step 11: Test for Leaks
To avoid dangerous accidents, test for leaks before you use your burner. Do this by submerging the entire end in water and opening the gas up and slowly opening the regulator.
Now, look for bubbles. If you see any, take that part of the burner off and try sealing it again as tightly as possible. Before you proceed with the next steps, make sure that there are no bubbles coming out of the top.
Step 12: Drill a Hole Into the Forge for Mounting the Burner
The hole you’ll be drilling into the body of your DIY forge is where you’ll be mounting your burner.
Start by drilling a small hole using a step bit. When the hole is close to the size of the opening you need, use a rasp to slowly open it up to the right shape and size.
Step 13: Test the Burner Outdoors Before Mounting It to Your DIY Forge
Now, take your burner outdoors and test it just to be safe. If possible, put a barrier between the gas source and the actual burner just in case something goes wrong.
Once you see that your burner works fine, you can mount it to your DIY forge. Now grab a piece of metal and test it to see if your forge is able to heat the metal enough for it to be worked on.
Step 14: Modify as Necessary
You want your metal to go beyond that bright red hue and all the way up to a yellow shade. If it doesn’t, you might need to modify some pieces of your DIY forge.
First, you could set the forge on its side to allow the burner to come in from the top. Having it come in from the side creates convection on the inside, but having it come from the top puts direct heat on the metal below. This, however, sacrifices the platform you left at the front for holding the metals in.
If that’s not enough, you can also change your nozzle to use a MIG tip on it instead. These modifications combined should be enough for you to achieve that bright yellow color that you want to achieve on your metals.
The final product should look like this:
View this post on Instagram
There you have it – your very own homemade DIY forge. Gather your metalworking projects and get to work, but just remember: Safety first, DIYers!
Other than this DIY forge, are there other DIY crafting essentials you know how to make? Share them with us in the comments section below!
Up Next:
- How To Repair Leaky Single And Double Handle Faucet Cartridges
- How To Remove Rust From Tools
- 20 Clever Car Hacks To Help Keep Your Car Clean
Calling all crafting DIYhards, DIY Projects needs YOU! Click here if you want to write for us.
Don’t forget to stay connected with us on Facebook, Twitter, and Instagram!


