


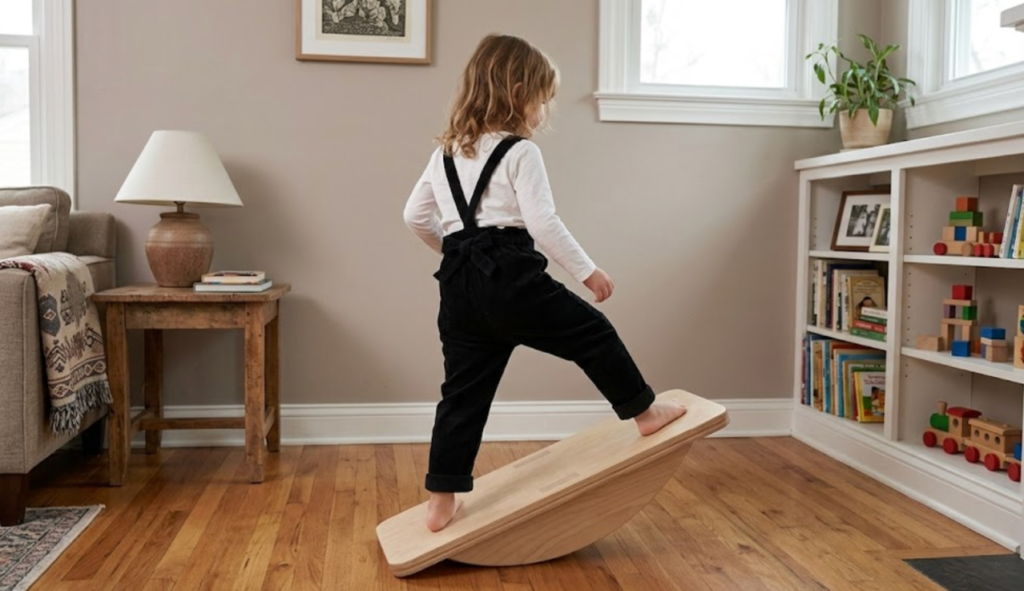

Project At-A-Glance: DIY Balance Rocker
- Skill Level: Intermediate (Beginner-friendly when dividing tasks between adult and kids).
- Time Investment: 3 to 5 hours of hands-on build time (plus overnight glue curing).
- What This Guide Features: Step-by-step family-collaborative milestones, zero-guesswork metric cut lists, and kid-safe finishing methods.
RELATED: Woodworking Toy Projects for Kids and Parents
Screen-Time Blues? Let’s Build a Solution!
Parents, let’s be honest. Every summer, the battle against screens feels like a losing war. The kids are zoned out on their phones, the tablets are running hot, and getting them to do anything active feels like pulling teeth.
But what if you could channel that boundless energy into a project you build together?
Introducing the DIY Balance Rocker, the ultimate screen-free antidote. This isn’t just a physical coordination toy; it’s a memorable, collaborative family project. By building this staggered rocker balance board, you give your kids an active outlet for balance training, core strength, and sensory play, while teaching them the hands-on magic of woodworking.
We’ve designed this build plan specifically to get the whole family involved. Every step is clearly divided between safety-first tasks for adults and engaging, hands-on jobs for the kids. Let’s put down the phones, grab some safety glasses, and make some sawdust!
⚠️ Safety First!
Safety Reminder: Wear PPE (gloves, goggles, ear protection, dust mask). Use sharp tools responsibly. For load-bearing projects (decks, sheds, barns), check local building codes and consult pros. Work in ventilated spaces; minimize dust with eco-friendly practices.
Materials & Tools List
🪵 Materials
- Main Deck (A): 1 piece of 90.0 cm x 40.0 cm hardwood project panel or premium Baltic Birch plywood, 2.7 cm thick.
- (Note: If 2.7 cm thickness is hard to find, securely glue/laminate a 1.8 cm sheet and a 0.9 cm sheet of plywood together).
- Rockers/Runners (B): 2 blocks of hardwood or laminated plywood measuring 45.0 cm x 8.0 cm with a final thickness of 3.65 cm.
- (Note: You can easily achieve this 3.65 cm thickness by gluing two standard 1.8 cm / 18mm plywood pieces together).
- Fasteners: 6 heavy-duty, flat-head countersunk wood screws (approx. 6.0 cm length).
- Glue: Premium, non-toxic wood glue (PVA).
- Finish: Eco-friendly, child-safe low-VOC finish (e.g., Osmo Polyx-Oil, beeswax, or food-grade mineral oil).
🛠️ Tools Needed
- Jigsaw or Band Saw
- Power Drill / Driver with countersink drill bit
- Orbital sander and hand-sanding blocks (coarse and fine grit)
- Clamps (at least 4 long bar clamps)
- Tape measure and combination square
- Compass or a round template (like a small can or jar lid)
- Pencil
Complete Cut List
| Component | Quantity | Description | Dimensions (Metric) |
| Main Deck (A) | 1 | Top Platform | 90.0 cm x 40.0 cm x 2.7 cm |
| Rocker Blanks (B) | 2 | Curved Runners (Pre-cut) | 45.0 cm x 8.0 cm x 3.65 cm |
Step-by-Step Build Instructions
Step 1: Mark the Corner Radii on the Main Deck
👦 Kids/Collab Task: Place the Main Deck flat on the workbench. Take a small jar lid or a compass set to a radius of 4.0 cm. Place it at each of the four corners and carefully trace the curve onto the wood with a pencil.
Step 2: Cut and Round the Deck Corners
🛠️ Adult Task: Secure the board to the bench. Use a jigsaw with a clean-cutting wood blade to carefully cut along the traced lines, rounding off all four corners of the deck.
Step 3: Laminate the Rockers (If Using Plywood)
👦 Kids/Collab Task: Spread wood glue evenly across the mating faces of your two 1.8 cm plywood blanks using a silicone brush or a piece of scrap cardboard.
🛠️ Adult Task: Align the glued pieces perfectly and clamp them down tightly. Let them cure completely overnight.
Step 4: Trace the Rocker Arc (Radius = 35.0 cm)
👦 Kids/Collab Task: On the side face of your 45.0 cm x 8.0 cm rocker blocks, mark the exact center point along the top edge (at 22.5 cm).
🛠️ Adult Task: Pin a makeshift beam compass (a scrap strip of wood) 35.0 cm away from a pencil tip. Swing a smooth, beautiful arc across the bottom of the block, keeping the center height of the runner exactly 8.0 cm tall.
Step 5: Cut the Rocker Arcs
🛠️ Adult Task: Secure the rocker blocks safely in a vise. Use the jigsaw to cut smoothly along the curved pencil line.
Step 6: Pre-Drill the Rocker Mounting Holes
🛠️ Adult Task: On the flat top edge of each rocker, mark three mounting hole locations. The center hole sits at exactly 22.5 cm. Mark the outer holes exactly 18.0 cm to the left and right of the center. Drill straight pilot holes downward into these marks.
Step 7: Layout the Underside of the Deck
👦 Kids/Collab Task: Flip the main deck upside down. Use a combination square and tape measure to draw two layout lines across the long axis, exactly 6.0 cm inset from the long outer edges.
🛠️ Adult Task: Mark the longitudinal positioning:
- Front Rocker: Mark its center at exactly 30.0 cm from the left edge.
- Back Rocker: Mark its center at exactly 30.0 cm from the right edge.
- Double-Check: Your runners should now look perfectly staggered on opposite corners of the board!
Step 8: Drill Countersinks and Join the Deck to the Rockers
🛠️ Adult Task: Transfer the rocker hole locations up through the deck, drilling countersink holes from the top side. This ensures the screw heads sit perfectly flush or slightly below the surface of the deck.
👦 Kids/Collab Task: Squeeze a uniform bead of wood glue along the flat top edge of the rockers. Help hold the rockers aligned perfectly with your layout lines on the underside of the deck.
🛠️ Adult Task: Drive the 6.0 cm wood screws from the top side of the deck down into the runners until tight. Wipe away any squeezed-out glue immediately with a damp rag.
Step 9: Sand All Components Smooth
👦 Kids/Collab Task: Give the kids hand-sanding blocks (medium grit). Let them sand all the sharp edges of the top deck and the bottom curves of the rockers until they feel buttery smooth.
🛠️ Adult Task: Do a final quick pass with an orbital sander (fine grit) to make sure the top deck surface is completely flat and splinter-free.
Step 10: Apply the Child-Safe Finish
👦 Kids/Collab Task: Using a clean cotton cloth, let the kids wipe on the child-safe, eco-friendly wax or mineral oil. Watch the natural wood grain instantly pop and come alive!
Eco-Tip:
To keep this project sustainable, look for FSC-certified Baltic birch ply cut-offs or a beautiful piece of reclaimed thick hardwood countertop (butcher block) at a local architectural salvage yard. Because it requires no toxic paints, using a natural oil-wax finish keeps this entirely safe for tiny hands and indoor air quality!
DIY Balance Rocker FAQs
1. What wood species is best for this project?
For maximum durability and safety, hardwoods like White Oak, Hard Maple, or Birch plywood (such as Baltic Birch) are best. Avoid softwoods like standard construction-grade pine for the deck, as they can flex too much under load or splinter easily.
2. What weight limit can a 2.7 cm deck support?
When constructed using high-quality Baltic Birch or premium hardwood, a 2.7 cm (approx. 1-1/16″) thick deck can easily support up to 220 lbs (100 kg), making it fun for kids and adults alike!
3. Will this board damage my hardwood or tile floors?
It can scuff shiny floors over time. To protect your floors (and quiet down the noise!), you can apply a strip of heavy-duty adhesive felt or a thin layer of natural cork sheet to the bottom curved edge of the runners.
4. How difficult is the staggered layout to ride?
The staggered offset of the runners provides a dual-axis wobble (both side-to-side and front-to-back tilt). It is slightly more challenging than a standard single-curve rocker, making it an excellent tool for developing core stability and spatial awareness.
5. Can I use this balance rocker outdoors?
Yes, but you must seal it properly. If you plan to leave it on a porch or yard, use exterior-grade wood glue and seal the wood with a marine-grade teak oil or outdoor polyurethane rather than mineral oil.









