
At a Glance: Easy Summer Woodworking Projects
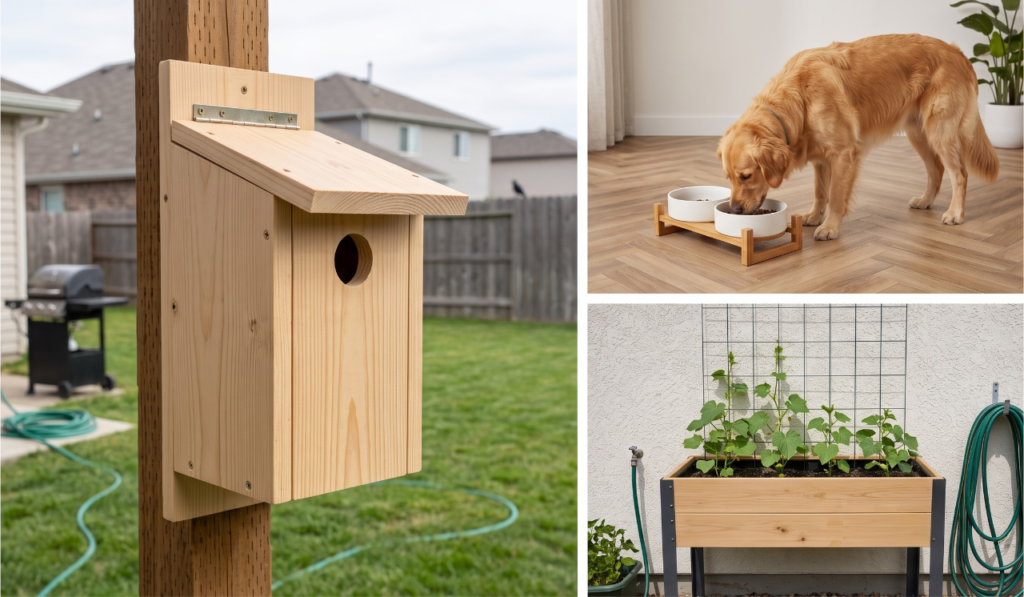
- The Slanted-Roof Birdhouse: A classic wildlife staple to invite vibrant songbirds right to your morning coffee views.
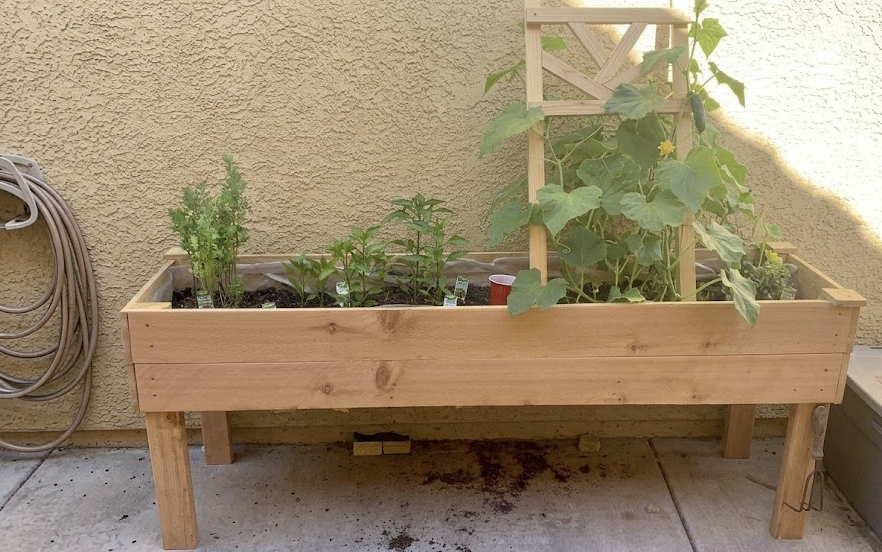
- The Elevated Wooden Planter Box: Heavy-duty backyard ergonomics designed to save your spine while growing fresh summer herbs.
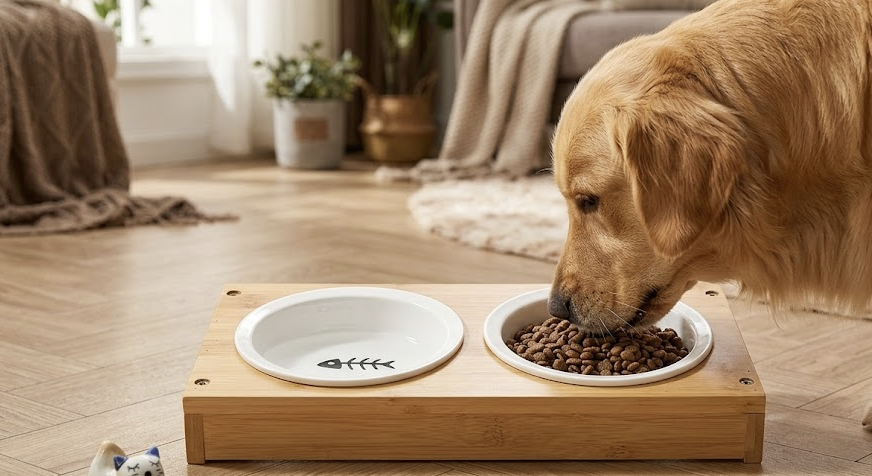
- The Minimalist Ergonomic Pet Feeder: Precision indoor craftsmanship to improve your pet’s digestion while looking sleek and modern.
Tired of overpaying for flimsy, mass-produced garden decor that falls apart after a single heavy storm? Sick of straining your lower back every time you want to tend to your garden, or shelling out top dollar for overpriced pet accessories that don’t even match your home’s aesthetic?
Summer is the absolute perfect time to stop settling for low-quality storefront items and start building your own custom solutions. The long, sunny days give you the perfect excuse to open up the garage, step into the fresh air, and tackle highly rewarding summer woodworking projects that actually solve these annoying household headaches.
Safety First: Wear PPE (gloves, goggles, ear protection, dust mask). Use sharp tools responsibly. For load-bearing projects (decks, sheds, barns), check local building codes (e.g., Round Rock, TX regulations) and consult pros. Work in ventilated spaces; minimize dust with eco-friendly practices.
Project 1: The Classic Slanted-Roof Birdhouse
- Skill Level: Beginner
- Time Commitment: 2 Hours
- Estimated Cost: $15 – $25
- Best Wood Choice: 1×8 Cedar or Redwood (approx. 2.0 cm actual thickness). Natural cedar is weather-resistant and requires no toxic chemical seals.
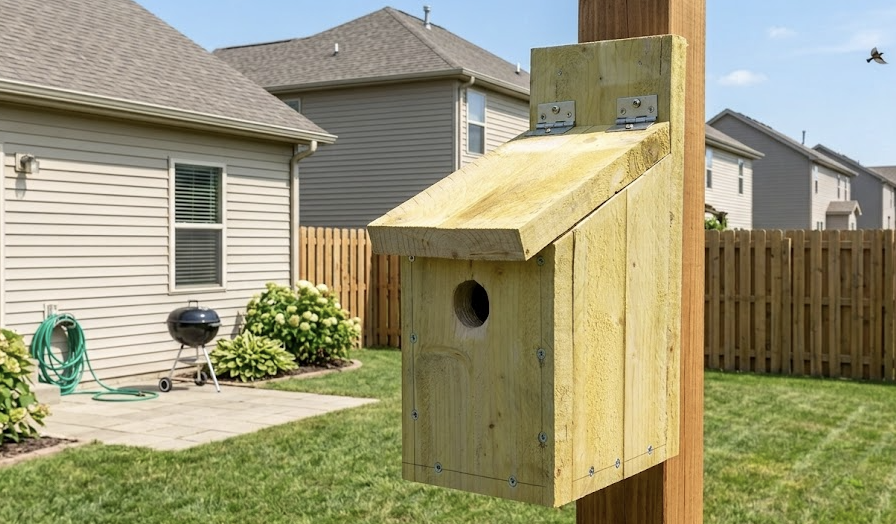
Optimized perfectly for small native cavity-nesting songbirds (like wrens, chickadees, or bluebirds), this classic blueprint features an integrated front overhang to shed rain, built-in floor ventilation, an optional predator guard to keep hatchlings safe, and a back-mounted hanging bracket.
Materials & Tools List
- Lumber: 1 board of 1×8 Cedar or Redwood (minimum 150 cm length)
- Fasteners: 35mm (1.5″) exterior-grade wood screws or galvanized casing nails
- Adhesives: Waterproof, non-toxic exterior wood glue
- Tools: Miter saw or handsaw, drill/driver, 5mm bit (for drainage holes), spade bit or hole saw (28mm to 32mm matching target species), tape measure, and 120-grit sandpaper
I get my wood screws from this place:

- SUPERIOR EXTERIOR COATIONG: Tan coated exterior deck screws 1-1/2 inch through 1500 hours salt spray…
- STAR/TORX DRIVE: Star/Torx drive deck screws with 6 contact points prevent stripping, save drive…
Precise Cut List
| Part # | Component | Qty | Width | Length / Height | Special Instructions |
| 1 | Mounting Bracket | 1 | 5.0 cm | 40.0 to 60.0 cm | Optional. Pre-drill mounting holes 5 cm from top and bottom. |
| 2 | Side Walls | 2 | 17.0 cm | 28.0 cm / 24.0 cm | Cut top edge at a straight angle matching the roof slope. |
| 3 | Back Wall | 1 | 17.0 cm | 28.5 cm | Bevel top edge at an angle to fit flush under the sloped roof. |
| 4 | Front Wall | 1 | 13.0 cm | 25.0 cm | Drill entry hole centered horizontally, exactly 19 cm up from bottom. |
| 5 | Roof | 1 | 20.0 cm | 23.0 cm | Provides a defensive weather overhang on front and sides. |
| 6 | Floor | 1 | 13.0 cm | 13.0 cm | Pre-drill four 5mm drainage holes in the corners. |
| 7 | Predator Guard | 1 | 13.0 cm | 8.0 cm | Optional block. Match entry hole alignment precisely. |
Step-by-Step Assembly Guide
- Marking & Slope Cutting: Lay out your lumber flat. Mark rectangles for Parts 1, 3, 4, 5, 6, and 7. For the two Side Walls (Part 2), mark 28 cm on one edge and 24 cm on the parallel edge. Connect the points with a straight line and execute the cut to create identical angled profiles. Bevel the top of the Back Wall (Part 3) to match this angle.
- Entry & Drainage Prep: Take the Front Wall (Part 4) and mark a center point 19 cm up from the bottom edge. Drill through using your hole saw bit. If installing the optional Predator Guard (Part 7), clamp it tightly over the front wall and drill through both simultaneously for seamless alignment. Drill four 5mm holes into the Floor (Part 6) corners.
- Forming the Core U-Shape: Stand the two Side Walls (Part 2) up against the edges of the Back Wall (Part 3). Apply exterior wood glue along the joints and fasten using screws driven through the back panel into the rear edge of the side walls.
- Inserting the Floor & Front: Slide the Floor (Part 6) into place at the bottom of the assembly. Fasten it securely through the sides and back. Next, place the Front Wall (Part 4) between the side walls. Leave two screws at the top of the front wall un-tightened to serve as a pivoting door for easy annual nest cleaning.
- Roof and Bracket Mount: Position the Roof (Part 5) over the top, aligning it flush against the back wall so it extends over the front entry. Secure with screws down into the walls. Finally, center and screw the Mounting Bracket (Part 1) vertically onto the back wall face.
Project 2: The Elevated Backyard Planter Box
- Skill Level: Advanced Beginner
- Time Commitment: 3 – 4 Hours
- Estimated Cost: $45 – $75
- Best Wood Choice: Western Red Cedar or Douglas Fir.
No more bending down or straining your lower back to tend to your garden! This heavy-duty elevated planter box is an absolute backyard showstopper. By reverse-engineering its proportions from the blueprint, we find it uses sturdy 2×2 structural corner posts to completely encase a deep, high-capacity growing trough with an elegant, modern profile.
Materials & Tools List
- Lumber: 2×2 structural lumber (actual 1.5″ × 1.5″) for posts; 1×10 boards (actual 0.75″ × 9.25″) ripped down to 9.0″ for side walls; 1×4 boards (actual 0.75″ × 3.5″) for floor slats and support cleats.
- Fasteners: 2.5″ exterior pocket-hole or deck screws; 1.5″ wood screws for floor slats.
- Tools: Circular saw or miter saw, pocket-hole jig (optional but recommended for hidden joints), drill/driver, tape measure, speed square, and clamps.
Precise Cut List
| Component | Qty | Thickness (Actual) | Width (Actual) | Length | Special Instructions |
| Corner Legs/Posts | 4 | 1.5″ | 1.5″ | 29.5″ | Cut true and square. Top with a decorative cap block. |
| Long Outer Walls | 2 | 0.75″ | 9.0″ | 46.5″ | Forms the long structural facade of the bed. |
| Short End Walls | 2 | 0.75″ | 9.0″ | 20.0″ | Forms the short end caps of the box enclosure. |
| Floor Support Cleats | 2 | 0.75″ | 1.5″ | 46.5″ | Mount flush along the bottom inside edge of the long walls. |
| Bottom Floor Slats | 12 | 0.75″ | 3.5″ | 20.0″ | Drop in horizontally. Space evenly with ~0.4″ drainage gaps. |
| Post Caps (Overhang) | 4 | 0.75″ | 2.5″ | 2.5″ | Decorative square caps centered over the top of the legs. |
Step-by-Step Assembly Guide
- Building the Side Panels: Lay two Corner Posts flat on your bench, spaced apart. Place a Long Outer Wall (46.5″) between them. Align the top edge of the wall exactly 2.5″ down from the top of the posts (leaving room for the post cap extension). The bottom edge of the wall must rest precisely 18.5″ from the ground. Fasten using pocket screws from the inside or pre-drilled exterior deck screws from the outside. Repeat for the matching opposite side.
- Connecting into a Box: Stand both long frame assemblies upright. Position the Short End Walls (20.0″) between the corner posts at each end, matching the exact height alignment of the side walls. Clamp securely and drive fasteners to square up the complete four-sided rectangular box structure.
- Installing Cleats: Take the Floor Support Cleats (46.5″) and attach them along the inside bottom edge of both Long Outer Walls. Use wood glue and heavy-duty 2″ screws spaced every 6 inches. These cleats bear the entire down-force weight of the damp soil, so make sure they are fastened firmly!
- Dropping the Floor Slats: Place the 12 Bottom Floor Slats (20.0″) across the support cleats. Space them out evenly so there is a consistent, small gap (approx. 0.4″) between each board to allow excess water to drain freely. Screw each slat down into the cleat using a single 1.5″ screw on each end.
- Finishing Accents: Center the 4 decorative Post Caps (2.5″ x 2.5″) over the top exposed end of each leg and secure with finish nails or glue. Line the inside of the box with permeable landscape fabric to keep soil from washing through the drainage gaps while allowing water to pass.
To make sure that my planter can withstand the weather, I use this bulletproof glue:
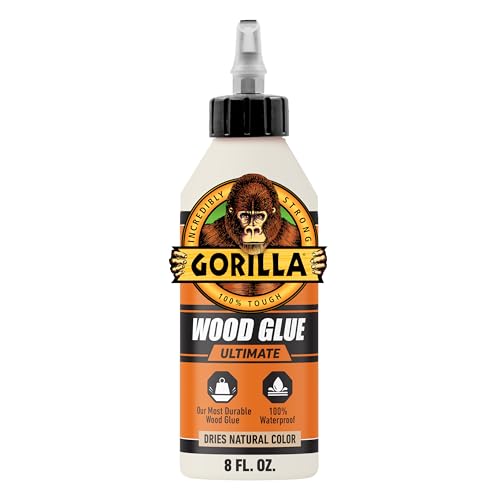
- Use indoors or outdoors: Give your indoor or outdoor projects a Gorilla Tough bond with waterproof…
- Extended working time: This Gorilla glue has an extended working time of 15 minutes before it forms…

Project 3: The Minimalist Ergonomic Pet Feeder
- Skill Level: Beginner
- Time Commitment: 1.5 Hours
- Estimated Cost: $10 – $20
- Best Wood Choice: Premium Hardwood (Oak, Walnut) or Furniture-Grade Bamboo ply (approx. 1.0 cm actual thickness).
Elevated feeding stations reduce neck strain and improve digestion for pets. This modern, minimalist Scandinavian-inspired platform elevates stainless steel or ceramic pet bowls off the floor. The sleek design can be adapted easily for a single, double, or triple bowl setup based on your pet household needs.
Materials & Tools List
- Lumber: 1×6 Premium Hardwood or Bamboo board (12.0 cm width, 1.0 cm thick)
- Bowls: Standard lip-style feeding bowls with a maximum under-rim outer diameter of 10.0 cm.
- Tools: Jigsaw or 100mm hole saw bit, drill/driver, wood glue, clamps, countersink bit, and 220-grit sandpaper for an ultra-smooth finish.
These bowls are the perfect size for this wooden pet feeder. Here’s where I get mine:
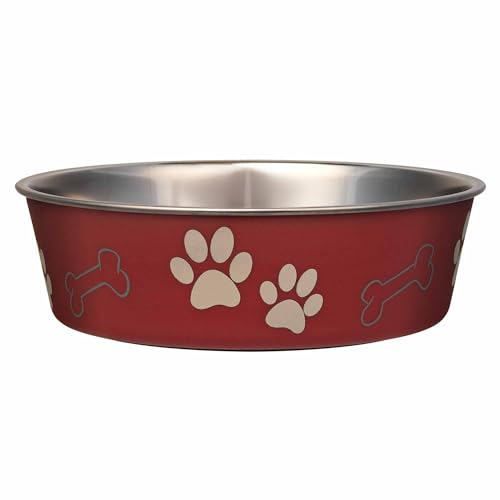
- STAINLESS STEEL & DURABLE – This Bella Bowl (27 oz, 6.75″ x 2″) features a stainless steel design…
- REMOVEABLE RUBBER BASE – This feature prevents and ensures no spill water bowl for dogs. It’s…
Dimensional Blueprint Configurations
Note: For all configurations, the Riser Feet require 2 pieces cut to exactly 12.0 cm wide × 3.2 cm high to achieve a perfect 4.2 cm finished platform height when combined with the 1.0 cm thick top board.
- 1-Bowl Feeder: Top Panel = 12.0 cm × 13.0 cm (Total Length: 13.0 cm)
- 2-Bowl Feeder: Top Panel = 12.0 cm × 23.7 cm (Total Length: 23.7 cm)
- 3-Bowl Feeder: Top Panel = 12.0 cm × 34.3 cm (Total Length: 34.3 cm)
Step-by-Step Assembly Guide
- Layout and Hole Center Marking: Select your preferred length configuration and cut your top panel and two riser feet to exact size. On the face of the top panel, mark out the exact center lines for your circles. For the 3-bowl version (34.3 cm), mark center points for the three holes at 6.5 cm, 17.15 cm, and 27.8 cm from one edge, keeping them centered perfectly along the 12.0 cm depth line.
- Cutting the Bowl Insets: Securely clamp the top panel to your workbench. Use a 100mm hole saw to drill the circles cleanly. Alternatively, drill a starter hole inside your marked circle template and use a fine-toothed scroll-work jigsaw blade to slowly trace and cut out the circles.
- Attaching the Riser Feet: Apply a bead of wood glue to the top edge of the two Riser Feet (12.0 cm × 3.2 cm). Place them underneath the outer ends of the top panel, flush with the edges. Secure from underneath using pocket screws or drive fine trim screws straight down from the top panel into the feet, making sure to pre-drill and countersink the heads below the surface.
- Sanding and Softening Edges: Use 180-grit followed by 220-grit sandpaper to thoroughly break all sharp outer corners and smooth out the inner rim profiles where the bowls sit. This prevents any splinters or rough areas from bothering your pets.
- Applying a Food-Safe Sealant: Since this project will be exposed to water droplets and wet pet food daily, it requires a robust, safe finish. Coat the entire feeder in 3 coats of non-toxic mineral oil, pure tung oil, or a non-toxic water-based polyurethane sealant. Let it cure completely before popping the bowls in! If you’re wondering which oil coating I apply, well, I use this food-grade, pet-safe product:

- NSF CERTIFIED FOOD GRADE – This premium mineral oil is NSF certified and lab-tested to meet the…
- SUPERIOR PROTECTION & RESTORATION – Deeply penetrates and conditions wood to prevent cracking…
Frequently Asked Questions (FAQs)
Q1: What is the absolute best wood to use for outdoor builds like the birdhouse and planter box?
A: Western Red Cedar and Redwood are the gold standards for outdoor woodworking. They naturally contain organic oils and tannins that ward off rot, fungal decay, and boring insects without requiring chemical pressure treatments. If those aren’t available, Douglas Fir is a strong budget alternative, though it will require a non-toxic external sealant to last long-term in wet environments.
Q2: My wood splits almost every time I drive a screw near the edge. How do I stop this?
A: Splitting happens because the wedge shape of a screw forces wood fibers apart. To completely eliminate this, you must always pre-drill a pilot hole using a drill bit that matches the inner core diameter of the screw (ignoring the threads). For an ultra-clean professional finish, use a countersink bit so the screw head sits perfectly flush or slightly below the surface of the wood.
Q3: Are finishes and glues safe for wildlife and family pets?
A: For the birdhouse interior, leave the wood completely raw—birds do not need finishes, and trapped chemical fumes can be lethal to chicks. For the pet feeder and outer planter box, look for products rated as “food-grade” or labeled FDA-compliant, such as pure raw linseed oil, mineral oil, or beeswax. Standard PVA wood glues (like Titebond II or III) dry completely inert and non-toxic.
Q4: I don’t own a large 100mm hole saw for the pet feeder. Can I still build it?
A: Absolutely! Simply draw the circular outline perfectly onto the wood using a compass or by tracing the bowl rim. Drill a single large hole (about 8-10mm) just inside that line to act as an entry window. Insert your handheld jigsaw blade into that hole and carefully follow your pencil line all the way around. Sand smooth afterwards to clean up minor deviations.
Q5: Do I really need to use wood glue if I am already putting structural screws in?
A: Yes! Think of screws as temporary clamps that hold the wood steady while the glue cures. Wood glue forms a microscopic chemical bond with the wood fibers that is actually stronger than the wood itself. Screws alone will eventually loosen over time as wood expands and contracts with changes in humidity; a glued joint ensures your project stays square and solid for years to come.
Happy Building!
There you have it—three rock-solid, beautiful weekend projects out of the workshop and ready to enjoy. Building your own gear is a highly rewarding habit that saves money, allows for absolute customization, and connects you deeply to the craft. Remember, every master woodworker started exactly where you are today with a few basic tools and a strong desire to learn. Keep your blades sharp, your measurements precise, and as always, happy building!