
At a Glance: Floating Witch Hat Lights
- About 10 minutes a hat. Run fishing line out each hat tip with a battery light centered under it, then hang it from a hook set in solid wood.
- Built for the porch. Use lights rated for outdoor use, and make sure that rating covers the battery box too.
- Three ways to build it. Start with basic supplies on a covered porch, or step up to timer lights and rust-resistant hooks for a set you’ll pull out every fall.
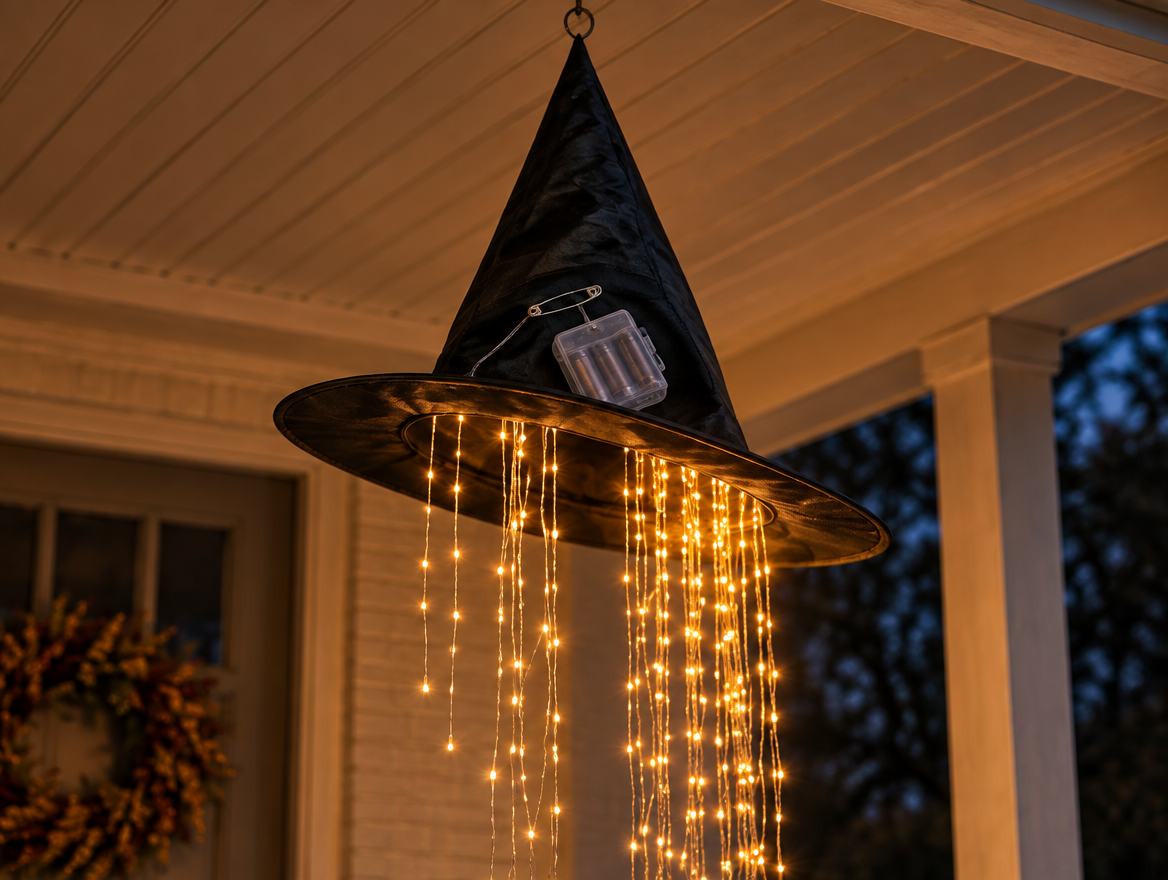
To make floating witch hat lights, thread clear fishing line through the tip of each hat and anchor it inside with a safety pin. Clip a battery fairy light to that pin so the weight sits centered, pin the strands under the brim, and hang the hat from a screw hook in the porch ceiling framing. Jump to the steps.
There’s a moment on an October evening when the porch lights come on and a row of witch hats starts to glow. Kids stop on the sidewalk to point. A porch isn’t a living room, though. Wind and damp air push back on a craft that was designed indoors, so this guide covers the small fixes that keep your hats level and glowing right up to trick-or-treat night.
What do you need to make floating witch hat lights?
For each hat
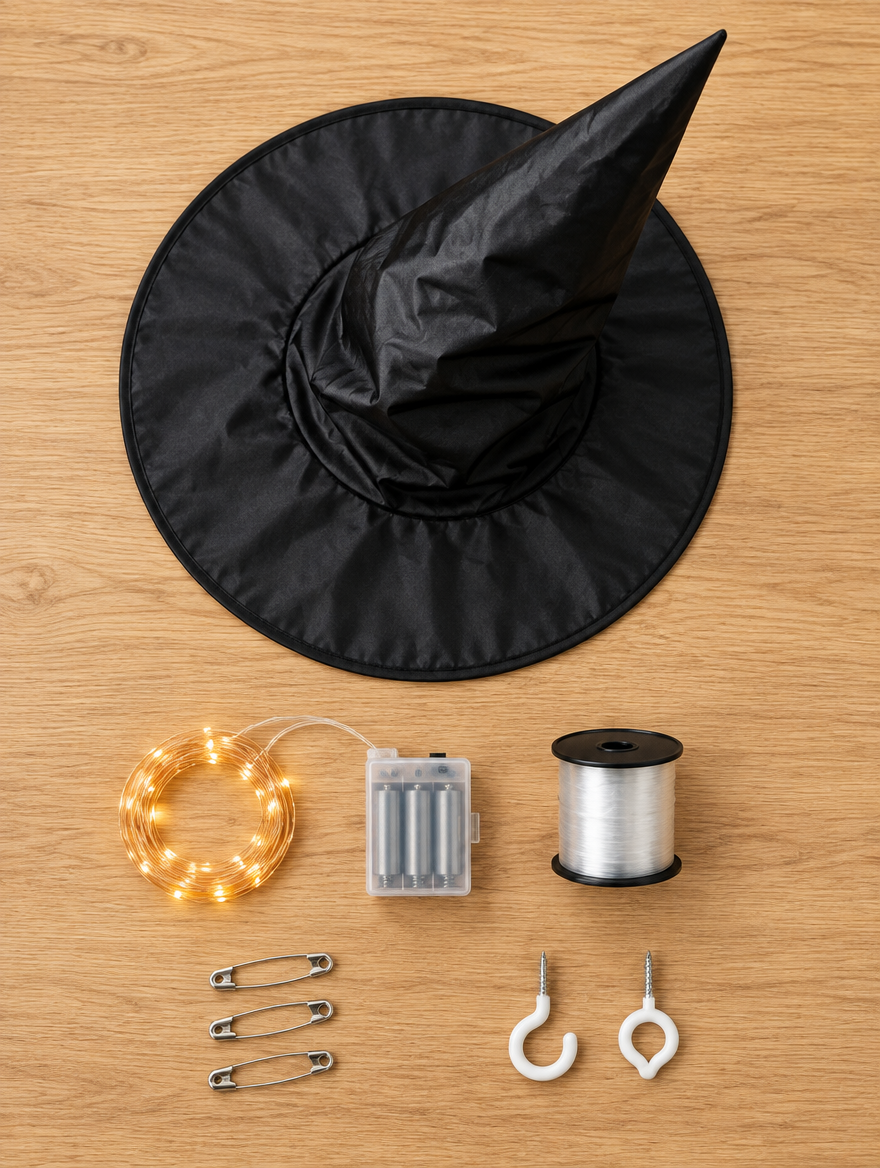
- 1 witch hat. Thin polyester with a cone that stands on its own.
- 1 strand of battery fairy lights. Outdoor-rated, box included.
- Clear fishing line. About 3 feet of monofilament.
- About 5 safety pins. The large size.
- 1 screw-in ceiling hook. A cup hook or screw eye.
Tools: large sewing needle, scissors, drill with a small bit, and a sturdy stepladder. Optional: a small fishing swivel and a plastic file folder for a cone liner.
Quick tip: Before you buy, check the package for a label showing the lights are certified for outdoor use. It’s the biggest reason one set lasts all month while another quits after the first wet night.
The hat you can grab in any Halloween aisle for a few dollars, and the safety pins are already in a drawer somewhere. The lights are the row worth ordering. A porch set has to be outdoor rated, and that label is the one thing you can’t confirm by looking at a box on a dollar-store shelf. Clear monofilament and screw-in cup hooks are the other two, since hardware stores sell them by the single item and a small multipack costs about the same.

- ¡¾Easy to use¡¿: Install high quality batteries into the battery holder,the multicolor copper...
- ¡¾Remote Control¡¿: With a remote in hand, you can easily turn on/off the lights; 8 functions...

- CLEAR FISHING LINE & INVISIBLE STRING: Made of transparent nylon monofilament, this clear fishing...
- 1800FT, 0.45MM & 20LB STRENGTH: Includes one spool of 1800 ft/600Yards clear monofilament line with...

- If you are fed up with the problem of easy peeling of adhesive hooks, then try this vinyl coated cup...
- These coated hook screws are made of Vinyl and quality carbon steel, Use Easily, Easy to mount into...
These are affiliate links. If you buy through one we earn a small commission, at no extra cost to you.
What can go wrong with floating witch hat lights outdoors?
Hooks that let go
Outdoor adhesive hooks are made for smooth surfaces, and many porch ceilings are textured or grooved. Screw hooks have their own trap: twisted into a thin ceiling board alone, they work loose as the hat swings all night. Aim for the framing behind the boards. Step 7 shows you how.
A battery box that gets wet
An outdoor-rated light strand doesn’t always come with an outdoor-rated box. The box has a sliding door and a switch, and damp air gets in through both. Wet contacts corrode, and the lights flicker before they quit. If the package doesn’t say the box is weather-resistant, protect it the easy way in step 6.
How do you make floating witch hat lights?
Build one hat first, then test it outside overnight. Here’s the whole build in four moves. Tap any one to jump to the full steps.
Prep the hat
Stiffen the cone, run fishing line out the very tip, and anchor it to a safety pin inside.
Add the glow and center the weight
Clip the battery box right under the tip, then pin the light strands evenly under the brim so the hat hangs level.

Mount it so it holds
Screw hooks into solid wood, tie a knot that can’t slip, and add a swivel so the line won’t twist.

Hang, test, adjust
Stagger the heights, check the row from the sidewalk at dusk, and look at your test hat again after a night outside.
Every step, in detail
This project looks like a breeze, and it mostly is. Still, think through each step and what happens if it goes wrong before you start.
- Shape the hat before you do anything else. Cheap hats ship folded flat, and those creases soften even more in damp fall air. Cut a strip from a plastic file folder, roll it into a narrow cone, and slide it up inside the tip so the point stands tall. Keep the liner in the top half of the hat so the bottom 3 inches stay open for the lights.
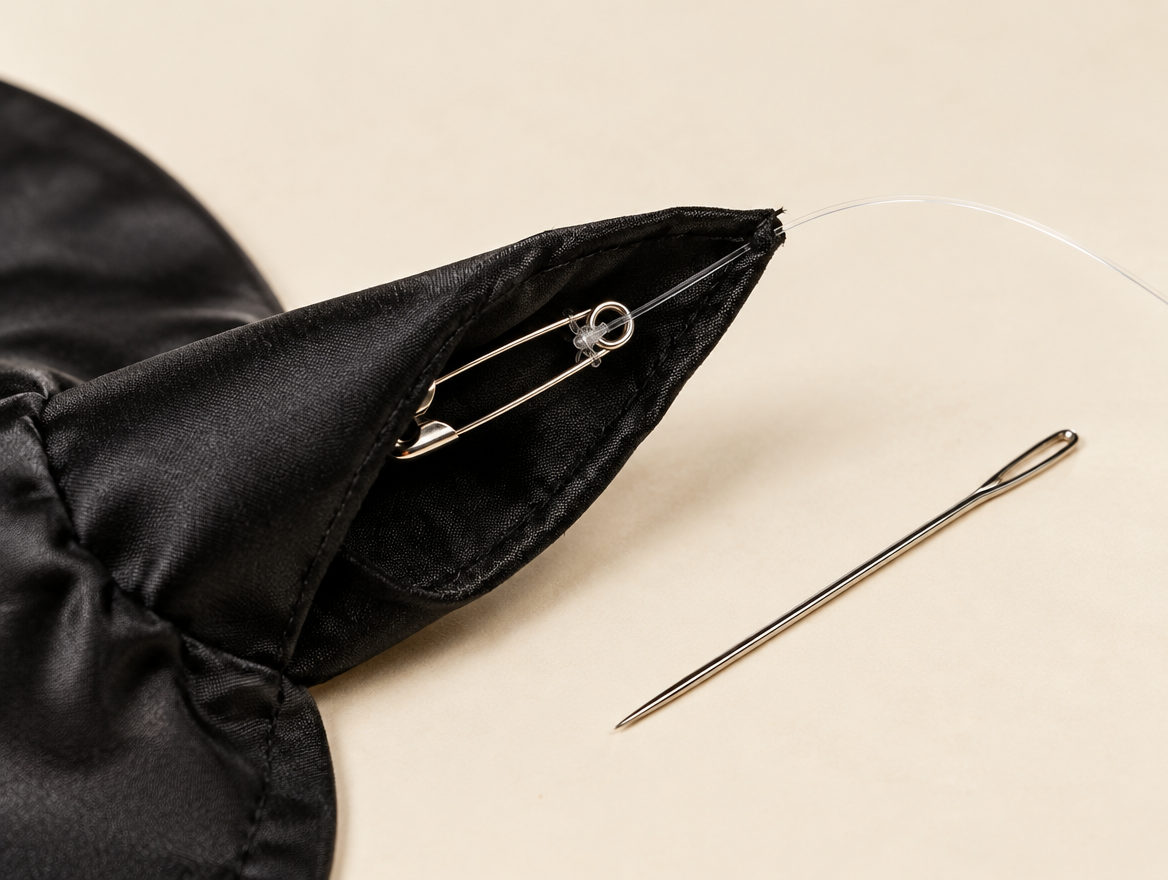
- Run the fishing line through the very tip. Thread a large needle with 2 to 3 feet of line. Push it from the inside of the hat straight out through the point, and leave a long tail inside. The tip is the only spot where the hat hangs balanced, so even a half inch off center shows as a lean.
- Tie the inside end to a safety pin. Knot the tail around the bar of a large safety pin, then close the pin. The pin spreads the pull across a wider spot. A bare knot can slowly work through thin fabric until the hat drops off the line.
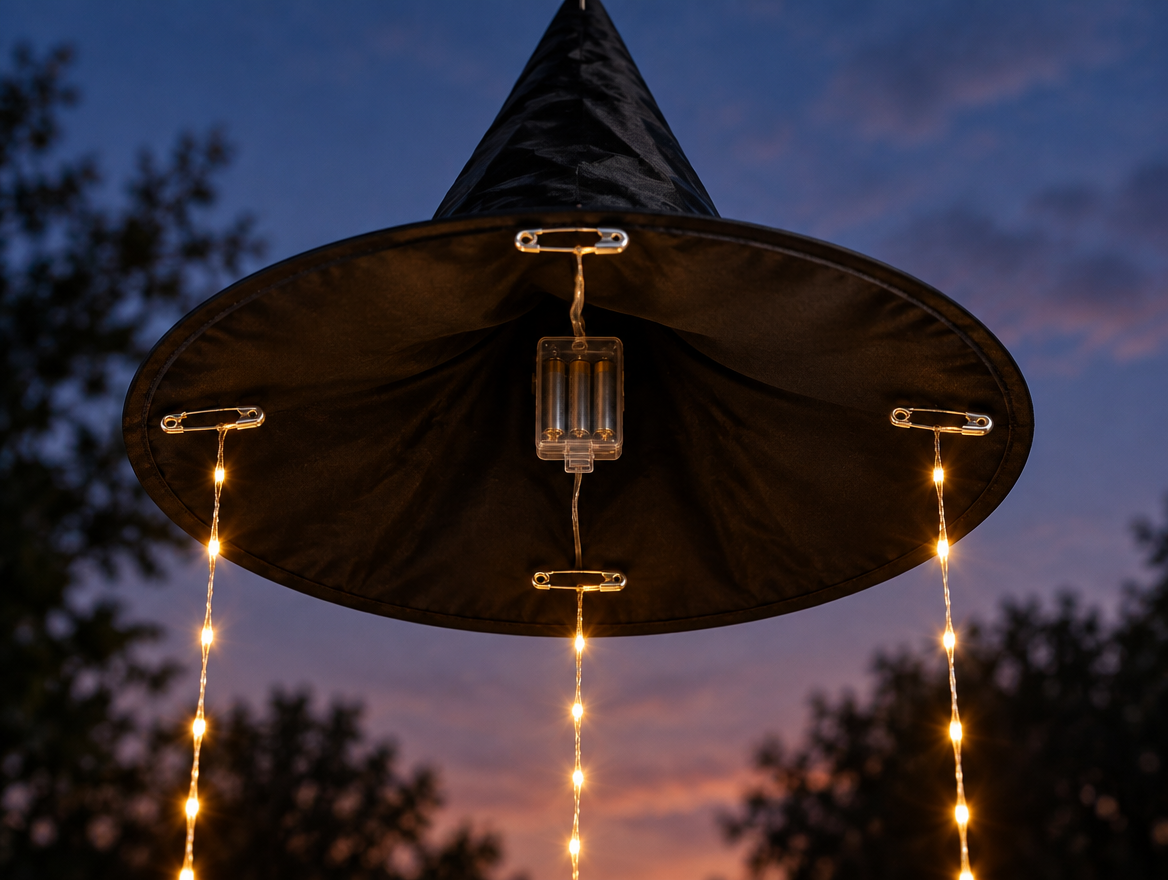
- Clip the battery box to that same pin. Hook the box’s tab or wire right onto the safety pin so it sits centered under the tip. This is the step that keeps your hats level. The box is the heaviest part of the build, and if it’s pinned to the side of the cone, it pulls the hat a few degrees off. That lean is easy to spot from the street.
- Tuck the lights in and pin them under the brim. Let the strand drop down from the box and loop it into several long strands. Pin them to the underside of the brim with 4 safety pins spaced evenly around the circle. If most of the strands hang from one side, the hat tips toward them.
- Turn the battery door so it faces down. Water runs down, so an opening that faces the ground has a hard time filling up. If your box isn’t rated for outdoor use, slip it into a small zip-top bag and snip one tiny corner at the bottom. That corner lets moisture drain out instead of sitting on the batteries. If your box has a timer button, set it now so the lights come on at the same time every night.
- Put your hooks into solid wood. Mark each spot on the ceiling first. Look for rows of nail heads in the ceiling boards, because the framing sits right above them. Drill a pilot hole a little skinnier than the hook’s screw, then twist in a screw eye or cup hook until the threads are fully buried. Space hooks at least two brim widths apart so the hats can swing without bumping. Rather not drill? Push a wood tack into the gap between your ceiling planks. It works for light hats on a well-covered porch.
- Tie the line securely so it doesn’t slip as the hat moves. Fishing line is slick, so a simple knot can easily come loose. Pass the line through the hook, then wrap the loose end around the main line five times. Feed the loose end back through the first loop. Wet the knot, pull it tight, and leave about a quarter-inch of extra line at the end.
- Add a small fishing swivel to stop the spin. Tie the line to one end of a swivel and hang the other end from the hook. A breeze turns the hat, and without a swivel, every turn twists the line tighter. After a few windy nights the line kinks and the strands wrap around each other. The swivel lets the hat turn freely and keeps it secure even when it’s windy.
- Stagger the heights and check from the sidewalk at dusk. Hang neighboring hats 6 to 12 inches apart in height so the row looks like it’s drifting. Then walk out to the street right as it gets dark. That’s when the fishing line vanishes and you see what your neighbors see. Adjust any hat that leans or hangs too low to walk under.
Porch tip: Check the balance and the hooks on your test hat after its first night outside, then make the rest.
How do you keep floating witch hat lights working after a windy night?
Once your test hat has spent a night outside, check it in the morning. Here’s what to look for and how to fix each issue before you build the rest.
The line is twisted or the strands are tangled
That’s spin. Add a swivel if you skipped it. If the strands still wrap, shorten them a little and add a fifth pin under the brim. Shorter strands have less room to swing into each other.
The hat has dropped lower than where you hung it
Your knot is slipping. Retie it using step 8, and wet it first. Before you tie off, loop the line around the hook a few extra times so the wind can’t blow the hat down.
The cone is sagging or crumpled at the tip
Polyester soaks up damp night air and loses its stiffness. A plastic liner fixes this for good. Skip paper liners outdoors, because paper goes limp the first humid night.
The lights flicker or won’t turn on
Open the box and check for moisture or a chalky film on the contacts. Dry it out, wipe the contacts, and put in fresh batteries. Then protect the box as shown in step 6. If you get a lot of blowing rain, move that hat deeper under the roof line.
The hook is loose
It probably missed the framing. Back it out, move over to the nearest row of nail heads, and drill a fresh pilot hole. Don’t just screw a bigger hook into the same thin board.
Which version of floating witch hat lights should you build?
Your total depends mostly on how many hats you hang and which lights you pick. Prices shift a lot around Halloween, so check current listings before you shop. Here are three ways to build a set of six.
Budget build: the basics for a covered porch
A multi-pack of basic polyester hats and basic battery fairy lights, plus fishing line, safety pins, and small cup hooks. This works well on a deep, fully covered porch. Plan to bag the battery boxes.
Mid build: the sweet spot for most porches
Same hats, but with outdoor-rated fairy lights that have a timer button. Add screw eyes, a pack of small fishing swivels, and a plastic file folder for cone liners. This is the sweet spot for most porches.
Quality build: a set you’ll hang for years
Sturdier hats that hold their shape without help, and fairy lights where both the strand and the box are rated for outdoor use. Look for a set with a remote if you can find one. Use rust-resistant hooks you’ll be happy to leave up all year.
Where should you hang floating witch hat lights on your porch?
Start with your front door. It’s the heart of the porch, so let it set the plan. Hang your hats along the path your guests walk, and let the row lead the eye right to the door. If you have a fall wreath, keep the closest hat a little off to the side so it frames the wreath instead of covering it.
Odd numbers look more natural than even ones. Three hats suit a small stoop, and five or seven fill a long porch. Keep the lowest hat high enough that the tallest person in your house can walk under it without ducking.
Want more spooky charm? These floating cheesecloth ghosts hang from the same kind of hooks and look amazing mixed in with the hats. For more ways to style the whole space, browse our favorite DIY porch decorations.
Can you reuse the hooks after Halloween?
Yes, and it’s worth planning for. Screw hooks leave small holes, and nobody wants a ceiling full of them by spring. Put your hooks where you’ll use them again, so they can hold something new every season.
The same hooks can carry hanging stars or lanterns when you switch to holiday porch decor. They’re ready for hanging planters during your spring porch refresh. Come July, they’ll hold bunting for your patriotic porch decor. When you take your floating witch hat lights down, pull the liners out and nest the cones inside each other so they keep their shape until next fall.
When should you call a pro for floating witch hat lights?
This is a beginner-friendly build. A few things you might spot along the way are worth handing off, though.
- Soft, stained, or sagging ceiling boards. That usually means water is getting in from the roof or gutters. Call a roofer or carpenter before you hang anything, since hooks won’t hold in damaged wood anyway.
- You want to power the lights from your porch light or an outlet. Stick with batteries, or have a licensed electrician add a proper outdoor outlet. Never splice lights into an existing fixture.
- Your ceiling is vinyl or metal panels. Screws don’t hold well in thin panels. A handyman can find the framing behind them and set hooks that will last.
- The ceiling is too high for a stepladder or sits over stairs. A handyman with the right ladder can set all your hooks in one short visit.
Ladder falls while hanging lights and decorations are a well-documented holiday injury, so keep your hips between the rails and have someone hold the base. Don’t stand on the top step.
How will you know your floating witch hat lights turned out right?
Walk out to the sidewalk after dark and run through this quick check.
- You can’t see any fishing line from the street.
- Every hat hangs straight, with the tip pointing up.
- The light strands fall freely and don’t touch the hats next to them.
- After a breezy night, every hat is still at the height where you hung it.
- The lights still turn on after the first rainy day.
If you can check off all five, your porch is ready for its close-up. Snap your photo right at dusk, when there’s still a little blue in the sky behind the glow.
Ready to light up your porch?
Floating witch hat lights are one of the easiest ways to make your porch feel magical this fall. Build one test hat tonight, hang it, and see how it looks in the morning. Once it passes, the rest of the set goes fast. By the time trick-or-treaters show up, you’ll have a glowing row of hats that stayed put all month.
We’d love to see your floating witch hat lights in action. Share your glowing porch with us on Facebook, and save this guide to your fall board on Pinterest so it’s ready when you shop for supplies.
A few helpful answers
Floating witch hat lights FAQs
Hanging, lighting, and storing your porch display.
Add a small fishing swivel between the line and the ceiling hook. The hat can still turn in the breeze, but the line won’t twist up. Pinning the light strands evenly under the brim also helps the hat settle back in place.
Most battery LED fairy lights run cool, but always check the directions on your set first. A timer is the easy answer. It saves your batteries, and you’ll never have to remember to switch the lights off.
Only on a smooth surface, and only with hooks made for outdoor use. Textured or grooved porch ceilings don’t give adhesive much to grab. Screw hooks set into the framing are the safer bet for a whole month outside.
The weight is off center. Clip the battery box to the safety pin right under the tip, and spread the light strands evenly around the brim. If the line doesn’t come out of the exact point of the hat, rethread it.
Take the liners out, then stack the cones inside each other like paper cups. Store them upright in a box where nothing heavy sits on top. Put the liners back in before you hang them next fall.
Still have a question? Ask in the comments.
Hot Take Poll: Is it rude to put Halloween decorations up in September?
Stores put Halloween decor out in summer now, and some porches are glowing before Labor Day weekend is over. Other neighbors think anything before October is too much. Where do you land?
Be honest, then defend your pick in the comments. If you voted “rude,” tell us the exact date you think is fair game. If you’re team September, tell us how early your first decoration went up this year.