

If you’re tired of battling a messy craft room where your art supplies are constantly taking over your desk, it’s time to look up and take advantage of your empty vertical space. Here’s how to build and mount a custom pegboard system that’ll help organize the clutter for good.
Two Mistakes to Avoid Before You Start Your Craft Room Pegboard
- Mistake #1: You mounted it flat against the wall
No hook fits behind a board with zero gap. You need at least 1/2″ of space between the back of the board and the wall. Skip the spacer and the whole system is dead on arrival. No hook will seat, and nothing stays up. - Mistake #2: You bought 60 accessories on day one
You don’t know your actual workflow until you’ve used the board. Buy a basic hook variety pack first. Add bins, baskets, and specialty holders after one week of real use.
Materials:
- Pegboard Panel (Hardboard, Pre-painted, or Steel/HDPE)
- 1×2 Furring Strips
- Wood Glue
- 3″ Screws
- Washers
- Paint (Optional)
- Hook Variety Pack
- Bins & Baskets
- Dowel Rod
- L-Hooks
Tools:
- Power Drill
- Stud Finder / Multi-Scanner
Craft Room Pegboard: Step-by-Step Instructions

1. Plan Your Setup
Before running to the hardware store, sort the supplies you want to hang into three piles:
- Daily: Items you grab every single session.
- Project-Based: Tools you use for specific projects.
- Occasional: Things you rarely need.
Seeing your piles will tell you exactly what size pegboard you actually need to buy.
2. Cut and Frame the Board
You don’t need fancy saws for this. Big box stores like Lowe’s or Home Depot will usually cut the pegboard to your exact dimensions for free.
- The Biggest Beginner Mistake: Do not mount the board completely flat against the wall! Hooks need space to slide behind the board. You need at least a ½” gap.
- The Fix: Glue and screw 1 x 2 furring strips around the back edges of the board to create a frame. This gives you the gap required for hooks to seat properly.
- If you decide to paint the board, make sure to use very thin coats so you don’t accidentally clog the holes.
3. Find the Wall Studs
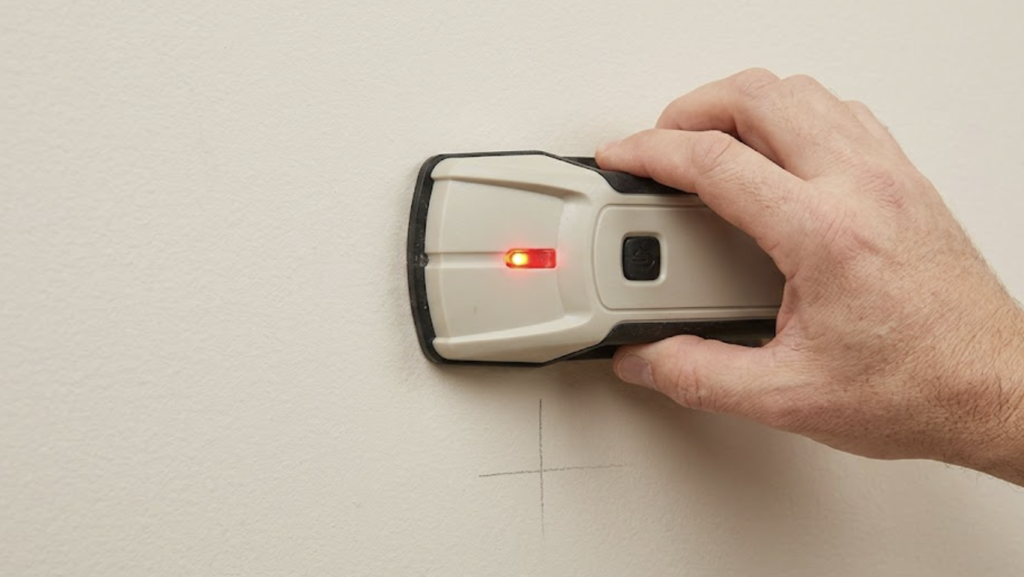
If your pegboard is larger than 24” x 24”, it must hit at least one wall stud. Studs are usually spaced 16″ apart inside the wall. Don’t rely on basic drywall anchors as they usually cannot hold the weight of a loaded board and could rip a chunk out of your wall. If you’re unsure where your studs are, I highly recommend using a multi-scanner first. You don’t need a pricey, top-of-the-line model. You can go for a basic, reliable electronic stud finder or a simple magnetic tool to locate hidden electrical wiring and prevent your drywall from becoming Swiss cheese. This is my go-to wall scanner:
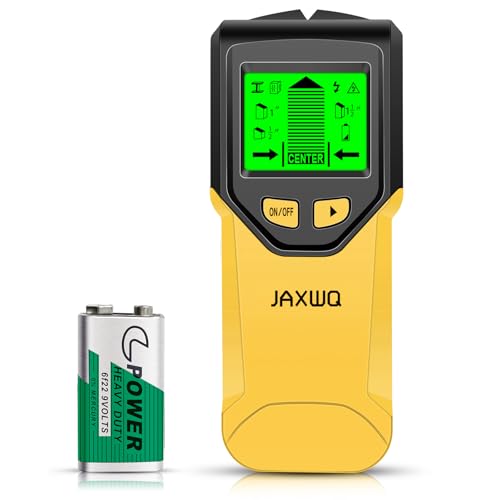
- Stud Finder Wall Scanner - 5 in 1 Stud Detector with Intelligent Microprocessor Chip and HD LCD...
As an Amazon Associate, we may earn from qualifying purchases.
RELATED: The Best Stud Finders for Hanging Heavy Wall Projects (2026 Guide)
4. Mount It Safely
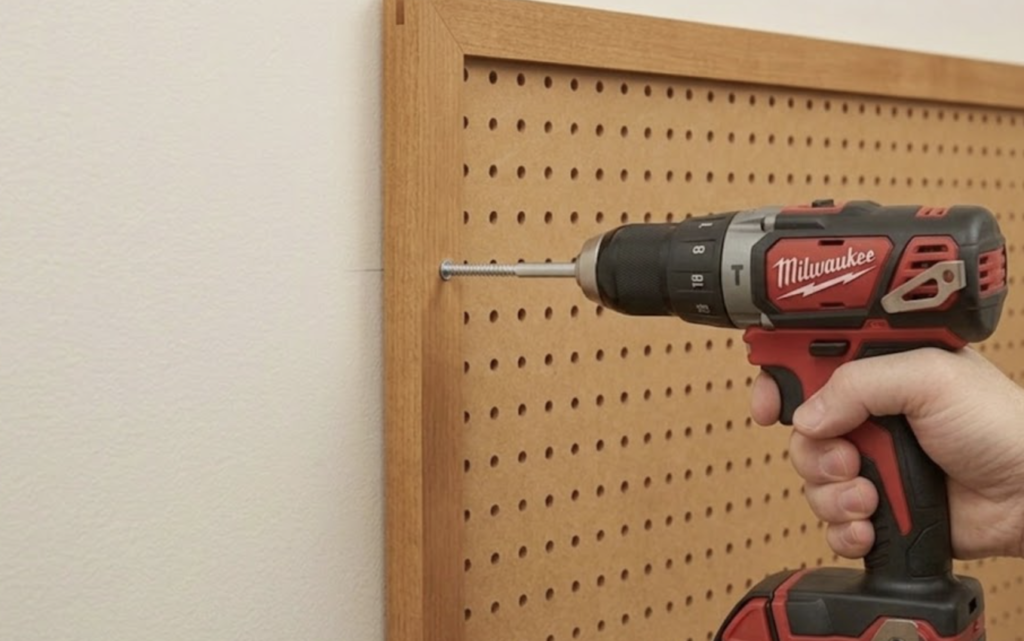
Secure the framed board into the wall studs before you put a single hook or basket on it. Driving thick screws through your wood frame and into the wall requires a solid amount of torque, so you’ll definitely want a reliable power drill for this step like the Milwaukee drill shown in the photo.
(Speaking of power tools, we’re currently giving away a $1,000 Milwaukee Tool Prize Package! No purchase necessary to enter or win. Here’s the link.)
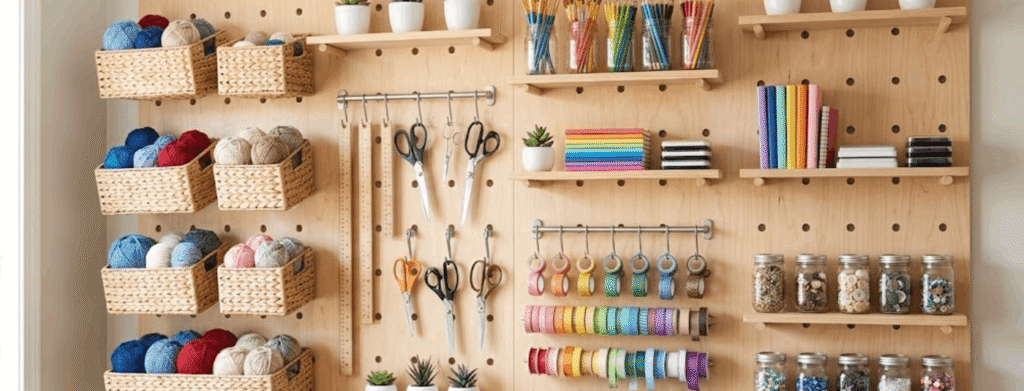
5. Zone Your Supplies
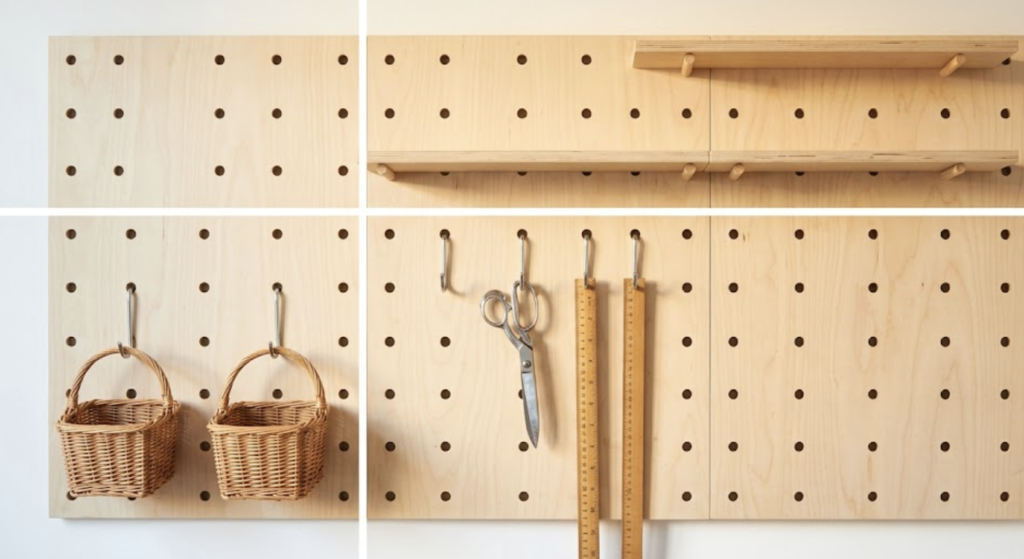
When it’s time to organize, map out the board logically:
- Eye Level: Your daily tools. Tip: Leave a little bit of empty space here for whatever active project you are currently working on.
- Middle: Your project-based tools.
- Upper: Seasonal or specialty items.
6. The “One-Week” Rule
Don’t buy 60 different accessories and try to fill the entire board on day one. Start with a basic variety pack of hooks and hang only your everyday items first. Use the setup for a week, and then rearrange it based on what you actually reach for. Once you know your workflow, you can confidently add the specialty bins and baskets.
7. The Finishing Touch
Add a dowel rod resting on two L-hooks to hold washi tape, ribbon, or thread in a color row at eye level. It costs under $5 but makes the board look professional.
Project Budget Tiers
| Tier | Estimated Cost | Includes |
| Budget Build | Under $35 | 2’x4’ hardboard, 1×2 furring strips, 50-piece hook pack, existing paint. |
| Mid Build | $35–$75 | Pre-painted panel, hook + basket kit, 1×3 backing boards, dowels, MDF moulding. |
| Quality Build | $75–$120+ | Steel/HDPE panel (Wall Control/IKEA), locking hooks, coordinated bins, wood border. |
If you’re short on time but still want the satisfaction of a DIY room upgrade, an all-in-one package like the FZK Pegboard Kit from Amazon is a perfect shortcut. It comes with four mount-ready panels and all the accessories, which gives you an instant organizational win without breaking out the power tools.
You still get to roll up your sleeves and install it yourself, but you get to skip the prep work and jump straight to the fun of customizing your layout!

- High quality material, Strong construction- Our peg board are upgraded with high quality ABS...
- Perfect Size & Value for Money - Each of our plastic pegboard is 12*12in, fit most family sizes...
Let’s build something together! Join the community on YouTube, Instagram, Pinterest, and Facebook.
FAQs
Can I use drywall anchors to hang my pegboard?
It’s highly recommended that you don’t rely solely on drywall anchors. Drywall anchors alone won’t hold a loaded board long-term. When they inevitably fail under the weight of your supplies, they’ll take a chunk of your drywall down with them. Any board larger than 24″ x 24″ must be anchored into at least one wall stud for proper support.
Do I need a gap between the pegboard and the wall?
Yes, absolutely! One of the biggest mistakes you can make is mounting the board totally flat against the wall. No hook will fit behind a board with zero gap. You need at least 1/2″ of space between the wall and the back of the board. You can easily create this necessary gap by gluing and screwing 1×2 furring strips around the back edge of your pegboard.
How do I paint my pegboard without ruining the holes?
You can absolutely paint your pegboard to match your room, but the secret is to use very thin coats. If you apply the paint too thickly, it’ll clog the holes and block your hooks from seating properly. Just take your time with light layers, and don’t forget to paint the frame too if you added one!


