

Washing your hands with soap and water is of utmost importance. Try this simple tutorial on soap making for kids to help them practice good hygiene habits while having fun at the same time.
RELATED: How To Make Your Own Exfoliating Loofah Soap
Soap Making for Kids Starter Guide
What You Need:
- 2 lbs. Glycerin soap base
- Cupcake tray or soap molds
- Soap dye or food coloring
- Soap scents or essential oils
- Microwave-safe measuring cup
- Toys or trinkets (optional)
- Knife
- Spoon
Tip: Store your ingredients inside your molds to keep things organized
Step 1: Chop the Glycerin Soap Blocks
Cut up your glycerin soap into tiny cubes. This makes melting them in the microwave much easier later.
We used a pre-made soap base for this recipe because chemicals typically used to make a soap base from scratch like lye aren’t safe to use around kids.
Step 2: Melt the Soap Base in the Microwave
Have your kid place some of the glycerin soap cubes inside your microwave-safe measuring cup. Heat it on high in the microwave for 30-second increments until completely melted.
Tips:
- If you plan on making soap in different colors, heat up 2-3 cubes at a time and place them in separate containers after.
- Make sure to watch your soap carefully while in the microwave. You don’t want it to burn.
Step 3: Add the Scents and Coloring
Ask your kid to add a couple of drops of scent and soap dye to the now melted soap. Once you get your desired color and scent, have your kid stir the dye in using a spoon or popsicle stick.
Tips:
- A little goes a long way with any of these additions.
- Feel free to experiment with the dye to get the colors you want.
RELATED: 11 Creative DIY Bathroom Ideas On A Budget
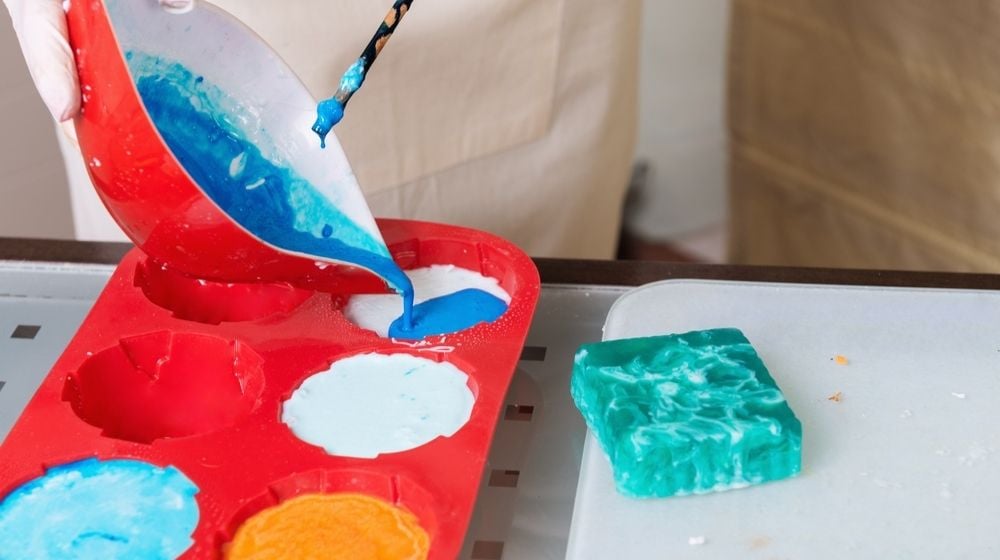
Step 4: Pour Soap Into the Molds
Pour the soap into the molds. You can pour just one color or even multiple colors for a cool layered look. For a fun touch, you can have your kid add in a trinket at the center like this adorable rubber ducky.
Caution: Be careful with pouring the soap as they’re very hot!
Step 5. Let Cool!
Let the soap chill in the fridge for 2-3 hours before taking them out. If you used a cupcake tray, you can use a knife to pop the soap out of the molds.
Step 6. Try Them Out
Now for the fun part: giving them a try. See how bubbly that is? That’s the kind of soap we want.
Here’s another kid-friendly soap making tutorial from ClutterBug:
Soap making is a great way to bond with your kids. We hope you and your family enjoyed this simple tutorial and stay tuned for more.
What’s your favorite type of soap? Let us know in the comments section below!
UP NEXT:
- DIY Projects: How To Make Soap Without Lye
- 21 Incredible Bathroom Makeover Ideas You Can DIY
- 8 Fun And Easy Origami Animals For Kids
Calling all crafting DIYhards, DIY Projects needs YOU! Click here if you want to write for us.
Don’t forget to stay connected with us on Facebook, Twitter, and Instagram!


