

Want to learn how to create a DIY Fairy Garden? Decorate your home and break the boring interior with this DIY weekend project!
RELATED: 12 Cutest DIY Fairy Garden Ideas and Kits
In this article:
- Homemade Fairy Garden Ideas
- What You’ll Need for Your DIY Fairy Garden
- How to Make Your DIY Fairy Garden
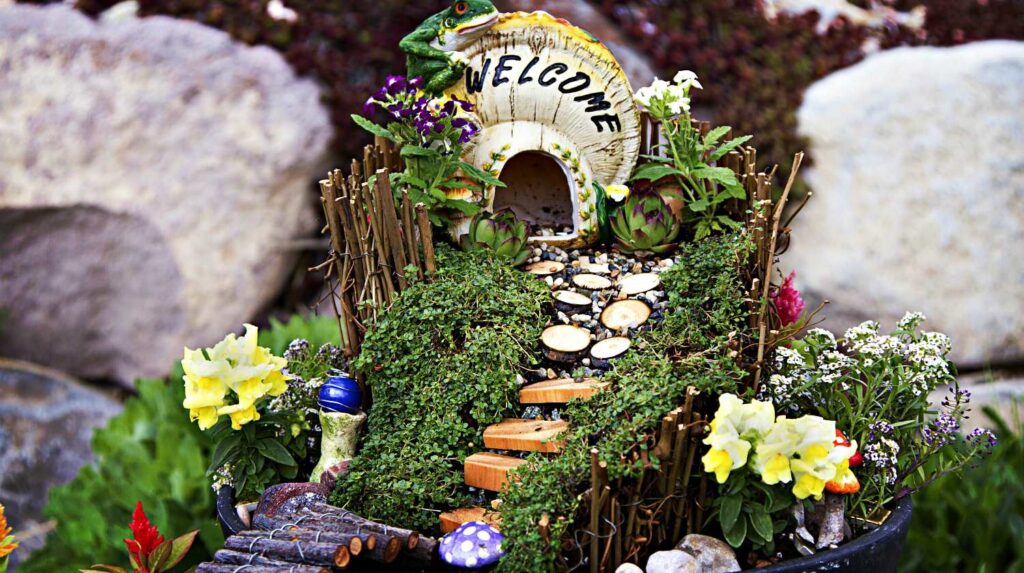
Handcraft Your Own Fairy Garden at Home
Homemade Fairy Garden Ideas
Decorating your home with store-bought items can be fun but not as fun as decorating with something green, creative and crafty! A little touch of green in your home can be a source of positive energy, great for both your mind and health.
Miniature garden ideas are becoming a popular way of indoor gardening. These projects are very inspirational and full of life, especially if they’re handcrafted.
It feels great to have a small piece of the outdoors in a delicately crafted tiny scene. Would you like to craft one yourself?
If yes, then you’ve come to the right place! I will take you through all the steps of making a mini fairy garden.
Get creative and follow me!
What You’ll Need for Your DIY Fairy Garden
- Teacup and Saucer
- Small rocks and mixed soil
- Dry twigs
- Cutting pliers
- Super Glue
- Moss and ferns
- Mini items for decoration
You’ll never have to miss the sea with these cute seashell crafts! ???????? https://t.co/Bg6Ns2feRO pic.twitter.com/pSmhJqm1BU
— DIY Projects (@DIY Projects) September 7, 2016
How to Make Your DIY Fairy Garden
Step 1: Ready the Teacup and Saucer
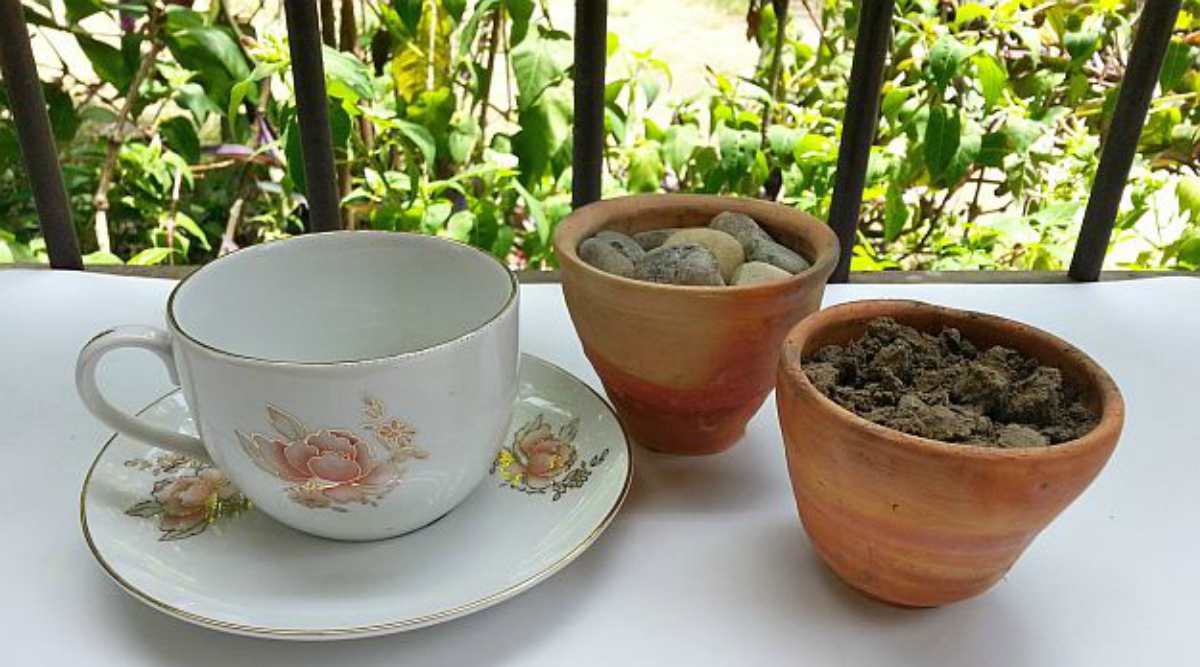
Use a teacup instead of a small flowerpot and of course a saucer. You can either use a leftover, old cup, and saucer or buy these at local thrift stores.
Step 2: Put Small Stones in Teacup
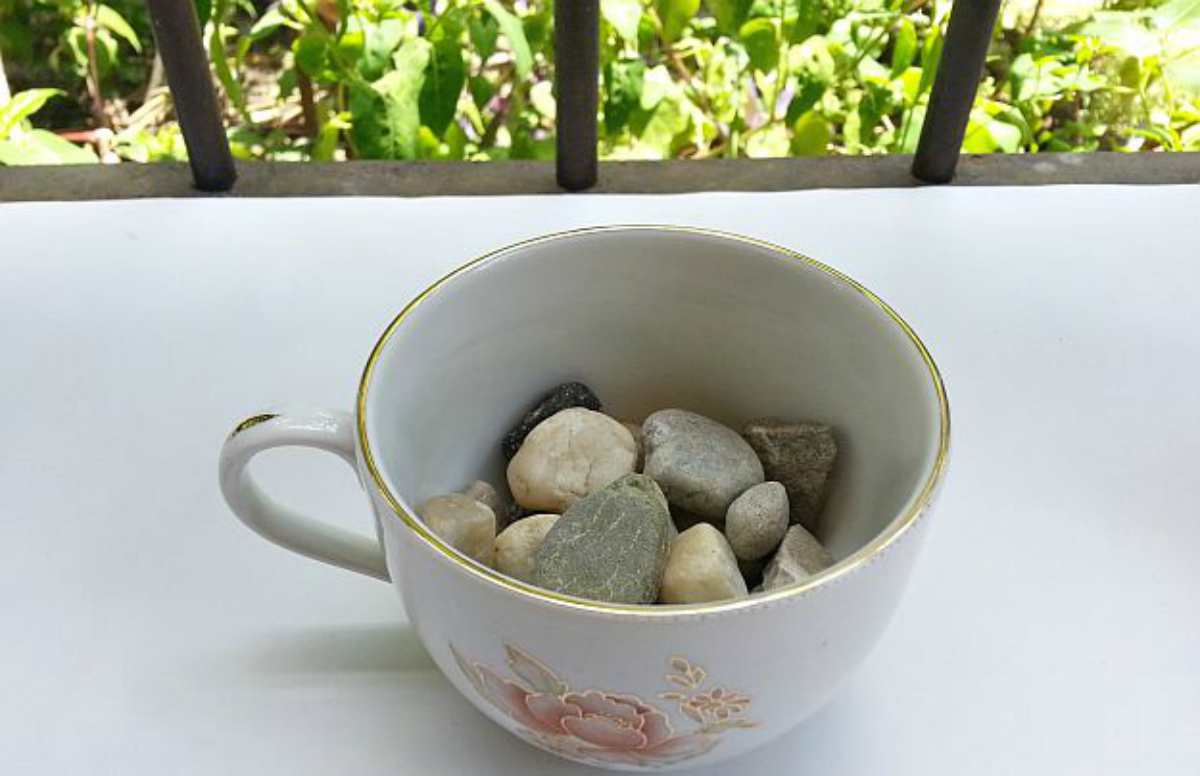
Fill the bottom third of the teacup with small stones to provide drainage for the soil. This technique eliminates the need for a hole in the bottom of the cup.
Step 3: Fill Cup with Soil

Fill the rest of the cup with mixed soil. Do not use sand.
Step 4: Cut the Twigs for Mini Ladder and Bench
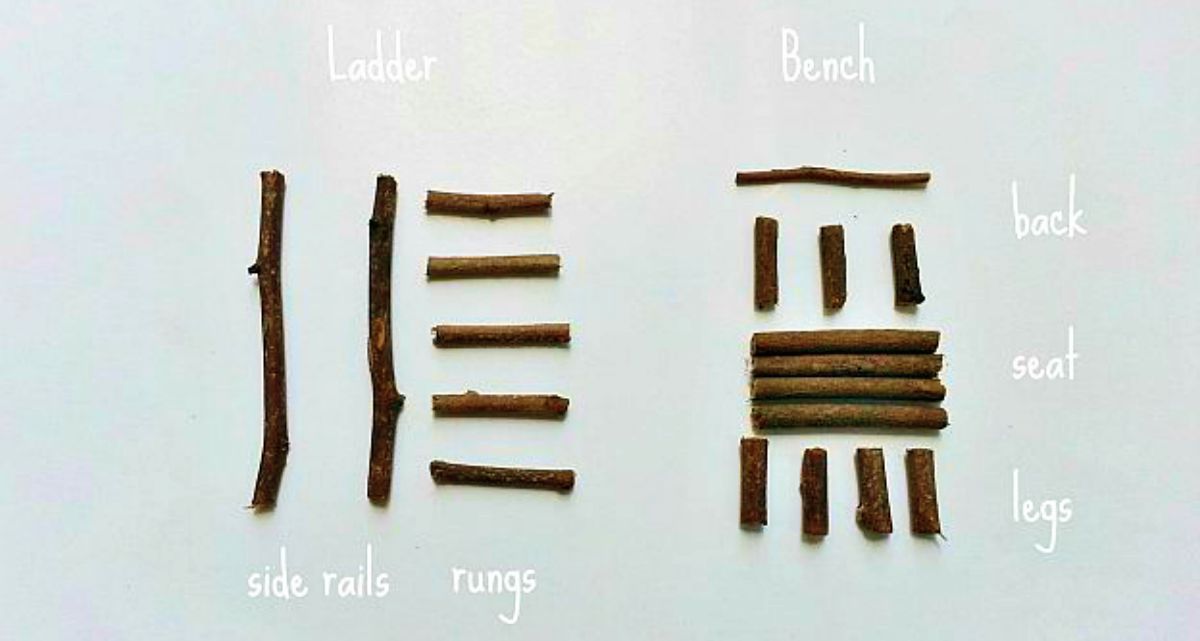
Time to create the mini accessories to give the garden a little charm. We will make a mini ladder and a mini bench using dry twigs, cutting pliers and super glue.
In this picture, you can see that we’ve cut the twigs into small pieces for the accessories. The size of the accessories will depend on the teacup size.
RELATED: 5 Lawn and Garden Tips for First-Time Homeowners
Step 5: Glue the Twigs
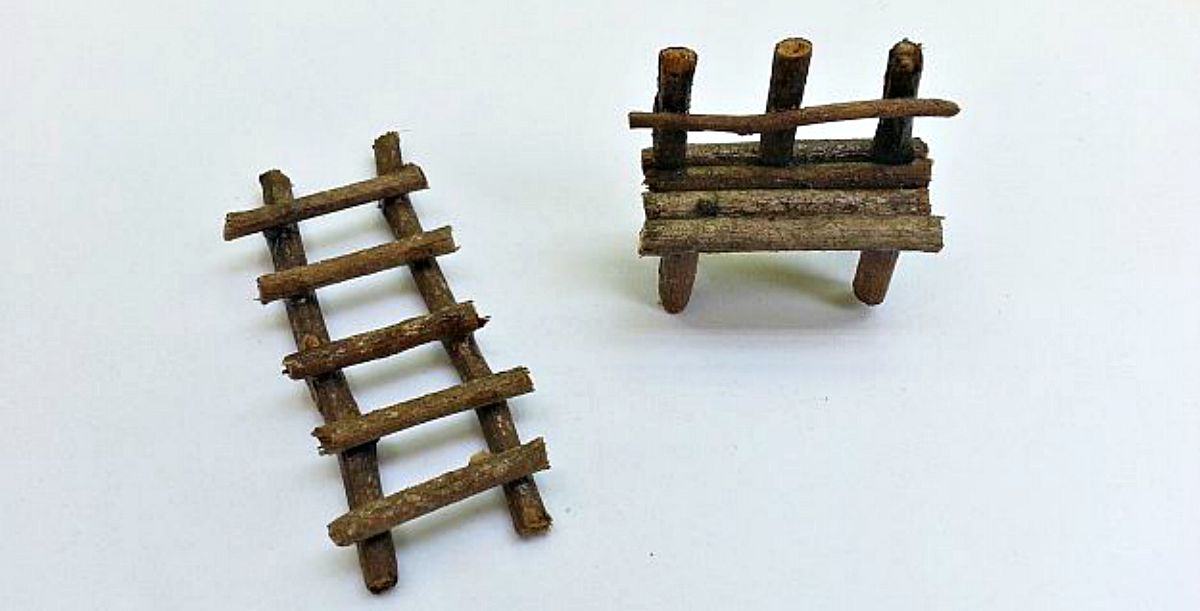
Glue the twig pieces to complete the ladder and bench. With a little imagination and some dry twigs, you can make loads of mini accessories for the mini garden.
Use these sweet #scrapbook ideas to display your #summer memories! https://t.co/HlaIK8QxQy pic.twitter.com/8nFMYSHGoG
— DIY Projects (@DIY Projects) August 24, 2016
Step 6: Prepare Colorful Stones and Shells
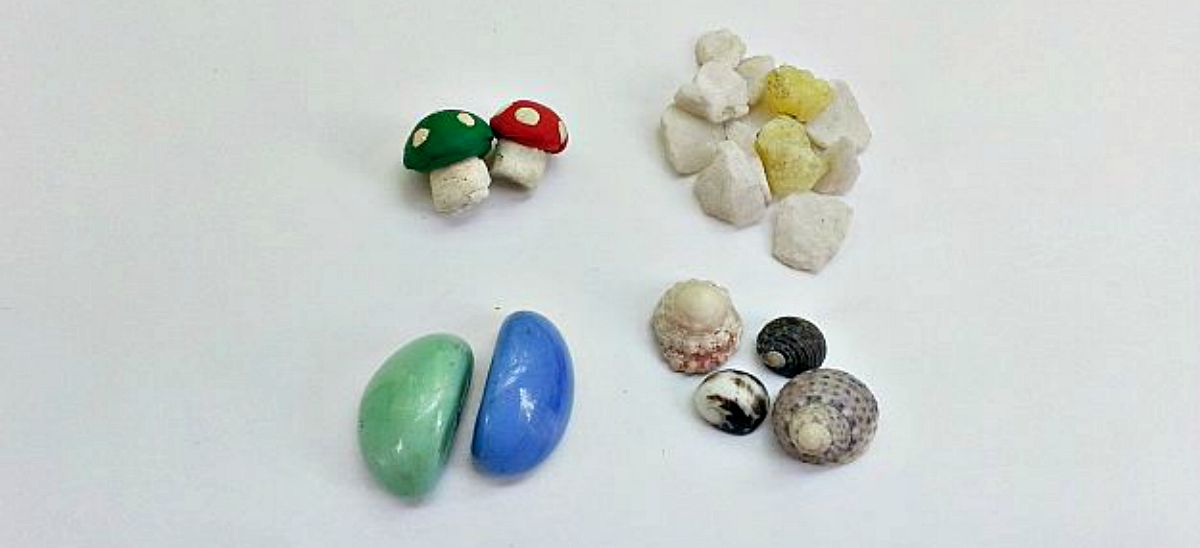
To give the garden a playful look we collected a number of cute accessories, including- small mosaic stones, small shells, little clay mushrooms, and artificial pebbles. Try collecting little and colorful items for decoration.
Step 7: Ready the Moss and Ferns
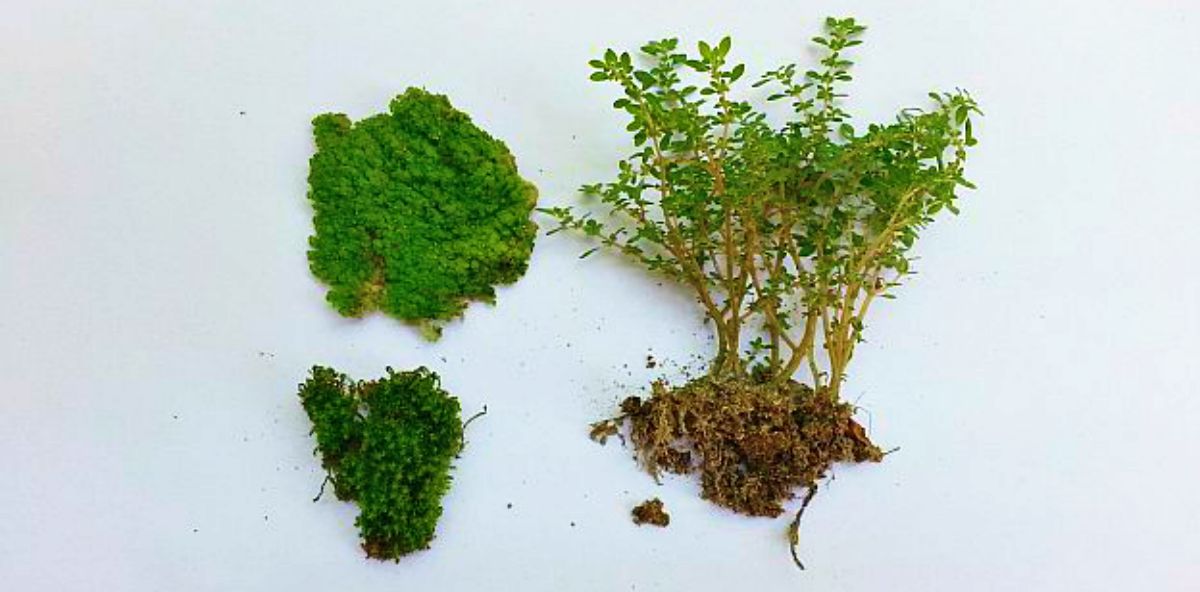
Moss and ferns are perfect for this garden. They have shallow roots and do not require too much care.
Besides, they are perfect for adding a luscious green look. They can be found on old concrete walls, bricks, tree bark, etc.
Step 8: Put the Plants in Place

Time to place the plants. Use your finger to make a small hole in the soil for planting.
Place the entire root inside the hole and fill the rest of the hole with soil. Keep in mind to leave some space so that the plants can grow.
And of course, leave some space for the accessories.
Step 9: Decorate the Stones and Shells
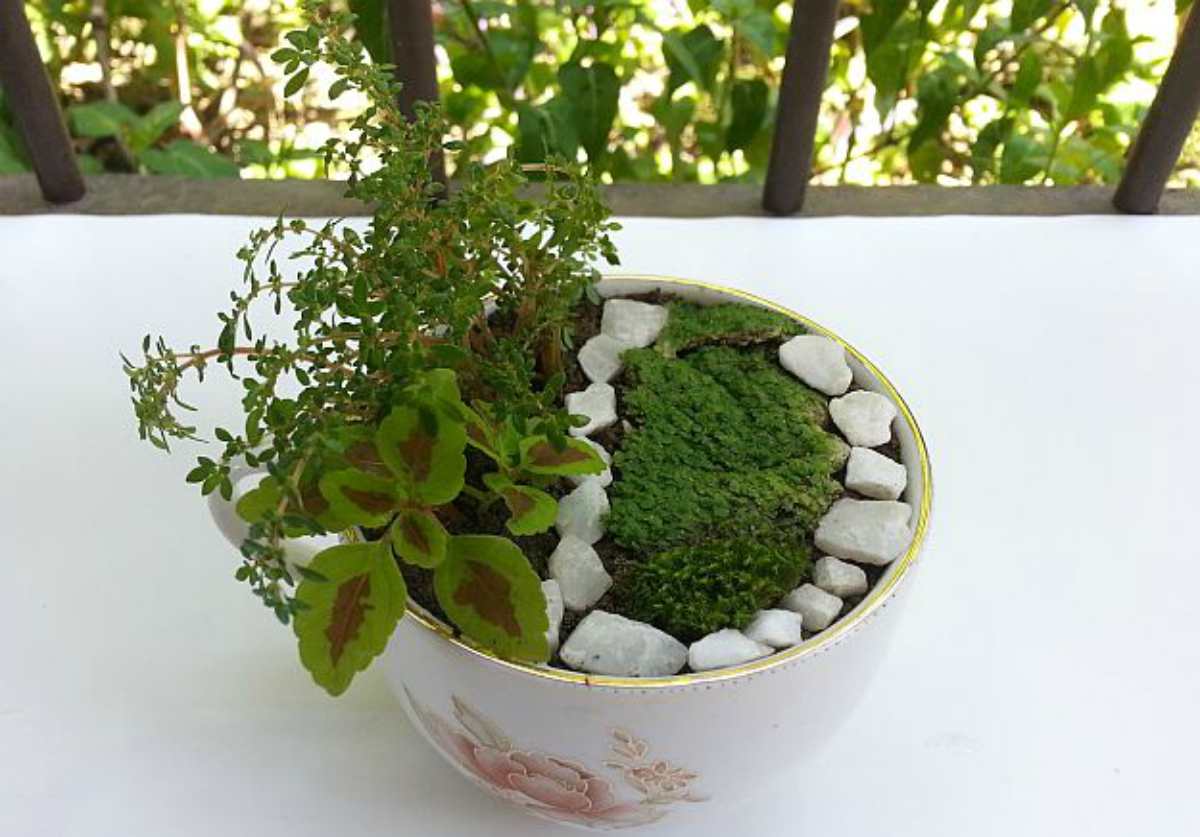
Cover the topsoil with moss, little mosaic stones, and shells.
Step 10: Position the Mini Accessories
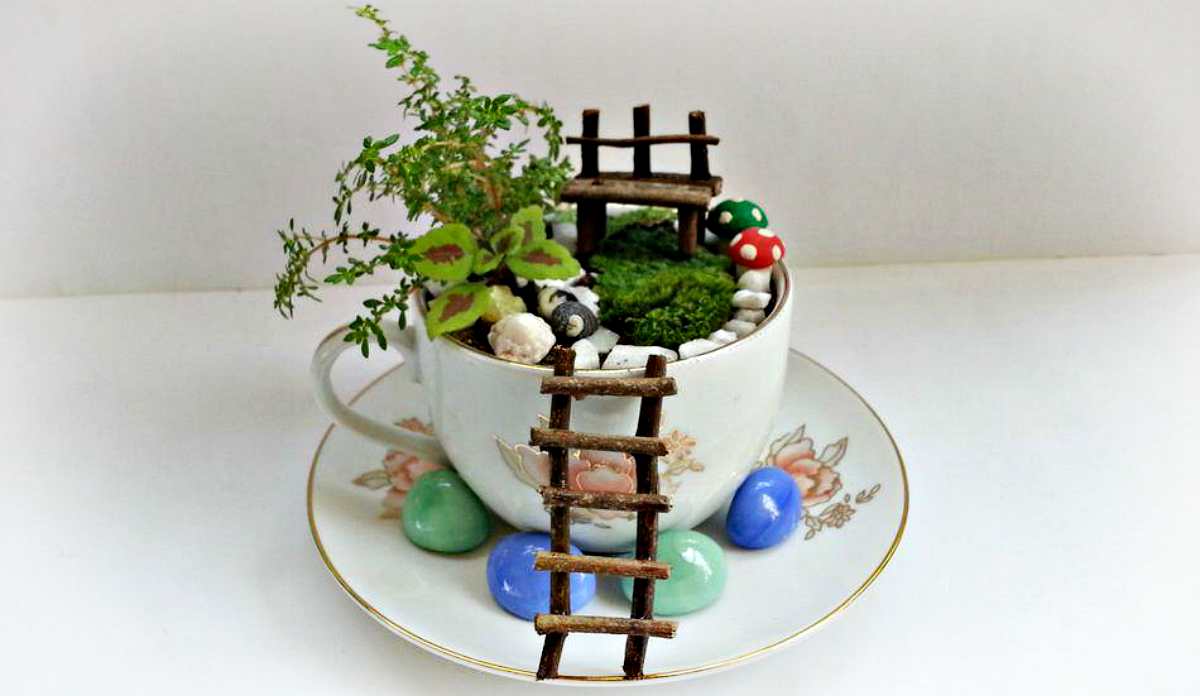
Add all the mini accessories one by one. The possibilities of designing a mini garden are endless, so get creative!
Once you’re done decorating the teacup glue the saucer with the teacup and also glue the ladder with them.
Caution: Crafting teacup gardens can be really addictive!
Want to see a video on how to make DIY Teacup Fairy Gardens? Check out this video from Factory Direct Craft:
Easy right? With some easy to get materials and a few simple steps, you have a lovely fairy garden to decorate anywhere in your home.
Surely you’ll be able to devise your own brilliant idea based on the example above. Don’t hesitate to apply what you have in mind and have fun doing it!
Do you like this miniature fairy garden project? Share your thoughts with us in the comments section below!
UP NEXT:
![]() For more DIY and craft news, follow us on Facebook, Twitter, Pinterest, and Instagram!Editor’s Note: This post was originally published on September 20, 2016, and has been updated for quality and relevancy.
For more DIY and craft news, follow us on Facebook, Twitter, Pinterest, and Instagram!Editor’s Note: This post was originally published on September 20, 2016, and has been updated for quality and relevancy.