
You know that Saturday morning when the kids are bouncing off the walls, and you need something that’ll actually hold their attention for more than seven minutes? We have the solution for that.
These five kids painting ideas 2026 tutorials were built for exactly that kind of day. Whether you’ve got a two-year-old who just wants to smash things into paint or a six-year-old who’s ready to follow actual steps, there’s something here that’ll work.
Every single project uses stuff you already have or can grab for a few dollars at the dollar store. We’re talking toilet paper rolls, kitchen forks, plastic soda bottles, and straws.
So pour yourself a coffee, lay out some newspaper, and let’s make something your kids will be proud to hang on the fridge.
5 Kids Painting Ideas for 2026: Easy Step-by-Step Tutorials
Project 1: The Squeegee Paint Pull Canvas
This build relies on precise material layout and a single, smooth mechanical motion — kind of like running a board through a planer, but way more colorful.
Materials List
- Blank stretched canvas (11×14 or 16×20 inches)
- Heavy-body acrylic paints (a mix of colors: blue, green, yellow, pink, white, whatever you’ve got)
Tools Needed
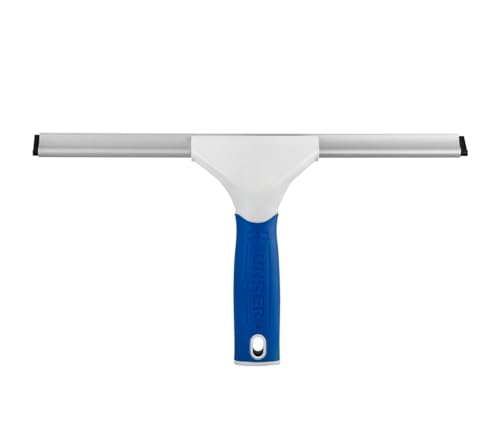
- A standard rubber window squeegee (wide enough to span your paint layout — ideally 10 to 12 inches)
Step-by-Step Instructions
- Prep the Surface: Lay your canvas flat on a protected surface.
- The Foundation Layout: Squeeze out generous, quarter-sized drops of paint in a horizontal row about three-quarters of the way up the canvas. Alternate your colors to build a skyline effect.
- The Field Layout: Below that main row, scatter smaller, pea-sized drops of paint randomly across the lower section.
- The Pull: Set the rubber edge of your squeegee flat against the canvas, just above the top row of paint drops.
- The Execution: Press down firmly and evenly, then pull the squeegee straight down the canvas in one smooth, continuous motion. The squeegee drags those top dots into long arching trails and smears the smaller scattered ones into streaks.
- Finishing: Lift the squeegee cleanly off the bottom edge. Let the canvas dry completely for 24 hours.
Eco Twist: Scrape the leftover paint off your squeegee onto a palette for your next project instead of washing it straight down the drain.
If you want to try the squeegee pull, these are the exact supplies I grabbed last week. This acrylic paint set has the best color variety, and using a real window squeegee makes the whole thing so satisfyingly smooth.


Project 2: Upcycled Sunflower Stamping
This is a great upcycling project where you’ll make your own custom stamps out of stuff you’d normally toss in the recycling bin.
Materials List
- Heavyweight craft paper or cardstock
- Yellow washable paint (for the petals)
- Brown washable paint (for the seeds)
- A small piece of bubble wrap
Tools Needed
- 2 empty cardboard toilet paper rolls
- 1 rubber band
- Scissors
- 2 flat paper plates (to use as paint palettes)
Tool Fabrication (The “Cut List”)
- Petal Stamp: Grab one toilet paper roll. Cut straight slits about 1.5 inches deep all the way around the rim, spacing them about 0.5 inches apart. Fold those little flaps outward to a 90-degree angle to make a sunburst shape.
- Center Stamp: Take your second toilet paper roll (or just a crumpled piece of scrap paper if you only have one left). Wrap the small piece of bubble wrap tightly over one end and hold it in place with the rubber band.
Step-by-Step Instructions
- Palette Prep: Pour a thin layer of yellow paint onto one paper plate and a thin layer of brown onto the other.
- Stamping the Petals: Dip the fanned-out cardboard flaps of your Petal Stamp into the yellow paint. Get all the flaps coated evenly.
- Transfer: Press the Petal Stamp firmly onto your craft paper, then lift straight up to reveal the yellow petal ring. Repeat across the paper to make more flowers.
- Stamping the Center: Dip the bubble wrap face of your Center Stamp into the brown paint.
- Transfer: Line up the Center Stamp right in the middle of your yellow petals. Press down gently so the bubbles leave a textured seed pattern, then lift straight up.
Eco Twist: Reusing cardboard tubes and bubble wrap is a great way to cut down on household waste. When you’re done, the cardboard stamp can go straight into the compost or recycling bin!
Project 3: The Upcycled Blossom Branch
This one is all about building your branch framework first, then using the bottom of a soda bottle as a built-in five-petal stamp. It’s a neat trick.
Materials List
- Heavyweight craft paper or poster board
- Brown acrylic or washable paint (for the branches)
- Light pink and dark pink paint (for the blossoms)
Tools Needed
- 1 large empty plastic bottle (like a 2-liter soda bottle) with a 5-lobed bottom
- 1 small empty plastic bottle (like a 16oz water bottle) with a 5-lobed bottom
- 1 medium paintbrush
- 2 shallow plastic lids or paper plates (palettes)
Step-by-Step Instructions
- Drafting the Framework: Using your paintbrush and brown paint, lay down the base of your tree. Paint thick, sweeping lines across the paper to look like wooden branches. Add smaller offshoots coming off the main lines. Let this layer dry completely before you move on — you don’t want muddy colors.
- Tool Prep: Pour a thin, even layer of light pink paint into one shallow lid and dark pink into the other.
- Loading the Stamp: Take your large plastic bottle. Dip the lobed bottom into the light pink paint palette. Get all five sections of the bottle bottom coated evenly.
- Stamping the Primary Blooms: Press the painted bottom of the large bottle firmly onto the paper, overlapping the brown branches. Apply even pressure so all five petals transfer cleanly, then lift straight up. Repeat this across the branches.
- Adding the Secondary Blooms: Switch to your smaller bottle. Dip it into the dark pink paint and stamp it into the open spaces around your primary blooms to add depth to the whole canopy.
Eco Twist: Rinse these plastic bottles out after you’re done and toss them in your local recycling bin.
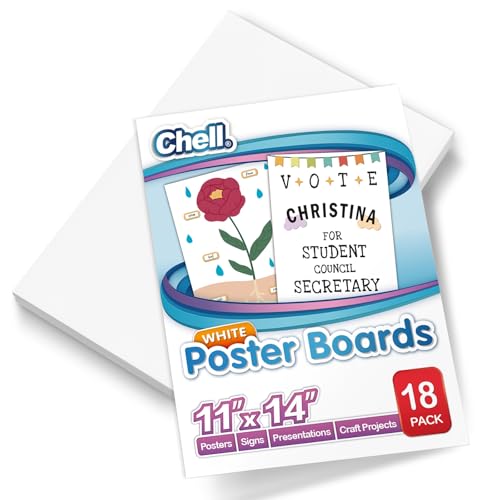
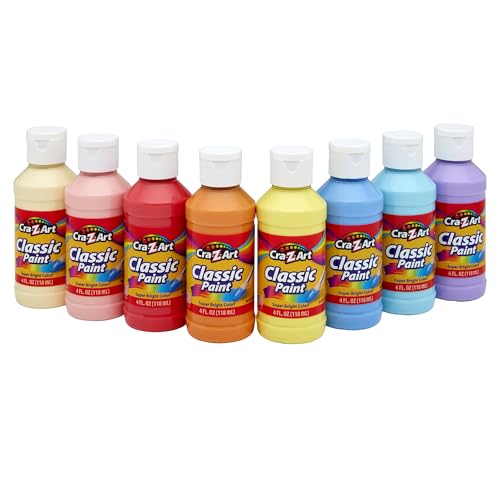
I swear by this heavyweight poster board so the wet paint doesn’t warp the page. Plus, these pastel colors look gorgeous and their washable formula saved my dining table from getting stained:
Project 4: The Tine-Stamped Tulip Garden
This project is about lining things up carefully and using the back of a regular kitchen fork to create that signature jagged, layered edge of a tulip head.
Materials List
- Heavyweight craft paper
- Green paint (for the stems and leaves)
- Red and yellow paint (for the flower heads)
Tools Needed
- A standard metal 4-tine kitchen fork
- 1 fine-tip paintbrush (for the stems)
- 1 flat plate (palette)
Step-by-Step Instructions
- Palette Prep: Squeeze out a small puddle of red paint and a small puddle of yellow paint side by side on your plate.
- Loading the Fork: Press the back of the tines (the rounded, convex side) flat into the red paint. Coat the entire back of the tines and the upper part of the base.
- Stamping the Flower Head: Hold the fork horizontally over your paper. Press the painted back firmly down onto the paper. Gently rock the fork from the base to the tips of the tines to make sure everything makes full contact and transfers cleanly. Then lift straight up.
- Alternating Colors: Wipe the fork clean, load it with yellow paint, and stamp it right next to your red bloom. Keep alternating colors across the page in a horizontal row.
- Building the Support Structure: Once your tulip heads are stamped, grab your fine-tip paintbrush and green paint. Start at the bottom of each stamped flower head and pull a straight vertical line down to the bottom of the page for the stem.
- Adding Leaves: Add two upward-sweeping brushstrokes on either side of each stem to mimic the long, blade-like leaves of a real tulip.
Eco Twist: Wash the fork thoroughly with soap and water and put it right back in the kitchen drawer. Zero waste!
Project 5: Splatter Monsters
This one uses a blowing technique to push watered-down paint across the paper. Your paint needs to be pretty thin for this to work — think the consistency of a wood stain or a light juice.
Materials List
- Heavyweight paper (watercolor paper or thick cardstock keeps it from warping)
- Liquid watercolors (or water-thinned washable paints in pink, purple, blue, green, orange)
- White scrap paper (for the eyes)
- Black fine-tip marker or pen (for pupils and legs)
- Glue stick
Tools Needed
- Standard drinking straws, cut in half (shorter straws give you better control and stronger air pressure)
- Eye dropper, pipette, or a small spoon
- Scissors
Step-by-Step Instructions
- Surface Prep and The Drop: Lay your heavy paper flat. Using a pipette or spoon, drop a nickel-sized puddle of your first color onto the upper section of the paper.
- The Blow: Take your half-straw and hold it about 1 to 2 inches above the puddle at a 45-degree angle. Blow a sharp, steady burst of air right into the center of the puddle to push the paint outward in every direction.
- Directional Routing: To get long, wild splatters, chase the wet edges of the paint with the straw and blow hard to push the paint further across the paper.
- Repeat and Dry: Repeat steps 1 through 3 with your other colors, spacing them out so your monsters don’t bleed together. Let everything dry completely.
- Making the Eyes: While the paint dries, cut small circles of various sizes from your white scrap paper. Draw pupils and eyelashes on them with your black marker.
- Final Assembly: Once the paint is dry, glue your eye circles onto the center blob of each splatter.
- Adding the Legs: Take your black marker and draw 2 to 4 long, skinny lines extending straight down from the bottom of each monster to the edge of the paper for their spindly little legs.
Eco Twist: Skip the single-use plastic straw. Use a reusable silicone or metal straw (just wash it well afterward) or grab a compostable paper straw instead.
And yep, this is where liquid watercolor beats regular paint: it spreads quickly and gives those monsters the wild splatter legs kids love. Here’s where I got it:
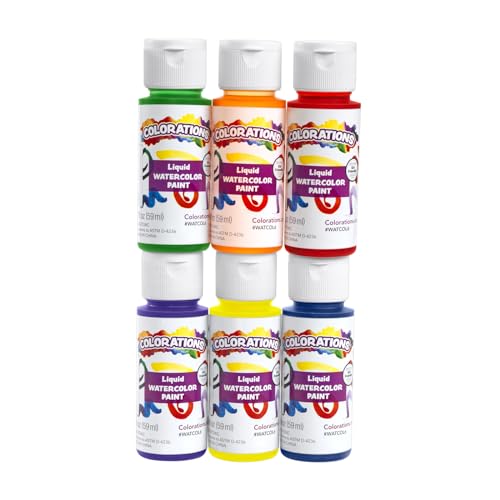
- RICH, VIBRANT WATERCOLOR. Set of 6 classic colors – red, yellow, blue, green, orange, purple – in a…
- VERSATILE WATERCOLOR PAINT. Use right out of the bottle for all kinds of art projects – tinting…

The messiest art afternoons are usually the most memorable ones.
Your kid is going to remember the Saturday you let them drag a squeegee through five colors of paint and acted like it was the coolest thing you’d ever seen.
These kids painting ideas 2026 tutorials will give your little ones a chance to make something with their own hands, see what they’re capable of, and feel proud of it.
Hang their art on the fridge. Frame it. Send a photo to grandma. Whatever you do, let your kid see you celebrate it. That’s the part they’ll carry with them.
Frequently Asked Questions
What are the best kids painting ideas for 2026 tutorials that work for toddlers? The squeegee pull canvas and the splatter monsters are your best bets for toddlers. Both involve big, satisfying physical motions with zero precision required. Just load up the paint, let them go, and the result looks great no matter what they do.
What kind of paint is safe for kids painting projects? Stick with washable acrylic or tempera paint for most of these projects. Washable formulas clean up easily from hands, clothes, and tables. For the splatter monsters, liquid watercolors or water-thinned washable paint works best since you need a thinner consistency to blow through the straw.
Do I need to buy special supplies for these kids painting ideas 2026 tutorials? Nope. Most of these projects use stuff you’ve already got at home. Toilet paper rolls, kitchen forks, soda bottles, and drinking straws do most of the heavy lifting here. You may need to pick up a canvas or some heavyweight paper, but that’s about it.
How do I keep painting projects from becoming a total disaster cleanup? Lay down newspaper or a dollar store plastic tablecloth before you start. Put paint on plates instead of letting kids squeeze directly from the bottle. Keep a damp rag nearby for quick wipe-ups. And honestly? Just accept that some paint is going somewhere it shouldn’t. That’s part of the deal.
How long do these kids painting ideas 2026 tutorials take from start to finish? The active crafting time for most of these runs about 20 to 30 minutes. Drying time is where it stretches out. The squeegee canvas needs a full 24 hours to cure. The splatter monsters need to dry completely before you add the eyes. Plan for the hands-on fun to happen in one sitting, then let everything dry overnight before you hang it up.
Quick Poll
What kind of kid projects should we make next?
Not in the choices? Tell us in the comments below!