


Last Updated: March 2026
At a Glance: Woodworking Projects For Kids
- The article highlights simple, beginner-friendly woodworking projects designed to help kids safely explore building, crafting, and hands-on creativity.
- Each project focuses on using basic tools, pre-cut wood, and minimal supervision, making them approachable for young makers.
- The list includes fun, practical builds, like birdhouses, toy cars, toolboxes, and small décor pieces, that teach foundational woodworking skills.
In this article:
Projects You Can Do with Preschoolers (Ages 3-5)
Projects You Can Do with Elementary Kids (Ages 6-9)
Projects You Can Do with Tweens (Ages 10-12)
FREE Woodworking Workshop Checklist
Safety First: The 5 Golden Rules of the Kid’s Workshop
Before grabbing the hammer, go over these five non-negotiable rules with your young woodworker to ensure a fun, injury-free crafting session.
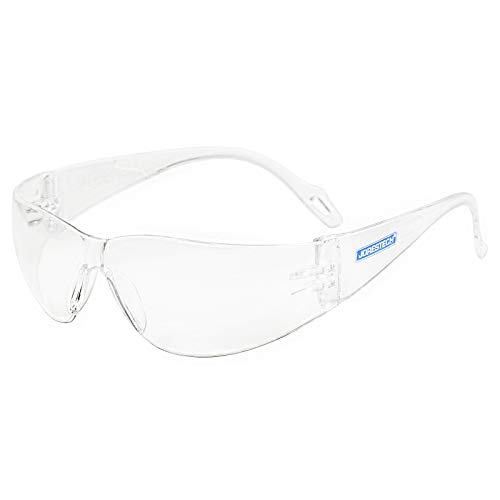
- Eye Protection is Mandatory: Even for simple gluing, wood splinters and dust happen. Every “mini-carpenter” needs a pair of snug-fitting safety goggles.
- The “Two-Hand” Rule: When using a tool, both hands should be accounted for. If one hand is hammering, the other should be nowhere near the nail (use a clothespin to hold the nail in place!).
- No Running in the “Zone”: Establish a 5-foot “Work Zone” around the bench. No siblings or pets allowed inside the zone while tools are in use.
- Respect the Sharp Edges: Teach kids that sandpaper is for smoothing, but wood corners can still be sharp. Always sand down the edges of a piece before assembly.
- Clean as You Go: A cluttered workspace is a dangerous one. Sawdust is slippery, and stray wood scraps are tripping hazards. Wipe the bench after every step.
New to woodworking projects? Our free Cut List Optimizer gives you a printable layout with accurate dimensions to avoid wasting a good sheet of plywood.
Easy Woodworking Projects for Kids to Make
Woodworking projects for kids are one of the best ways to spark creativity, build confidence, and introduce hands-on skills that last a lifetime. With simple tools, pre-cut wood pieces, and step-by-step guidance, children can safely create fun, functional projects while learning problem-solving, patience, and craftsmanship. Whether you’re a parent, teacher, or DIY enthusiast, these beginner-friendly woodworking ideas make it easy to help kids explore the joy of building, no advanced skills required.
Projects You Can Do with Preschoolers (Ages 3-5)
These projects focus on tactile creativity, such as gluing, painting, and simple assembly, while the adult handles all dangerous tool work.
1. Balsa Wood Fall Wind Chimes
This wood project is colorful and fun. Balsa wood is easy to manipulate, so your kids can have a great time playing with it.
I’m sure you’ll have tons of wind chimes around the house if you let them.
- Materials: 1/8″ Thick Balsa wood sheets, 1x 1/2″ Round dowel (12″), Acrylic paint (Fall colors), Fishing line or twine.
- Tools: Utility knife (Balsa is soft!), Small drill bit or hole punch.
- Steps:
- Shapes: Draw leaves or acorns on the Balsa wood and cut them out with the utility knife.
- Paint: Let the kids go wild with reds, oranges, and yellows.
- Stringing: Poke a small hole in the top of each shape. Tie varying lengths of fishing line to the shapes.
- The Hanger: Tie the other ends of the lines to the 1/2″ dowel, spacing them about 2″ apart. Add a loop to the top of the dowel to hang it outside.
- Eco Note: Balsa is highly renewable; use leftover scraps as garden markers!
2. DIY Wooden Robot Buddy
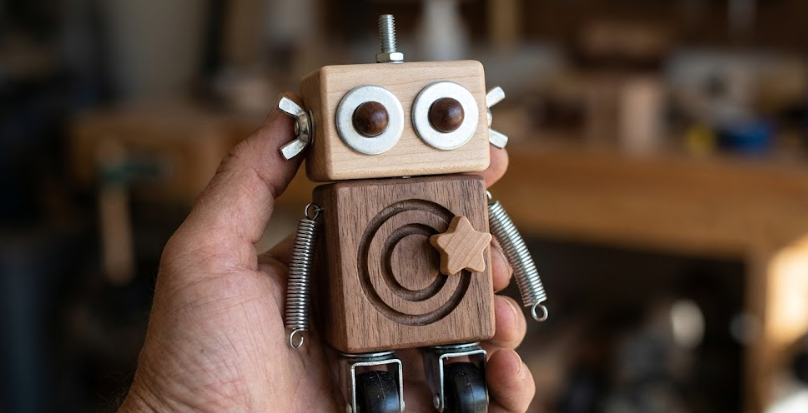
This DIY Woodworking Project for kids will prove that you can make robots out of anything. Have your kids get creative with wooden blocks of different sizes to make this DIY wooden robot buddy.
- Materials: Scraps of 2×4 (body), 1×1 (arms/legs), and 2×2 (head). Hardware like washers, wingnuts, and eye-bolts for “sensors.”
- Tools: Wood glue, Sandpaper, Drill (small bit for hardware).
- Steps:
- Prep: Sand all blocks so there are no splinters.
- Assembly: Use wood glue to attach the 2×2 head to the 2×4 body. Glue the 1×1 strips as arms and legs.
- The Details: (Kid job) Drill small pilot holes and let the kids screw in wingnuts for ears or washers for eyes.
- Eco Note: This is the ultimate “scrap bin” project. Zero waste!
3. Crayon Holder
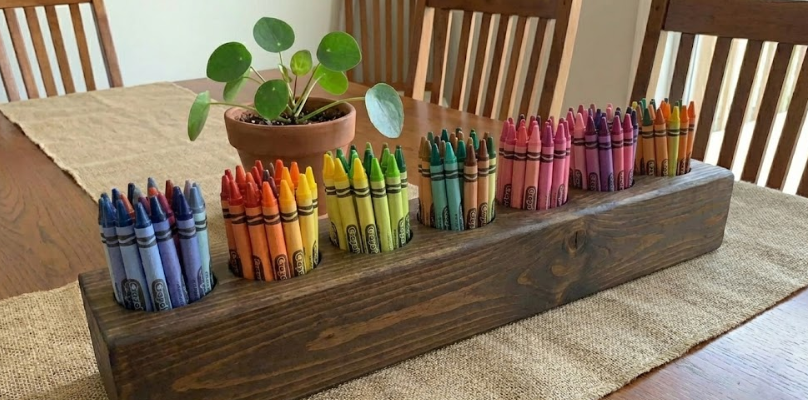
Kids will always have crayons lying around. This wooden crayon holder will make a neat solution! Help them with the drill, and it’s as good as done.
- Materials: 4×4 Scrap of wood (approx. 12″ long).
- Tools: Drill, 3/8″ Drill bit (standard crayon size), Sandpaper.
- Steps:
- Marking: Draw a line down the center of the 4×4. Mark dots every 1″ along that line.
- Drilling: (Adult job) Drill holes about 1.5″ deep at each mark.
- Finishing: (Kid job) Sand the holes and the block smooth. They can paint the top of each hole the color of the crayon that goes there!
4. DIY Wooden Texture Stamps
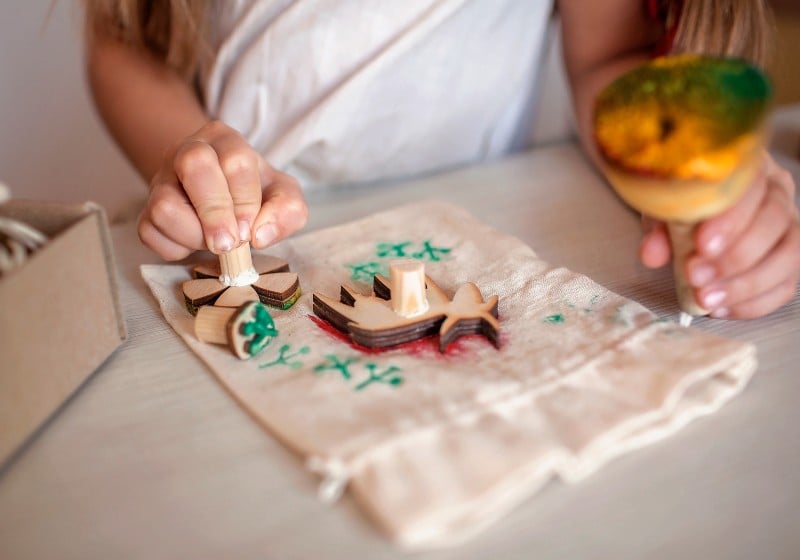
These DIY wooden texture stamps are so easy to make. It’s a craft project they’ll treasure for many art projects to come.
- Materials: 2×2 Wooden cubes (scraps), Craft foam, or Twine.
- Tools: Glue gun or Titebond glue.
- Steps:
- Prep: Ensure the faces of your 2×2 blocks are flat.
- Texture: Glue patterns onto the block faces. Use twine in a spiral, craft foam cut into stars, or even old rubber bands.
- Stamping: Once dry, dip the textured side in paint and stamp onto paper or fabric.
- Eco Note: Use leftover Balsa scraps from the wind chimes to make small handle grips!
Projects You Can Do with Elementary Kids (Ages 6-9)
These collaborative builds involve more complex assembly and introduce basic hand tools under close supervision.
5. Homemade Catapults for Kids
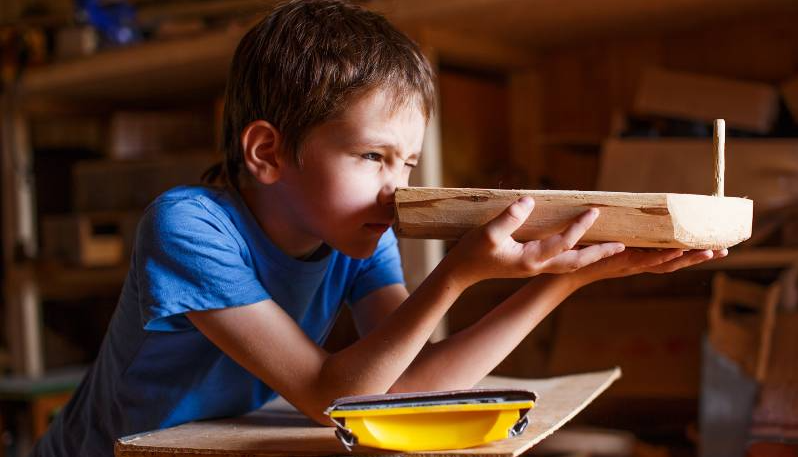
Dowels, rubber bands, a plastic cup, some small balls, and you’ve got yourself a DIY catapult. The process and aftermath will be awesome!
- Materials: 10x 3/8″ Wooden dowels (12″ long), heavy-duty rubber bands, 1x Plastic cup, Hot glue/Gorilla Glue, Ping pong balls.
- Tools: Small hand saw (or have Home Depot cut them), Glue gun.
- Steps:
- The Base: Glue three dowels into a triangle on the table.
- The Frame: Glue three more dowels to the corners of the base, meeting at the top to form a pyramid (tetrahedron).
- The Arm: Take one dowel and glue the plastic cup to one end.
- Tension: Use a rubber band to hinge the “arm” dowel to the bottom front of the base. Use another rubber band near the top of the pyramid to create the “snap” when pulled back.
6. DIY Nail String Art
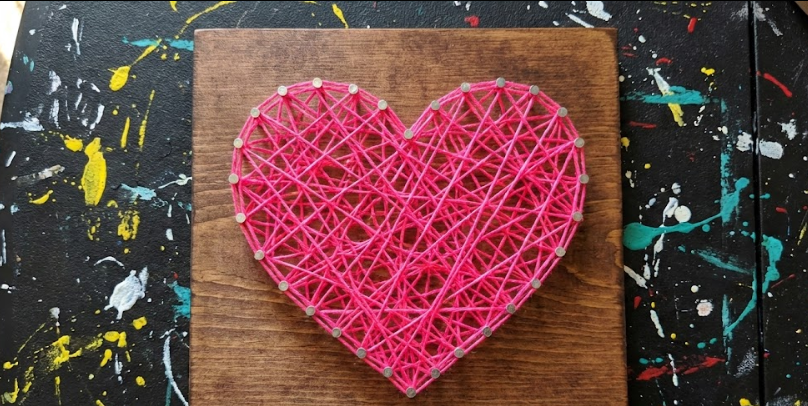
I won’t recommend your kid do the hammering, but you can have him help with the strings. It’ll be a fun time for the kids to get the strings done in this DIY nail string art.
- Materials: 1x 1×8 Pine board (cut to 8″ square), 1″ Finish nails (brass looks great), Colorful embroidery floss/string.
- Tools: Hammer, Sandpaper (220 grit), Printer (for template).
- Steps:
- Prep: Sand the pine block smooth. You can apply a quick low-VOC stain for a “Texas rustic” look.
- Template: Tape a paper shape (like a star or heart) to the center of the wood.
- The Nails: (Adult job) Space nails about 1/2″ apart along the outline of your shape. Hammer them in halfway so they are sturdy.
- The Art: (Kid job) Tie the string to one nail and weave it back and forth between the nails until the shape is filled.
7. DIY Wooden Toy Camera
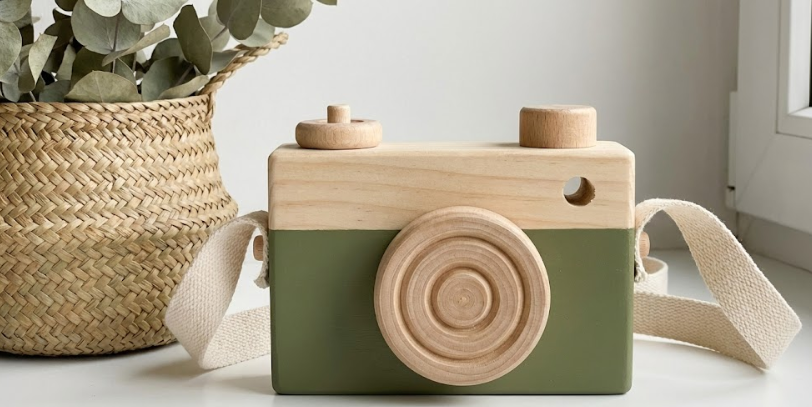
Kids love to take pictures and play with cameras, but you can’t just let them use the real ones. So keep yours safe by helping them make a DIY wooden toy camera.
- Materials: 1x 2×4 scrap (cut to 5″), 1x 2″ Diameter dowel scrap (for the lens), 1x Small wooden drawer knob (for the shutter), 1x Leather scrap or twine (for the strap).
- Tools: Drill with 1″ spade bit, Sandpaper, Glue.
- Steps:
- Body: Sand the 2×4 block until all edges are rounded and kid-safe.
- The Lens: Glue the 2″ dowel slice (about 1″ thick) to the front center of the block.
- The Shutter: Drill a small pilot hole on the top right and screw in the drawer knob.
- The Viewfinder: (Optional) Drill a hole straight through the block above the lens.
8. DIY Wood Frame
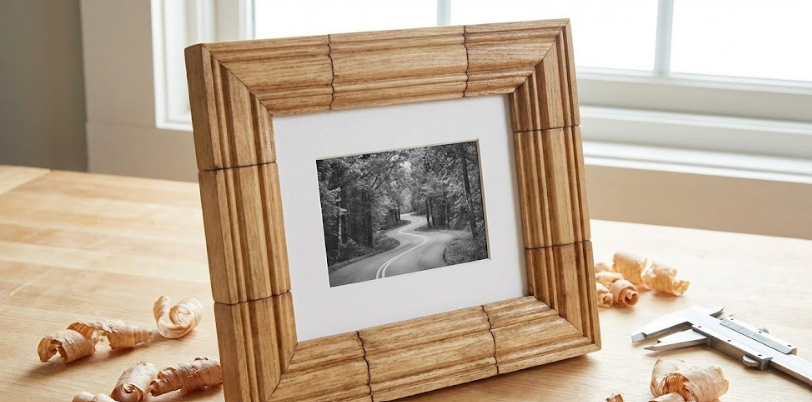
This DIY wood frame is a great holder for their artwork. Kids would surely want to display their handiwork as soon as done.
- Materials: 1×2 Pine strips, 1/4″ Plywood scrap (backing), Wood glue, 4x Mini clothespins.
- Tools: Hand saw, Miter box (for 45-degree corners), Clamps.
- Steps:
- Measure: Cut four pieces of 1×2 to frame an 8×10 drawing.
- The Joint: Use the miter box for 45-degree corners (or just butt joints for simplicity).
- Assembly: Glue the corners and clamp them.
- The Clip: Once dry, glue mini clothespins to the top of the frame so kids can swap their art in and out easily.
9. Minimal X-Shaped Coasters
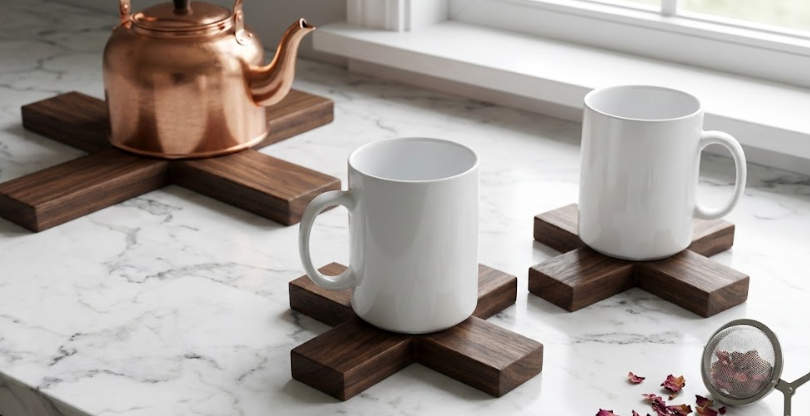
X marks the spot! This DIY woodworking project for kids maybe something for the kitchen, but I’m sure they’ll love the craft project.
These minimal X-shaped coasters are very easy to make and quite useful too.
- Materials: 1/2″ Square wooden dowels (poplar or oak).
- Tools: Hand saw, Wood glue, Small file or sandpaper.
- Steps:
- Cut: For each coaster, cut two 4″ lengths of the square dowel.
- The Notch: (The “Half-Lap”) Use a file or saw to cut a notch halfway through the middle of each piece so they “lock” together.
- Assembly: Apply a drop of glue in the notch and press them together into an ‘X’ shape.
Projects You Can Do with Tweens (Ages 10-12)
These “apprentice” style projects are more involved and allow older children to participate in measuring and precision assembly.
10. DIY Board Game Mounted Storage
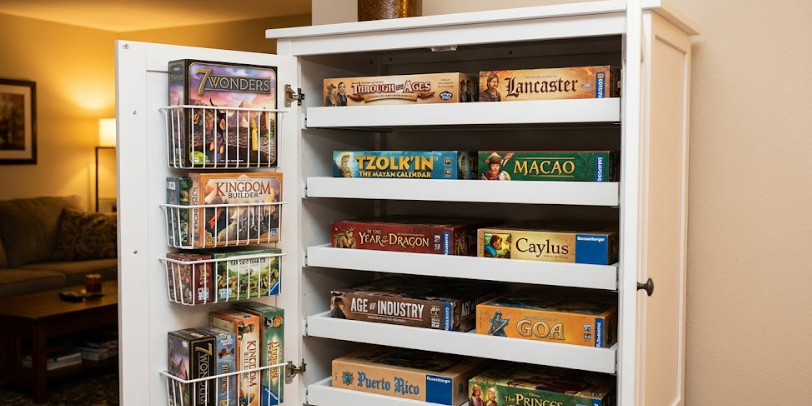
Organize your board games and make them a craft decor with this DIY board game-mounted storage. No nails are required, just some wood panels and gorilla glue.
- Materials: 1/4″ Plywood (for backing), 1×2 Pine strips (for the “lips”), Gorilla Glue Construction Adhesive.
- Tools: Measuring tape, Hand saw or Miter saw, Clamps.
- Steps:
- Measure: Measure the length and depth of your board game box.
- The “L” Shelf: Cut one piece of 1×2 to the length of the box. This is your “shelf.”
- The Retainer: Cut another piece to act as a front lip so the box doesn’t slide off.
- Assembly: Glue the lip to the shelf to create a “J” or “L” shape. Once dry, glue the back of the shelf directly to your mounting board or wall (if using wall-safe adhesive).
11. DIY Angry Birds Birdhouse
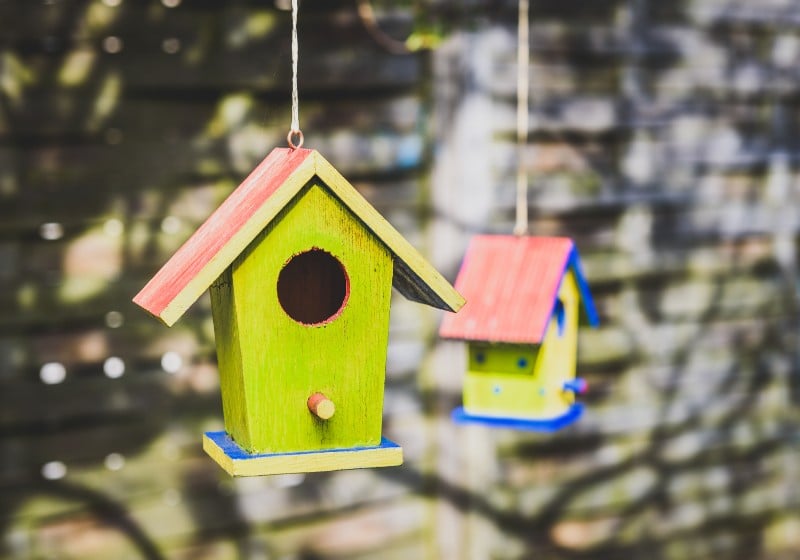
Who doesn’t know this popular game? This angry birds project has some easy-to-do paint jobs your little one will enjoy. The birds won’t get angry when you build them this DIY birdhouse.
- Materials: 1×6 Cedar fence picket (naturally rot-resistant!), Titebond Original Wood Glue, 1″ finish nails, Exterior acrylic paint (Red, Yellow, Black, White).
- Tools: Miter saw or hand saw, Drill with 1.5″ hole saw bit, Hammer, Paintbrushes.
- Steps:
- The Box: Cut the picket into six pieces: Bottom (5″), Back (8″), Front (8″), Sides (2 @ 7″), and Roof (6″).
- The Entry: Drill a 1.5″ hole in the upper center of the Front piece.
- Assembly: Glue and nail the sides to the base, then attach the front and back. Nail the roof on last.
- The Character: (Kid job) Paint the front face like a Red or Chuck “Angry Bird” using the entrance hole as the “open mouth.”
Looking for more projects for kids? Here’s another: Washi Tape Ideas | 9 Creative Ways To Use Washi Tape
Save This Checklist!
Workshop Prep Checklist
📌 BOOKMARK OR SCREENSHOT THIS LIST
🛡️ Safety Gear
- ✅ ANSI Z87+ Safety Glasses (Kid-Sized)
- ✅ Noise Reduction Ear Muffs
⚒️ Essential Toolkit
- ✅ Small Lightweight Hammer
- ✅ 220 Grit Sandpaper
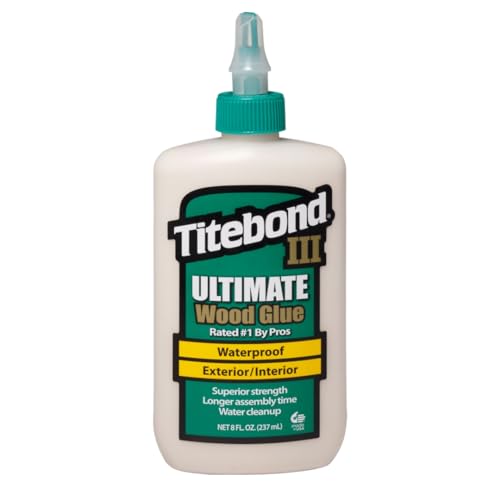
- ✅ Titebond Wood Glue
- ✅ Quick-Release Clamps
- ✅ Hand Saw or Miter Box
- ✅ Drill with 1″ Spade Bit
🪵 Material Bin
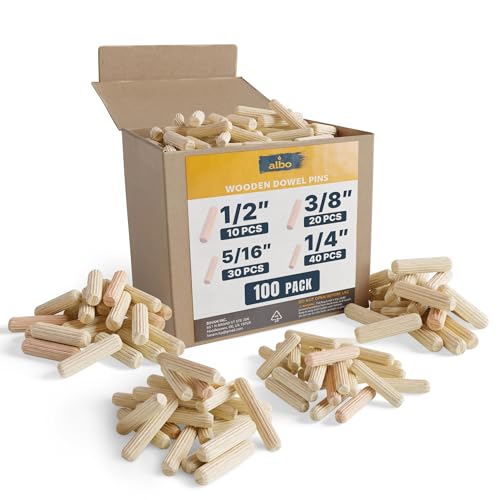
- ✅ Wooden Dowels (3/8″ & 1/2″)
- ✅ Scrap Wood (2x4s and 1×2 strips)
- ✅ 1/8″ Balsa Wood Sheets
- ✅ Hardware (Washers, Wingnuts, Clothespins)
Let me show you some of the materials I got last week:


Inspire Creativity Through Woodworking
Introducing kids to woodworking doesn’t just teach them how to build; it teaches them how to think, create, and explore new possibilities with their hands. These simple, engaging projects encourage independence, boost fine-motor skills, and turn everyday blocks of wood into something they’ll be proud to display or use.
Ready to Start Building?
Choose a project, gather a few tools, and make woodworking a fun learning activity your kids will look forward to. Browse more kid-friendly DIY ideas, try new builds, and help your young makers discover the excitement of creating something all on their own.
FAQ
1. Are woodworking projects safe for kids?
Yes, when supervised and using age-appropriate tools. Many beginner projects use pre-cut wood and simple hand tools to ensure safety.
2. What tools do kids need to start woodworking?
Basic tools like sandpaper, a small hammer, wood glue, clamps, and sometimes a hand saw are usually enough for most starter projects.
3. What are the easiest woodworking projects for kids?
Simple builds like bird feeders, pencil holders, toy cars, picture frames, and small boxes are perfect for beginners.
4. What skills do kids learn from woodworking?
Woodworking helps build hand-eye coordination, fine motor skills, problem-solving, creativity, and patience.
5. Do woodworking projects require expensive materials?
Not at all. Most kids’ woodworking projects use affordable scrap wood, craft wood, or pre-cut pieces available at any hardware or craft store.
Need one more woodworking project for kids? See how you can make a candlestick from Steve Ramsey:
Let’s build something together! Join the community on YouTube, Instagram, Pinterest, and Facebook.
QUICK POLL: Is keeping every one of your kid’s woodworking projects a sweet sentimental gesture, or just total hoarder energy?
Tell us the truth below: Is their latest ‘masterpiece’ displayed on your mantle, or is it already buried at the bottom of the scrap bin? Defend your take in the comments.


Leave a Comment