

Toilet paper roll crafts are included in trending things you can look into doing during the quarantine period. With the high demand for toilet paper the past few months, it is normal to be stuck at home with a bunch of toilet paper cores.
Don’t throw those cores away and create some fun crafts with toilet paper rolls. In this article, we show you how to create a fun unicorn puppet that your kids can play with for hours on end!
RELATED: 15 Fun & Easy Toilet Paper Roll Craft & Projects For Kids
Toilet Paper Roll Crafts: How to Make a Unicorn Puppet!
What You Will Need:
- 2 core rolls of toilet paper
- 2 popsicle sticks
- Yarn
- Some colored paper
- Black or colored markers
- Tape
- Ruler
- A pair of scissors
- Glue
- Hole punch
- Beads or pasta sticks
- Additional decorations, like glitter, stickers, etcetera (this is optional!)
Step 1: Create Your Control
Before we go to the actual puppet making, we need to create the control first. Grab one popsicle stick and place a dot of glue on the center.
Grab your remaining popsicle stick and line it perpendicular to the first stick and press it in the middle. You should be left with an X, that will be where your puppet will hang onto and where you’ll get to control it.
Set aside to let dry completely.
Step 2: Let’s Go to the Body!
Now we go to the toilet paper roll crafts! Grab your two toilet paper rolls and cut one of them in half using your scissors.
Get your colored paper and measure the width of your short toilet paper roll, the one that you just cut in half. Once measured, cut the paper and glue it around your toilet paper roll.
Do the same thing for full-sized toilet paper roll. After you’re done, you should have with you two colored toilet paper rolls, one in full size, and another in half-size.
Step 3: Cut Your Yarn or String
Set your now colored toilet paper rolls aside and grab your yarn and ruler. Cut two pieces of strings that are the same length as your ruler.
Then, cut another piece of string that’s about forty inches long. So in total, you should now have three pieces of strings, two of them are 12 inches long, and one is 40 inches.
Step 4: Punch Some Holes!
Get your full-size tissue paper roll and punch six holes using your puncher. You’re going to punch two sets of parallel holes for your unicorn’s legs, and one set of parallel holes on top.
You can refer to the video above for this step if you’re confused, but you should have six holes in total for the unicorn puppet’s body.
Step 5: Punch Some More Holes!
Grab your shorter tissue paper roll and punch two holes towards one side. The two holes should be aligned and you should be able to see through them.
This will be your unicorn’s head and the two holes you’ve just punched is where your long string will pass through, connecting the head to the body and to your control popsicle sticks from earlier.
RELATED: How to Make DIY Tissue Paper Pom Poms
Step 6: Pull Your Strings Through
Grab one of your 12-inch strings and pull it through two holes of your unicorn’s body. At this point, you can determine how long you want your unicorn’s legs to be and cut according to your preference.
Do the same thing to the remaining 12-inch string and pull it through the other two holes that are parallel to the one you just pulled through. Make sure that both strings are leveled as you don’t want your unicorn to have uneven legs!
Step 7: Add Your Beads
When you have your strings pulled through, you’re going to want to add your beads on each end of your strings. You can use pasta for this one as well because it’s more elongated and resembles a leg better than a stack of beads.
Knot each end a few times so that your beads or your pasta will not slip through.
Step 8: Connect the Head and Body
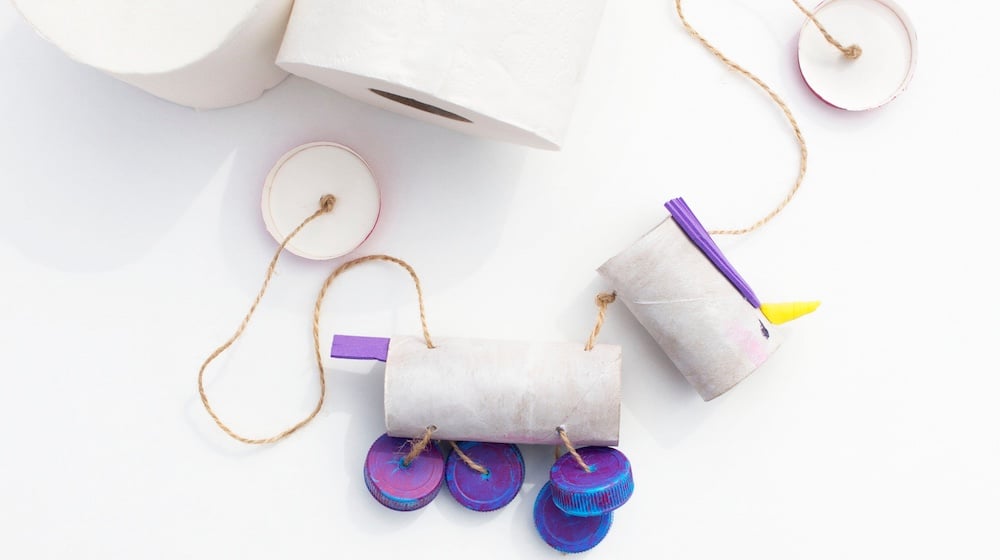
Grab your 40-inch string and pull them through the remaining holes on your unicorn’s body. This is done to connect your unicorn’s body parts together!
Connect the string through the holes of the shorter toilet paper roll and you should have the semblance of your unicorn puppet at this point. Because you want this project to be fun for yourself and your kids, you can put beads in between the body and the head of your unicorn.
The beads will act as your unicorn’s neck and will make a more distinct separation between the body and neck. You can also simply knot your string between to act as a stopper between the head and the body.
This step allows you to be more creative with your approach so it’s a great opportunity to have your child think of fun ways to incorporate his or her unicorn neck.
Stick your long string to your X popsicle sticks from earlier.
Step 9: Finishing Touches!
It is now time to put on your unicorn’s face, horn, hair, and tail! Grab your yarn and cut off multiple strings of the same length.
Bunch these strings together and glue them on your unicorn’s head and body for its hair and tail. Cut out a triangular piece of paper and stick it onto the head for your unicorn’s horn.
You can choose to glue on squiggly eyes or simply draw on the eyes and the mouth of your toilet paper roll crafts.
This step is really up to you and your child’s imagination. They can decorate their unicorn however they want and add their favorite stickers, or draw on clothes–whatever they want!
Watch the full tutorial video on how to create your own tissue roll unicorn marionette by Wonderspark Puppets below:
Creating toilet paper roll crafts with your kids not only enhances their creativity, but it helps save the environment too with the use of recycled materials.
So the next time you finish a roll of tissue paper, think twice before throwing it in the trash!
What did you think of our fun unicorn marionette toilet paper roll crafts idea? Tell us in the comments section below!
UP NEXT:
- DIY Projects And Creative Crafts To Keep You And Your Kids Busy At Home
- 60+ DIY Kids Crafts You Can Make In Under An Hour
- How To Repair Leaky Single And Double Handle Faucet Cartridges
Calling all crafting DIYhards, DIY Projects needs YOU! Click here if you want to contribute for us.
Don’t forget to stay connected with us on Facebook, Twitter, and Instagram!


