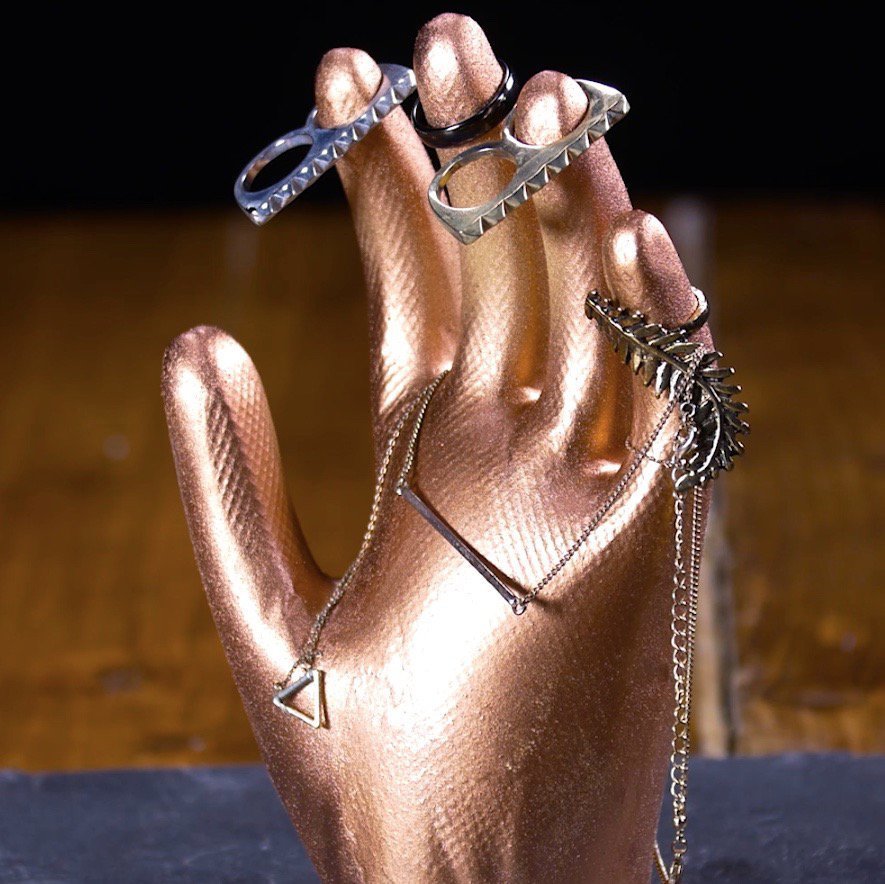

Does your old jewelry box need an upgrade? Give your bedroom a touch of whimsy with this adorable DIY ring holder. Using a rubber glove and some plaster, you can keep your rings and necklaces organized – and who doesn’t love a jewelry DIY? Check out the steps below to make your own!
Make Your Very Own Ring Holder
If you’re looking for a ring holder that is both practical and fun, look no further! This jewelry DIY is super easy to make, and it’s also a great solution to keeping your rings and necklaces from getting lost or tangled. Check out the step-by-step tutorial below, and let us know your own jewelry DIY ideas in the comments below!
Ready to make your own ring holder?
Ring Holder Supplies:
- plaster & water (2:1 ratio)
- bucket
- rubber glove
- plastic pitcher
- cardboard square
- sharpie
- scissors
- hot glue
- bronze spray paint
How to Make Your Ring Holder:
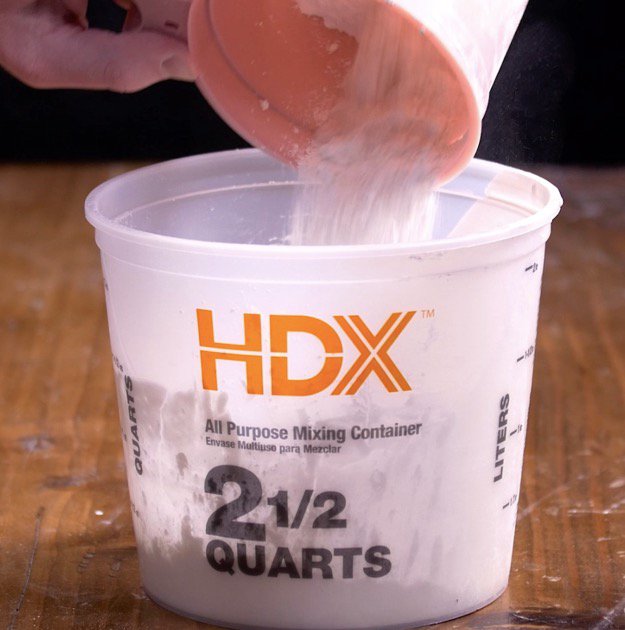
Step 1: Pour plaster into a small bucket.
Use as much plaster as you need to fill up the rubber glove(s).
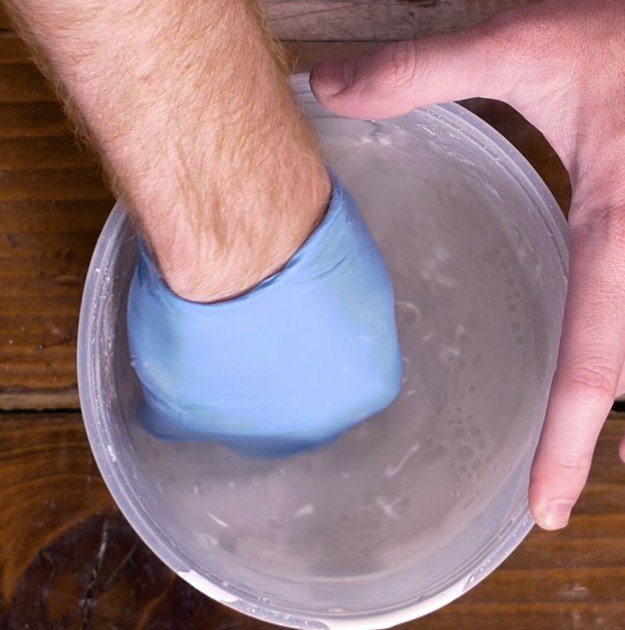
Step 2: Add water, then mix thoroughly with your hands. The ratio is 2 parts plaster 1 part water. Combine the mixture with gloved hands and a mixer.
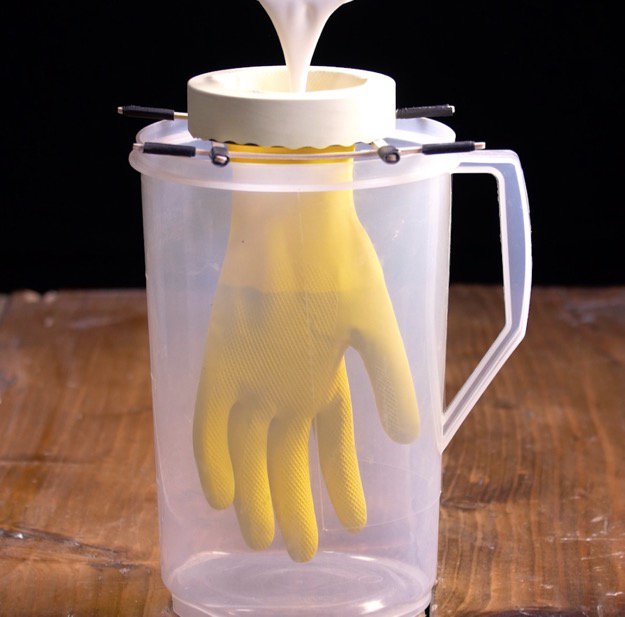
Step 3: Position your glove over a pitcher. When it’s secure, lowly pour the plaster into the glove.
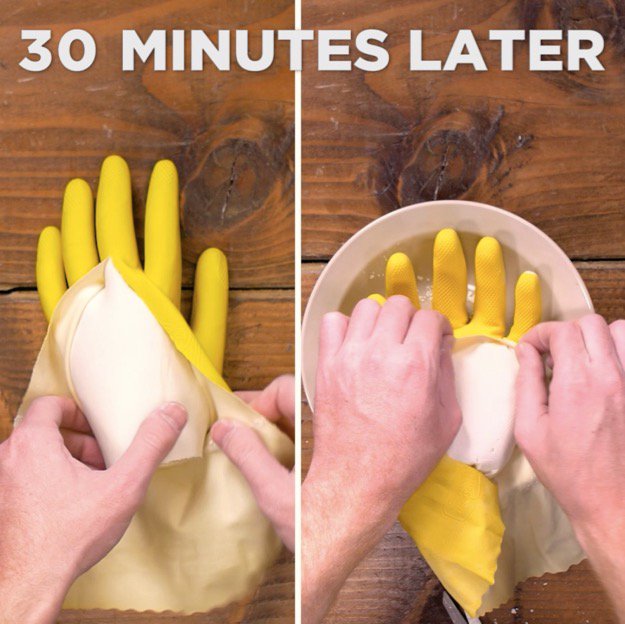
Step 4: Let it sit for 30 minutes. Carefully cut the glove open.
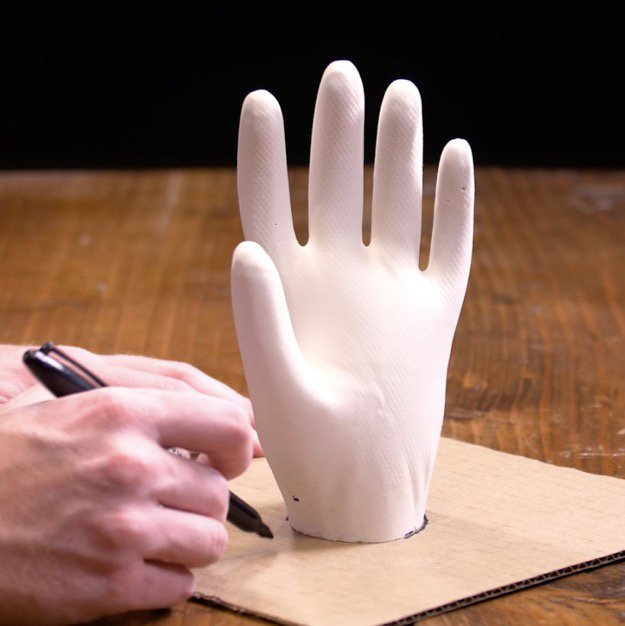
Step 5: Trace the base of the hand onto a sheet of cardboard.
Cut out the circle and set it aside.
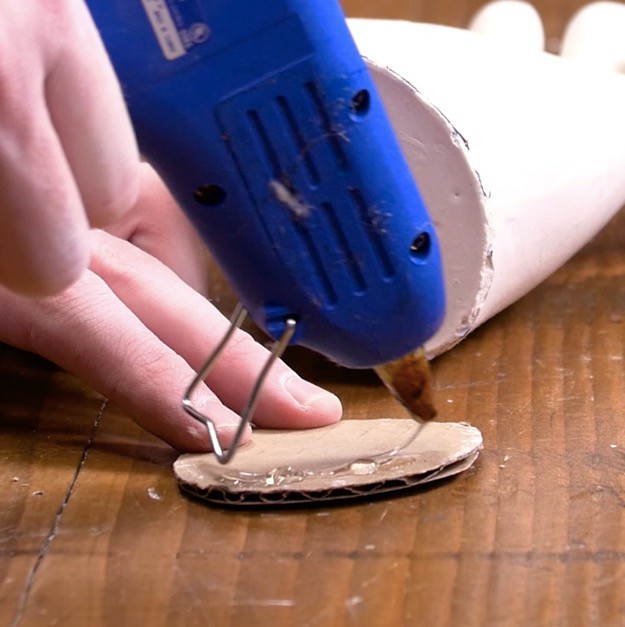
Step 6: Add hot glue.
Use a hot glue gun to add glue all over one side of the cardboard cut out.
Step 7: Glue the circle to the base of the hand, then spray paint. Spray several light coats so you can an even look.

Check out the full tutorial in the video below:For more DIY and craft news, follow us on Facebook, Twitter, Pinterest and Instagram!![]()
LIKE this? I’m sure you’ll LOVE:
DIY Jewelry Ombre Paint Chip Chevron Necklace How to Build a Jewelry Box | DIY Cardboard Jewelry Box
 Cheap DIY Jewelry Projects for Girls