
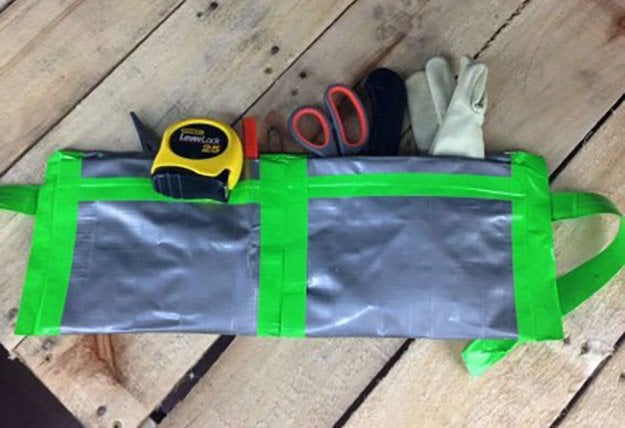

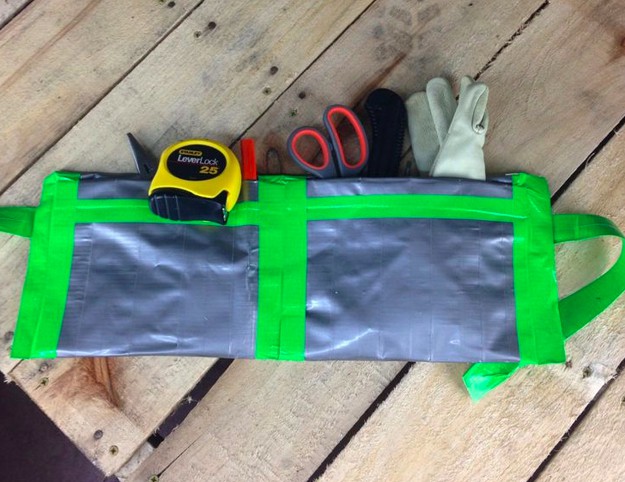
A duct tape toolbelt is a great project for DIY enthusiasts and also makes a great gift. This toolbelt is waterproof and spill proof, great for just about anyone. You can make them in the colors of your choice and add extra trim to accent, if you like. This project takes under an hour to make, and the finished product is super cool and practical.
Tools and supplies you need to make a duct tape tool belt:
- Exacto or Utility knife
- Cutting mat or clean nonstick surface
- Ruler
- One or more rolls of Duct Tape in the color(s) of your choice
Step 1: Make duct tape sheets
Create two duct tape fabric sheets that measure 9 x 18 inches. Also create a belt strip that measures 15 inches longer than your waist. If you are going to use more than one color for your toolbelt, be sure to use an accent color for the belt. You need an additional 2 3: strips the same color as the belt strip. These will be the buckle.
I like to use a large mat with a grid that makes measuring easy, and I lay out the cut strips of duct tape before I make the duct tape fabric sheet.
This video we made shows you exactly how to make a duct tape sheet:


Step 2: Fold sheet, tape and make pocket
Take one of your sheets and fold it at 8 inches, back to the center of the sheet. Now, from the top of the part you folded over, fold another inch back over. Close the pocket with a piece of duct tape that is cut in half. Here, I am using green tape as an accent color, but you can choose the color of the pocket or any other color of you choice.


Step 3: Repeat for second pocket
Repeat this step with the other 9×18 piece to make a second pocket.

Step 4: Tape pockets together
Lay the pockets side by side and tape them together, on front and on back. I am using the green accent color again, but you can choose your own. Reinforce the fold across the front with one long piece of tape.


Step 5: Tape sides and back
Fold the remaining 3″ piece at the top of the toolbelt back so that it is folded in half. You should have 1 1.2″ folded over the back.


Step 6: Make belt for toolbelt
Take your two three inch strips, and wrap them around the belt strip, close to one end. You want them to have just enough room to allow the belt to go through. Set them 1/2 inch apart. Secure them to the belt with a small strip of duct tape. Tuck the belt under the fold on your toolbelt abd secure it in place with one long piece of tape.

Step 7: Run the loops through and wear
Your belt is ready to wear. Run the belt through the two loops and back through one to secure it.


