


Fresh out of DIY gift ideas? You’ve come to the right place! This handmade wire ornament is ridiculously easy to make, and it’s totally budget friendly. You can make a ton of these in no time at all – plus, who doesn’t love a DIY Christmas decoration? Hang a few of these from your tree this Christmas, or wrap them up and give them away to friends and family.
Make Your Own Handmade Wire Ornament
We never get tired of DIY holiday decor, and this handmade ornament is no exception! This dollar craft is perfect for DIYers on a budget – and all you need are a few nails and some copper wire. With Christmas just around the corner, it’s the perfect time to add a bit of homemade charm to your tree. Best of all, this ornament is a fantastic addition to your list of DIY gift ideas! In just a few simple steps, you can transform a string of copper wire into a beautiful handmade gift.
In addition, if you’re looking to expand your reach – learn to sell these crafts and other homemade projects on Etsy!
What you’ll need:
- small wooden board
- 5 nails
- hammer
- copper wire, about 9 feet long
- wire cutter
How to make the ornament:
Step 1: Assemble the framework.
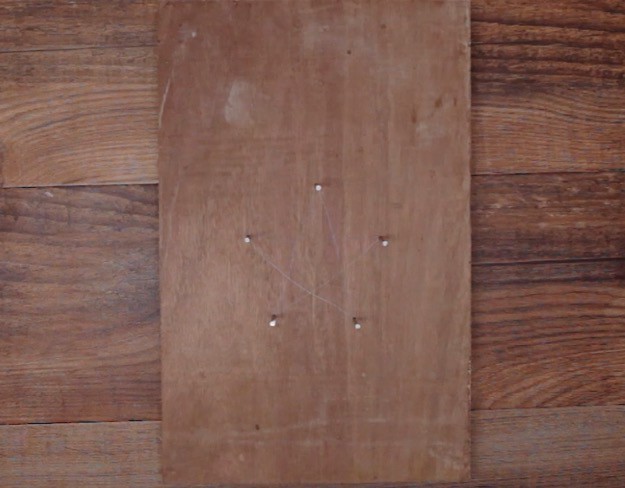
Draw a star outline onto a small wooden board, then hammer a nail into each point of the star.
This copper wire is perfect for DIYers on a budget – click HERE to get your own!
Step 2: Wrap wire into a star shape.
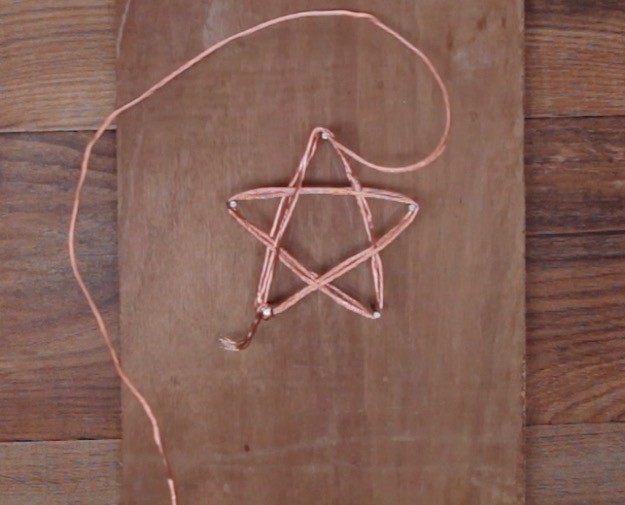
Begin drawing a star pattern with the wire, hooking it around each point of the star. Keep the wire fairly taut, but you don’t necessarily want to create sharp angles at each nail. The looser your wire, the softer the star will look.
Repeat until you have about 2 feet of wire left. We wrapped ours about 5 times, but yours will vary based on the size of the star that you drew for the template.
Step 3: Loop your wire under the star.
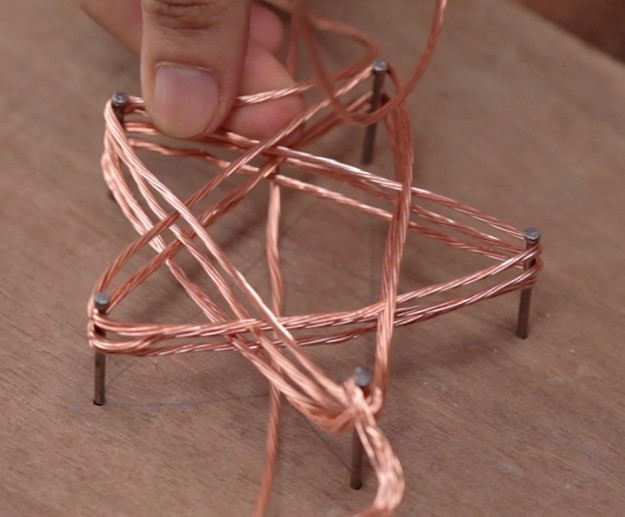
For this step and the next, you’re going to wrap the remaining wire around the inside angles of the star. This will keep it from unravelling when pull it off the template. (You’re basically wrapping up all of the wire into a neat package.)
Step 4: Continue until you’ve made a small star shape.
Keep wrapping your wire around each inside angle. Continue until you’ve formed a small star shape (you should have about 4 inches of wire left).
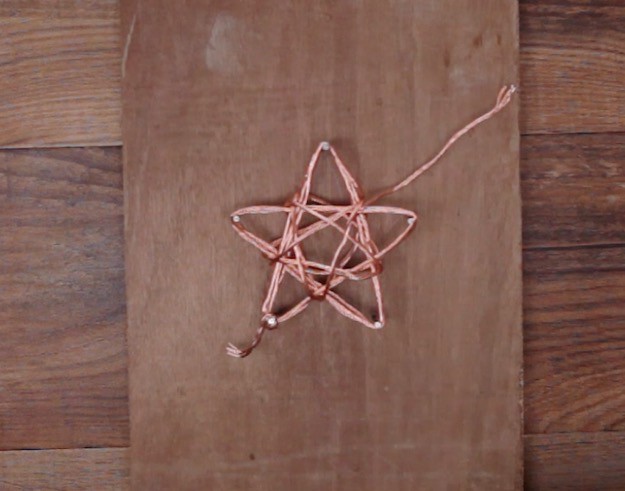
Step 5: Cut the excess wire.
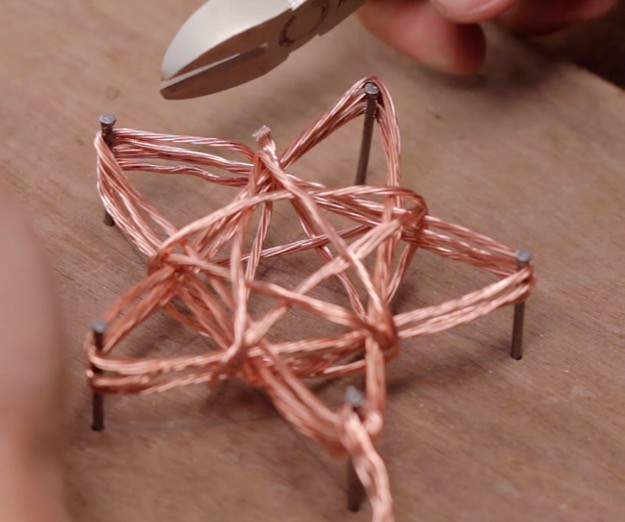
Use a wire cutter to snip off the remaining wire, but don’t throw it away! You’ll need it for the next step.
Step 6: Make a hook.

Carefully remove your ornament from the nail frame. Wrap the small remaining piece of wire around the top of your ornament, then bend it into a hook. Hang it on your Christmas tree, or wrap it up for a fun festive gift!
Check out the full tutorial in the video below:
Do you have any DIY gift ideas of your own? We’d love to hear about them! Leave a comment and let us know!
And if you need more DIY gifts to add to your craft list, check out these 25 DIY gifts you can make in under an hour.
![]()
Stay connected with me on Facebook, Twitter, Pinterest and Instagram!


