
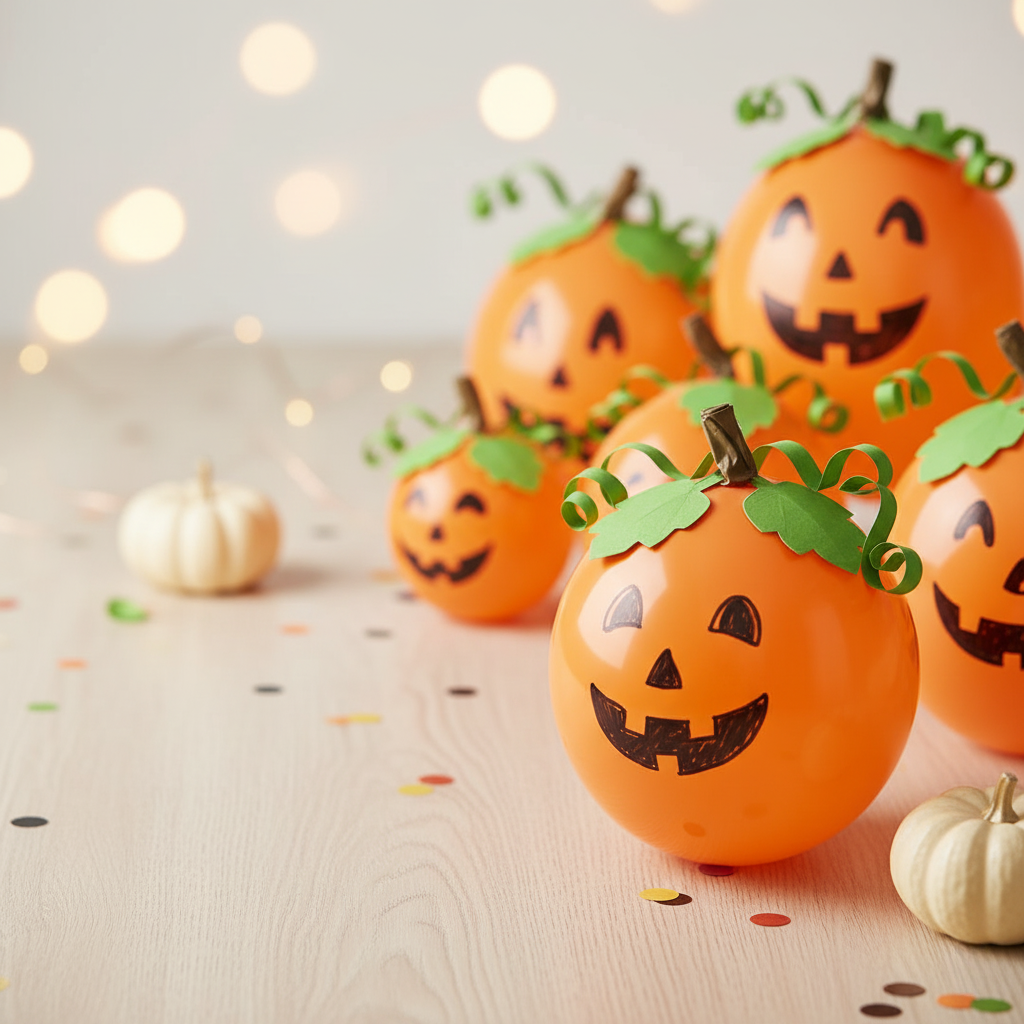

With this Halloween DIY, you can turn a bag of balloons into an instant pumpkin patch. They’re fun to make and even more fun to pop – plus, their little jack-o-lantern faces are just so ridiculously cute.
RELATED: 25 Yummy Treats Made From Leftover Halloween Candy
Grow Your Own Pumpkin Patch With This Halloween DIY!
Simple and Fun Halloween Decorations Ideas
Get into the spirit of fall with this super cute Halloween DIY! In just a few steps, you can make an instant pumpkin patch without having to leave your house. Simply blow up a few orange balloons, add candy (the best part), then draw on a spooky face!
When you’re ready for candy, just pop the balloons and fill up your treat bag. Try this fun project at your next Halloween party or make some with your kids as a fun weekend project!
What You’ll Need For This DIY Halloween Treat:
- Orange balloons
- Candies, individually wrapped
- Green paper
- Black Sharpie
- Empty plastic water bottle
- Hand balloon pump
- Box cutter
- Scissors
Step 1: Fill Your Balloon With Candy
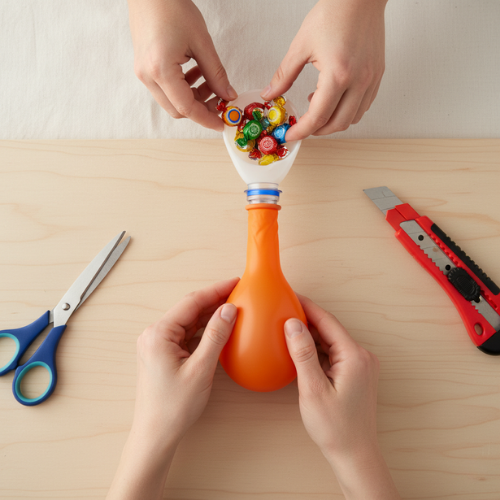
Grab your empty plastic bottle and use your box cutter to cut the top portion of the container. This will be used to stuff the balloon with candies before inflating.
Tip: Use a larger plastic bottle with a wider mouth for stuffing larger candies.
Step 2: Inflate the Balloon
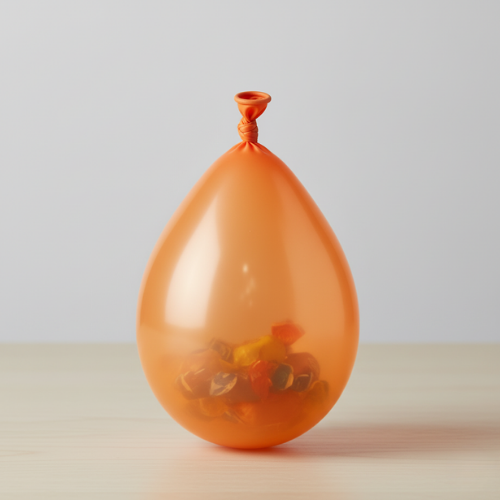
With the candies inside, use the hand pump to blow up the balloon. Tie a knot when you reach the desired size of the balloon.
Step 3: Add Some Greenery
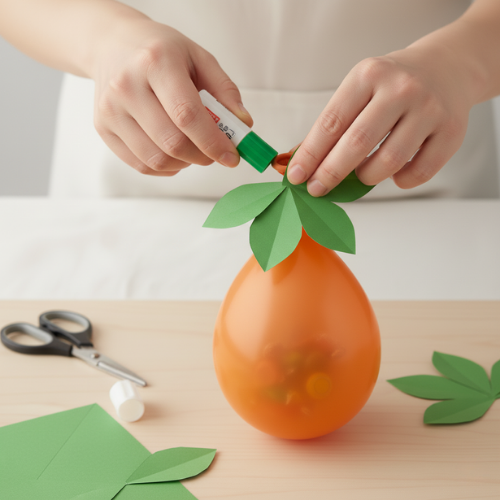
Create the fringe around the balloon pumpkin by using the green paper that you have.
Start with a square piece of paper. Fold it in half, then in quarters. Fold the edge of the square to meet the other edge to create a triangle.
Now, use your scissors to cut the folded paper. Try to make a petal shape, then open it up. It should have a flower pattern when unfolded. Glue it around the top of the balloon to represent the stem and vines.
RELATED: DIY Halloween S’mores Bar Food Idea For An Indoor Party
Step 4: Give Your Pumpkin a Face
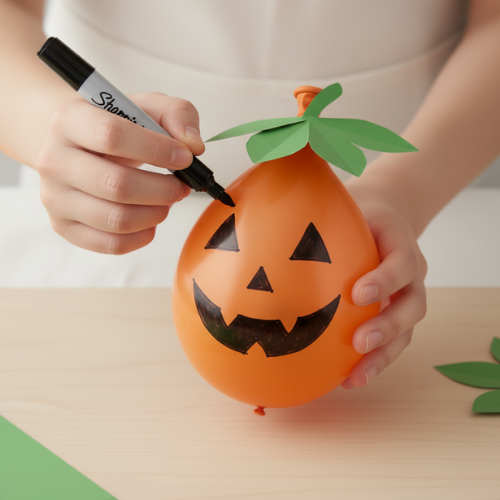
Draw your favorite jack-o-lantern faces onto the balloons using your black Sharpie. Start off by creating the eyes by drawing an outline, next will be the nose, and then the eyes. Shade it off after.
This can be a fun activity to do with your kids to boost their creativity.
Note: With the candy in the balloon, the balloon should be able to stand on its own without a problem.
Step 5: Repeat!
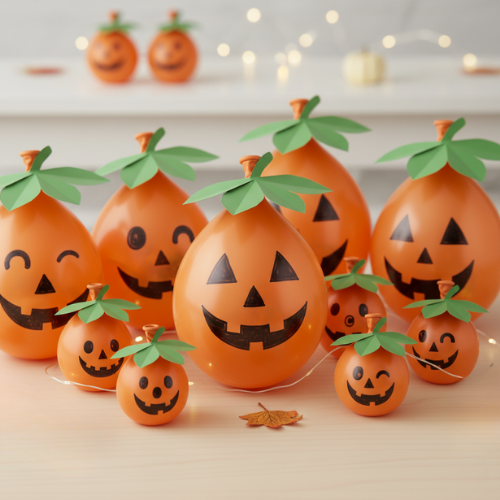
Give your pumpkin some friends until you have a whole pumpkin patch. You can create different sizes for different treats if you like.
Step 6: Candy Time
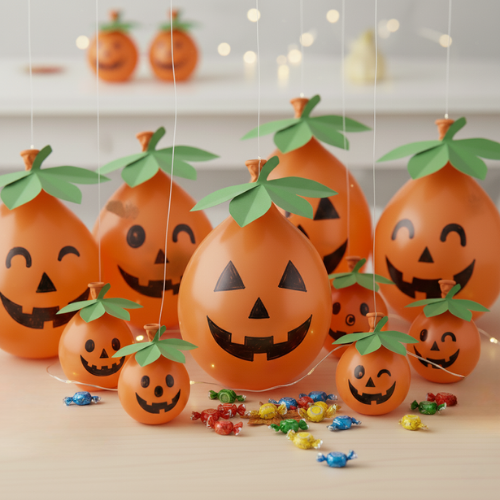
Try out one balloon before using it at a party. Raise it on top of a table, then pop it with a pin.
When you’re ready for candy, just pop the balloons and fill up your treat bag. Try this fun project at your next Halloween party or make some with your kids as a fun weekend project!
Do you have any other Halloween DIY ideas? We’d love to hear about them! Leave a comment and let us know!
Up Next:
- Easy Pumpkin Crafts To Welcome Fall With
- DIY Halloween Makeup | 25 Cool Looks For Scares Or For Laughs
- The Best Ladder for Home Improvement Projects: Why You Need It
Calling all crafting DIYhards, DIY Projects needs YOU! Click here if you want to write for us.
Don’t forget to stay connected with us on Facebook, Twitter, and Instagram.Editor’s Note: This post was originally published on October 13, 2016, and has been updated for quality and relevancy.


