

I have here one cool mermaid tail crochet pattern you can’t resist. Keep reading and be inspired to crochet one for yourself (and your kids too).
RELATED: 17 Amazing Crochet Patterns For Beginners
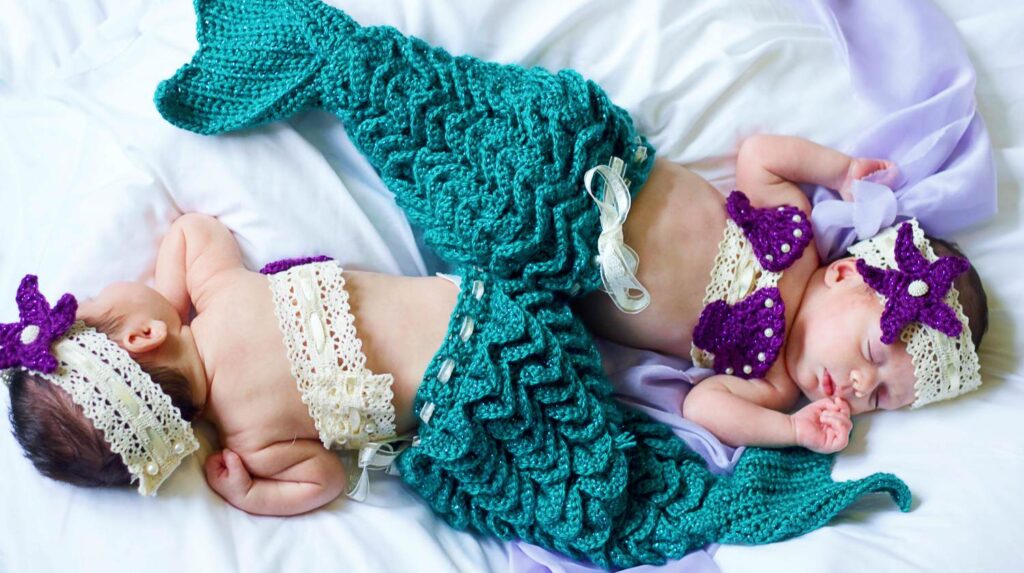
Mermaid Tail Crochet Pattern for You and Your Girls
Crochet Mermaid Blanket Pattern
have been the craze among girls lately! And because it’s winter, this will be the perfect time to make one and give them as gifts to your sister or niece or friends!
I’ve been wanting this stunning blanket and I finally made one for myself and my daughters. It’s perfect for girls who want to feel like a mermaid princess while snuggling up on the couch or bed.
Be what they call a ‘couch mermaid’ with this comfy blanket! So, hop on the wagon and mermaid tail pattern free tutorial!
Things You Will Need for Mermaid Tail Crochet Pattern Blanket:
- Yarn: 600 grams (near 800 yards) of chunky/bulky yarn (number 5)
- Hook: 10 mm hook (US: N-P or number 15)
- Pair of scissors
- Yarn needle
Let’s get started!
Making The First Round
Step 1: Make The Base
Starting with a slip knot, make 15 chains that will serve as a base for your blanket. Simply add fewer or more chains if you want the base to be smaller or bigger.
Step 2: Add Three Extra Chains
After making a base of 15 chains, add 3 extra chains.
Step 3: Make a Double Crochet Stitch
On the 4th chain (right after the 3rd extra chain) from the hook, make 1 double crochet stitch. Continue until you get to the other side.
Step 4: Make Four Double Crochet Stitches
Make 4 double crochet stitches when you reach the last chain. This will allow you to move or turn to the other side.
Step 5: Create a Mirror Crochet
When you’re on the other side of the base look for the available stitch, then make 1 double crochet stitch. Continue on each available chains until you finished crocheting the same pattern called the mirror crochet.
Mirror crochet is also called reverse single crochet.
Step 6: Make Two Double Crochet Stitches
When you turn around the other side of the base, you will see the 3 chains and the first double crochet you made at the beginning. So, on that corner, you just need to add 1 double crochet stitch to make it 2.
Step 7: Add Two Double Crochet Stitches
After the 2 double crochet stitches you did from the previous step, you add another 2 double crochet stitches to make it 4. You’ll have 4 double crochet stitches on each side of the corner.
Step 8. Closing the First Round
To close the first round, you look for the 3rd chain you did earlier, and make 1 stitch to close.
Making the Second Round
Step 9: Make The V-Stitch
Start making 3 chains. On the 1st stitch available, make 1 double crochet stitch. Then, skip 1 stitch and make 2 double crochet stitches (2 double crochet stitches in the same stitch will create a ‘V’ shape and you will call that the V-stitch).
Continue doing V-stitch the whole round.
Step 10: Closing The Second Round
Closing the second round, search for the 3rd chain you did in the last step. Then, make a slip stitch to close.
Making the Third Round
Step 11: Work in the Holes of The V-stitches
Start with 3 chains and work in the holes of the V-stitch. First, make 1 double crochet stitch on the first ‘V’, then look for the second ‘V’ or the second hole, and make another V-stitch (2 double crochet stitches in the same hole).
Continue doing the same pattern until you get to the corner.
Step 12: Add One Double Crochet Stitch in All Odd Rounds
For this round (round 3) and odd rounds you’re going to work on later, you will need to add or increase 1 double crochet stitch on each corner (left and right corner). So, to make the increase on the corners you will make 3 double crochet stitches in the next hole of the V-stitch instead of 2 (later, on your 4th round you’ll see 2 holes available).
Now, continue doing the regular 2 double crochets stitches and when you get to the next corner, you will make another 3 double crochet stitches.
Step 13: Closing the Third Round
To close this round, look for the 3 chains you did and make a slip stitch to close.
Making Rounds 4-11
Step 14: No Increase to All Even Rounds
For the 4th round (and even rounds that you will work on later) you don’t need the increase or the additional 1 double crochet, just make 1 V-stitch on each available holes. Now, start with crocheting 3 chains and 1 double crochet stitch in the first hole.
Then, in each hole, you make the regular V-stitch (2 double crochet stitches on each hole). When you reach the corner, you’ll notice 2 holes available.
Choose the 2nd hole and make 2 double crochet stitches.
Step 15: Continue Crocheting The Same Pattern
Continue the same pattern while you’re growing the mermaid tail blanket until you get to round 11. Remember, alternate even rounds with no increase and odd rounds with the increase.
RELATED: How To Crochet Stitches | Crocheting For Beginners
Making Rounds 12-20
Step 16: No Increase For Odd and Even Rounds
From round 12, keep crocheting until you get to round 20. But, this time you don’t need an increase to odd rounds unlike what you did in the 4th-11th round.
After the round 20, you start crocheting the opening of your blanket. The opening will help you wear the mermaid tail blanket easier, but if you prefer not to add an opening, just keep crocheting in a circle as you have done so far.
Step 17: Closing Round Twenty
To close round 20, you make 1 last chain and cut the yarn.
Step 18: Opening of the Blanket
Starting from the back part, look for the center stitch (V-stitch) of the blanket. Then, insert the hook, bring back the yarn, and you’re ready for the next round.
Making the 21st Round
Step 19: Make Three Chains
Start by making 3 chains and work 1 double crochet stitch on the same hole where the chain came out. After you did the first V-stitch, continue crocheting each available V-stitches.
Step 20: Do Not Close Round Twenty One
When you get to the other side, do not close the round, just leave it open. Now, make 3 chains after the last V-stitch.
Step 21: Crocheting the Upper Body of the Blanket
Make 2 double crochet stitches on the first hole (V-stitch) available and continue doing the same pattern as you grow the upper body of your blanket (according to your desired size).
Step 22: Crochet The Tail Part
For the tail, you use a separate ball of yarn. Make 15 chains, and that will be the center of your tail.
Step 23: Make Three Additional Chains
After the 15 chains, you add 3 more extra chains.
Step 24. Make One Double Crochet Stitch After The Third Extra Chain
Make 1 double crochet stitch in the 4th chain from the hook. Continue doing 1 double crochet stitch in each chain until you get to the other side.
Now, you’ll have 14 double crochet stitches plus the 3 extra chains.
Step 25: Work in The Center of The Pattern
On this step, you make another 3 chains and turn your work to the other side. You will not work on the upper part of the stitches, instead, you will work in the center.
Step 26: Make Back Post Double Crochet Stitch
Here, you will make a stitch called the back post double crochet stitch. Look for the center of the pattern you need to start with.
Now, ready your hook, and yarn over. Insert the hook at the back of the stitch and make a regular double crochet stitch.
Then, make another back post double crochet stitch in the same stitch for the increase.
Step 27: Crochet the Same Pattern for the Second Row
Continue doing 1 back post double crochet stitch on each stitch available (no need to make the increase). When you’re almost done with the 2nd row, you will see the 3 chains available you did in the beginning.
Here, you will make 1 last back post double crochet stitch.
Step 28: Back Post-Double Crochet Stitch Increase at the End of the Third Row
For the 3rd row, make 3 chains, and here you will make the back post double crochet stitch increase at the end of the row. Remember, no increase at the beginning because you will only do that on the same side so the tail for your mermaid blanket pattern will start growing.
Now, make 1 back post double crochet stitch in every stitch until you get to the end of the row. Before you finished the last double crochet stitch, you will make the 1 back post double crochet stitch increase.
Step 29: Half of the Tail
Now, you see the 3 chains available you made from the previous row, and here you will make 1 back post double crochet stitch. Repeat the same pattern you did on the 2nd and 3rd row until you get to row 15.
Now you just made the half of the tail, then, make another piece of the tail. Just follow the steps you did earlier. When you have both pieces you will join them together for the last step.
Step 30. Join The Half of The Tail Pieces Together
Now that you have both pieces for the half of the tail, it’s time to join them together. First, insert the hook on both pieces, chain 1 (make sure to insert the hook on the same chain) and join them using single crochet.
Step 31: Join The Tail To The Blanket
Now, sew the tail to the rest of the blanket to join them together.
Viola! You’re done…
|You can also watch the full tutorial from crochet lovers on how to crochet your mermaid tail blanket below:
Crocheting the mermaid tail blanket is not as hard as you think it is. Give it a try and you’ll have fun.
Let’s keep winter fun, warm, and cozy with this mermaid tail blanket. And again, you can also make one as a gift to your friends and family for Christmas.
Share this stockinette stitch tutorial and have fun!
What other colors of yarn do you think will look great for your mermaid tail blanket? Let me know in the comments section below!
UP NEXT:
- 17 Awesome Crochet Blanket Ideas You Can Easily DIY
- How To Crochet A Hat | Crochet For Beginners
- How To Make A DIY Mason Jar Chandelier
![]() Stay connected with me on Facebook, Twitter, and Instagram!Editor’s Note: This post was originally published in January 2017 updated for quality and relevancy.
Stay connected with me on Facebook, Twitter, and Instagram!Editor’s Note: This post was originally published in January 2017 updated for quality and relevancy.


