


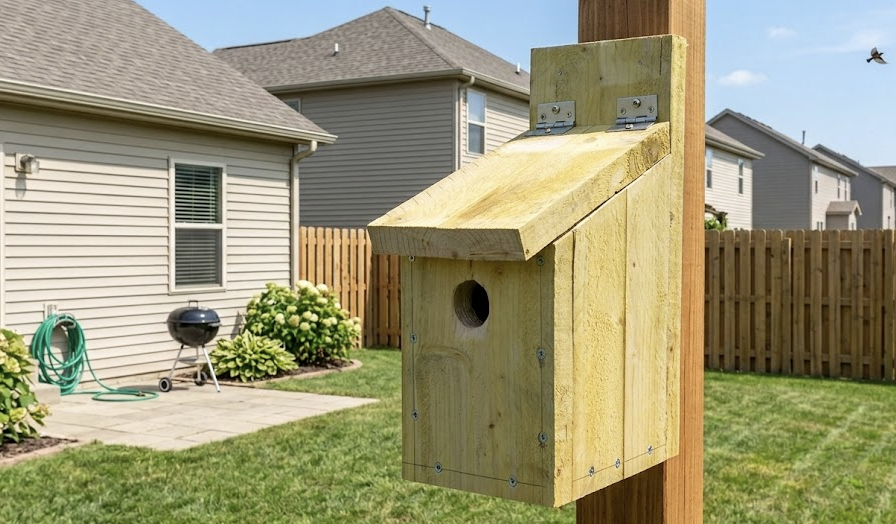

Banish Screen Time: The Ultimate Parent-Kid Weekend Build
Are you struggling with the ultimate modern parenting pain point: endless screen time and a constant digital disconnect? Getting kids away from their tablets and engaged in the real world is harder than ever, often leading to boredom and a lack of practical life skills.
This classic birdhouse project is the perfect antidote. Building this together offers a hands-on, highly engaging weekend activity that bridges the generational gap. For kids, it’s a brilliant, stealthy way to learn practical math, spatial reasoning, and tool safety. The ultimate benefit? It provides an incredible, tangible sense of accomplishment and fosters a deep, lifelong connection to nature when they finally get to watch native birds raise a family in a home they built with their own hands.
To ensure professional, zero-guesswork results, we will be referencing the blown-up diagrams and precise layouts. Let’s get building!
The Classic Slanted-Roof Birdhouse
- Skill Level: Beginner
- Time Commitment: 2 Hours
- Estimated Cost: $15 – $25
- Best Wood Choice: 1×8 Cedar or Redwood (approx. 2.0 cm actual thickness). Natural cedar is weather-resistant and requires no toxic chemical seals.
Optimized perfectly for small native cavity-nesting songbirds (like wrens, chickadees, or bluebirds), this classic blueprint features an integrated front overhang to shed rain, built-in floor ventilation, an optional predator guard to keep hatchlings safe, and a back-mounted hanging bracket.
Materials & Tools List
- Lumber: 1 board of 1×8 Cedar or Redwood (minimum 150 cm length)
- Fasteners: 35mm (1.5″) exterior-grade wood screws or galvanized casing nails
- Adhesives: Waterproof, non-toxic exterior wood glue
- Tools: Miter saw or handsaw, drill/driver, 5mm bit (for drainage holes), spade bit or hole saw (28mm to 32mm matching target species), tape measure, and 120-grit sandpaper
Builder’s Supply Note: I get my wood screws from this place:
- LIONMAX Wood Screws 1-1/2 Inch, Deck Screws #8 x 1-1/2″, 100 PCS, Rust Resistant, Epoxy Coated…
- SUPERIOR EXTERIOR COATING: Tan coated exterior deck screws 1-1/2 inch through 1500 hours salt spray…
- STAR/TORX DRIVE: Star/Torx drive deck screws with 6 contact points prevent stripping, save drive…
Precise Cut List
| Part # | Component | Qty | Width | Length / Height | Special Instructions |
| 1 | Mounting Bracket | 1 | 5.0 cm | 40.0 to 60.0 cm | Optional. Pre-drill mounting holes 5 cm from top and bottom. |
| 2 | Side Walls | 2 | 17.0 cm | 28.0 cm / 24.0 cm | Cut top edge at a straight angle matching the roof slope. |
| 3 | Back Wall | 1 | 17.0 cm | 28.5 cm | Bevel top edge at an angle to fit flush under the sloped roof. |
| 4 | Front Wall | 1 | 13.0 cm | 25.0 cm | Drill entry hole centered horizontally, exactly 19 cm up from bottom. |
| 5 | Roof | 1 | 20.0 cm | 23.0 cm | Provides a defensive weather overhang on front and sides. |
| 6 | Floor | 1 | 13.0 cm | 13.0 cm | Pre-drill four 5mm drainage holes in the corners. |
| 7 | Predator Guard | 1 | 13.0 cm | 8.0 cm | Optional block. Match entry hole alignment precisely. |
Step-by-Step Assembly Guide
- Marking & Slope Cutting: Lay out your lumber flat. Mark rectangles for Parts 1, 3, 4, 5, 6, and 7. For the two Side Walls (Part 2), mark 28 cm on one edge and 24 cm on the parallel edge. Connect the points with a straight line and execute the cut to create identical angled profiles. Bevel the top of the Back Wall (Part 3) to match this angle.
- Entry & Drainage Prep: Take the Front Wall (Part 4) and mark a center point 19 cm up from the bottom edge. Drill through using your hole saw bit. If installing the optional Predator Guard (Part 7), clamp it tightly over the front wall and drill through both simultaneously for seamless alignment. Drill four 5mm holes into the Floor (Part 6) corners.
- Forming the Core U-Shape: Stand the two Side Walls (Part 2) up against the edges of the Back Wall (Part 3). Apply exterior wood glue along the joints and fasten using screws driven through the back panel into the rear edge of the side walls.
- Inserting the Floor & Front: Slide the Floor (Part 6) into place at the bottom of the assembly. Fasten it securely through the sides and back. Next, place the Front Wall (Part 4) between the side walls. Leave two screws at the top of the front wall un-tightened to serve as a pivoting door for easy annual nest cleaning.
- Roof and Bracket Mount: Position the Roof (Part 5) over the top, aligning it flush against the back wall so it extends over the front entry. Secure with screws down into the walls. Finally, center and screw the Mounting Bracket (Part 1) vertically onto the back wall face.
Eco Twist: Minimize waste by laying out all your cuts tightly on your single 1×8 board before sawing. Since you’re using cedar, skip the paint or stain and leave it raw! Low-VOC or no finishes protect the nesting birds and maximize sustainability in your backyard ecosystem.
FAQs
I want the inside to last longer. Should I seal the interior walls?
No, you should never treat, paint, or seal the inside of a birdhouse. Nestlings need the rough, natural texture of the raw wood (especially the interior of the front wall) to grip onto when it’s time for them to climb up to the hole and fledge. Sealing it makes the walls too slippery, which can trap the babies inside.
How do I ensure the roof angle sheds water perfectly? The key is in the Side Walls (Part 2). By marking one edge at 28.0 cm and the opposite edge at 24.0 cm, you create a precise slope. When you secure the 20.0 cm by 23.0 cm Roof (Part 5) on top, it will naturally slope forward. Make sure the back of the roof is completely flush with the Back Wall (Part 3) so water doesn’t seep down the mounting bracket, and let the excess roof length hang over the front entrance like an awning.
Can I use plywood instead of Cedar or Redwood?
While you can use exterior-grade plywood (minimum 3/4″ thick), it is not ideal for this specific project. Plywood edges are prone to delaminating over time when exposed to rain, even with good overhangs. If you must use plywood, ensure you seal the exposed, cut edges with a non-toxic, waterproof wood glue or outdoor edge-banding before assembly, but solid cedar remains the gold standard for longevity.









