


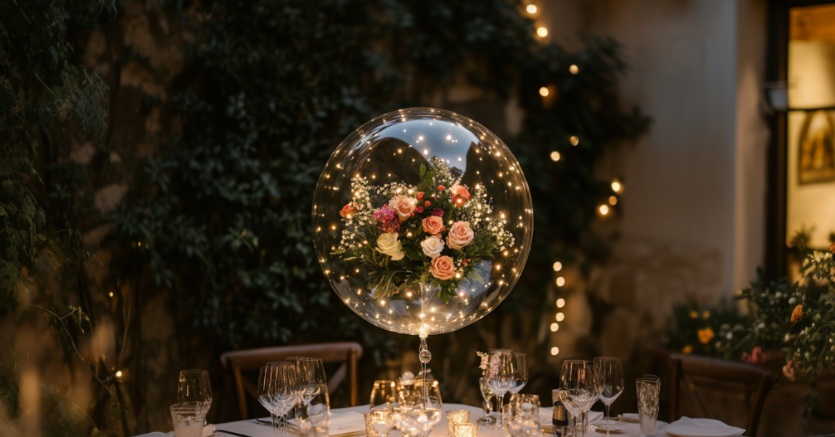
Imagine walking into a room and seeing a stunning bouquet seemingly floating inside a bubble—it’s like stepping into a fairy tale. Whether it’s a wedding, birthday, or any celebration, these whimsical decorations add an elegant surprise. The best part? They’re a joy to create! With a sprinkle of patience and a dash of creativity, you’ll craft a breathtaking centerpiece that will have everyone talking. Moreover, if you’re curious about how to create these magical decorations, let’s dive into making your own DIY stuffed bubble balloons and discover how to transform any event into something extraordinary.
Why Choose DIY Stuffed Bubble Balloons?
Before diving into the creation process, let’s explore why DIY stuffed bubble balloons are a fantastic choice for your event décor. Not only do they add a unique, eye-catching element to any space, but they are also customizable to match your theme. Additionally, these balloons offer versatility and style if you’re looking to impress guests at a wedding or create a fun atmosphere at a birthday party. Furthermore, creating them yourself allows you to add a personal touch that store-bought decorations simply can’t replicate.
Creating Your Own Stuffed Bubble Balloon
So, are you ready to create something truly special? If so, you’re about to embark on a delightful journey of crafting that will surely make your event unforgettable.
Materials You’ll Need
Before you begin, make sure to gather the following materials to ensure you have everything you need for this project:
- 24-inch Bobo balloon
- Electric balloon inflator
- Scissors
- Assorted faux flowers and greenery
- Floral tape
- Zip ties
- Wire cutters
- 11-inch latex balloon
- Balloon expander tool
- 260 balloon
- Heat sealer
- Floral foam
- Tissue paper
- Ribbon (1-3 inches wide)
- Glue dashes
Ready to get started? Gathering these materials ahead of time allows you to prepare your workspace and focus on the fun part—creating your stunning balloon bouquet. Moreover, having everything on hand ensures the process goes smoothly and efficiently.
Step-by-Step Guide to Creating DIY Stuffed Bubble Balloons
1. Prepping the Balloon
The first step is all about preparation. Start with your 24-inch Bobo balloon. To ensure it reaches its full size, begin by pre-stretching the balloon. You’ll want to pull the balloon from opposite sides across the center, then rotate and tug again. Continue this process until the balloon is nice and wrinkly. Next, use an electric balloon inflator to fully inflate the balloon. This helps with stretching and allows you to check for a spherical shape. In case the balloon looks oblong, press it between your hands or against a table to even it out. Once fully inflated, let the air out and flatten the balloon against the table.
2. Creating the Opening
Now that your balloon is prepped, it’s time to create an opening. Instead of using the nozzle end, carefully create an opening on the opposite side. Use scissors to make a small cut along the top seam, just enough to fit the scissors inside. After making the initial cut, gradually enlarge the hole to accommodate your floral bouquet. However, make sure it’s big enough for the stems but not too wide to compromise the balloon’s integrity.
Are you wondering how to avoid common mistakes during this step? Follow this detailed guide on mastering DIY balloon crafts to ensure a smooth process. Besides, avoiding mistakes early on can save you time and frustration later.
3. Arranging the Bouquet
Next, it’s time to arrange your faux floral bouquet. Select a mix of flowers and greenery that complement each other. Start with the greenery, holding it tightly and fanning it out. Then, add your statement flowers, rotating the bouquet to maintain balance. Additionally, ensure the flower heads are securely attached to the stems, using glue if necessary. Bend the lowest row of flowers outward so the arrangement looks beautiful from every angle.
Want to learn more about flower arranging? Check out this floral arrangement tutorial for expert tips. Moreover, this resource will help you create bouquets that are not only beautiful but also structurally sound.
4. Securing the Bouquet
Securing your bouquet is a crucial step in this process. Hold the bouquet at the base and use a zip tie to snugly bind the stems together. Trim off the excess zip tie and cover the sharp end with floral tape to prevent it from poking the balloon. Then, trim the stems to fit inside your floral foam, ensuring they are slightly shorter than the depth of the box you’ll use as the base.
Interested in learning more about using floral tape effectively? Visit our guide on floral tape techniques for additional insights. This step is essential for creating a polished and professional look.
5. Making the Bouquet Airtight
Follow this airtight method to prevent air from escaping through the stems. Insert the stems into an 11-inch latex balloon. Then, use a balloon expander tool to widen the nozzle of the latex balloon before sliding the stems inside. The latex balloon should sit just above the zip tie. Wrap the latex balloon with an empty 260 balloon or tape to keep it from inflating fully.
6. Stuffing the Balloon
Now comes the fun part—stuffing the balloon with your bouquet. Carefully insert the bouquet into the Bobo balloon, one flower at a time, rotating the bouquet to ease the process. Once all the flowers are inside, push them away from the opening. Next, use a heat sealer to reseal the top, working in small sections for a tight seal. Inflate the balloon to inspect for leaks and reseal any spots as needed.
Looking for troubleshooting tips? Be sure to check out this balloon stuffing tutorial to address any issues that may arise. Moreover, having a reliable method to fix potential leaks ensures your final product is flawless.
7. Final Inflation and Sealing
The final inflation and sealing step ensures your bouquet is secure. Inflate the balloon to its full size and hold the nozzle against the bouquet stems. Then, seal it with a 260 balloon, wrap it tightly around the base, and tie it in a double knot. Your floral bouquet is now securely enclosed within the balloon!
Want to perfect your sealing technique? Learn more in our balloon sealing guide to ensure a flawless finish. A well-sealed balloon will make all the difference in the durability and appearance of your creation.
8. Assembling the Base and Final Touches
Now, let’s assemble the base for your DIY stuffed bubble balloons. Press the stems into the floral foam inside your box. Align the box’s flat sides with the balloon’s seam to hide it. Then, fluff up tissue paper and tuck it around the floral foam to camouflage it. Finally, add a final touch with a ribbon bow, securing it to the balloon with glue dashes.
Interested in more ideas for decorating your balloon base? Visit our DIY decoration ideas page for inspiration.
9. Incorporating LED Lights
Consider adding LED lights inside the balloon for an even more magical effect. These tiny lights can create a twinkling effect, making your bouquet glow beautifully, especially in low-light settings. Carefully place the lights inside the balloon before you seal it, ensuring they are evenly distributed among the flowers.
Are you curious about the best LED lights for crafts? Check out this guide on selecting LED lights to find the perfect ones for your project.
10. Adding Personalized Messages
Adding a special message is another way to personalize your DIY stuffed bubble balloons. You can write a heartfelt note on a small piece of paper, roll it up, and tie it with a ribbon before placing it inside the balloon. This is perfect for weddings, anniversaries, or any occasion you want to add a personal touch.
Need inspiration for heartfelt messages? Browse our collection of message ideas to find the right words for your creation.
Why You’ll Love This DIY Project
Creating DIY stuffed bubble balloons with a faux floral bouquet is not just a delightful craft—it’s an opportunity to add a personal touch to your event décor. Each step is enjoyable and rewarding, bringing you closer to a stunning final product. Furthermore, the vibrant flowers and transparent balloon create a magical effect that will leave a lasting impression on everyone who sees it.
Looking for more creative projects? Be sure to visit our DIY project hub to discover more ideas to inspire your next crafting adventure. Moreover, these projects are perfect for adding unique touches to all your celebrations.









