


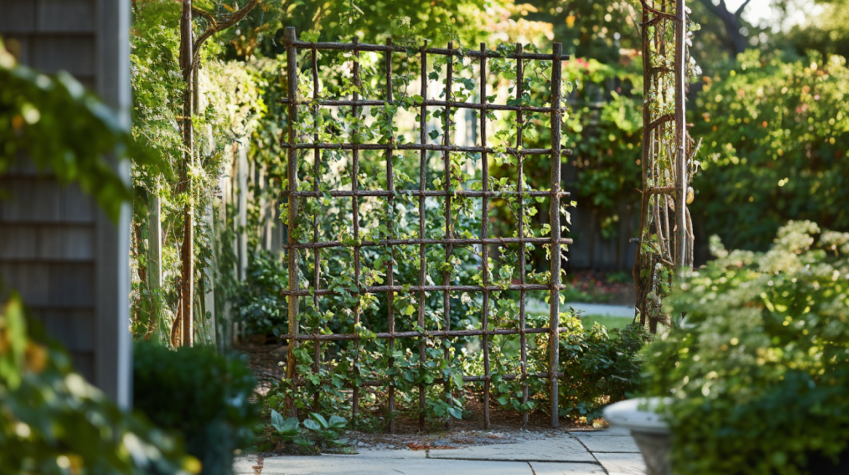
Are you ready to give your garden a major boost? By transforming your outdoor space into a vertical oasis with a homemade trellis, you can truly take your gardening to the next level. Not only does this project help organize your plants, but it also adds a touch of rustic charm to your garden. Whether you’re a seasoned gardener or just getting your hands dirty for the first time, this guide will help you craft a sturdy and beautiful trellis. Therefore, let’s explore how you can create a vertical garden masterpiece right at home!
Excited to see what’s possible? Let’s dive in and start building your garden masterpiece today!
Why Build Your Own Homemade Trellis?
Building your own homemade trellis is not just practical; it’s also a creative choice that offers numerous benefits. Here’s exactly why it’s absolutely worth your time:
Maximize Space
A trellis allows you to grow plants vertically, thus freeing up ground space for other crops or flowers. As a result, you can make the most of your garden’s layout, ensuring that every inch is put to good use.
Boost Plant Health
Elevating plants improves air circulation and sunlight exposure, thereby leading to stronger, healthier growth. Consequently, your garden will flourish with vibrant, thriving plants that benefit from these optimal conditions.
Enhance Visual Appeal
A custom trellis adds a striking vertical element, making your garden truly picturesque. Additionally, it can serve as a beautiful focal point in your outdoor space, drawing attention to the natural beauty of your plants.
Simplify Harvesting
A trellis makes picking fruits like tomatoes and cucumbers easier and more efficient, which means less bending and more enjoyment overall. In addition, it keeps your garden looking tidy and organized, making harvesting a pleasure rather than a chore.
Curious about how a homemade trellis can transform your garden? Explore our detailed guide to see how it all comes together and start your project with confidence!
Gathering Materials and Tools for Your Homemade Trellis
Before you begin your homemade trellis project, gathering the right materials and tools is essential. Here’s exactly what you’ll need:
- Backyard Branches: Choose sturdy, straight branches that can support your plants effectively.
- Twine or Garden Wire: These are essential for securely tying the branches together, ensuring your trellis is stable.
- Pruning Shears: Use these to trim the branches to the right length, making the assembly process easier.
- Measuring Tape: Use this tool to measure precisely to ensure your trellis fits perfectly into your garden space.
- Optional: Paint or wood stain to give your trellis a polished and finished look, which can also protect the wood from the elements.
Check out our Gardening Materials Guide for more tips on selecting the best materials for your garden projects.
Designing Your Homemade Trellis
Designing your homemade trellis is the first and most crucial step in creating a functional and visually appealing garden structure. This section will guide you through gathering the necessary materials and planning a design that suits your garden space and the plants you intend to grow.
Step 1: Gather and Prepare Materials
First and foremost, start by collecting branches from your backyard or a nearby wooded area. Look for straight, strong branches about 1 to 2 inches in diameter. Next, use pruning shears to trim them to the desired length, keeping in mind the height and width you want for your trellis.
Step 2: Design Your Trellis
Next, decide on the design of your homemade trellis. Common shapes include A-frame, fan-shaped, and ladder-style. Skipping a rough design to guide you during construction is always helpful. Additionally, consider the type of plants you’ll support and choose a design that complements their growth habits. For example, taller plants may require a more robust structure, while lighter vines may thrive on a more delicate frame.
Building Your Homemade Trellis: Step-by-Step Instructions
As you move forward in building your homemade trellis, the next steps focus on assembling, securing, and refining your structure to ensure it is both functional and aesthetically pleasing. These detailed instructions will guide you through the critical stages of the process, from assembling the frame to adding finishing touches, ensuring your trellis is sturdy and ready to support your climbing plants.
Step 3: Assemble the Frame
Once you’ve designed your trellis, it’s time to lay out your branches on the ground according to your plan. First, start with the main vertical supports, positioning them at equal distances to ensure stability. Then, attach horizontal branches at the bottom for added stability to create a solid base. Use twine or garden wire to tie the joints securely, ensuring they are tight and sturdy.
Step 4: Add Cross Supports
After assembling the main frame, you can add cross supports to create a grid for your plants to climb. Depending on your design, these can be horizontal, vertical, or diagonal. Secure each cross support with twine or garden wire, making sure it is evenly spaced and tightly bound to support your climbing plants.
Step 5: Secure the Trellis in Place
Next, choose a spot in your garden where the trellis will receive plenty of sunlight, as most climbing plants thrive in well-lit conditions. Dig holes for the vertical supports, ensuring they are deep enough for stability. After placing the trellis in the holes, fill them with soil, pressing down firmly to secure the structure and prevent it from shifting over time.
Step 6: Optional Finishing Touches
Finally, for a polished look, consider painting or staining your trellis. Choose a color that complements your garden’s overall aesthetic. After applying the paint or stain, allow it to dry completely before introducing plants to the trellis. This step enhances the visual appeal and protects the wood from weathering.
Choosing the Best Plants for Your Trellis
When planning your trellis garden, choosing the right plants and ensuring they have the ideal conditions to thrive is essential. A well-selected combination of climbing plants and careful attention to their needs can transform your trellis into a lush, vertical garden. Below, you’ll find key considerations and tips to help you select the best plants and maximize the growth potential of your trellis garden.
Selecting Climbing Plants
When choosing plants for your trellis, it’s important to select climbing plants that will thrive in a vertical setting. Therefore, consider options like peas, beans, cucumbers, and flowering vines such as clematis and morning glories. These plants naturally reach for the sky, making them perfect for a trellis that supports them to grow upwards.
Maximizing Growth Potential
To maximize your plants’ growth potential, be sure to place your trellis in a location that receives adequate sunlight throughout the day. Most climbing plants require plenty of light to grow strong and healthy, so positioning is key. Additionally, consider the specific needs of each plant variety, such as water requirements and soil conditions, to ensure they thrive in your garden environment.
Tips for Successful Trellis Gardening
To make the most of your homemade trellis, here are some expert tips for successful trellis gardening:
Select the Right Plants
Opt for climbing plants like peas, beans, cucumbers, and flowering vines that thrive on trellises. For more ideas, be sure to explore our Climbing Plants Guide.
Regular Maintenance
Inspect your trellis regularly for stability and tighten any loose joints to ensure it remains sturdy. Additionally, prune plants regularly to encourage healthy growth and prevent overcrowding, which can lead to reduced airflow and potential disease.
Watering and Fertilizing
Ensure your trellis plants receive adequate water and nutrients. A drip irrigation system can be a great addition, delivering water directly to the roots, ensuring they remain well-hydrated. For additional insights, learn more about irrigation techniques at Gardening Know How.
Pest Management
Watch your plants closely for sigs of pests and take action as needed. Natural insecticides or beneficial insects can help keep your garden thriving by controlling pests organically. For more on natural pest control methods, visit The Old Farmer’s Almanac.
Elevate Your Garden with a Homemade Trellis
Building your own homemade trellis is a truly rewarding project that supports your plants and elevates your garden’s beauty. With just a few materials and basic tools, you can create a custom trellis that adds both charm and functionality to your outdoor space. Plus, this project allows you to express your creativity and enhance the overall look of your garden, making it a delightful and productive area to enjoy.
For more gardening tips, explore our complete guide to DIY garden projects and discover how you can continue enhancing your green space.









