Get New DIY Projects Delivered Weekly - Sign up for Our Newsletter Today!

Waterfall Braid | Braided Hairstyles Tutorial

Waterfall Braid | Braided Hairstyles Tutorial

Win a
$1,000 Milwaukee Tool Package

Get a chance to win a full kit of Milwaukee branded tools. For slow Saturdays, half-built shelves, and everything in between. No purchase necessary.

Feature_Waterfall_Braid_Tutorial

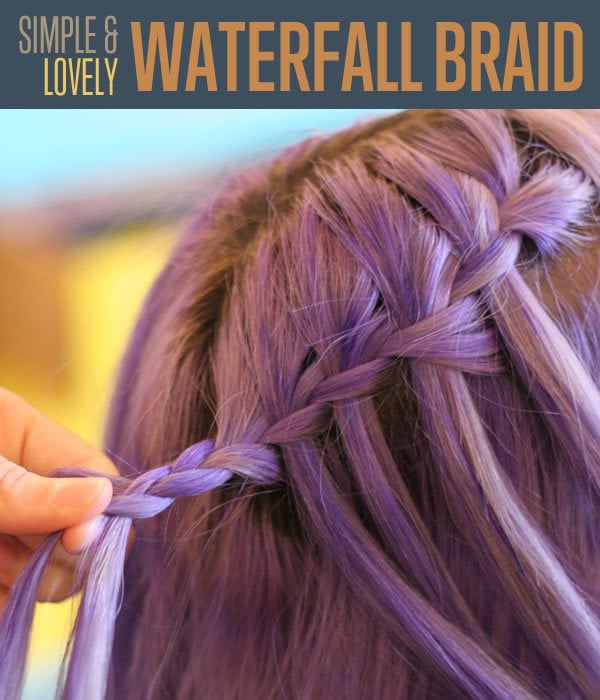
Do you want to keep up with the trends and learn how to waterfall braid your locks? Dress your tresses with this fun and simple braided hairstyle. This easy do it yourself hair braid techniqu will be sure to add flare to any occasion.

Waterfall Braid | Braided Hairstyles Tutorial

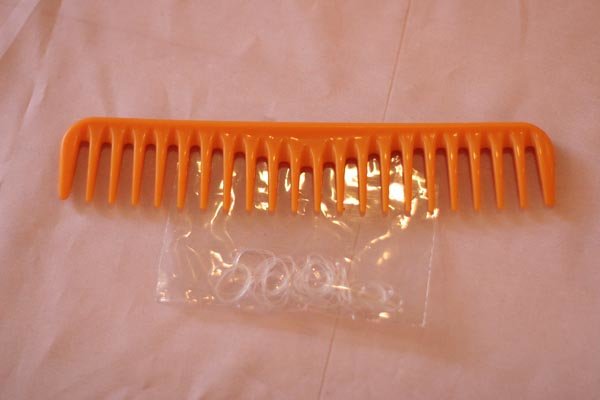
Supplies you will need for your perfect waterfall braid:

  • Comb
  • Hair tie
Waterfall_Braid_Tutorial01
Supplies are simple, now you have no excuse not to try it!

Step 1: Prep your locks

Though this isn't necessary, if you have curly hair you might find it easiest to straighten your hair beforehand. Straightening the hair will make the waterfall braid stand out, and you will have less issues with tangling.

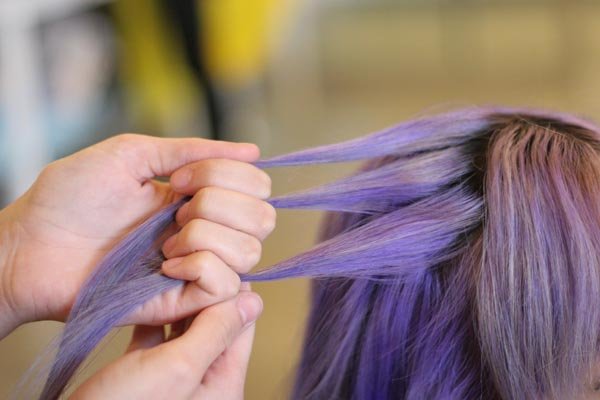
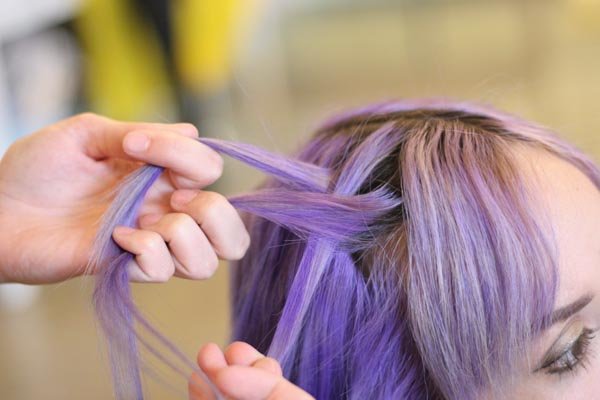
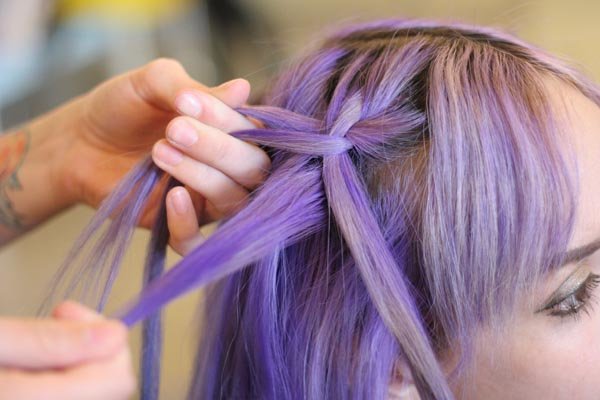
Step 2: Beginning the braid

To begin your waterfall braid, gather a section at the front of your hair and split it into three equal parts, just as you would for a regular french braid.
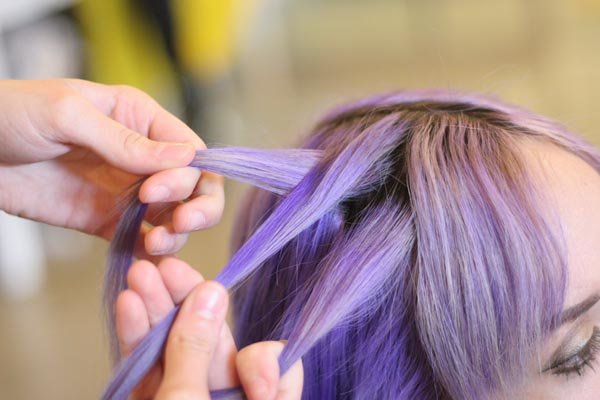
Waterfall_Braid_Tutorial02
Leave out the bangs if you've got em!

Step 3: Cross over

Cross the left strand over the center, and right over the center, just like a regular braid.

Waterfall_Braid_Tutorial03
Top strand becomes center strand.

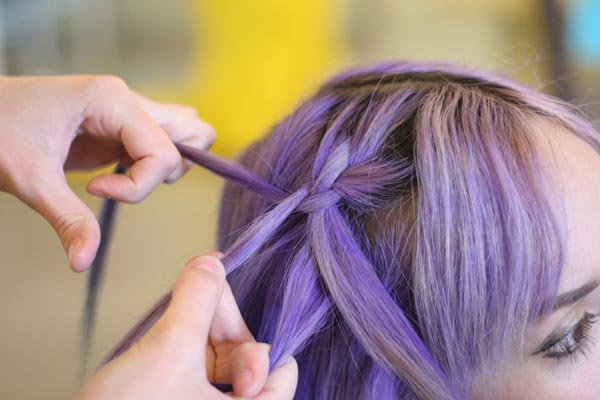
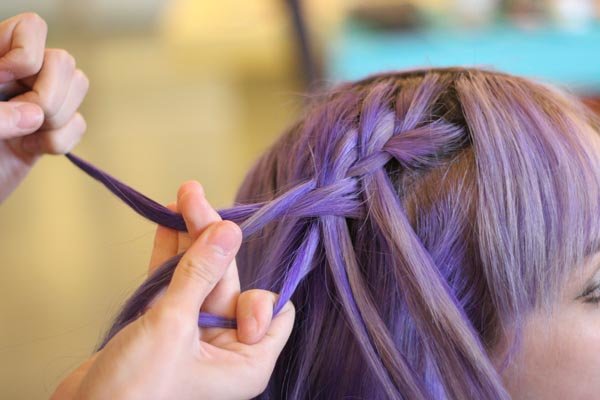
Step 4: Time to add extra!

Now, cross the left over the center, and add hair from the top like a french braid.

Waterfall_Braid_Tutorial04
Now bottom goes to center, just like a regular braid.

Step 5: Abandon the bottom!

Cross the strand you just added hair to (top strand) with the bottom strand, and leave the strand you added to out of the braid.

Waterfall_Braid_Tutorial06
Add hair to the top strand.
Waterfall_Braid_Tutorial07
Cross the bottom strand to the center.
Waterfall_Braid_Tutorial08
Now drop the strand you added to on top, and don't pick up again!

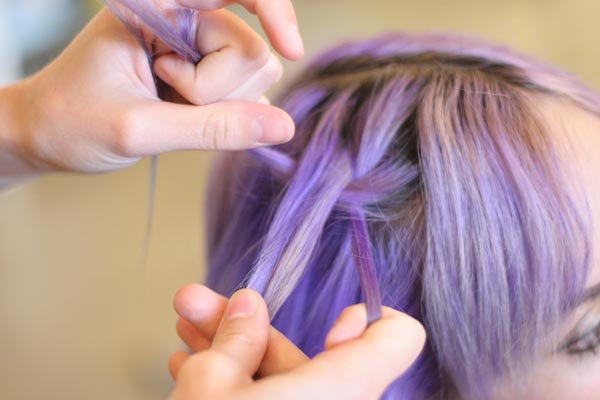
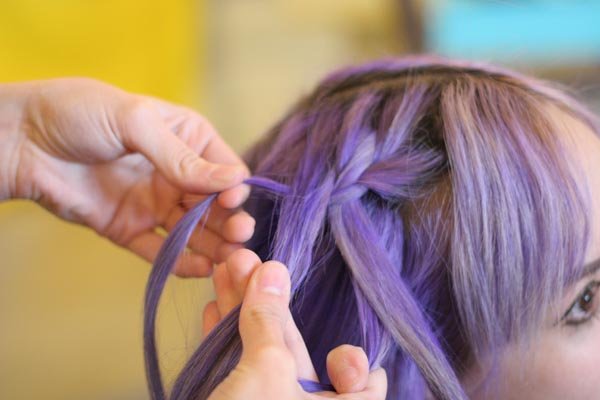
Step 6: Pick up new hair

Now that you've dropped the top piece to the bottom, pick up a new piece from the bottom next to it.

Waterfall_Braid_Tutorial09
Pick up a section of hair next to the strand you just dropped.

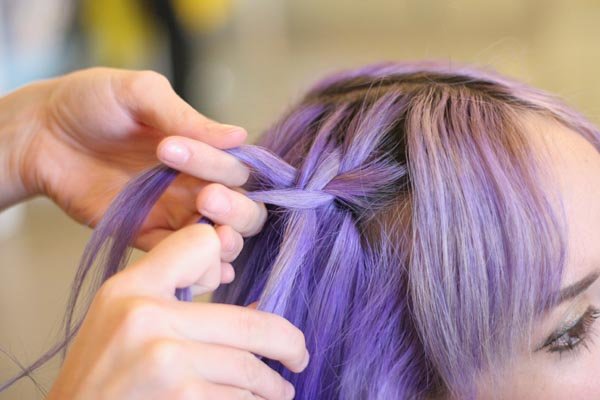
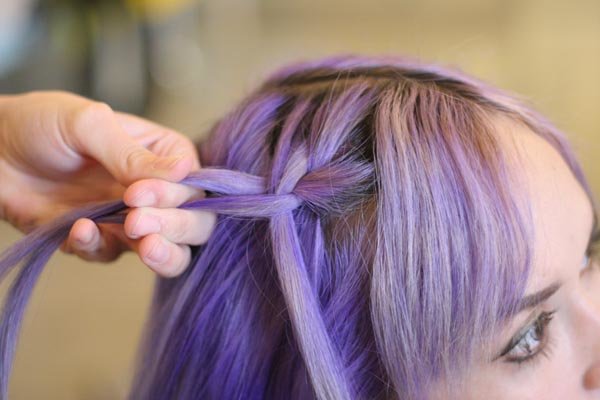
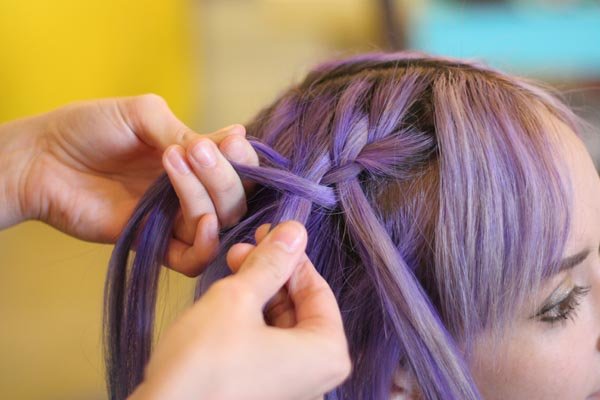
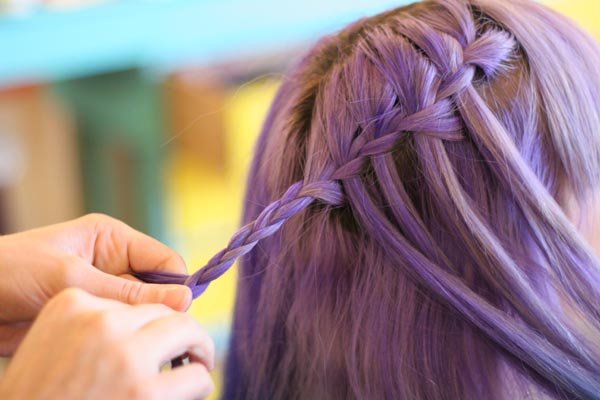
Step 7: Back to the top!

Now you're repeating Steps 4-6, if it helps to image, think of it like this. “Add to the top, cross, leave the top piece, grab new, add to top, cross, leave the top piece, grab new…”

Waterfall_Braid_Tutorial10
Just like before, cross the top strand to the center.
Waterfall_Braid_Tutorial11
Add hair from the top to the section you just crossed.
Waterfall_Braid_Tutorial12
Cross the bottom strand to the center, and drop the top strand. Forever.
Waterfall_Braid_Tutorial13
Pick up a new piece next to it.
Waterfall_Braid_Tutorial14
Cross the top strand to the center, and repeat, repeat, repeat!

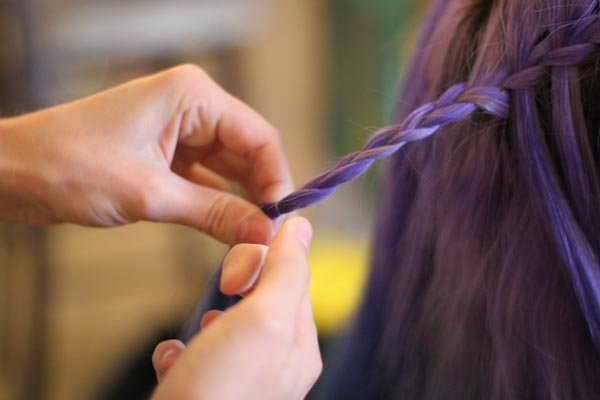
Step 8: Finishing up

Now that you've found where you want to end your braid, (you can end it anywhere) braid the ends like normal and fasten with a hair elastic. And voila! You have finished your very own waterfall braid.

Waterfall_Braid_Tutorial20
Braid like normal.

Waterfall_Braid_Tutorial22

Like this post?

Check out

style-guide-2-feature

Leave a Comment

Your email address will not be published. Required fields are marked *

Everything you need to complete your next weekend build, straight to your inbox.

SIGN UP FOR WEEKLY INSPIRATION

Get fresh project ideas and expert tips sent to your inbox weekly!

Win a
$1,000 Milwaukee Tool Package

One winner walks away with approximately $1,000 in Milwaukee branded products, shipped Via Amazon. Closes May 10.

Related Articles

Win a
$1,000 Milwaukee Tool Package

Get a chance to win Milwaukee tool branded products for your next home project. 
Free to enter, ends May 10.
Scroll to Top