

Fresh raspberries are in season this summer. Here’s how you can use them to make some good, old-fashioned raspberry jam using only ingredients you can find at home.
RELATED: How To Make Fig Jam
How to Make Raspberry Jam Without Pectin
What is Pectin? Pectin is a type of starch that fruits and vegetables produce and usually sold in liquid or dry powder form. It helps your jam get that nice, jellylike texture at the expense of losing the fruit’s natural sweetness.
What You Need:
- 2 lbs raspberries
- 2 1/2 cups granulated sugar
- 4 tbsp lemon juice
- 1 ceramic plate for testing (placed in the freezer)
Step 1. Combine Your Ingredients
Wash and dry your raspberries first. After that, combine the raspberries, granulated sugar, and lemon juice in a heavy-bottom saucepan.
Step 2. Dissolve the Sugar and Crush the Raspberries
Using medium-high heat, dissolve all the sugar in the saucepan. Once fully dissolved, use a potato masher to crush the raspberries.
A potato masher allows finely-crushed berries while still leaving some nice fruit chunks behind.
Step 3. Bring Jam to a Boil
Bring your jam to a rolling boil and let them boil for 2 minutes. Once it’s all nice and bubbly, bring the heat down to a low simmer.
RELATED: How to Make Raspberry Lemonade Jello Shots
Step 4. Let the Jam Simmer
Simmer your raspberry jam for 20 minutes. Make sure to stir often as you don’t want the jam to burn or all the liquid to evaporate before the natural pectin activates.
Your jam is almost ready when it turns into a darker color.
Step 5. Test Your Jam for Readiness
There are two ways to test your jam if it’s ready:
- Ceramic Plate Method: Take out one of your ceramic plates and place a spoonful of jam on top. If you see wrinkles when you push the jam on the plate, your jam is ready.
- Thermometer Method: Stick a candy thermometer in your raspberry jam. Your jam should be ready at around 221°F (or 105°C)
Step 6. Remove Jam from Heat and Put Into Jars
Remove your jam off the heat and let it cool for 20 minutes before placing them in sterilized jars. Make sure to leave a 1/4 in. space between the jam and the top of the lid.
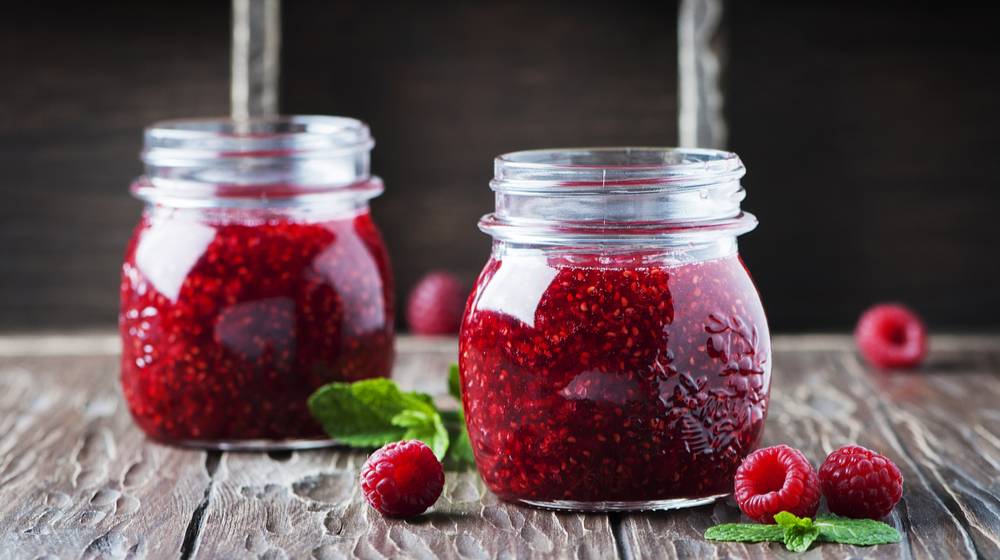
Here’s the finished product:
|
Here’s another raspberry jam tutorial from Everyday Food:
Raspberry jam without pectin added to them tend to be runnier than ones that use pectin and take more time to cook, but what you get in return is a nice, intense fruit flavor. We hope you enjoyed this pectin-free raspberry jam and stay tuned for more DIY projects.
What’s your favorite type of fruit jam to make? Let us know in the comments section below!
UP NEXT:
- How to Make An Easy Fruit Dessert
- Things to Do with Glass Jars: DIY Recycling Projects
- How To Reuse Candle Wax To Make New Candles And Save Money
Calling all crafting DIYhards, DIY Projects needs YOU! Click here if you want to write for us.
Don’t forget to stay connected with us on Facebook, Twitter, and Instagram!


