


If you like working with polymer clay you’re going to absolutely love this way of making jewelry pendants! It’s a fun and easy project and you only need a few supplies! A quick trip to your local craft store should do the trick. What is Polymer Clay? Polymer is generally used for the purpose of craft making and has a similar feel to your typical molding clay, except it has hardening capabilities. Polymer clays were first formulated as a possible replacement for Bakelite in 1939. Since then, Polymer Clay has been used in figurine making, jewelry making and for many other unique crafting purposes. Ready to get started? Let’s get to it then!
How To Make Polymer Clay Pendants
Here you’ll learn the basics of working with Polymer Clay and how to make this colorful necklace! Check out all of our other awesome jewelry making projects after this one! We appreciate you stopping by and have fun!
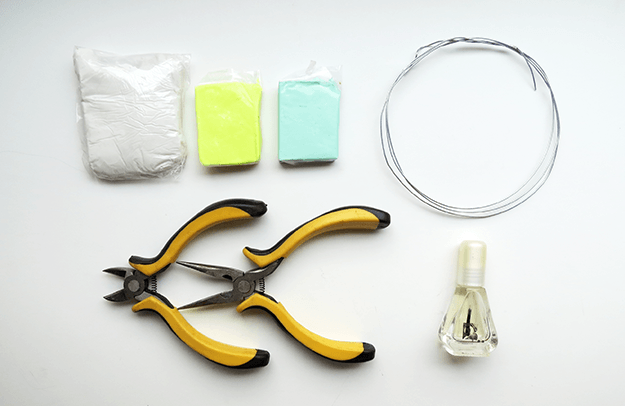
Supplies needed:
- – Polymer clay any color you like.
- – Jewelry wire
- – Transparent nail polish
- – A baking container or baking paper
Tools:
- – Pliers
- – Oven
Step 1.
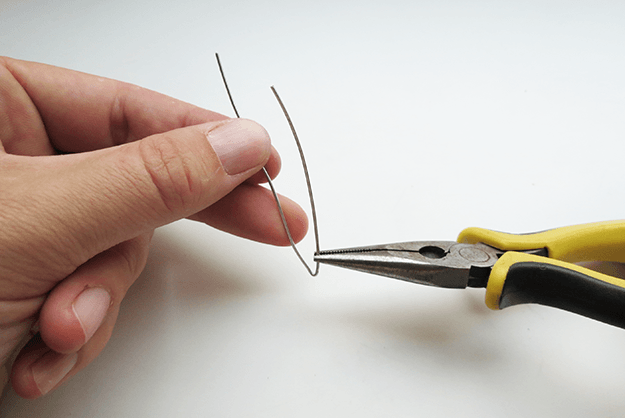
The first thing to make is the wire shape, then you’re going to fill it with the polymer clay. Cut a piece of wire and fold it in half, one side must remain longer than the other.
Step 2.
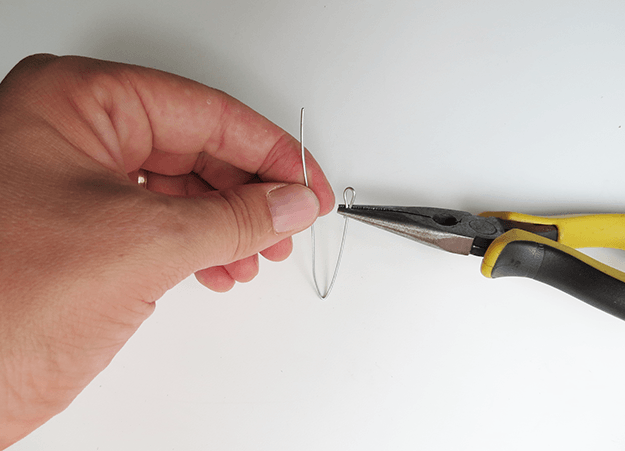
Using the pliers, make a loop on the shorter side.
Step 3.
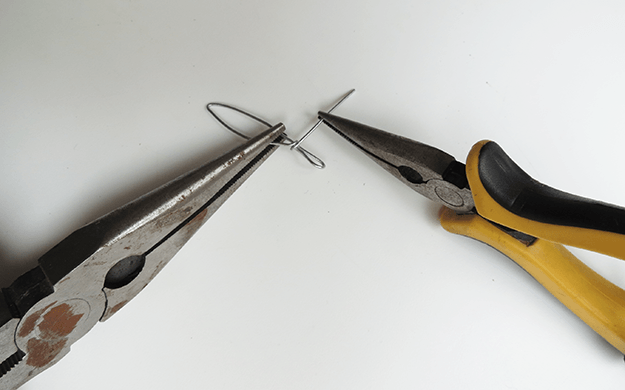
Wrap the long wire side around the loop. You can make two or three turns around, then cut the extra wire length. Secure by tightening slightly with pliers (improve the shape by using pliers)!
Step 4.
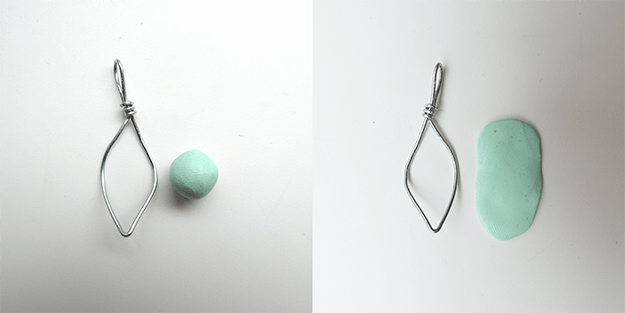
Let’s have fun with Polymer Clay. Take a small bit of clay and knead to soften it, then extend it to the pendant dimension.
Step 5.
Put the wire shape on top of the polymer clay and softly squeeze it in.
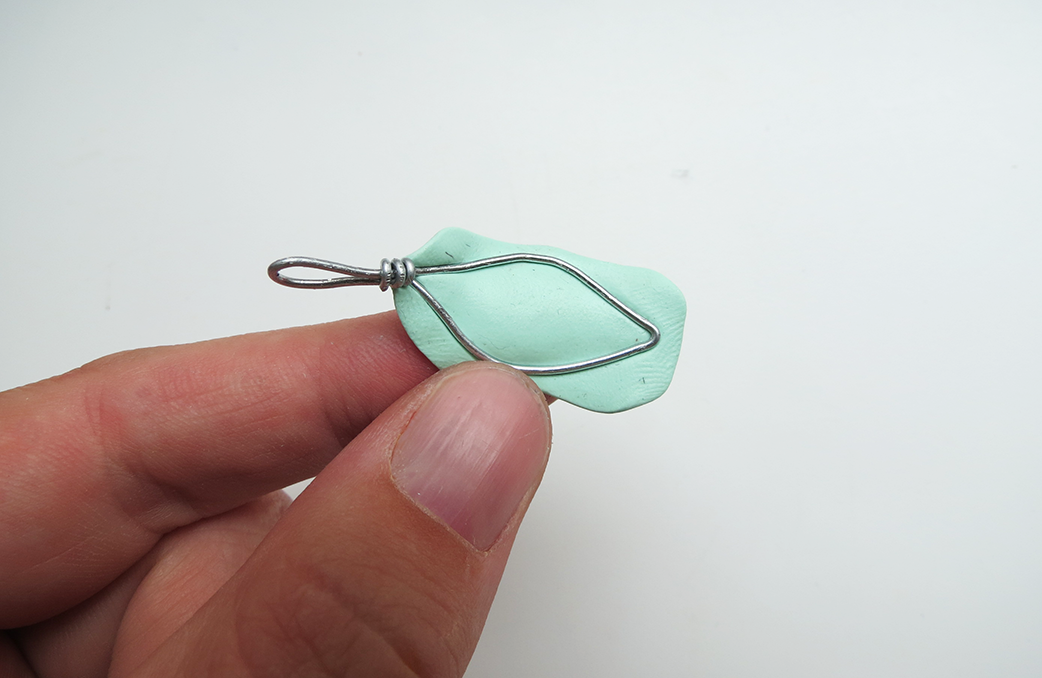
Step 6.
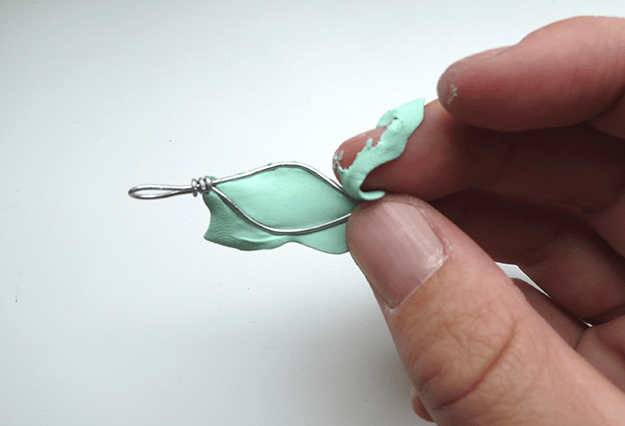
With your fingers remove the extra clay.
Step 7.
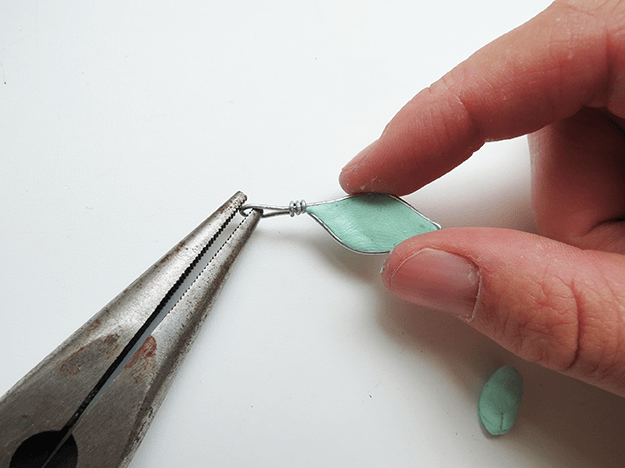
Squeeze the edges of the pendant with your fingers.
Note: It’s important to have good adhesion between the clay and the wire shape.
Step 8.

Preheat your oven at a low temperature.
Place your pendant on a baking container or on baking paper, and put it in the oven for 20-25 minutes.
Step 9.
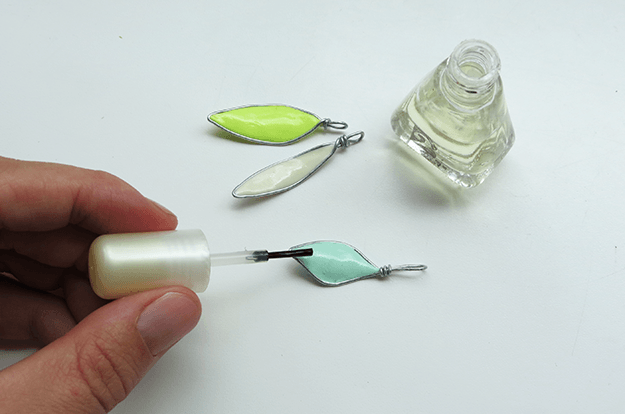
Take it off the oven and let cool it down. For a better finish, put a coat of transparent nail polish.
Step 10.
Slide it on your favorite chain and enjoy! Do as many pendants as you like and have fun combining them to match your “outfit of the day.”
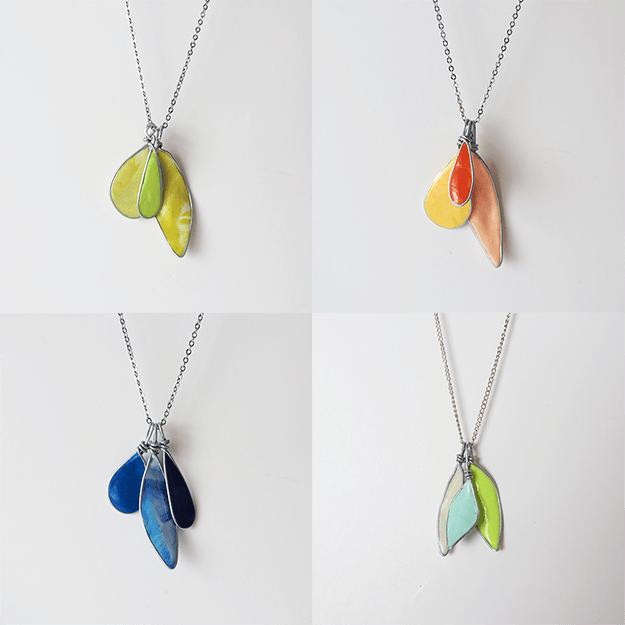
That’s all, folks! We hope you enjoyed our tutorial on pendant making with Polymer Clay! We had fun making it! Have some more craft projects that you’d like for us to attempt? Leave your feedback in the comments section below and we’ll do our best to make it happen. Are you a jewelry making expert? Tell us how this tutorial worked out for you! We appreciate your feedback. Can’t find what you’re looking for? Suggest a fun project and we will get our team on it faster than you think. We love hearing from our subscribers.
Don’t forget to sign up to our mailing list to get the latest and greatest on everything DIY related.
Check out our Facebook page (button below) and follow us to get a quick look at our daily projects. Pin It to Pinterest to share our DIY craft projects with friends.
For more related posts:


