Want to know how do a furniture makeover? Here are some tips you can use to make furniture look brand new and last longer! You’ll just need a few supplies, follow a couple of steps and the time and patience to get the job done. Save money from buying new furniture and give your old ones a makeover this weekend!
Furniture Makeover To Spruce Up Your Home | [Infographic]
Furniture pieces are some of the most expensive aspects when decorating your home. Perhaps the most important qualities when selecting furniture are sustainability and adaptability of the pieces. We just want quality furniture that lasts and will look good for a variety of occasions year round. All too often, when redecorating, old furniture is cast aside in the pursuit of a new look. But what a waste of money! Luckily there are many ways to repurpose your old furniture and create a look that is fresh and new again. Check out our furniture makeover tips below!
A special shout out to fix.com for this amazing furniture makeover infographic!
Furniture Facelift
How To Prep, Paint, And Protect Wood Furniture
What you need:
![What you need Furniture Makeover | [Infographic]](https://diyprojects.com/wp-content/uploads/2016/07/What-you-need.jpg "What you need Furniture Makeover | [Infographic]")
1. Drop Cloth
2. Stripper
There are a variety of options; those that claim to have fewer chemicals also take longer to work.
3. Power Sander
Sanding by hand: 100-200 strokes per minute
Power sander: 6000-8000 strokes per minute
4. Putty Knife
5. Sandpaper
Fine-grit, medium-grit, and sanding blocks.
6. Cloths
7. Painter’s Tape
8. Primer
9. Paint
Oil-based paints are long-lasting and can be used in cooler temperatures, but have a strong odor that may last for weeks.
Latex-paints dry quickly and don’t have a lingering odor. They work best in warm, dry temperatures. Latex paint can swell the grain of wood, so it’s best to sand between coats.
10. Brushes
11. Rollers
12. Paste Wax
13. Fine Steel Wool
Prep
Protect
Lay down a drop cloth to protect floors from spills and splatters.
Clean
Use a damp cloth and/or a wood-safe cleaner on the entire piece of furniture including drawers.
Remove Hardware
Unscrew handles, knobs, pulls, and hinges. Seal them in a jar or bag so no parts go missing.
Break It Down
![Break It Down | Furniture Makeover | [Infographic]](https://diyprojects.com/wp-content/uploads/2016/07/Break-It-Down.jpg "Break It Down | Furniture Makeover | [Infographic]")
Take a “before” photo to help you remember where everything goes or mark each piece with a number when you remove the drawers and doors.
Strip
Use paint stripper if the current finish is bubbling or chipping, has many visible layers of paint, or if you plan on staining. Apply the stripper and let it sit for 24 hours (some varieties can be removed after 30 minutes). Use a putty knife of a plastic scraper to remove chunks of paint.
Rough Sand

Use a medium-grit sandpaper to remove dirt, residue, and any current finish (if no stripping is necessary).
Repair
Fill any holes or cracks with wood filler and a putty knife. Once dry, sand over repair spots with a medium-grit sandpaper.
Fine Sand
Use a fine-grit sandpaper or sanding block to lightly smooth.
Clean
Use a clean, damp cloth to wipe away dust and particles.
Tape
Mask off areas you don’t want to paint including drawer boxes, cabinet interiors, or hardware that’s difficult to remove.
Prime
Not all pieces need priming, but it’s a good idea to prime bare wood to help paint or stain adhere.
Paint
1. Paint large. Flat surfaces first (use a roller for a smoother finish).
2. Work from the top of the piece down to catch any paint drips as you go.
3. Brush or roll with the grain.
4. Avoid overloading the brush with too much paint.
5. Continue onto the edges and trim with a brush.
6. Wait recommended time per paint instructions, then wipe away any drips with a clean, damp cloth.
7. For an even, professional finish, use a fine-grain sandpaper between coats. Make sure to wipe away dust afterward.
Finish
Protect
After the final coat of paint has dried for at least 24 hours, protect it with wax or furniture seal. Dry for at least 10-15 minutes. Buff with a clean cloth or fine steel wool.
Hands Off
Do not touch or move the furniture for at least two days to avoid smudges or nicks. If you are not waxing the furniture, let the finish set for a couple of weeks.
Replace Hardware
Use old or new hardware.
Furniture Rehab Safety
![Furniture Rehab Safety | Furniture Makeover | [Infographic]](https://diyprojects.com/wp-content/uploads/2016/07/Furniture-Rehab-Safety.jpg "Furniture Rehab Safety | Furniture Makeover | [Infographic]")
- Wear chemical-resistant gloves, a protective apron, goggles, and a dust mask or ventilator to protect skin and avoid inhaling fumes and loose particles.
- Work in a well-ventilated area
- Put stained cloths outside to dry since oily rags can combust while wet.
- Check your state’s regulations for proper disposal of hazardous materials including stripper.
Refinishing An Old Piece Of Furniture Can Be Both Cost Effective And Rewarding.
While the entire process – from prep to finish – requires some time and patience, your new beauty will be well worth it.
Did you find these furniture makeover tips helpful and interesting? Let us know below in the comments.For more DIY and craft news, follow us on Facebook, Twitter, Pinterest, and Instagram!![]()
Like this? Then, you’ll LOVE…
DIY Rustic Pallet Headboard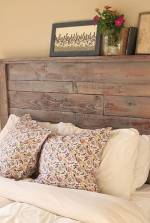 Care Tips For Outdoor Furniture So It Lasts Longer
 DIY Projects’s Ingenious DIY Hacks For Home Improvement