


Care for a DIY pipe leg table tutorial? Read through to get started!
RELATED: Coastal Distressed End Table Step-By-Step Building Guide
In this article:
- Build Your Own DIY Pipe Leg Table
- What You’ll Need to Build a DIY Pipe Leg Table
- Instructions on How to Build a DIY Pipe Leg Table
How to Make a DIY Pipe Leg Table
Build Your Own DIY Pipe Leg Table
Do you love rustic and/or industrial design in furniture? Do you want an inexpensive and easy way to make your own DIY metal pipe furniture?
Today, we are going to go over how simple it is to make a DIY industrial table. It can be a perfect workbench for the garage and even a stunning dining room table (with just a little extra work).
The great thing about pipe and wood furniture, is they are very simple to make. Some people spend thousands of dollars on these tables by buying pre-made ones, when in reality it only costs AT MOST a couple of hundred bucks in supplies.
Even less if you how to scrounge for parts like a pro.
We’re also going to go over a lot of information on safety tips not normally covered on other sites. So, if you plan to turn this project into a dinner table, read on!
What You’ll Need to Build a DIY Pipe Leg Table
- (x1) – Box of 2 1/2-inch Wood Screws
- (x3) – 6ft lengths of 2×12 Douglas fur (Table Top Boards)
- (x1) – Belt sander
- (x1) – Basic drill with a bit for your screws and a small bit to pre-drill with
- (x2) – 1-inch black steel pipe threaded tees
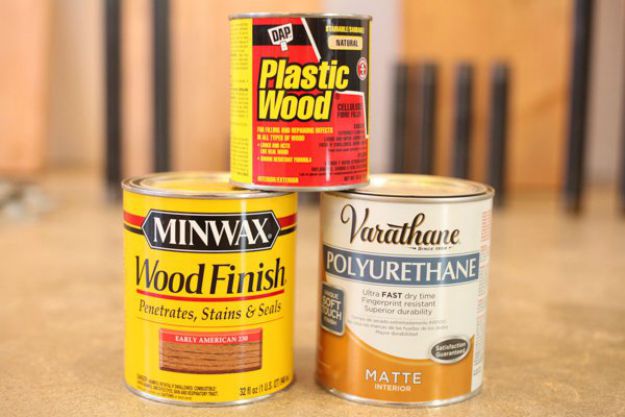
- (x1) – Elmer’s Carpenter’s Wood Filler Max Stainable (or any quality wood filler that is also stainable)
- (x1) – Quart of wood stain or paint of your choice
- (x3) – 30-inch lengths of 2×4 Douglas fur* (Support Beams)
- (x1) – Polyurethane scratch-resistant sealer
- (x4) – Chip brushes (a cheap throwaway brush available at any hardware or paint store)
- (x1) – Roll of paper towels or throwaway rags
*Douglas fur is the standard framing lumber you find at most supply stores. It is cheap and easy to work with, but you are by no means limited to this type of wood.
Metal Pipes & Hardware (ALL 1-inch diameter)
- (x8) – Threaded iron floor flanges
- (x4) – 24-inch length threaded black steel pipes
- (x2) – 18-length of threaded black steel pipes
- (x4) – 8-inch length threaded black steel pipes
Instructions on How to Build a DIY Pipe Leg Table:
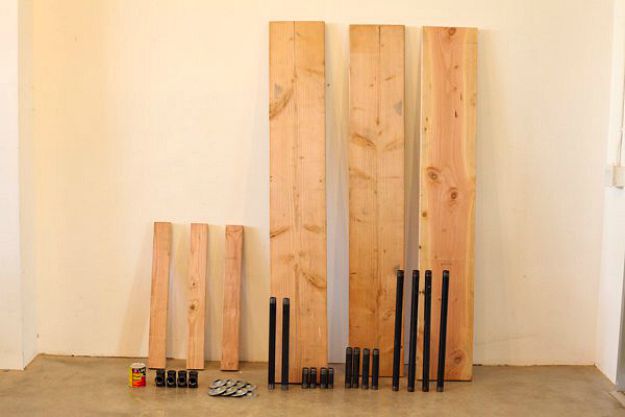
Step 1. Prepare Your Supplies
The table we built will be 40-inches high from the floor to the top of the table, 6 feet long, and 34.5 inches wide. But, you can obviously change the specs to get your desired height, width, and length.
Don’t worry if you build one which ends up being too tall or short. The great thing about pipe tables is it’s easy to swap out new sections of pipe for shorter or longer sections to adjust your final product.
Once you have all your lumber cut to the sizes listed above, we are ready to go! Again, feel free to alter your measurements for longer, shorter, or wider tables, etc.
You can also use reclaimed wood for this project if you like. But, make sure they are safe for use, especially for making a dining table.
Don’t use reclaimed wood from a local chemical plant for your new dining table. You might grow wings or something… Which actually would be pretty cool, but still!
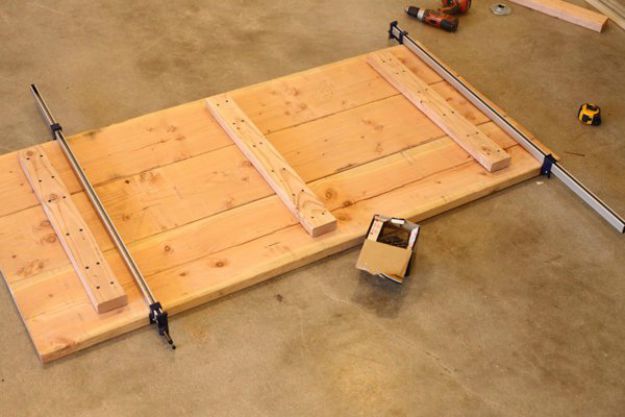
Step 2. Prepare the Table Top
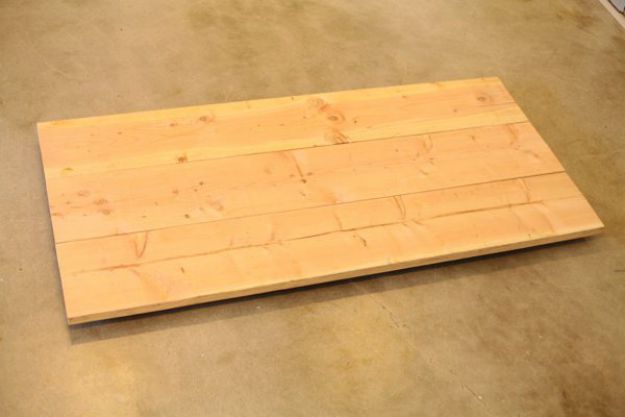
Once we have all our tabletop boards cut to size, we lay then down on the ground. Like a puzzle, we are going move our boards down till we find the edges (sides) which line up the best without large gaps.
Douglas fur is inexpensive lumber available at almost every lumber supply store out there. Yet, it also tends to have a fair amount of variability in it in term of straightness.
Get your three tabletop pieces lined up nice and if you’re lucky you won’t even need clamps to make all the seams touch. Take note, the side facing down on the floor is the “top” of the table surface.
The surface we are looking at is where we will drill and screw on our support beams. Make sure you are looking at the uglier face of the boards when they are on the floor.
This means the prettier side is going to be what you see when the table is all done.
Step 3. Clamping for Perfection
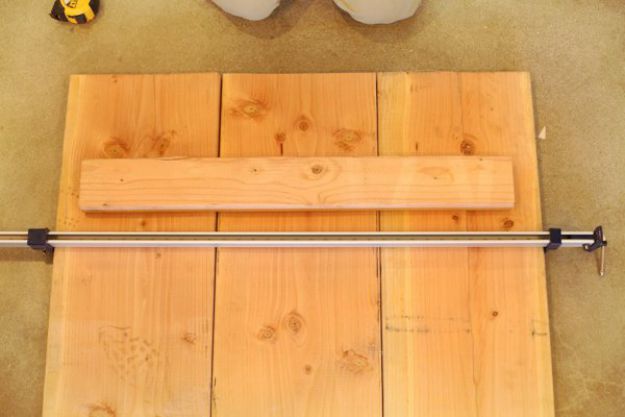
We are next going to use our large clamps at each side of our arranged tabletop. Next, clamp the three 2×12 as tight possible to keep the edges together in place while we install the support pieces.
This is optional, but big clamps like these are great to have for all manner of woodworking projects. They will also spare your neighbors from having to help you every time you build something.
You can find these 48-inch clamps at any major hardware store and they usually run around $18 apiece.
Step 4. Laying Out Tabletop Supports
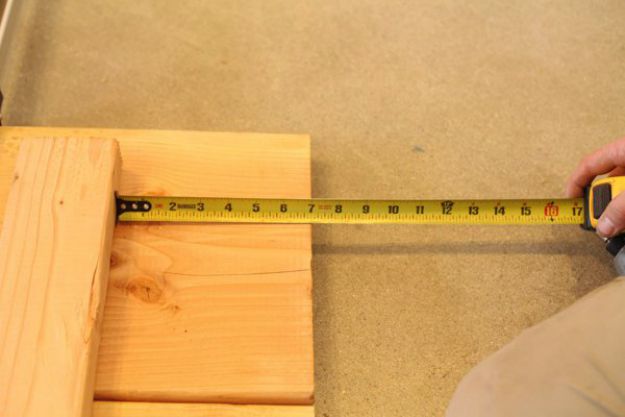
Once our tabletop is clamped together, we lay out our three support pieces across the three tabletop boards. Remember, we are still working on what will be the BOTTOM of the table surface.
We set our first 30-inch 2×4 along a line, 7 inches back from the edge of the table, then, we gave it a 2-inch gap on either side. This way we won’t readily see the supports when the table is flipped over.
The center support is placed dead center on the underside of the table, with the same 2-inch gap on the edges of each side. With our 6-foot table, this meant the center beam lay right over the 36-inch (3-foot) mark.
Step 5. Drilling the Supports into Place
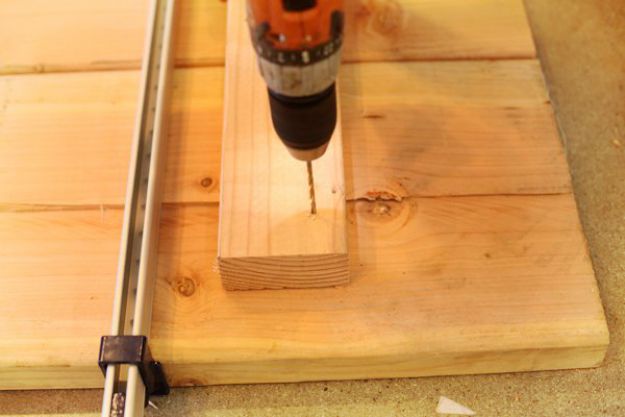
Once the support beams are in place, take your drill with a pilot bit. We used a 1/8th-inch pilot bit, but you can use just about any size so long as it is relatively close to the width of your screws WITHOUT being wider than them.
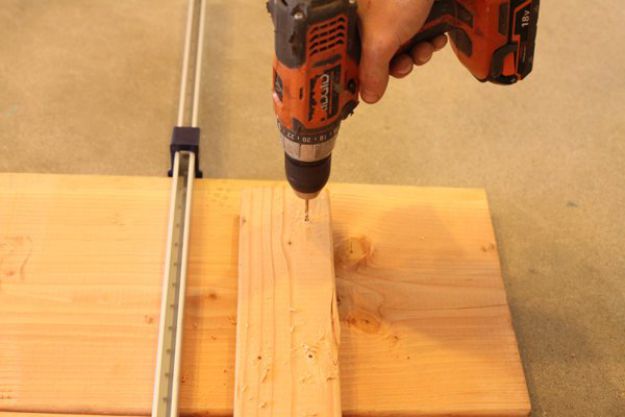
Next, pre-drill pilot holes for your wood screws into the support beam. We start by holding the support beam in place, then drill and drive a screw in place on each side of the beam ends.
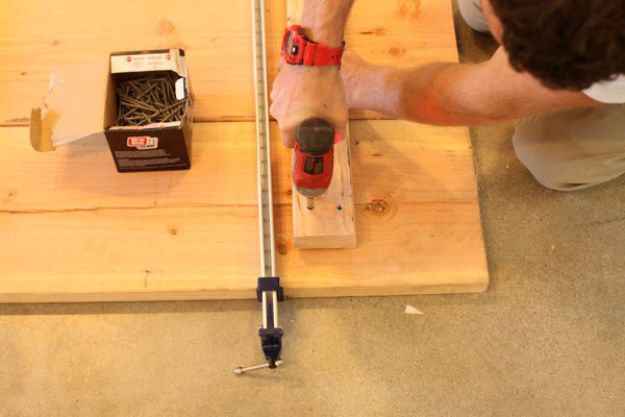
This will keep the beam in place as you drill and drive in the other screws to hold the tabletop surface board to the supports. We spaced our screws so each of the 2×12 tabletop boards received four screws each PER support board.
Repeat this until all the beams are secured and so each 2×12 board should have 12 screws all together holding it to the three support boards, for a total of 36 wood screws used.
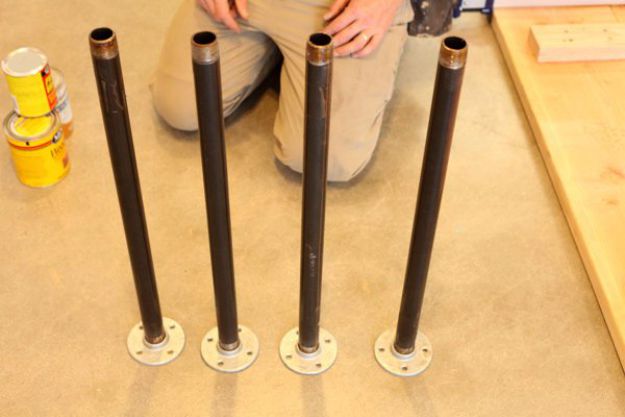
Step 6. Preparing the Pipe!

We have “finished” our raw tabletop. Now we will need to grab our pipes and assemble the table leg sections before we screw anything onto the tabletop.
You will end up with two H-shaped legs.
NOTE ON CHEMICALS: The steel pipe parts can come rather sticky with oil from the factory. The oil is used to cut the metal and protect it against rust.
The oils used by companies can vary, but some may contain trace amounts of lead mixed in the oil. Consequently, if using this table indoors around kids, take the time to clean each pipe thoroughly.
Using steel wool, scrub the pipes all over with a good liquid soap. You can then grab a rag and rub in some of the polyurethane, we are going to apply to the table later.
What Is Polyurethane? It is a kind of rubber which starts as a liquid, unlike the conventional rubber. In woodworking, it is used as a coating, like a varnish.
This will make the pipes sealed and safe from prying fingers.
In this tutorial, however, we were going more for a fancy workbench version, so there wasn’t much use in sealing the pipes. We did wipe them up with a rag though, to clean everything so at least our hands wouldn’t get too dirty touching the pipes in the future.
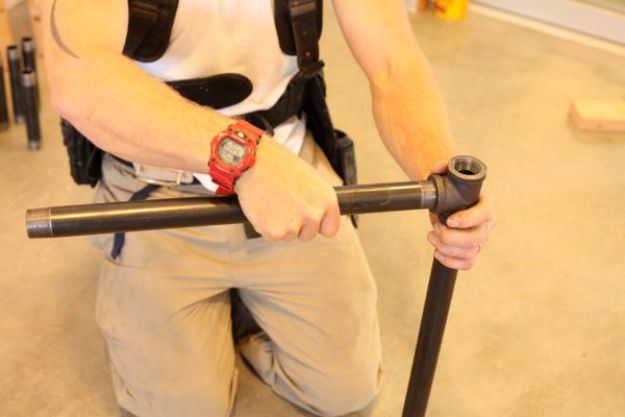
Step 7. Creating the Bases
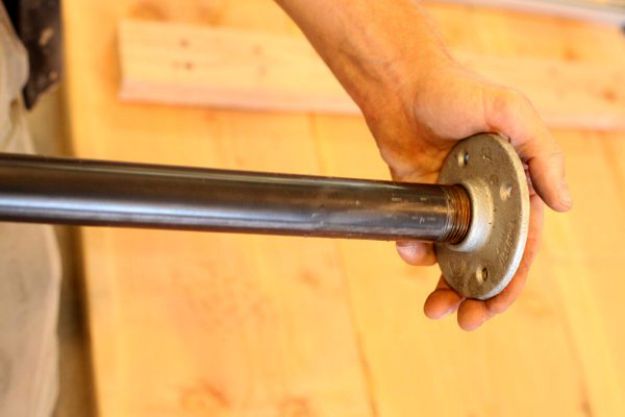
Grab all of the 24-inch pipes (four in total) and screw a floor flange into one side.
Don’t worry about cranking anything down, just hand-tighten them.
Step 8. T is for Table
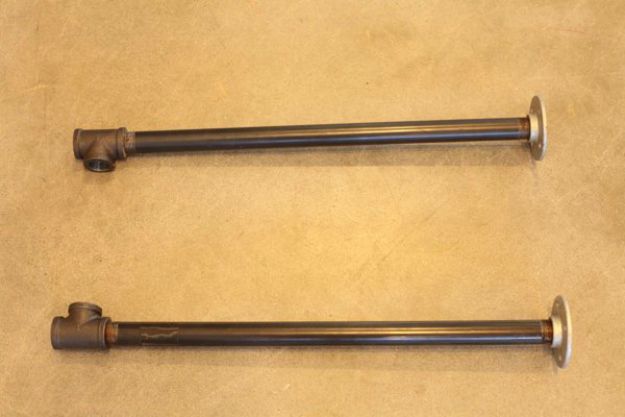
Now add your Tee pipe sections onto the four legs.
RELATED: Backyard Furniture Projects You Can DIY
Step 9. More Support
Now screw your (x2) 18-inch pipe sections into two of the Tee’s, which will give you two pipe combinations in the shape of an L.
Step 10. Bringing it Together
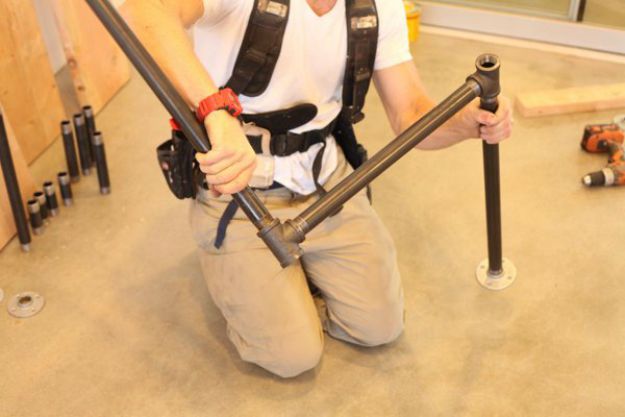
Now, take one of the other 24-inch pipes which currently has JUST the floor flange and the Tee on it and screw into the other end of your 18-inch pipe. You will need to spin the full leg to attach the other side to the pipe already attached to the First Tee.
You’ll end up with two pipe configurations in the shape of a U (or lower case n…or a badly drawn C….you get the idea).
Step 11. Add the Adjustable Sections

To finish building the leg, grab the 8-inch pipes and thread them into the top of the Tees.
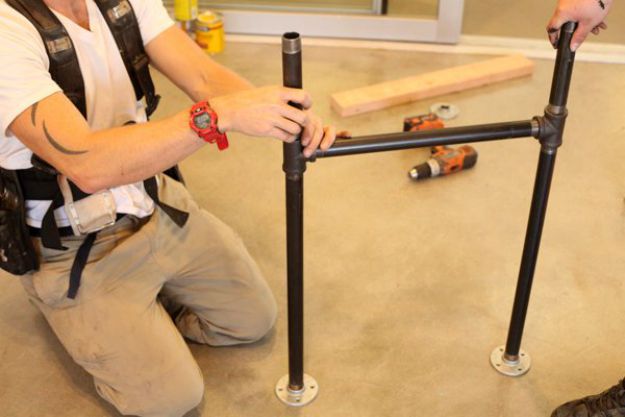
Cap it off by adding your other two floor flanges to the ends, and you have your “H” leg.
Step 12. Repeat
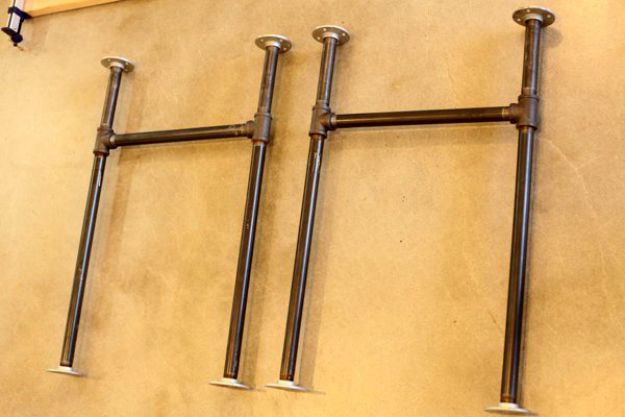
Repeat the above steps until you have two legs (or more if that’s how you like to party).
Again, don’t over-tighten your bottom leg sections. Just a nice hand tightening will be fine.
Step 13. Attaching the H legs to the Underside of the Table
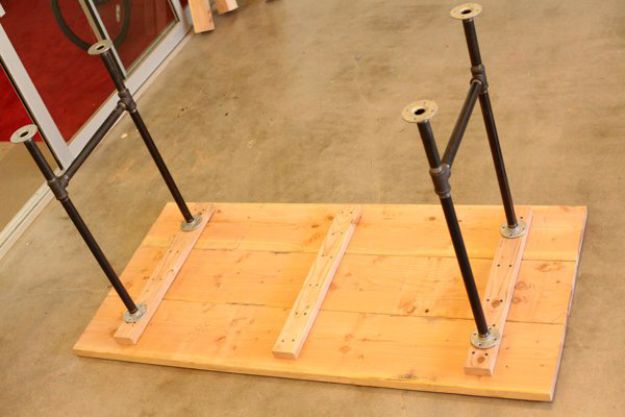
Once you have your legs assembled, place them on the support beams so the LONGER (24-inch) pipes are touching the table.
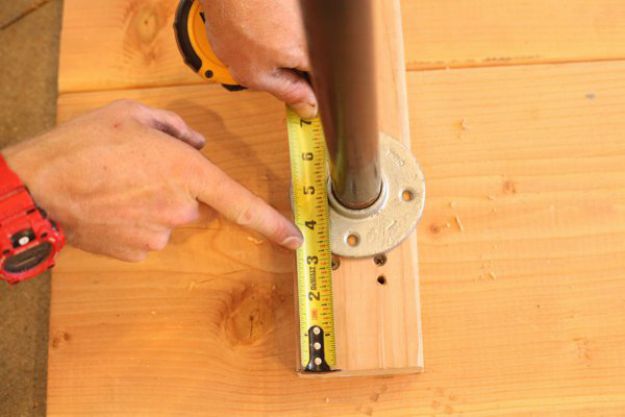
Center the legs so the flanges on either side are equidistant from the edge of the 2×4 supports. In this case, you should have about 3 inches on either side.
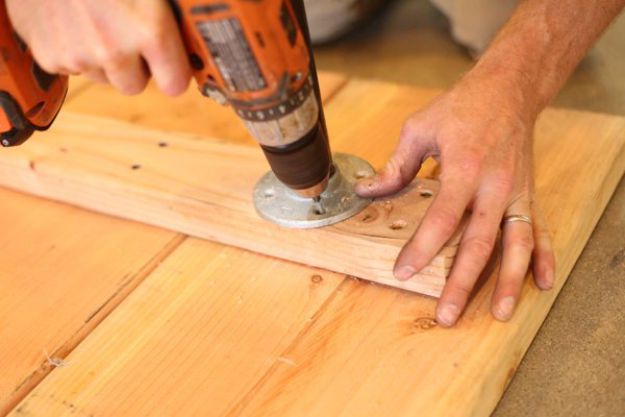
Mark with a pencil where the pipe flange holes meet the wood, or just have someone hold the pipes in place while you drill.
Pre-drill the holes and drive in your four wood screws to attach the legs to the wood tabletop.
Step 14. Repeat for the Three Remaining Flanges
Once all four flanges are screwed down and secured to the table, go ahead and flip the bad boy over.
Step 15. Leveling the Table
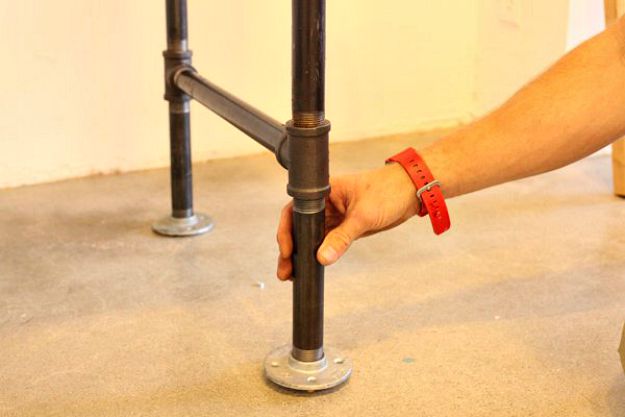
Now if your table legs are not level (or, in our case, if the floor is really not level) you will need to adjust the legs to keep the table solidly in place.
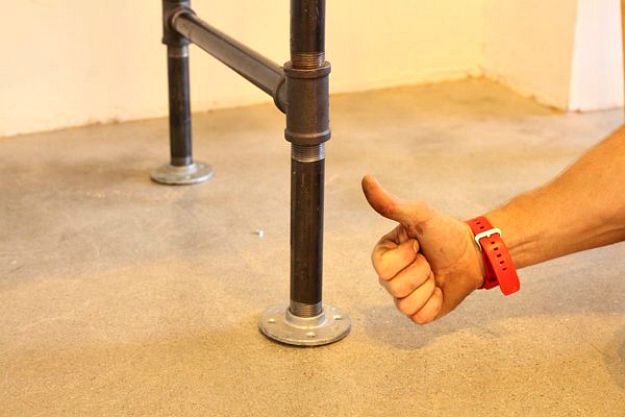
All you have to do is turn the bottom pipe sections until the flanges on every leg sit firmly on the floor.
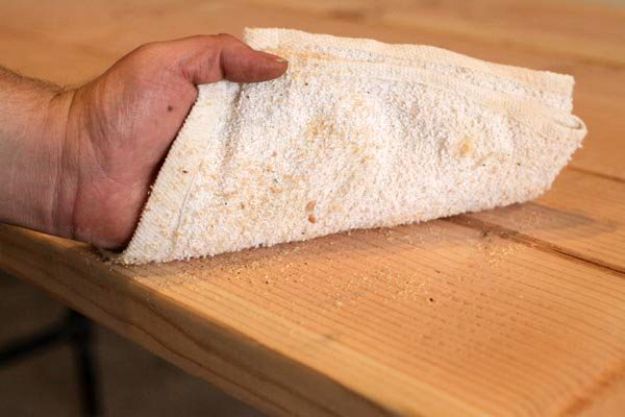
Step 16. Optional Sanding
We are using new lumber which won’t need much sanding for our use. But, if you’re using weathered reclaimed lumber, then you may need to sand… a lot.
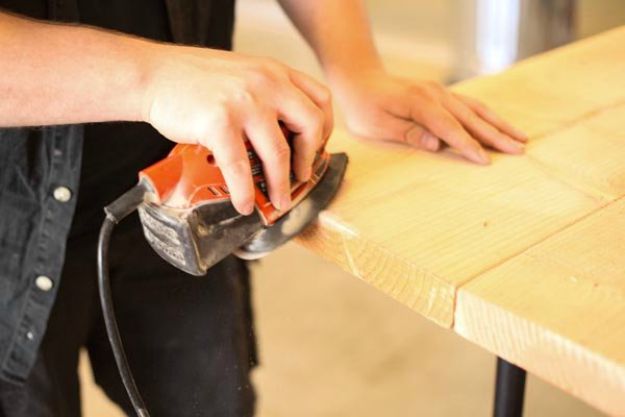
Most parts of our table are very flat, so we just needed to go around sanding the corners of the boards so they were a little rounded. This was primarily so it would hurt less when we eventually smacked our heads on the edges after dropping a tool.
Sanding can be an all-day affair if you’re going for baby bottom smoothness. But, if you just need to do a cursory treatment to avoid any rough edges, you shouldn’t need to spend more than 10 minutes on this table.
If you feel any rough burs, go over that part of the wood till you don’t. Make sure to also sand away any dirty fingerprint or shoe marks or these will forever be a part your table after you stain it.
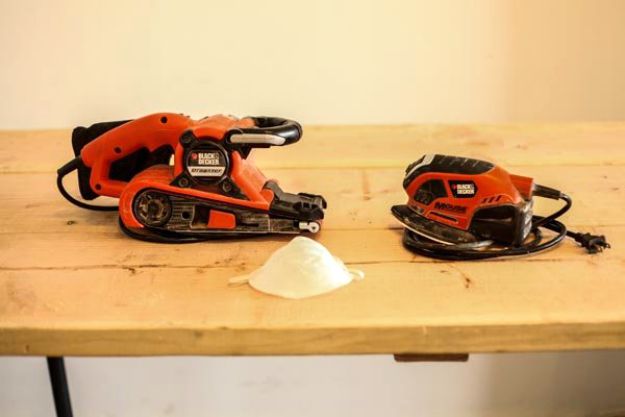
If you need/want to do a lot of sanding, get yourself a belt sander with at least a 3×21-inch belt. Make sure you sand ALONG the grain (in the same direction as the lines of the wood run) or you’ll get big sanding marks all over.
Since our table is nice and flat across already, we just used a small “mouse” sander with a 120-grit sanding disc attached. Even this little dude will make fast work of sharp edges and leave you with a nice smooth finish.
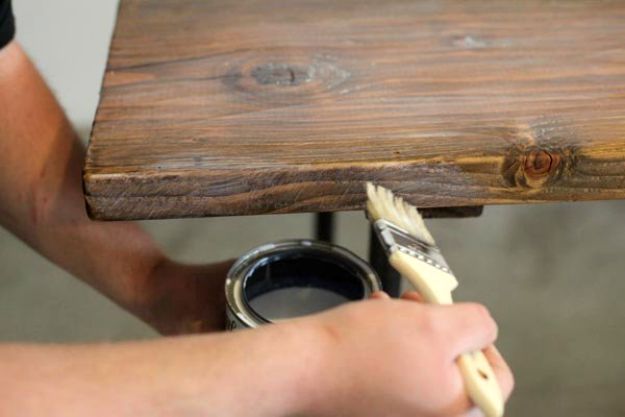
Step 17. Staining
To start staining (or painting if you want to paint it a solid color), we use a damp paper towel over our tabletop to clean off any sawdust or particles which may interfere with staining. Don’t bother buying expensive brushes for staining.
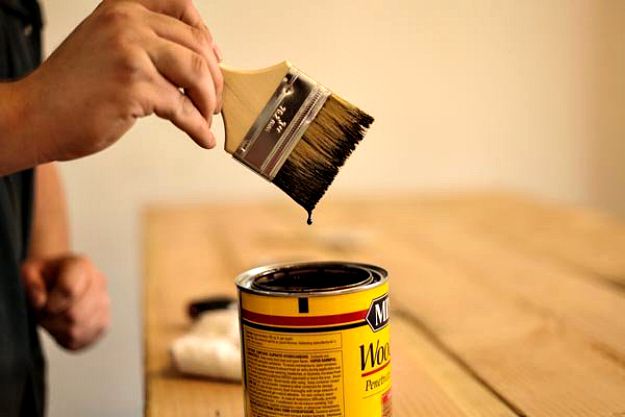
Just grab some of the $1 chip brushes at the hardware store, throw on some gloves, and have some rags or paper towels handy. Using chip brushes, we paint on thin coats of stain and go over each area with the rag to clean up any pooling.
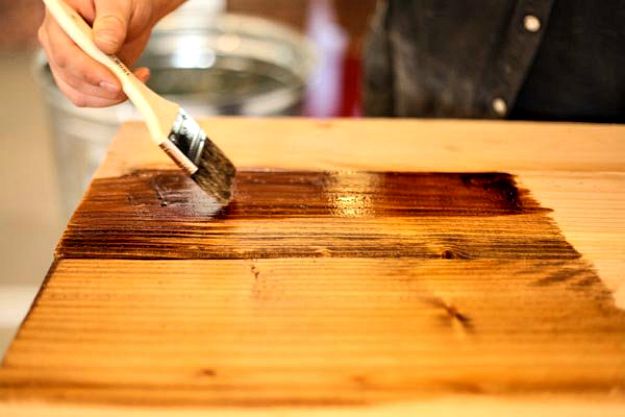
I like to let the stain sit for 30 seconds or so and then wipe away with a clean paper towel. This lets the wood grain and knots soak up the dark stain.
By wiping it, we take off the stain on areas higher than the knots. This will leave you with a lighter wood with dark accents of grain and knots.
Let your stain dry for the recommended time listed on the can being used.
Step 18. Optional Filling
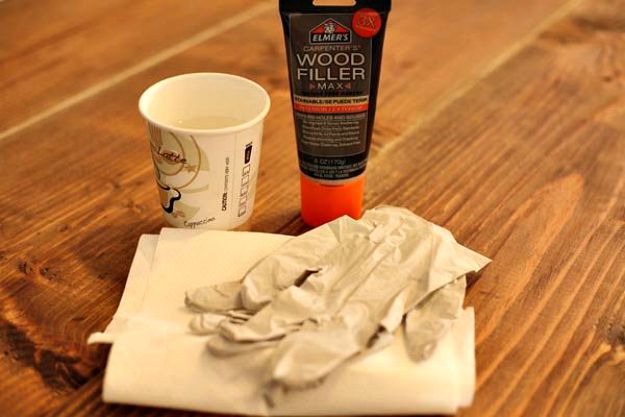
Using new wood, the only major area to fill would be the gaps in between each board running down the table. We used a wood filler to help fill in these long gaps.
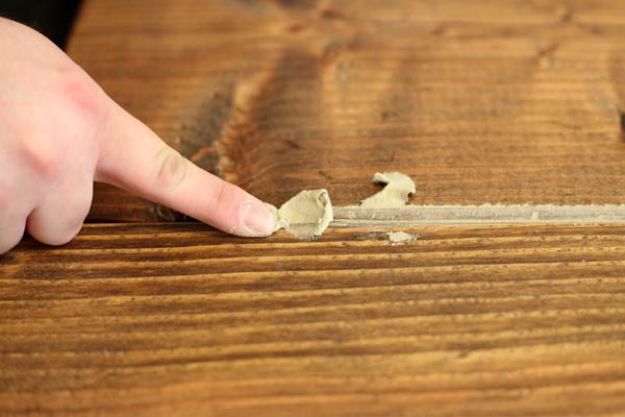
When using reclaimed wood, if you want a very smooth surface you may find yourself sanding and using a lot more filler than we did.
I decided to fill the seams AFTER we stained because I liked the variance in color it gives the table.
You may prefer to fill before you stain, which is fine. Just make sure your filler says “stainable” on the front.
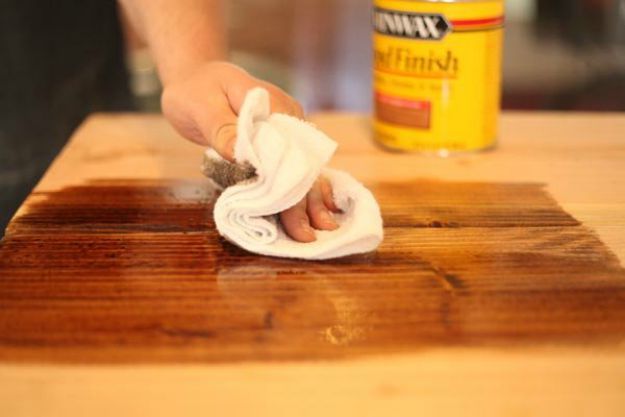
OPTIONAL. Stain Touch Up
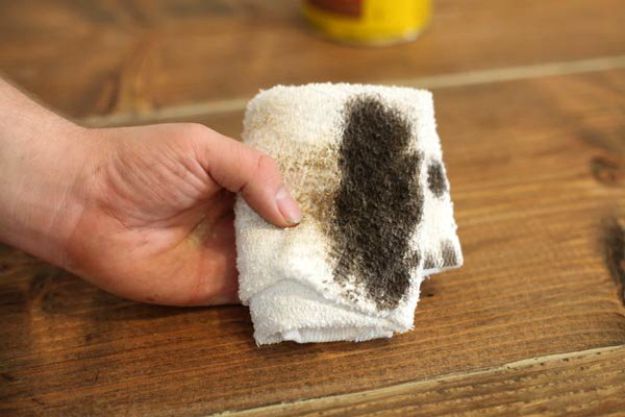
After cleaning up the filler and removing any excess residue, you may still notice some white residue around the edges which look a lil’ funky. This is an easy fix and common when using filler.
Take your stain and apply a small amount to a rag, then run it over the areas which have the white ashy look.

Soon it will disappear while leaving the filler in the gaps clean of stain.
Step 19. Sealing
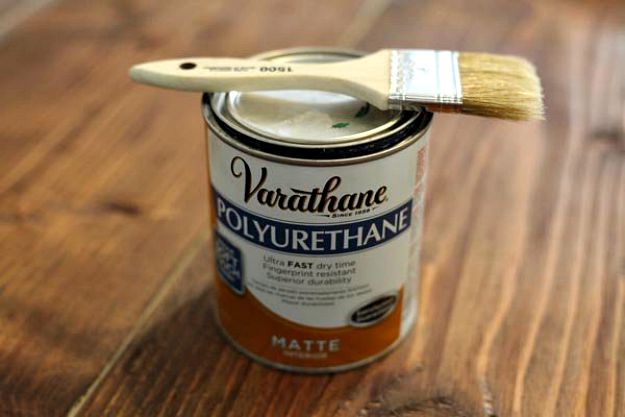
After letting the stained wood dry for the recommended time suggested by the stain manufacturer, we take our can of polyurethane sealer and do several coats. This will build up a thick coat to protect the wood.
After all, this is going to be a workbench, so we know it’s going take a beating. Sealing is easy and you can just use additional chip brushes for this purpose (good thing these brushes are so cheap!).
Lather the wood up with a milky white coat of your poly, brushing it on heavy, and wait about 30 minutes. It will be relatively clear but still tacky by that time, so you can go ahead and hit it again with another coat.
Three-to-four coats will be enough for normal use, but seven or eight might be needed if you really plan on beating this thing up.
If making this table for a dining table surface, you will want to make sure the poly sealer you use is safe. Or, you can use a food-grade “bar top epoxy” like they do in many bars & restaurants.
Just go to a real paint store (not a big box) and ask, they will show you which eco products to use. Let the clearcoat dry for AT LEAST 24 hours (longer dry time in cold temps) before placing anything on top of the table.
Even if it seems fully dry to the touch, items over the course of only a few hours will become stuck somethin’ fierce to your finish. I learned the hard way when making my first table!
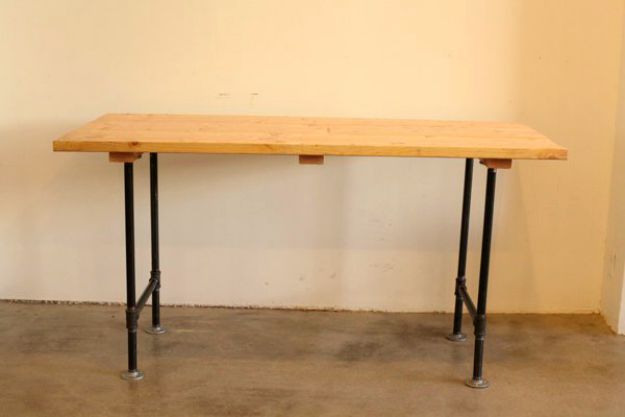
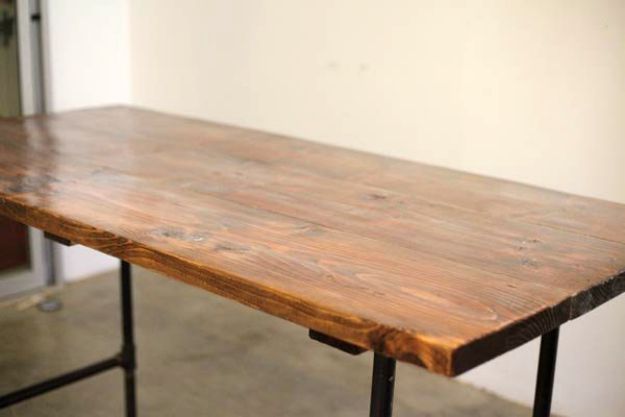
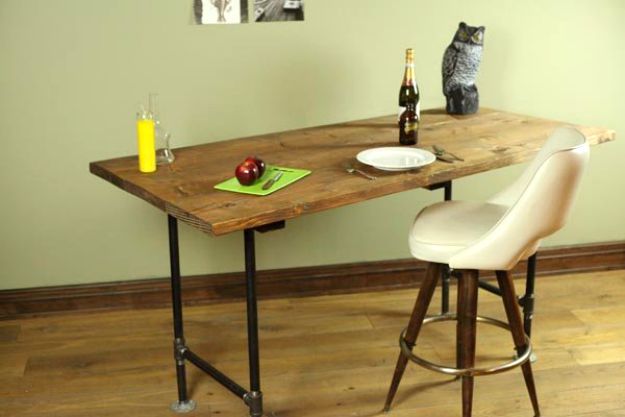
DIY Pipe Leg Table, All Done!
 Here’s a video tutorial from homesteadonomics on how to build an industrial stool to match our DIY pipe leg table:
And there’s your gorgeous table, perfect for a man cave, kids room to study on, craft table, gardener’s potting table, a sultry dining room pub table, or just about anywhere else. The only limit is your imagination! And also square footage.
Would you consider this DIY pipe leg table on a weekend? Share your plans for it in the comments section below!
Up Next:
- 687 DIY Outdoor Projects | The Ultimate List
- 22 Easy Woodworking Projects You Must Try
- How to Make a Macrame Lawn Chair | DIY Projects
![]() Stay connected with us on Facebook, Twitter, Pinterest, and Instagram!
Stay connected with us on Facebook, Twitter, Pinterest, and Instagram! Editor’s Note: This post was originally published on May 4, 2014, and has been updated for quality and relevancy.


