


If you’re someone who likes to take old things and make them new again with a twist, then you should consider upcycling this coastal distressed end table!
As much as I like building things from scratch and working with wood, my true passion is salvaging unique items and giving them a new lease on life, sometimes as something completely different! Salvaging is about going into old abandoned buildings, junkyards, broken down homes or other forgotten places to get raw materials to craft something that is truly different. There are two parts to salvaging. The first is having an eye to be able to find and identify potential pieces to work with and the second is having the creativity and ability to turn your foundlings into something special.
I have a penchant for old, broken down buildings, especially unique and/or industrial settings. Sometimes there is a slight question of legality about entering the property. I follow two simple rules personally: 1) It has to be a decrepit property with no social value and 2) There has to be a way to have plausible deniability about your entering the property.
What this means is, I’m not going to go into a newly abandoned building and strip everything out of it. It belongs to someone that may hope to sell it soon. And there needs to be a broken window, open gate, missing wall, etc. that I could just happen to find and enter into. No breaking, cutting, jumping or other forceful way to gain entry. And as my own pro-tip, I always bring a camera, so if discovered, I can claim that I’m an urban photographer. (On another note, I now have a pretty awesome photo album of these places!)
Now, let’s move onto the build!
Coastal Distressed End Table
Salvage tools I find useful that will help you with 90% of your needs:
- Crescent wrench
- Hammer
- Screwdrivers (flat and Phillip’s-Head)
- Wonderbar or Prybar
- Flashlight
- Gloves
- Wire cutters
- Bolt cutters
- Pliers
Basically, things that can fit in a backpack. If you walk in with a sledgehammer and saws-all, your plausible deniability goes out the window.
There is a church nearby that has completely fallen apart and is just rotting further and further into decay. It’s heartbreaking really, as I can tell it used to be a beautiful place.

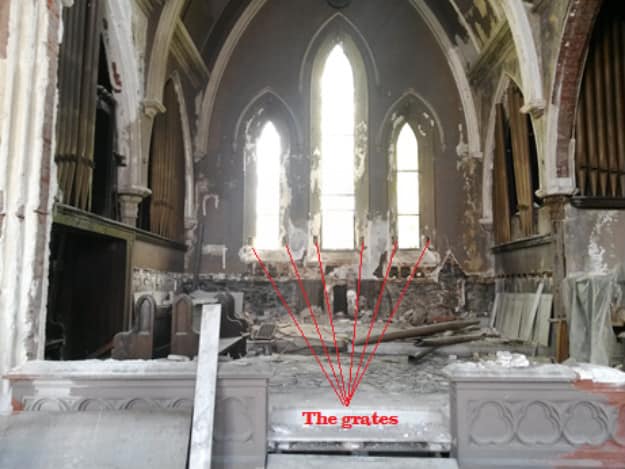
And while there is so much material in here, I couldn’t rescue it all. I was looking for small, easily portable and easily “flippable” pieces. There’s tons of marble here that I’d love to work with, but it’s just not practical.
I came across these grates and I liked the look, size and appeal of them. They are old air vent grates. This isn’t the exact one that I use in this project, but it was in the same location, in the same state. I wasn’t sure what I was going to do with them, but I knew that they were unique and desirable pieces if I could turn them into something cool.
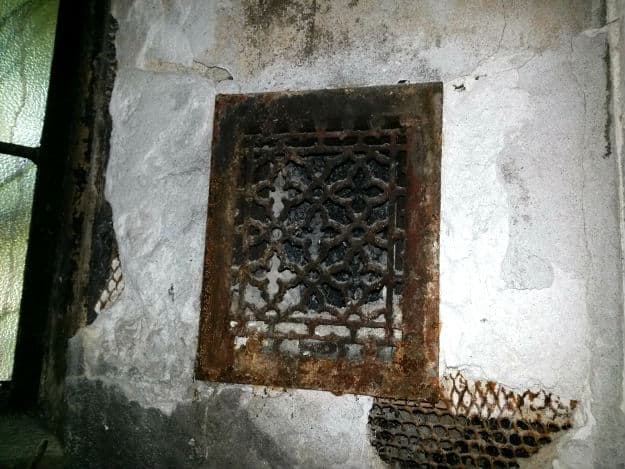
The plaster was so old it just fell apart in my hands. I barely even needed to pry it out.
Okay, so now I have it. What am I going to do with it?
My brother got married last year in South Carolina and I wanted to make him and his wife something for a wedding present. I figure, when you’re in your 30s, you don’t really need another toaster, so I thought something unique would be cool. I asked them their style and they said “coastal distressed.” Hmmmm…. Okay…. I enjoy trying to figure out what that means and what I can do.
So I decided to turn one of my grates into a coastal distressed end table for their new home.
Supplies needed:
- Old grate (these can be found at many thrift/flea market/antique or other type places)
- Legs for the table
- Drill Screws
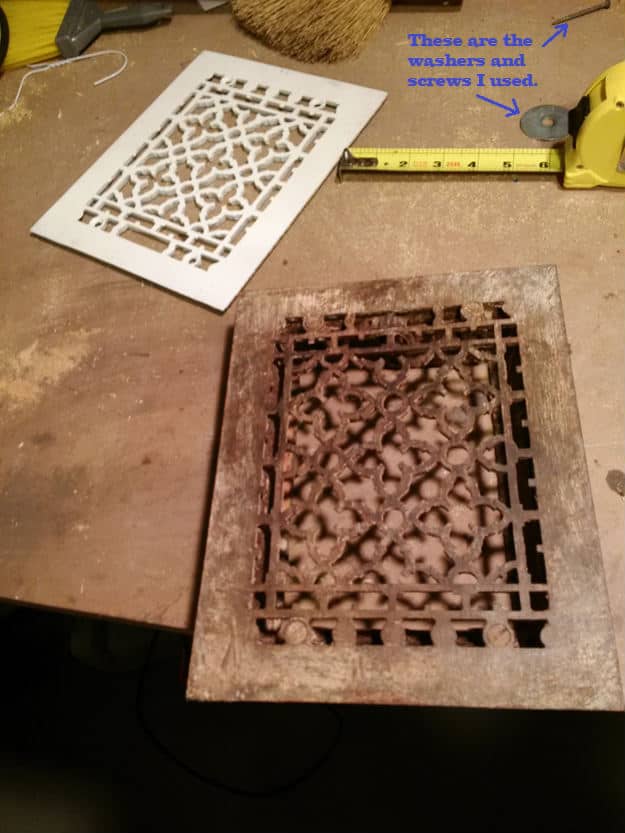
- Washers
**Note that I listed the hardware I used for this project. Your project might call for different hardware.**
Tools used:
- Orbital sander
- Respirator
- Small metal hand file
- Pick
- Hammer
- Crescent wrench
- Sandpaper (coarse, medium and fine)
- Saw
- Caulk
- Wood filler
- Spray paint
- Sealer
- Nail polish (yes, trust me)
- Wide, shallow tub
- Dishwashing gloves
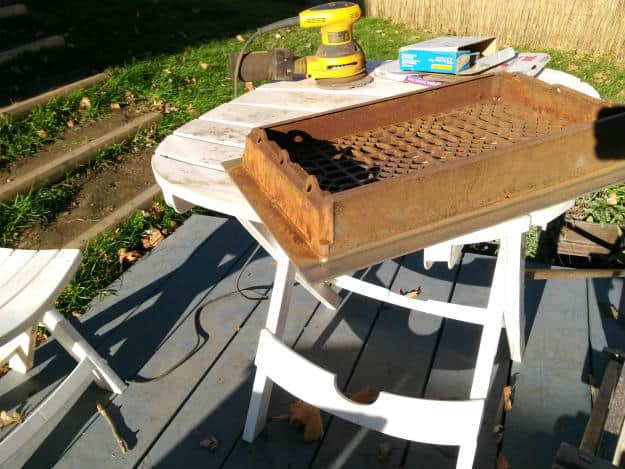
Step #1: Sand all the flat and easy to reach surfaces to remove rust
The first thing in the preparation is to get the grate ready. I used my orbital sander to get all the rust off of the flat surfaces. It being metal, I used a coarse grit, to really get down in there. It came off pretty easy as it’s been exposed to the elements for decades. For the love of everything, make sure you do this outside or in an extremely well-ventilated area. You’re sending little metal particles all over. Even outside, I used a respirator to protect myself from the noxious rust cloud.

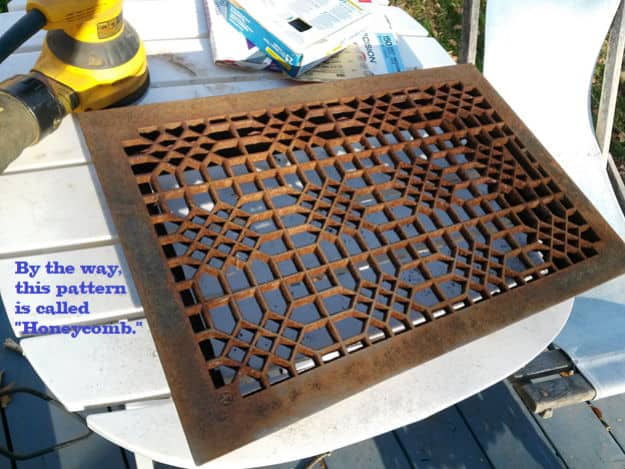
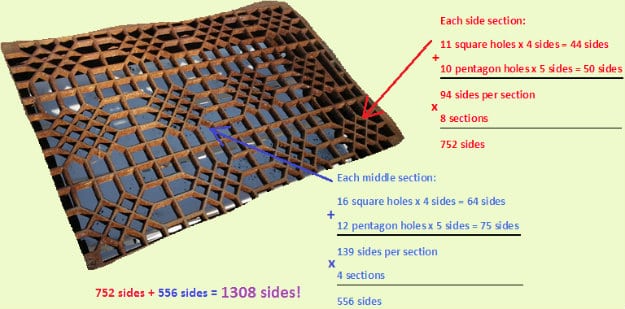
Step #2: Filing and picking
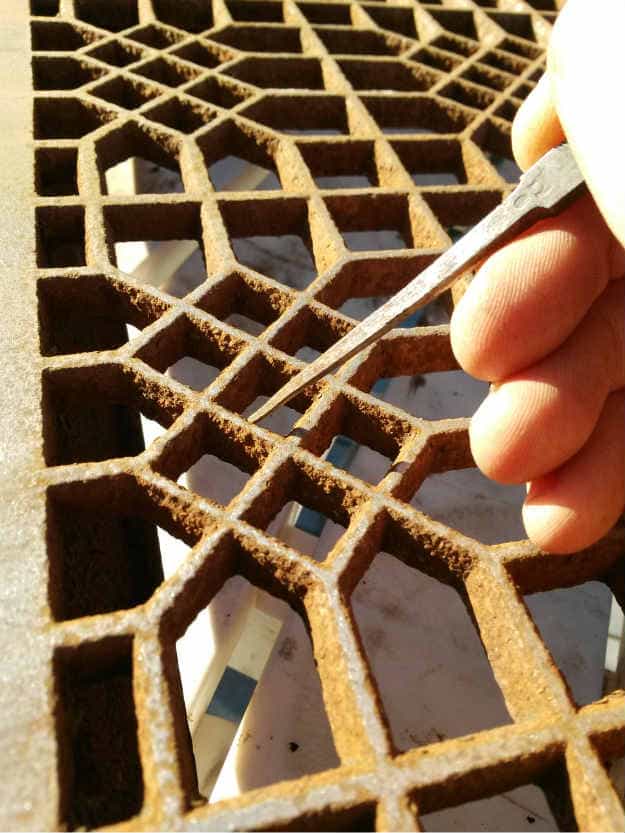
Okay, this part sucked. No way around it. I had to file and pick every surface of every hole. That is over 1,300 individual surfaces! I know it’s tempting to skip it or do a half-effort job, but if you do, and then paint it, the little rust pieces will eventually fall off, and with it the paint. It will end up looking shoddy and spotty. This took a few weeks of pecking away at it. The good part was that I could throw on a movie or TV show with my wife, throw down a piece of cardboard and just work on it while I watched. Hours and hours of work, but just do it while you’re doing something else and it’ll pass quickly.
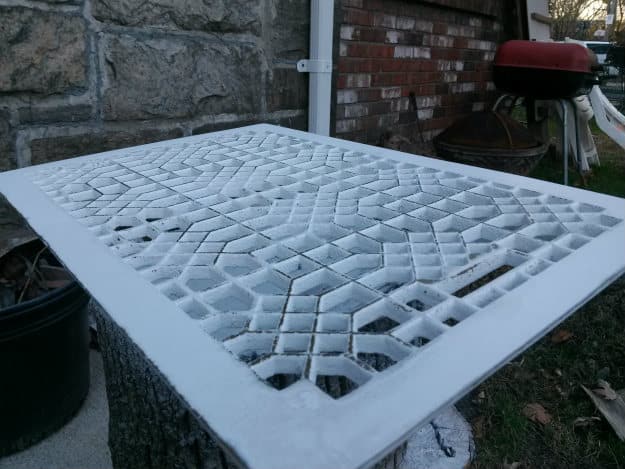
Step #3: Spray paint it
Now it’s time to paint the grate. I went back and forth about the color to use. Eventually I decided to use color on the legs and keep the most visual part, the grate, a neutral white color. When you have the ability, I always try to experiment or do a trial run, especially when you’re using one-of-a-kind materials. I used some of the smaller grates to test the paint.
I used a matte white paint that was made for metal. Again, make sure you’re in a well ventilated area. It’s always better to do a few light coats than one thick one. If it’s too thick, you get drips and drops and that doesn’t look good.
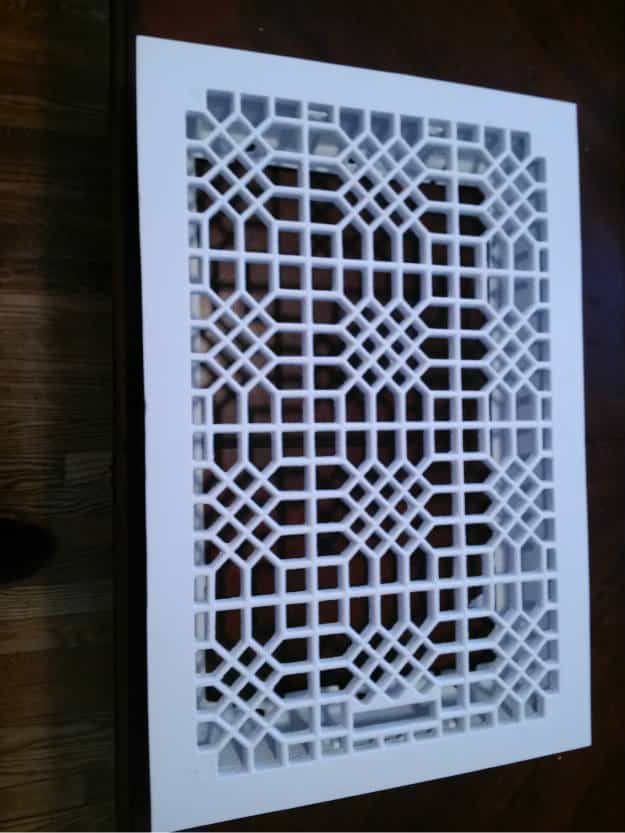
My wife thought it looked really pretty like this and didn’t want me to distress it. But to me, it’s too uniform with nothing visually to look at. Plus, if you’re doing the whole “industrial” thing, making it look like new kind of defeats the purpose. After doing a few coats, I used a spray sealer to protect the paint from water damage and casual wear and tear.
Step #4: Distressing
Distressing is taking something new or pure and making it look old, used or worn. I wanted to make the grate look its age a bit. In order to do it effectively, you need to imagine that the piece was getting rubbed and knocked around. So imagine where all of the contact points would be, mainly on the edges and corners with some other, random places as well. I chose my areas and gently started to hand sand the areas with coarse grit sand paper. Then I would move down to medium grit and finally fine grit. You can see that most of the edges and corners look to have a little wear and tear.
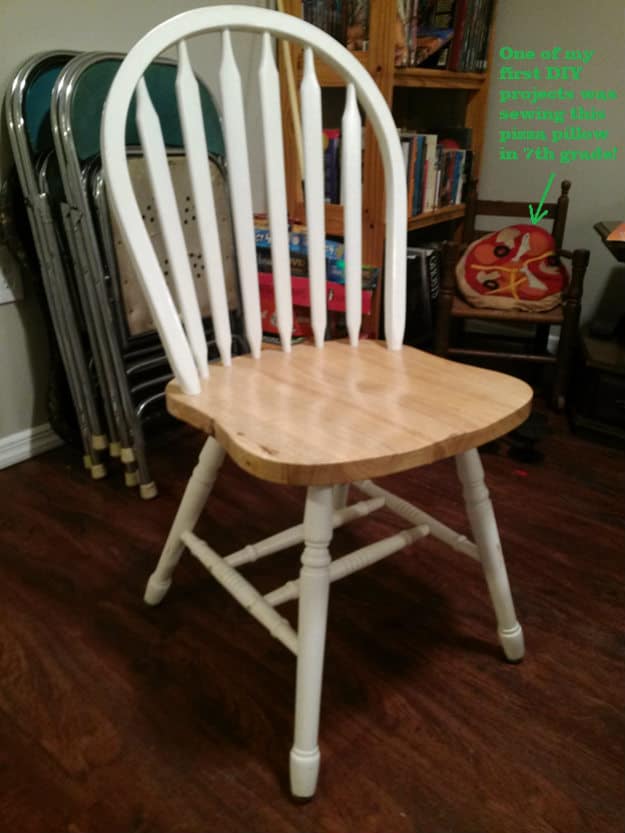
Step #5: She’s got le-e-egs!
The next step is to find yourself some legs. The type of legs you use is up to personal preference. I wanted to find some that had a little visual appeal to them, but didn’t draw away from the grate. Also, I didn’t want to use legs that are instantly identifiable of a certain time period, like mid-century modern or Victorian style. I checked out my usual favorite places like the Salvation Army, Goodwill, some thrift places and old furniture warehouses. I eventually settled on these legs from this chair at the Salvation Army.
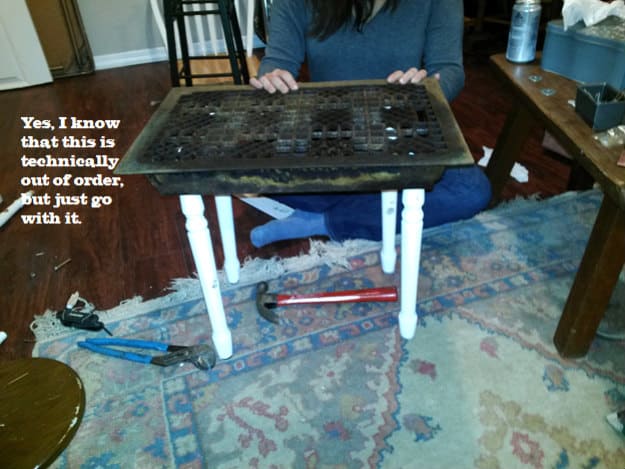
After I broke off/cut/sawed all of the legs off, I wanted to get a visual of how they would look. I wanted to make sure the design worked as well as the ratio of width, height and size.
If it doesn’t look quite right, don’t fall for the “sunk cost fallacy.” Basically what it means is, don’t say to yourself, “Well, they’re not quite right, but I already bought them, so I should use them.” If they’re not right, they’re not right. Throw ‘em away and search for new ones. This is why I always search used places, so if I don’t like it, I’ve only invested a few bucks and can easily justify throwing them out and starting again. In fact, I bought two options so I had a choice. One worked and I threw the other away. (But not before stripping it for parts!)
Step #6: Prepping the legs for painting
In order to get the legs ready for the nail polish bath (coming up soon!), I needed to get them ready. First I had to cut the legs level, as they were at angles on the chair. Then I removed the plastic pads on the bottom. Now I had to fill the big holes left by the braces. If the hole is small, go straight to wood filler. But if it’s a big hole, fill it up most of the way with caulk, then let them dry overnight.
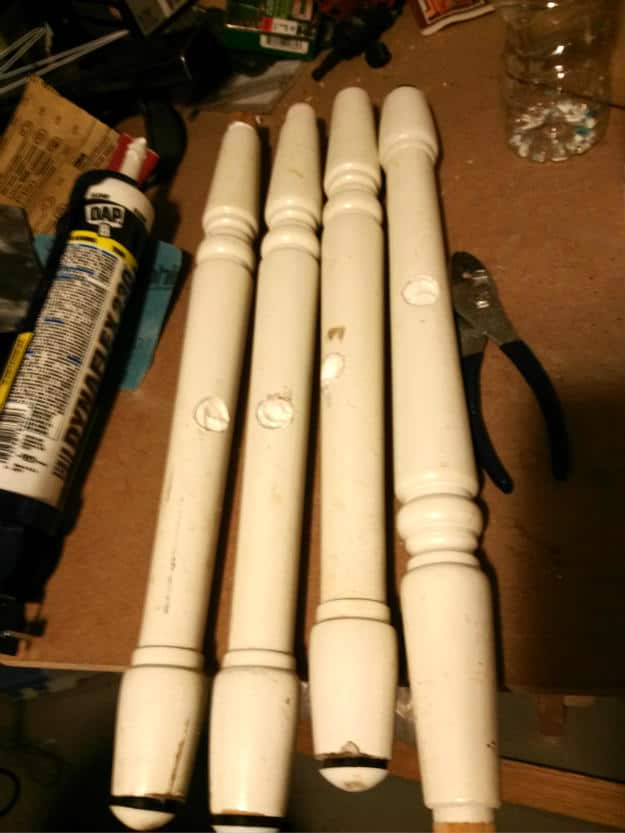
After the caulk was dry, I filled in the rest with wood filler. Make sure you add enough that all parts of the hole are filled up over the top. You want to make sure you have enough material to sand down. Then leave this to dry overnight.
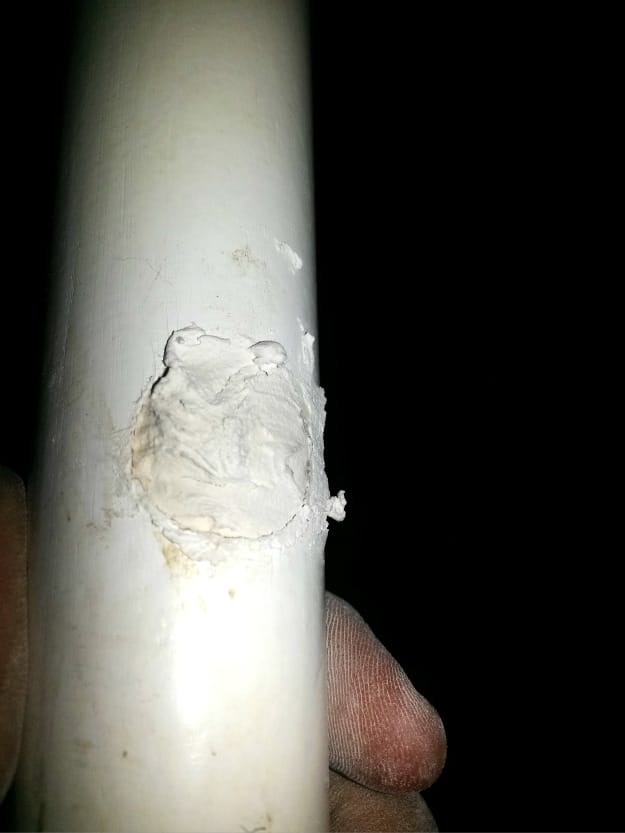
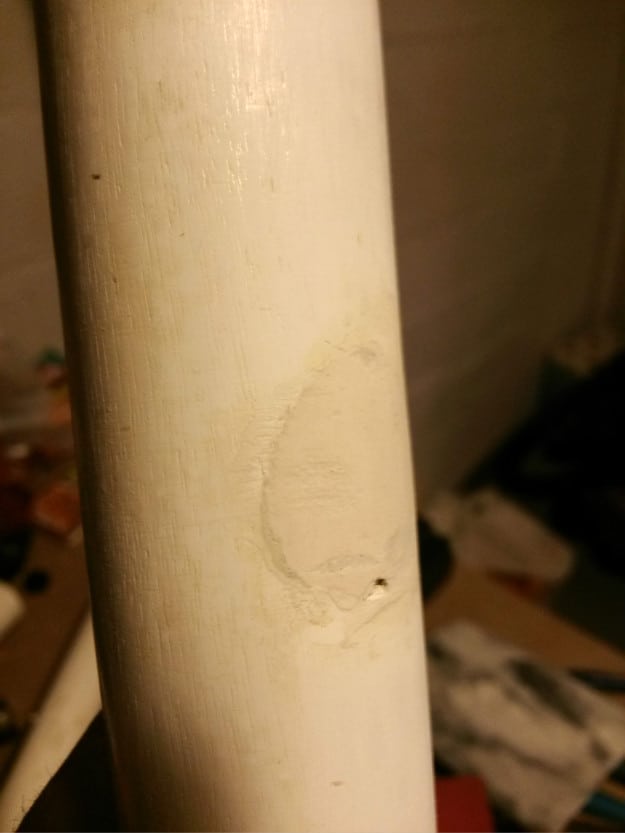
Once the wood filler is dry, it’s time to sand it down. When you sand it, make sure you sand it with an “around” motion, like you use to unscrew something. You want to make sure that the filler is matching the curved contour of the leg.
Step #7: “Paint” the legs
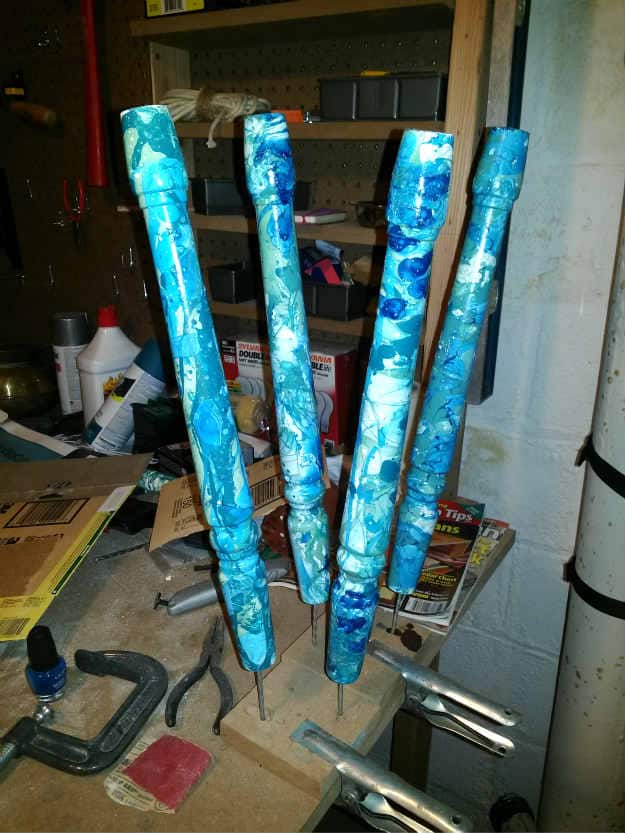
I have recently discovered a process that I am enjoying and experimenting with called water marbling using nail polish. I wanted to do this for the legs. As the style is coastal distressed, I wanted to use the colors of the sea and sand. So I chose some blue, green, teal and white colors. Get a wide, shallow tub and fill it with enough water to fully submerge the legs. Then pour in the nail polish. Try use zig-zag, or circular motions when pouring it in, so each color isn’t clumped together. You just want to get a slick on the top, you don’t need to empty all the bottles. First, I practiced on the chair’s braces that I wasn’t going to use, to get an idea of how it would look.
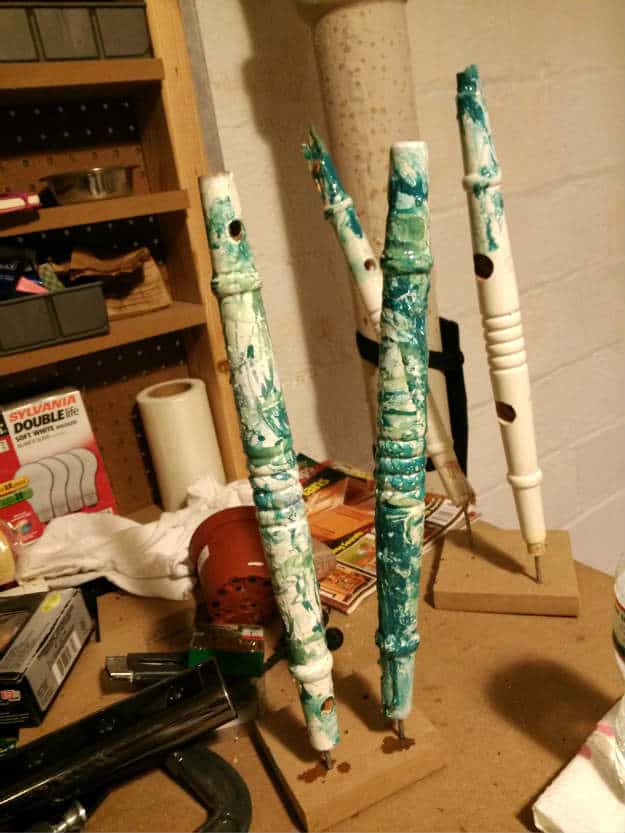
Once I knew what I wanted, it was time to do the legs.
After they are done, let them dry. I nailed some long nails into a piece of wood, so I could let them dry without having any of the finished surfaces resting on anything. I really like how they came out! They are all similar, yet each is distinctly different.
Step #8: Attach the legs
I messed around for a while trying to figure out the best way of affixing the legs to the grate. The large holes with the inward sloping base/edge made me have to get creative. Finally I decided on using drill screws. These are basically screws that have a hex top that can be tightened with a crescent or socket wrench. I got some wide washers to keep everything together. I spray painted the washers and screws and distressed them a bit as well. I’m all about continuity, meaning, if you had a distressed table, but undistressed hardware, it would look unbalanced to me.
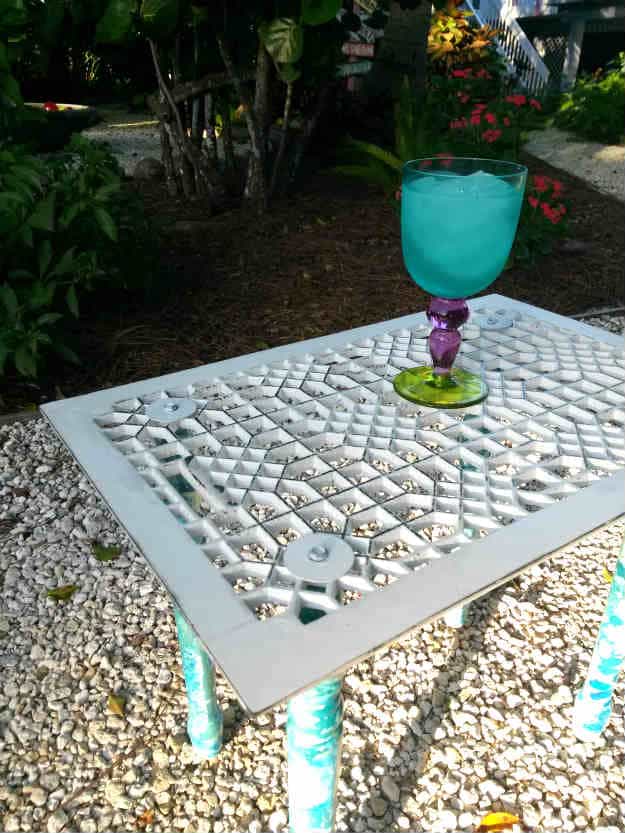
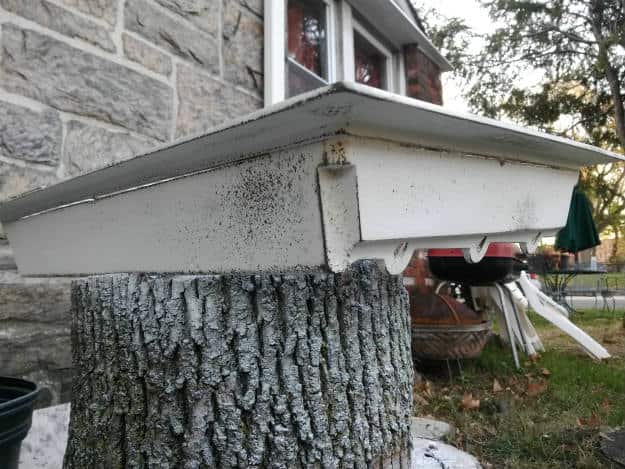
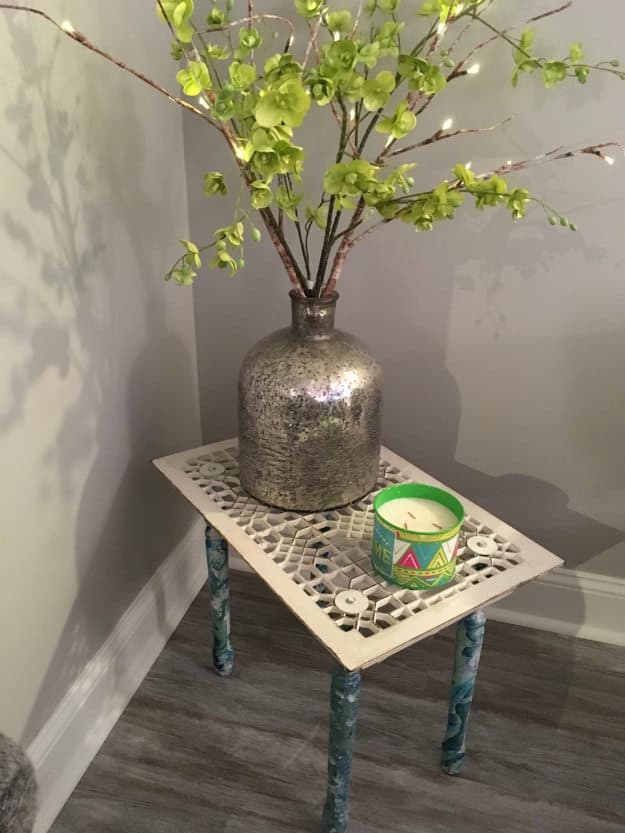
Step #9: Put it in the right place and add some decorative flair!
Here it is in my bro and sis-in-law’s place and I think it looks great!

What went wrong:
- Even with my diligent filing and picking, I still didn’t get everything and had a few places where the rust and paint fell off while I continued to work, so I had to do a few touch ups.
- It was difficult attaching the legs. I couldn’t get the grate steady enough, even with some help holding it. I finally pre-drilled some holes and the loosely attached the legs and then tightened them little by little, moving around to each one, making adjustments as I did.
- Cast iron is very brittle, especially that which has been in the elements for so long. In transit to SC, one whole side of the frame snapped off. I was very upset for a bit. I had to borrow some white paint to touch up all the exposed edges and then distress it a little. You can see the broken edge/corner in the last photo on the front left. But hey **shrugs** life happens and you gotta roll with it!
Up Next:21 Fleece Patterns You Can Sew To Stay Warm This WinterWhat did you think of this step by step guide to building your own costal distressed end table? Will you give this project a try? Let us know in the comment section below.


