


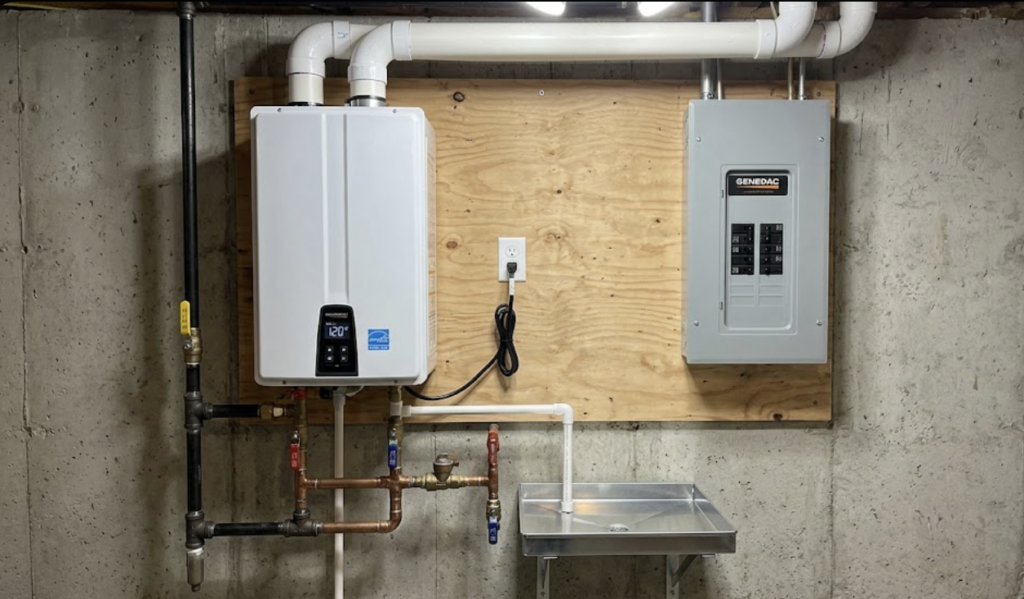

TL;DR: DIY electric tankless water heater installation is feasible for point-of-use units when a suitable circuit already exists. This project takes 4–8 hours and requires approximately $200–$400. Whole-house units require a licensed electrician for the electrical work and a permit in every U.S. state. Always verify panel capacity before purchasing any unit.
Point-of-Use vs. Whole-House: Which Electric Tankless Heater Can You Actually Install Yourself?
This is the most important decision you’ll make before touching anything. The answer changes the entire project scope.
Point-of-Use Units (Under-Sink, Single Fixture)
Point-of-use electric tankless heaters serve one fixture, typically a kitchen sink or a bathroom sink far from the main water heater. They draw 24–50 amps on a 240V circuit, or 110V for the smallest models. If you have a suitable existing circuit nearby, or if a licensed electrician installs the circuit first, the physical installation is genuinely homeowner-accessible. Mount the unit, connect the cold water supply line, connect the hot water output to the fixture, and make the electrical connection after power is confirmed OFF at the breaker panel.
Recommended point-of-use units:
- EcoSmart ECO 8 (8kW, 240V, 40A circuit)
- Stiebel Eltron Mini 2.5 (2.5kW, 120V, 20A — the most homeowner-friendly option for single sinks)
- Bosch Electric Mini Tank 4-Gallon (hybrid mini-tank, 120V, easier install than true tankless)
Whole-House Units
A whole-house electric tankless unit replaces a conventional tank heater and provides hot water to the entire home. These units require 150–200+ amps of dedicated capacity, commonly three separate 240V/50A circuits. For example, the EcoSmart ECO 27 requires 3 × 40A circuits while the Stiebel Eltron Tempra 29 Plus requires 150A service capacity.
The physical installation which consists of mounting, plumbing connections should be manageable for an experienced homeowner. However, connecting three heavy circuits to a panel is much more complicated even for seasoned builders. This is where you stop and call a licensed electrician.
What Do You Need for a DIY Electric Tankless Water Heater Installation?
Minimum (Point-of-Use, 120V unit, single sink):
- Stiebel Eltron Mini 2.5 or equivalent 120V unit (~$150–200)
- Teflon tape, adjustable wrench, pipe fittings to match supply lines
- Voltage tester / non-contact tester ($15–30)
- Drill with hole saw for mounting
- Wire nuts and wire staples if routing new wire
Mid-Range (Point-of-Use, 240V unit, licensed electrician installs circuit):
- EcoSmart ECO 8 (~$125–180)
- Licensed electrician to install 240V/40A dedicated circuit ($200–400)
- Plumbing tools: pipe cutter, SharkBite push-to-connect fittings, Teflon tape
- Mounting hardware, stud finder
Full Whole-House Replacement (licensed electrician for electrical work):
- Stiebel Eltron Tempra 29 Plus or EcoSmart ECO 27 ($400–700)
- Licensed electrician for panel assessment and circuit installation ($500–1,500+)
- Plumbing tools, soldering kit or push-to-connect fittings
- Permit fee ($50–150 depending on municipality)
What Panel Capacity Do You Need Before Buying an Electric Tankless Water Heater?
The core principle here is understanding your electrical system before purchasing any unit.
Step 1: Check Your Panel Capacity
Locate your main electrical panel. Look at the main breaker(the large double-pole breaker at the top). It tells you your service capacity: 100A, 150A, or 200A. Then identify how many breaker slots are occupied and whether any double-slot (tandem) breakers are already in use.
If your panel is 100A service with most slots filled, a whole-house electric tankless unit is not feasible without a panel upgrade. Stop here, call an electrician, and get an assessment before purchasing equipment.
Step 2: Pull Your Permit
In every U.S. state, any work that modifies the electrical panel or installs new 240V circuits requires a permit. In most jurisdictions, a homeowner can pull their own permit for work they perform themselves. However, the work must be inspected before you close the walls.
Call your local building department and ask: “Do I need a permit to install an electric tankless water heater?” The answer is yes for any electrical work. Most jurisdictions also require a permit for water heater replacement even without electrical changes.
Permit checklist:
- [ ] Contact local building department before work begins
- [ ] Confirm permit requirements for electrical AND plumbing work
- [ ] Ask if homeowner-pulled permits are allowed (most jurisdictions: yes, for your own residence)
- [ ] Schedule rough inspection before closing walls or covering electrical work
- [ ] Schedule final inspection after installation is complete
- [ ] File permit record with home records for insurance and resale purposes
Unpermitted electrical work can void homeowner’s insurance coverage for fire damage related to the installation and require complete removal and reinstallation at resale.
When Should You Stop the DIY and Call a Licensed Electrician?
STOP. Call a licensed electrician if any of the following apply:
- Your installation requires any work inside the main electrical panel such as adding breakers, evaluating load capacity, or running new branch circuits from the panel.
- Your unit requires 240V and there is no existing appropriate circuit nearby.
- Your panel service is 100A and you’re installing a whole-house unit.
- You are not certain which wire is hot, neutral, and ground. If you have to guess, stop.
- You discover aluminum wiring anywhere in the circuit path (silver-colored wire, not copper).
- You find evidence of previous amateur electrical work: melted insulation, mismatched wire gauge, or burnt breaker slots.
How Do You Install an Electric Tankless Water Heater Step by Step?
These steps assume the electrical circuit is already in place and confirmed correct . Do not start until power to the circuit is confirmed OFF with a voltage tester.
Step 1: Kill the power and verify. Turn off the breaker at the panel. Confirm with a non-contact voltage tester at the installation location. Test twice and don’t rely on the breaker label alone.
Step 2: Shut off the water supply. Locate the cold water supply line feeding the fixture and close the supply valve.
Step 3: Mount the unit. Locate studs with a stud finder. Tankless units are heavier than they look. Mount to studs and not drywall anchors. Follow the manufacturer’s mounting template.
Step 4: Connect the cold water inlet. Attach the cold water supply line to the unit’s inlet fitting using Teflon tape on threaded connections, or SharkBite push-to-connect fittings. Hand-tight plus one turn on threaded plastic fittings. Don’t overtighten.
Step 5: Connect the hot water outlet. Route hot water output to the fixture. For under-sink applications, standard braided supply lines typically reach the faucet’s hot inlet directly.
Step 6: Make the electrical connection. Open the unit’s wiring cover. With power confirmed off, connect the circuit wires per the manufacturer’s diagram. For 240V units: two hot wires (black and red) and a ground (bare copper or green). No neutral wire on 240V-only units. Secure connections in the terminal block with appropriate torque; loose connections cause heat buildup.
Step 7: Open the water supply first before power. Turn on the supply valve and allow the unit to fill completely. Check for leaks at all connections. Let the unit fill for two full minutes before any electrical power is applied.
Step 8: Restore power. Turn on the breaker at the panel. The unit should power up immediately.
Step 9: Test. Run the fixture. Temperature and flow should stabilize within 30 seconds on a point-of-use unit.
Recommended tool: Klein Tools Non-Contact Voltage Tester, a non-negotiable first purchase for any electrical work. You can get it here:
No products found.
What Are the Most Common DIY Electric Tankless Water Heater Installation Mistakes?
Powering up before the unit is full of water. Running an electric tankless heater dry burns out the heating elements immediately. Water first. Power second. Always.
Undersizing the circuit. The required circuit amperage is on the unit’s data plate. If the unit requires a 40A circuit, a 30A circuit is not acceptable even if the breaker physically fits the panel. Wire gauge and breaker must match the manufacturer’s specification.
Using push-to-connect fittings without checking the temperature rating. Standard SharkBite fittings are rated for hot water (200°F) and are fine for this application. Verify any off-brand fitting carries a hot-water rating before using it.
Skipping the permit. This will cost you more time and money when discovered at resale or following a water or electrical event.
Assuming the existing tank heater circuit is compatible. A conventional tank heater typically uses a single 240V/30A circuit. Many tankless units require 3 × 240V/40A circuits. These are not interchangeable.
RELATED: Electrical Panel Upgrade Cost Guide (2026)
Why Is My Electric Tankless Water Heater Not Working? Troubleshooting Guide
Unit powers on but produces cold water: Check that both hot wires are secured in the terminal block. A loose or missing connection on one wire can cause insufficient power draw to heat. Confirm 240V is reaching the unit with a voltage tester.
Water temperature fluctuates: Normal for tankless units during low-flow use. Increase flow rate slightly or adjust the unit’s temperature setting. Most electric tankless units have a minimum flow rate trigger of 0.3–0.5 GPM.
Unit trips breaker repeatedly: Circuit amperage may be insufficient for the unit’s actual draw under load. Don’t increase the breaker size without first verifying the wire gauge supports the higher amperage. Call an electrician.
Water leak at connection: Turn off the water supply. Retighten threaded connections or verify SharkBite fittings are fully seated. The pipe must be fully inserted past the clip. Retest after reseating.
Frequently Asked Questions
Can I install an electric tankless water heater myself? The physical mounting and plumbing connections are homeowner-accessible on point-of-use units. The electrical work — adding breakers to the panel or running new dedicated circuits requires a licensed electrician in most U.S. states and always requires a permit. The line: if it involves the panel or new 240V wiring from the panel, hire a pro.
Do I need a permit to install a tankless water heater? Yes, for any electrical work modifying the panel or adding dedicated circuits. Also yes in most jurisdictions for water heater replacement, even without electrical changes. Contact your local building department before starting. Permit fees typically run $50–150. The inspection confirms the work is safe before you close walls or put the installation into daily use.
What size breaker do I need for an electric tankless water heater? It depends on the unit. Check the manufacturer’s spec sheet. Point-of-use 120V units may need only a 20A circuit. A whole-house 240V unit like the EcoSmart ECO 27 requires three 40A, 240V dedicated circuits. Never size a breaker below the manufacturer’s requirement, and always match wire gauge to breaker size: 40A requires 8 AWG wire minimum.
What wire gauge does an electric tankless water heater require? Wire gauge must match circuit amperage. A 40A circuit requires 8 AWG copper wire minimum; a 50A circuit requires 6 AWG. The breaker size and wire gauge must both match the manufacturer’s specification on the unit’s data plate — never upsize a breaker without confirming the wire can handle the higher amperage.
Can I reuse my existing tank water heater circuit for a tankless unit? Usually not. A conventional tank heater typically runs on a single 240V/30A circuit. Most whole-house electric tankless units require multiple dedicated 240V/40–50A circuits, specifically three separate circuits for units like the EcoSmart ECO 27. A licensed electrician must assess panel capacity before any conversion attempt.









