


These step-by-step instructions will allow you to build a geodesic dome that is 19 feet wide x 9.5 feet high.
RELATED: Patio Projects For Your Garden & Landscape | DIY Projects
How to Build a Geodesic Dome: 268 Square Feet for $300
How to Build a 19′ 268 Square Foot Geodome
Geodesic domes can be used as an extra storage room, a living space, or a geodesic dome greenhouse. It takes about three hours to put one together and about 15 minutes to take it apart.
The parts are readily available at any local hardware store, and the cost for this 19 feet x 9.5, 278 square feet dome is about $300.

Supplies Needed to Build a Geodesic Dome
- 85 .5” x 10’ galvanized steel electrical conduit
- 100 2” x .25” bolts
- 100 .25” nuts
- 200 .25” washers
- 6 cans of spray paint in red, blue, green, yellow, purple, black
- zip ties
- plastic sheeting
- plastic clips
- duct tape
Tools Needed to Build a Geodesic Dome
- metal saw
- drill
- press or vice
- socket set
- optional ladder or sawhorses
Let us show you exactly how it’s made. Watch this step-by-step instructional video where we show you how to build your very own geodesic dome.
Our original video got lost in space! So instead I found this great tutorial with some excellent advice from ghog62’s channel:
Follow along as these guys (from the video) use wood beams instead of colored pipes, but it’s the same idea! Our guide below will help make things clear.
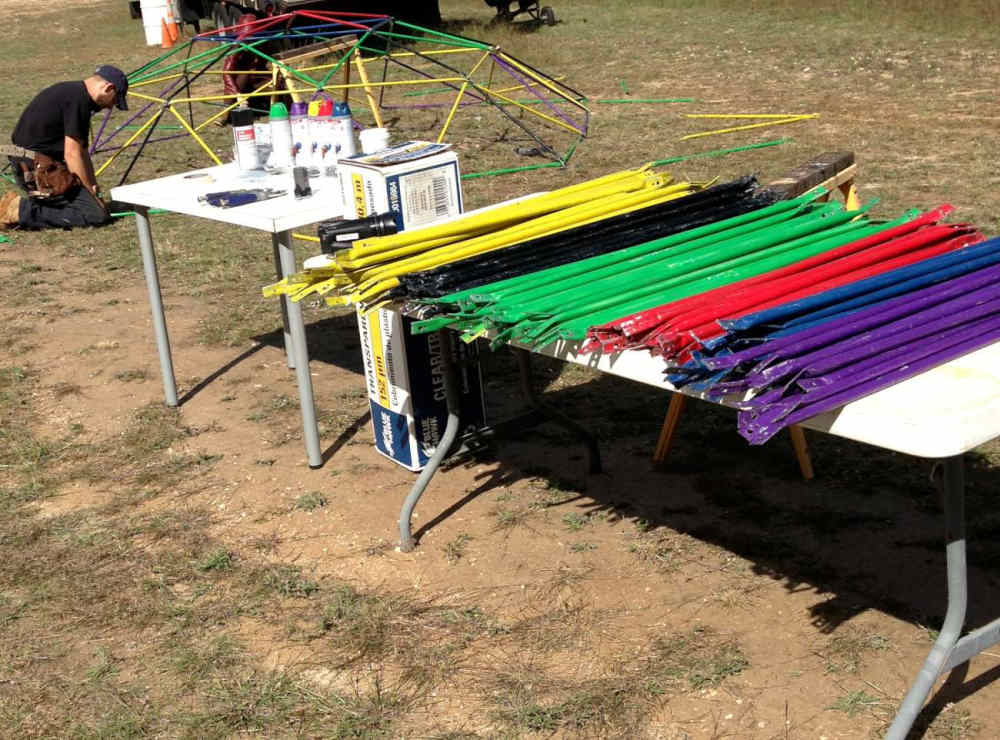
| STRUTS | ANGLE | COLOR | ||
| 30 X “A” | 2′ 6.86″ (30 55/64″) | 7.27° | RED | |
| 30 X “B” | 2′ 11.66″ (35 21/32”) | 8.49° | BLUE | |
| 60 X “C” | 2′ 11.576″ (35 9/16”) | 8.47° | GREEN | |
| 70 X “D” | 3′ 1.664″ (37 21/32”) | 9.35° | YELLOW | |
| 30 X “E” | 3′ 3.044″ (39 3/64”) | 8.59° | PURPLE | |
| 30 X “F” | 3′ .044″ (36 3/64”) | 9.00° | BLACK |
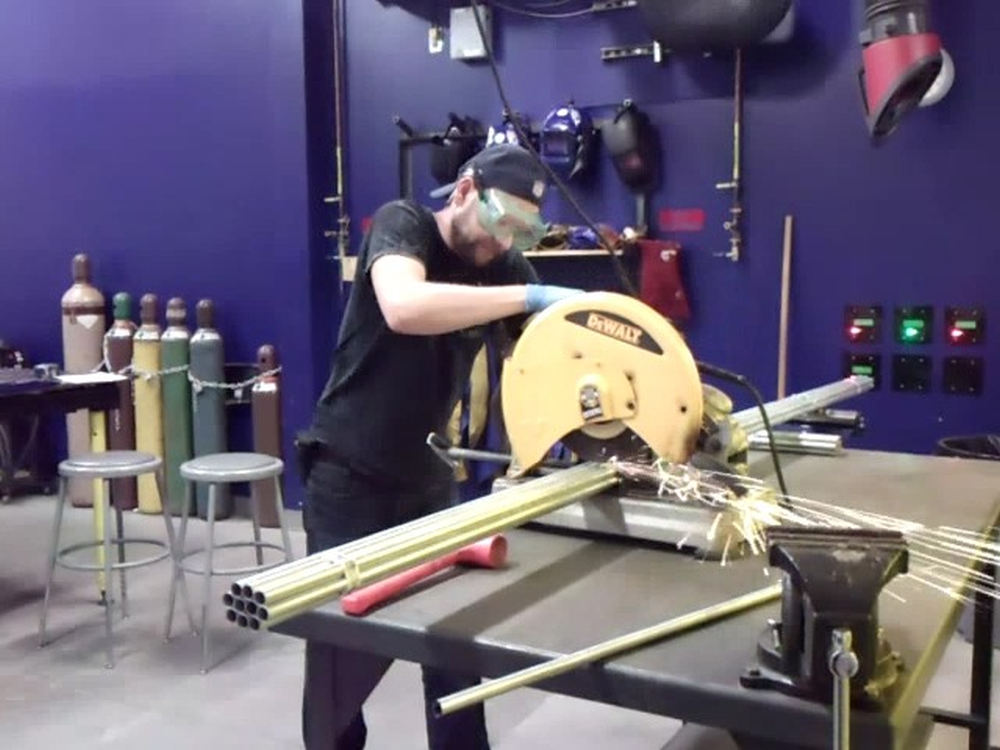
Step 1: Cut Parts to Length
Measure and cut parts to the lengths provided above. Be as accurate as possible. Your accuracy must be within a quarter of an inch.
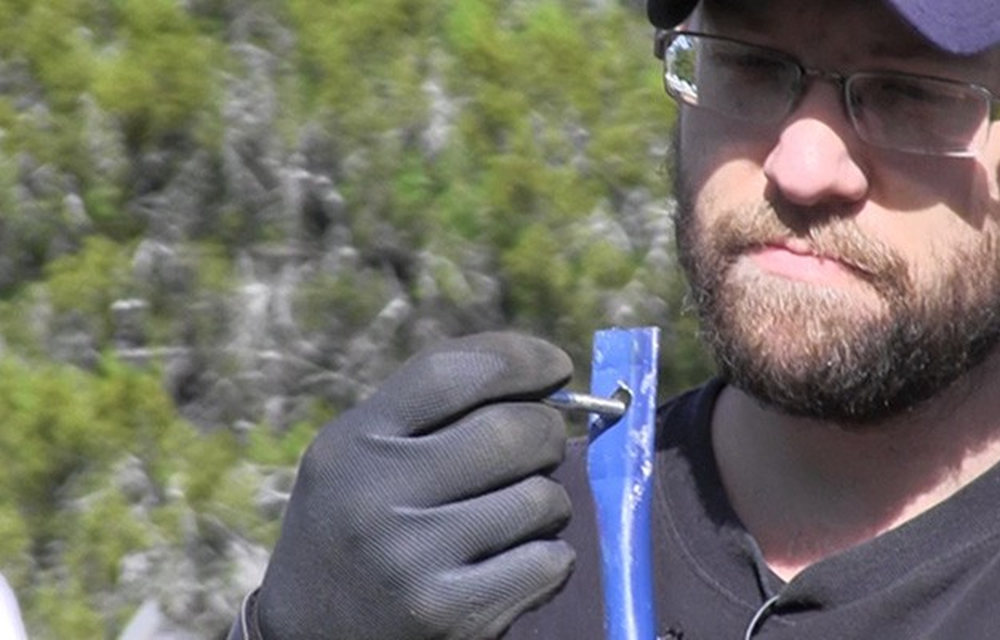
Step 2: Flatten the Ends

Flatten 1.5” of both ends of the pipe so they are square to each other, using either a press or a vice. Do not use a hammer to flatten the ends, as it will split the metal.
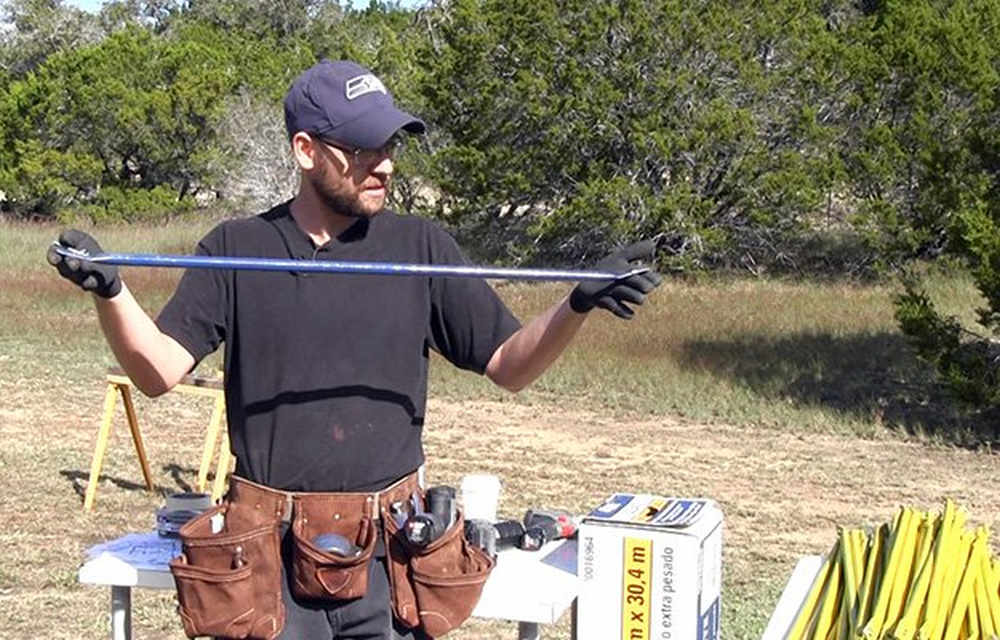
Step 3: Bend the Angles
Bend the ends at the angles provided above in the same direction. Your angle should be to the nearest degree.
You want to be as close as you can. Some inaccuracy here is okay, the pipes will give a bit as you bolt them together.
Use an angle finder, protractor, or cell phone app to measure the angles. A vice or the homemade jig shown in the video can be used to bend the angles.
Step 4: Drill the Holes
It is important to drill the holes after you bend the angles, as the length of the strut shortens once the pipes are bent. The distance between the center of each hole is provided below.
Drill your holes with a 3/8” drill bit to provide extra space for assembly. This does not affect structural integrity.
| 30 X “A” | 2′ 4.86″ |
| 30 X “B” | 2′ 9.66″ |
| 60 X “C” | 2′ 9.576″ |
| 70 X “D” | 2′ 11.664″ |
| 30 X “E” | 3′ 1.044″ |
| 30 X “F” | 2′ 10.044″ |
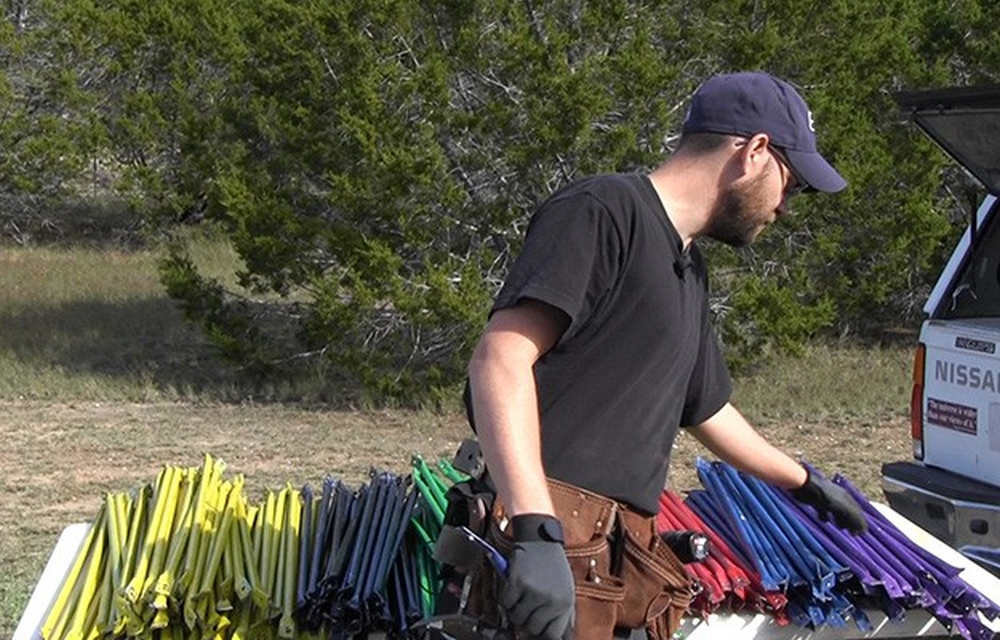
Step 5: Paint
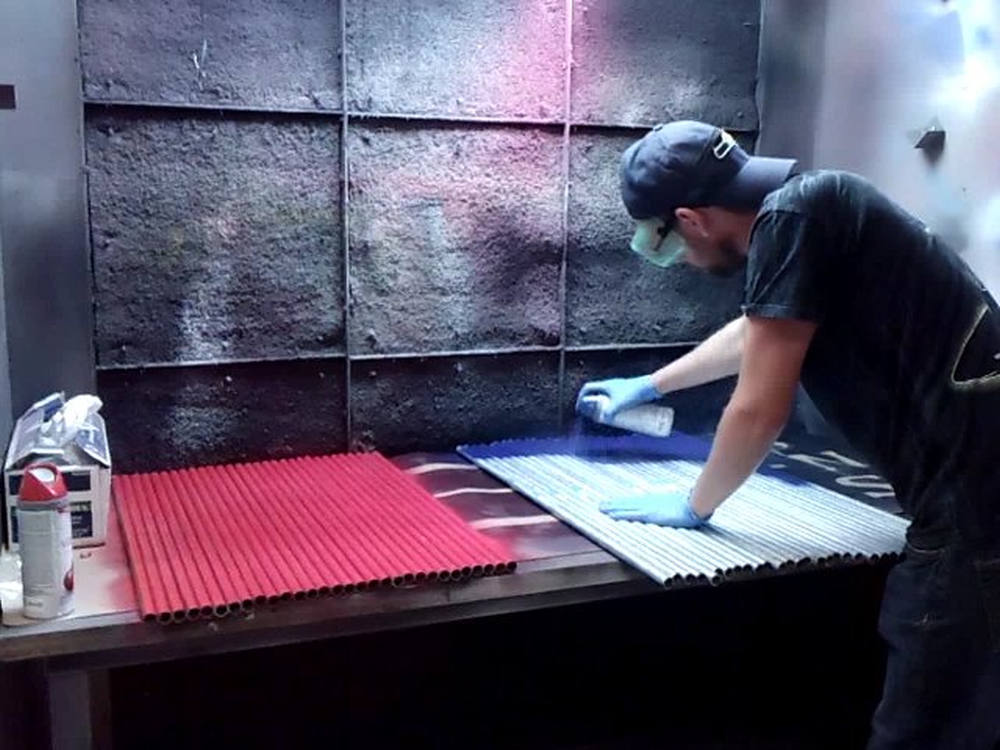
Paint each strut to protect from the elements, and to color code it to aid in the assembly process.
RELATED: How To Build A DIY Greenhouse | Greenhouse Design Ideas
Step 6: Layout
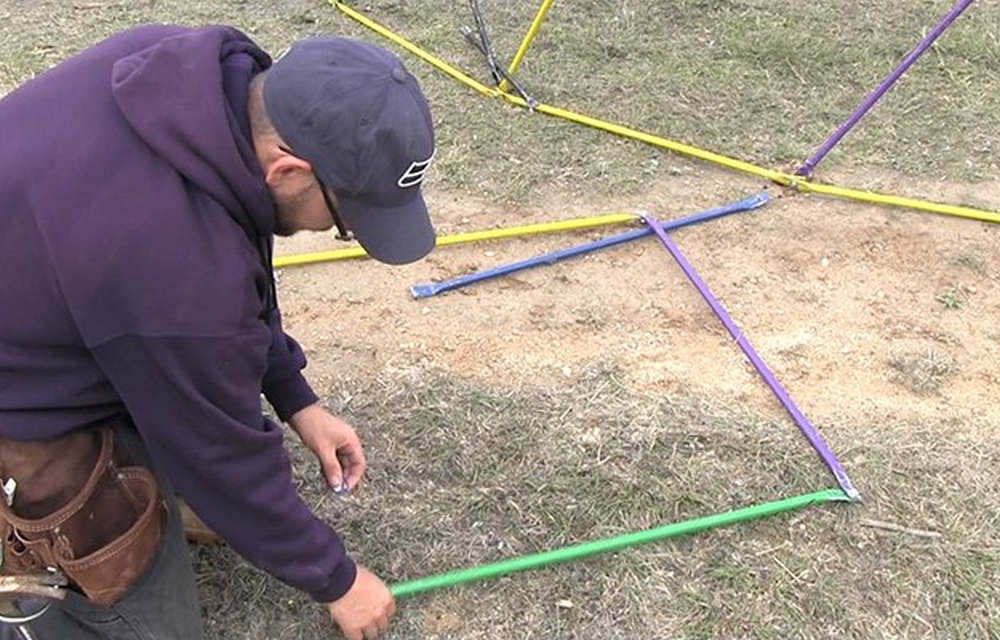
Using the map provided, layout 3 rows down starting at the top of the dome. Then begin assembly.
Once you have 3 rows assembled, layout the next 2 rows. Continue until all parts are assembled.
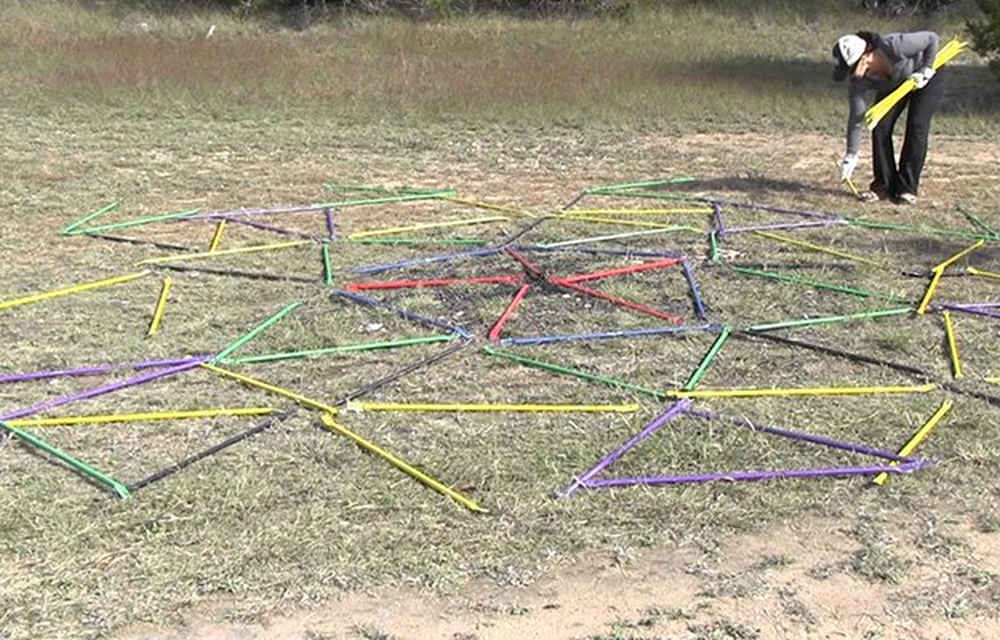
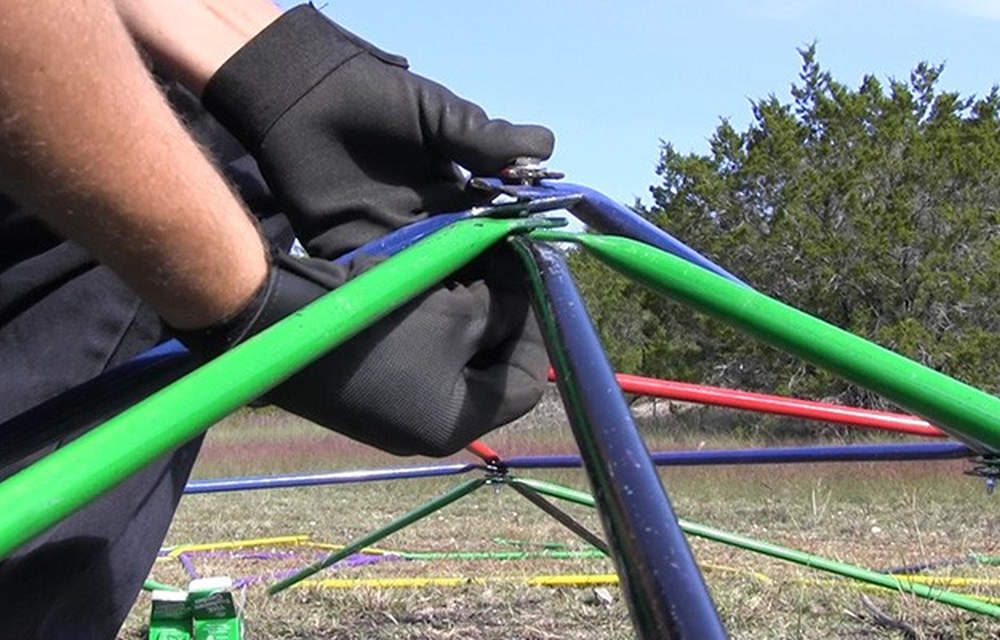
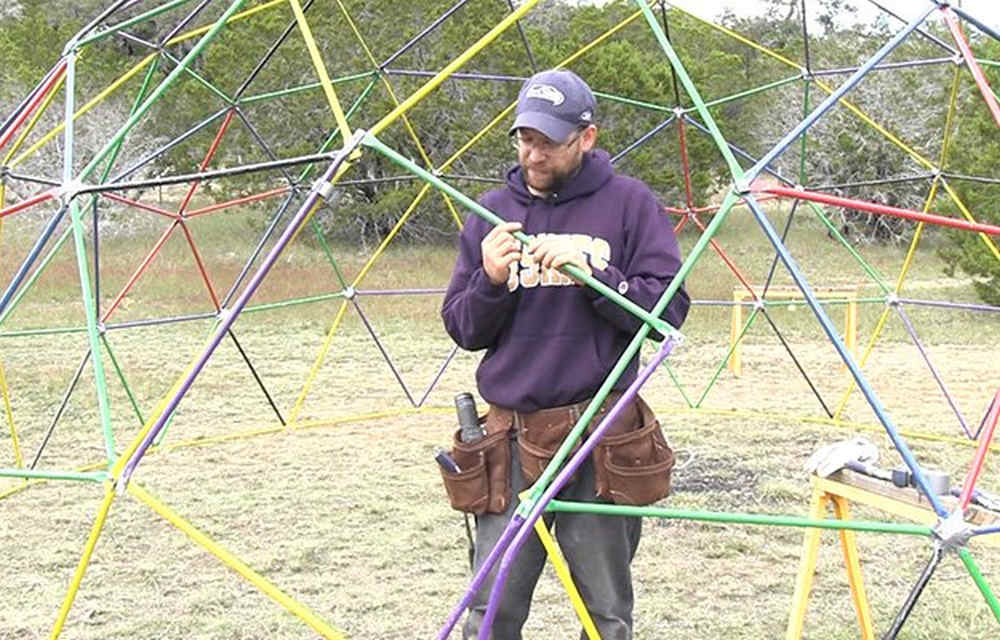
Step 7: Assembly
Starting from the top of the dome, follow the pattern and begin bolting the struts together. Building from the top down eliminates the need to work above head and using ladders.
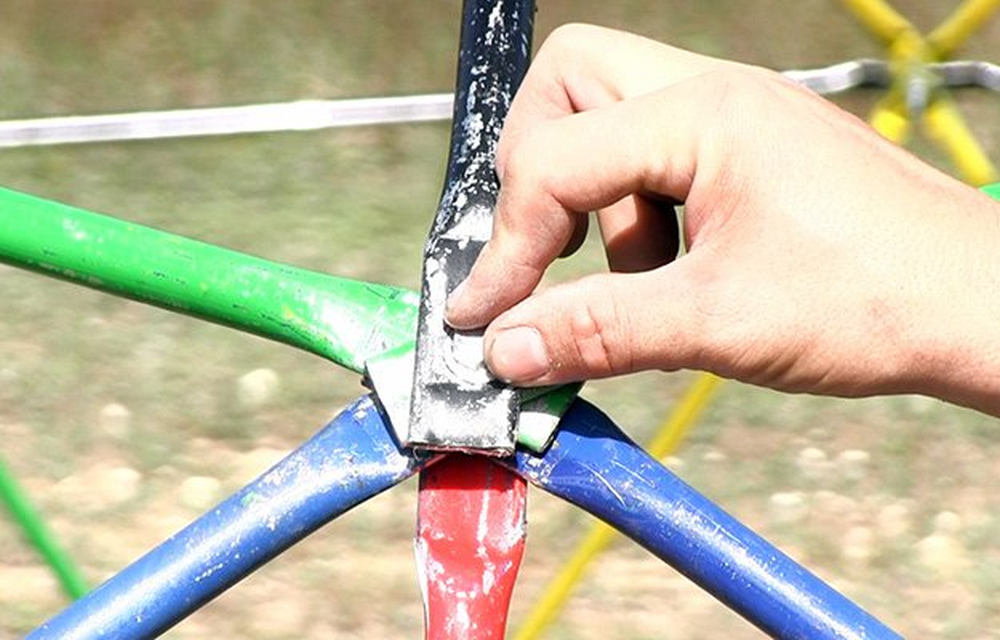
Sawhorses can be used to support the structure as it is being assembled. Each bolt should have 2 washers and 1 nut.
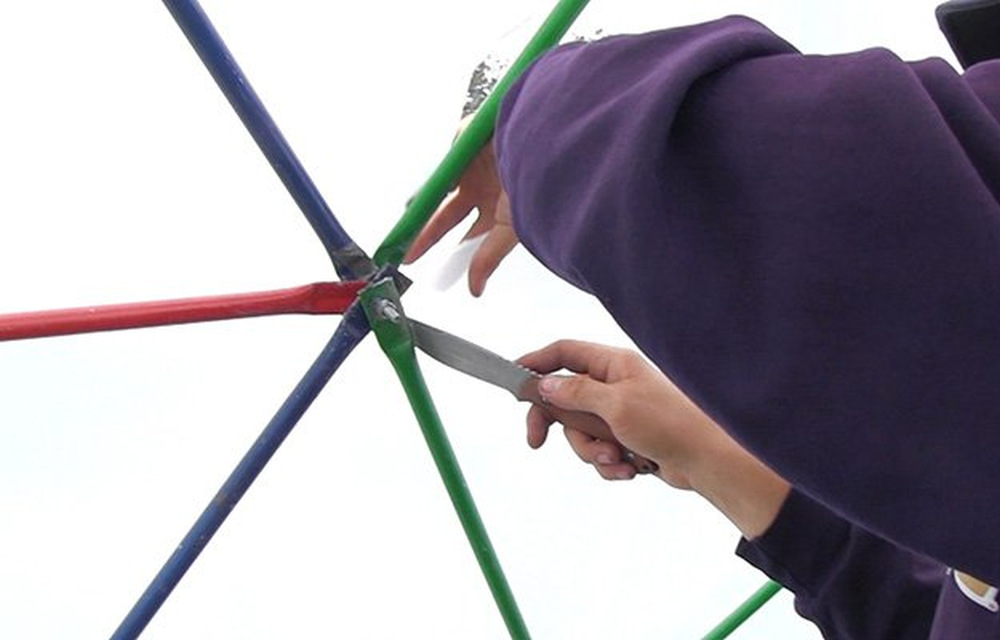
As you build, only bring each joint to hand tight until the V underneath it is completed. Then, tighten completely.
Be sure not to overtighten, but remove any gaps between the flat ends of the struts. Once you have tightened a joint, tape it with duct tape to cover any sharp edges that may tear the plastic cover.

Step 8: Door
Remove any section of the dome where you want the door. Use those struts to build the door.
Use zip ties as hinges. Be sure not to remove too many struts as it will affect the structural integrity.

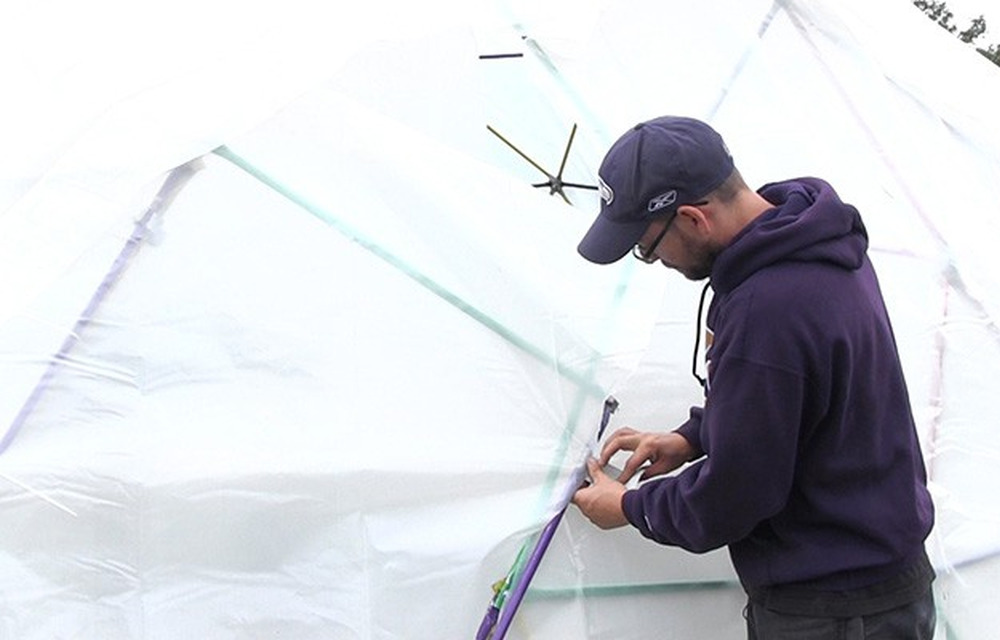
Step 9: Sheeting

You can buy a 32’ x 32’ sheet to cover the dome in one piece. Or, you can buy a roll of 20’ by 100’ and cover the dome in two pieces, crossing one piece over the other.
Before you unfold your sheeting, pull it over the top of the dome. Two people, one on each end, then unfold the plastic over the dome.
If it’s a windy day, you will need more than two people. Ropes will help hold the plastic down until it is secured to the base of the dome.
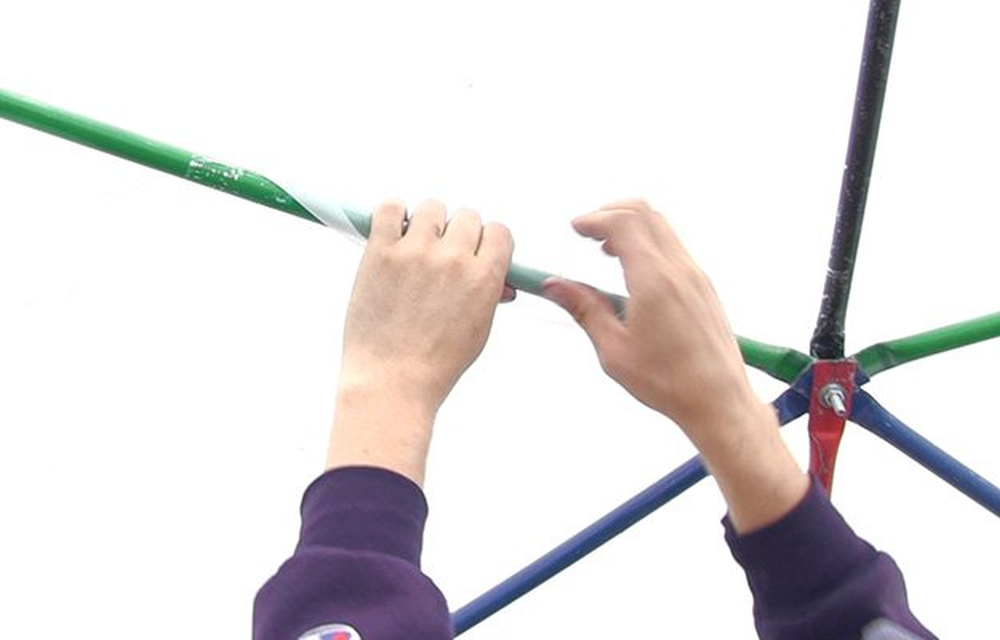
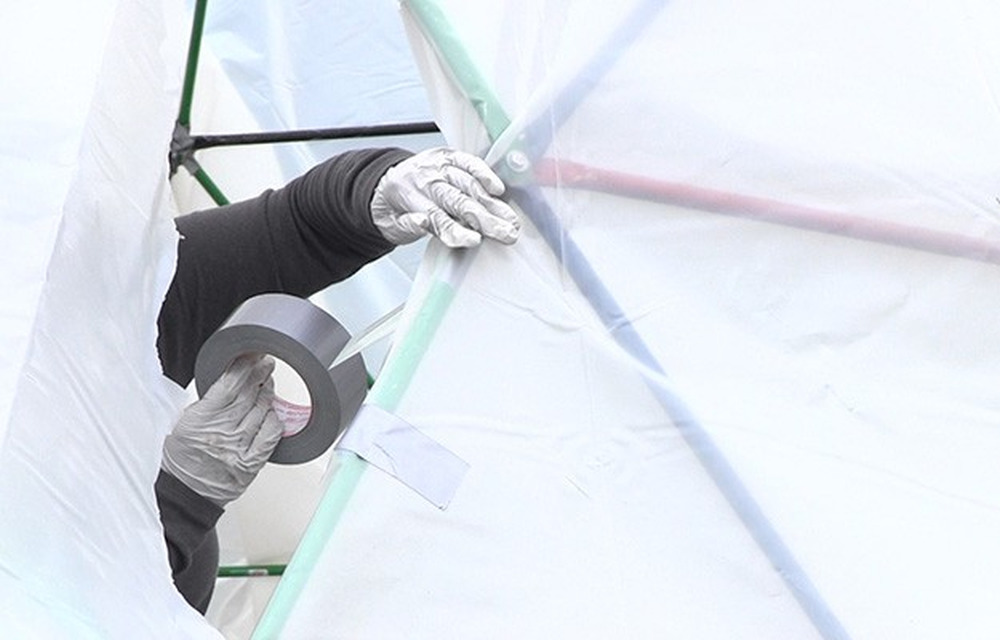
Plastic clips can be used to secure the edges of the sheeting to the base of the dome. Or, it can be taped or screwed to the struts.
To ensure a good seal, pick up the edges of the dome and pull the plastic underneath, and secure it from the inside. Cut the plastic to match the framework of your door, and attach it to the framework with either clips or tape.
When taping the plastic sheeting, wrap the tape around the strut at least once, and then attach the tape to the plastic sheeting.
Step 10: Enjoy!
Download the Map to Assemble 9ft Dome Drawing through this link.

Check out this other geodesic dome tutorial shared to us by Zip Tie Domes. This one was built using only PVC and Zip Ties:
Geodesic dome is one of the strongest, lightest structures you can build. Due to their unique geodesic dome design, they are wind, hurricane, and tornado resistant.
You’ll also discover that there are different types of geodesic domes you can make. So if you happen to have the need to use a geodesic dome, then this will be the perfect tutorial for you to DIY it!
Like this post? Let us know in the comments section below! Your feedback matters. The more interest we get in posts, the more likely we are to do more like that.
Be sure to like us on Facebook so you can be the first to know about the latest project updates as well as great DIY articles.
UP NEXT:
- 16 Cool DIY Crafts To Make With Pipe Cleaners
- How Zip Ties Can Help you Bike Through a Blizzard
- Our Last Minute Gift Ideas For Christmas | Creative Christmas Gifts
Editor’s Note: This post was originally published on March 19, 2018, and has been updated for quality and relevancy.


