


At a Glance: Boho Ghost Wall Hanging
- The loops tuck between the hoop’s two rings. Tie every strip to the plain inner ring, then press the outer ring down over the knots. The flowers cover anything that still peeks out.
- Cut your strips twice as long as you want the ghost to hang. Folding each one in half is what makes the loop. It’s also what cuts your length in half.
- About $20 and 40 minutes. One 8-inch hoop, an old sheet you don’t love anymore, and a single bush of fall stems.
To make a boho ghost wall hanging, you loop torn strips of cream fabric and lace onto an 8-inch embroidery hoop, glue two black felt ovals on for eyes, and cover the top of the hoop with faux flowers. Jump to the supplies, or skip straight to the loop question.
Because that’s the question. Every time this ghost goes up somewhere, the same thing happens in the comments, almost word for word.
“How do hide the loops ? In one photo it loops onto the circle. The photo next to it, you can’t see the lace loops. How are they tucked in?”
Twenty-three people hit like on that one. Someone else asked it shorter: “How are the knots hidden.” The best answer didn’t come from the photo. It came from readers who’ve used an embroidery hoop before.
Here it is. An embroidery hoop is two rings, and the loops get sandwiched between them. Every strip ties onto the plain inner ring. Then the outer ring, the one with the screw, presses down over the whole row and hides it behind a band of clean wood.
Then the flowers go across the top as a second layer of cover. If your fabric is too thick for the outer ring to close over, the flowers become the only cover, and that works too. It just means they’re doing a job instead of decorating, so don’t skimp on them.
Do it that way and the ghost reads as one piece of fabric pouring out from under a clean wood ring.
What goes wrong with a boho ghost wall hanging?
Two failure modes sink a boho ghost wall hanging, and they’re the only two worth warning you about.
You space the strips out. Twelve strips on an 8-inch hoop feels like plenty while you’re working, because the fabric fans out and hides the gaps when it’s flat on the table. Hang it up and gravity pulls everything straight down. Now the hoop shows through and so does every loop. Twenty strips is the floor. Crowded is the look.
You measure the strip as the finished length. You want a ghost that hangs 18 inches, so you cut 18-inch strips. Then you fold each one in half to make the loop and you’ve got a 9-inch ghost. Cut long. You can always trim it short at the end, and you will.
What do you need to make a boho ghost wall hanging?
Makes one ghost, about 8 inches wide and 20 inches long
- 1 embroidery hoop, 8 inches, both rings. The strips tie onto the plain inner ring, and the outer ring with the screw clamps down over them. Wood or bamboo suits the look best.
- Cream fabric, about a yard. An old flat sheet is perfect and free. Cheesecloth, muslin, or gauze all work, drape better, and slide under the outer ring more easily.
- Lace, a few yards of trim or one old curtain panel. This is what keeps it from looking like a rag. Mix two or three widths.
- Black felt, one sheet. Stiff craft felt holds an oval shape better than the soft stuff.
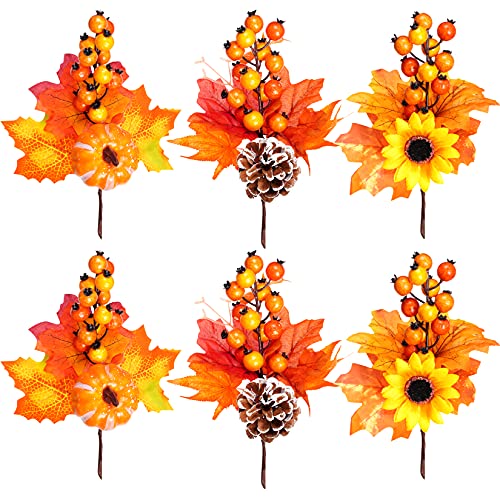
- Faux flowers and greenery, one bush of each. Fall stems with berries do the most work for the least money.
- Ribbon for hanging, about 18 inches. Velvet or satin. Jute if you want it rougher.
- Hot glue gun. Low temp is the better pick here, and the reason is further down.
- Sharp scissors. Only for starting the tears and cutting the felt.
Most of that list is stuff you already own or can pull out of a linen closet. The three you’ll probably have to buy are the drapey fabric, the stems, and the ribbon, so here’s what we’d grab for those.
DIY Projects earns a small commission from the links in this section, at no extra cost to you.



Quick tip: Tear one test strip before you commit to twenty. Woven cotton tears clean along the crosswise grain, which is one continuous thread running the full width of the fabric. University of Nebraska-Lincoln Extension’s fabric prep guide has you find that line by pulling a crosswise thread and cutting along it, and a tear follows that same line on its own. If your test strip wanders off sideways, that fabric has a finish on it. Cut those with scissors instead.
How do you make a boho ghost wall hanging?
Four steps. Do all your tearing first, in one pile, because stopping to tear another strip halfway through the loops is how spacing goes wrong.
1. Tear the strips
Cut strips 2 to 3 inches wide and 36 to 45 inches long. Snip an inch into the edge with scissors, then grab both sides and rip. It’s loud and it’s fast and the frayed edge it leaves is the whole point.
Make about 20. Vary the widths on purpose. Tear the lace into the same lengths and keep it in a separate pile so you can alternate.
2. Loop them on, and deal with the loops
Separate your hoop into its two rings. Fold a strip in half, lay the folded end over the inner ring (the plain one with no screw), reach through the loop from behind, and pull both tails through. Snug it down. That’s the whole knot, and it’s one of the four we walk through in our basic macrame knots guide.
This is where the loops go. Every strip ties onto the inner ring. When they’re all on, you press the outer ring down over the top and tighten the screw. The outer ring clamps right over the row of collars and hides them. Readers who sew spotted it straight away. One put it plainly: “its an embroidery hoop so there are 2 hoops that fit inside of each other. Tie the pieces to the inside hoop then…” Twenty people liked that, and they were right.
Slide each new strip tight against the last. Don’t eyeball the gaps, close them. Alternate fabric, lace, fabric, lace. And give each knot a quarter turn as you go so the pinch sits on the back of the ring. That keeps the front of the collars thin, and the front is what the outer ring has to fit over.
All twenty strips go across the top arc only. Roughly ten o’clock to two o’clock, about a third of the ring. It looks like they should wrap the whole hoop. They shouldn’t. The fabric falls in front of the lower ring and hides it for you, and crowding every strip into that top third is what gives you a dense curtain instead of a thin fringe.
Open the screw all the way before the outer ring goes on. Twenty collars add real thickness across that arc. Cheesecloth and lace slip under easily. Heavy cotton sheeting can be a fight. Set the outer ring on at the bottom first, then work it up and over the knots, with the screw at the top. If it won’t close, don’t force it. Wood splits at the screw, and that’s the end of the hoop.
If it won’t fit, the fallback is flowers. Skip the outer ring, tie your loops to a single ring, and glue the florals straight over the row in step 4. One reader shared her own finished build with exactly that note: “I used the flowers to hide the loops!” It works. Just buy a fuller floral bush, because now nothing else is covering the knots.
The council is split on which way up you build it. The straightforward way is to tie across the top arc and work outward. But readers who’ve made a few of these swear by the other way around, and one of them laid it out better than we could: “Knot it in a u-shape around the bottom, then you flip.it over so it drapes. Then add the flowers. It gives it more flow and volume than if you were to start at the top.”
She’s right, and there’s a reason it works. Knotting along the bottom curve lets every strip fall away from your hands while you tighten, so the collars all seat the same direction. Flip the hoop and that direction is now the back. A ghost-wreath build published this month uses the same logic, keeping the knots on the lower curve and leaving the upper wire bare so a hat can cover them. Same trick, different lid.
So pick by your fabric and your patience, not by the photo. Thin fabric and lace? Two rings, knots sandwiched, and the flowers are pure decoration. Heavy cotton that won’t fit under the outer ring? One ring, loops across the top, flowers over them. Making three, or fussy about volume? Knot the bottom curve, flip, then ring or flower. That last one takes five minutes longer and looks noticeably fuller.
3. Glue on the face
Cut two ovals from black felt, each about an inch tall and three quarters of an inch wide. Taller than they are wide. Round eyes look startled. Ovals look sweet, which is the entire reason this thing went viral.
Set them high. Roughly a third of the way down from the hoop, and closer together than feels right. Lay the ghost flat, step back, move them around before any glue comes out. Eye placement is the one thing you can’t undo on fabric.
Then a dot of glue in the center of each oval only. Not the edges. A glued edge stiffens and curls away from the drape.
About the glue gun: run a low-temp one if you’ve got the choice. Surebonder, which makes them, puts low temp around 300°F and high temp around 380°F, and calls low temp the one that’s safe for delicate materials like fabric. On thin cheesecloth and lace that 80 degrees is the difference between a bond and a scorch mark. It’s also a lot kinder to fingertips, and you’ll be holding small felt pieces down for a few seconds each.
If yours is high temp, that’s fine. Just put the glue on the felt and press the felt to the fabric, never the other way around.
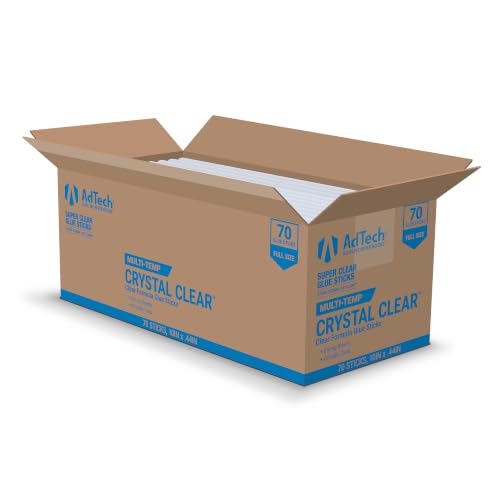
Here’s the low-temp gun we keep on the craft table, plus the multi-temp sticks that run in either kind. These are affiliate links, so we earn a small commission at no extra cost to you.

4. Flower the top and hang it
Cut your stems down to sprigs with about two inches of stem left. Greenery first, laid along the top of the hoop so the leaves point out and down over the loops. Then berries and blooms in the gaps. Then one more sprig wherever you can still see a knot.
Glue to the hoop itself, not to the fabric. The hoop is wood and holds. Fabric moves, and anything glued to it eventually lets go.
Tie your ribbon through the screw bracket at the top, hang it on a nail, and walk away for a few hours. Fabric settles. Then come back and trim the bottom. Straight across reads modern, a shallow U reads soft, and a ragged uneven hem reads like you ran out of time.
What does a boho ghost wall hanging cost?
Three ways to get to a boho ghost wall hanging, and the cheapest one is genuinely the best looking.
- Under $10 — the linen closet build. An old sheet, an old lace curtain, a thrift store hoop for a dollar, and felt you already have. Buy nothing but the stems, and Dollar Tree carries those. Torn vintage sheeting has a softness new fabric doesn’t, so this tier wins on looks, not just price.
- $20 to $25 — the one-trip build. New hoop, a cheesecloth roll, a bush of fall stems, a spool of ribbon, felt. Everything from one craft aisle in one stop, with enough fabric left over for a second ghost.
- $45 to $60 — the three-ghost cluster. Hoops in 6, 8, and 10 inch, two fabric weights, real lace trim by the yard, and a bigger floral haul so each one gets its own palette. Hung in a stagger, this is the version that stops people in a hallway.
Skip the mid tier if you have a linen closet. Go straight from free to the cluster.
When should you not make this yourself?
Nothing about a boho ghost wall hanging needs a pro. It’s fabric and a wooden ring. But three situations are worth naming.
Don’t hang it near an open flame or a heat source. Torn cotton, cheesecloth, and lace are about as flammable as decor gets. Not over a stove, not on a mantel with candles lit under it, not above a space heater. Pick another wall.
Get help with the anchor if you’re going into plaster, brick, or tile. The ghost weighs a few ounces, so a nail or a removable hook handles it on drywall. Older plaster and masonry crack, and that’s a repair bill out of all proportion to a $20 craft.
Buy them if you need a dozen for an event. One takes 40 minutes. Twelve takes a weekend. If it’s for a party next Friday, order them and spend the weekend on something you’ll keep.
How do you know you got it right?
Hang the finished boho ghost wall hanging, stand back six feet, and take one photo straight on.
If you can’t find a single loop in that photo, you nailed it. If you can count them, you need more strips or more flowers, and more strips is the better fix.
Doing the rest of the house? The Hocus Pocus wreath uses the same hoop-and-fabric logic with yarn instead, and the cheesecloth floating ghosts hang in a window above this one. If you’ve got leftover lace, the boho decor roundup has somewhere to put it.
The short version
A boho ghost wall hanging is a 40-minute project that photographs like a two-hour one, and the only confusing part is a question the pictures create rather than answer. The loops tuck between the hoop’s two rings, and the flowers cover whatever’s left.
Cut long, tear instead of cut, and hang it before you trim it. Everything else is arranging.
Show us your ghost
Drop a photo of yours on our Facebook page. The question that started this whole article came from there, so somebody out there is still waiting on the answer. Save it to your Halloween board on Pinterest for next September, and the fabric-tearing bit is a lot clearer in motion over on Instagram.
A few helpful answers
Boho ghost wall hanging FAQs
Loops, hoops, and whether it survives the attic.
Tuck them between the hoop’s two rings. Tie every strip onto the plain inner ring, open the screw all the way, then press the outer ring down over the row of knots and tighten it. The outer ring hides the loops behind clean wood. Glue the flowers across the top to cover anything that still peeks out. If your fabric is too thick for the outer ring to close over, use one ring and let the flowers do all the covering.
Eight inches for a single ghost, and you’ll use both rings. That size takes about 20 strips across the top arc, enough to look full without getting heavy. Six inches crowds fast and leaves the face nowhere to sit. Ten inches and up wants 30 strips or more, so budget extra fabric. Keep the screw at the top, since that bracket is your hanger.
Twice the length you want it to hang, plus a few inches. Folding in half is what makes the loop, so a 36-inch strip gives you roughly a 17-inch ghost once the knot eats its share, and a 45-inch strip about 22. Width is 2 to 3 inches, and varying it on purpose looks better than keeping it uniform. Always cut long, hang the ghost, then trim the hem once the fabric has settled.
Mostly, which makes it a good one to hand a kid. Every strip is a knot, so the body needs no glue at all. The eyes can be felt stickers or iron-on, and the florals can be wired to the hoop with floral wire or even twist ties hidden under the greenery. Craft tacky glue works for both if you can leave it overnight.
Yes, if you hang it to store it. Folded in a bin, the strips take a crease that shakes out slowly and sometimes not at all. Hang it on a nail in a closet or slide it into a pillowcase and hang that. The knots don’t loosen, so the only real enemies are creases and dust. A shot of cool air from a hair dryer handles the dust.
Is a cute ghost still a Halloween decoration?
Somebody in the comments called this one the “Booho ghost” and twelve people agreed hard enough to like it.
Which is the fight, really. One side says soft-spooky is the point, that it goes up in September and stays through Thanksgiving and nobody’s kid cries. The other side says Halloween is supposed to have a little bite, and a lace ghost with flower hair is just fall decor wearing a costume. Where do you land?
Pick one, then argue it out below. Team cute, tell us what else is on that wall. Team scary, tell us what you’d hang instead.









