


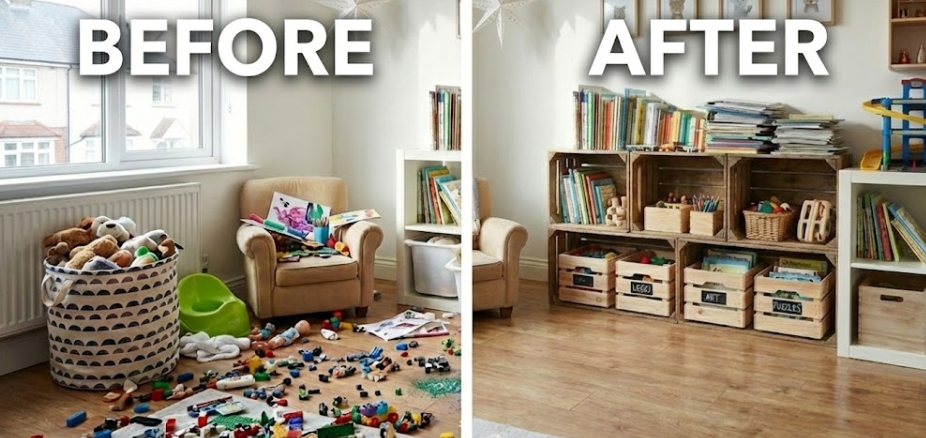

At a Glance: Toy Storage Solutions
- Implementing DIY toy storage solutions helps create a safer, clutter-free home environment for families.
- Projects range in time and skill level, including rapid 5-minute hacks like rolling wire bins and more involved woodworking tasks like toy chests.
- Budget-friendly organization is achieved by repurposing household items, such as using mint tins for dice or fruit baskets for bath toys.
- Functionality is improved through strategic labeling and adding wheels to heavy storage units for better mobility.
- Take these DIY toy storage ideas, solutions, life hacks, and tips and have a safe and clutter-free home!
RELATED: 800+ DIY Organization Ideas For A Clutter-Free Life
In this article:
- Covered Kiddie Car Garage
- Toy Chest
- Toy Car Garage
- Customizable Storage Bins
- Under The Bed Train Table
- Hanging Fabric Storage
- Cards Storage for Kids
- Dice Tin
- Mounted Board Games
- Stuffed Animal Swing
- Hidden Storage Bins
- Ikea Bins
- Bucket Outdoor Toy Organizer
- DIY Wood Crate Toy Storage
- Shower Toy Caddy
- Rolling Under Bed Wood Storage Cart
- Clear Storage Bags
- Pickup And Play Mat
- Fabric Lined Toy Box
- 5-Minute Rolling Storage
- Bird Nest
- Stuffed Animal Zoo
- Puzzle Pieces Organization
- Toy Figures Organizer
- Toy Canopy
DIY Toy Storage Life Hacks You Need to Know
1. Covered Kiddie Car Garage
Your kids will feel like grownups with this covered kiddie car garage. It can also serve as an early lesson in parking responsibly — making sure they “park” their car within the boundary.
The number of PVC pipes you’ll need depends on the number of toy cars your kids have. For this tutorial, 5 pieces measuring 10″ each was used.
2. Toy Chest
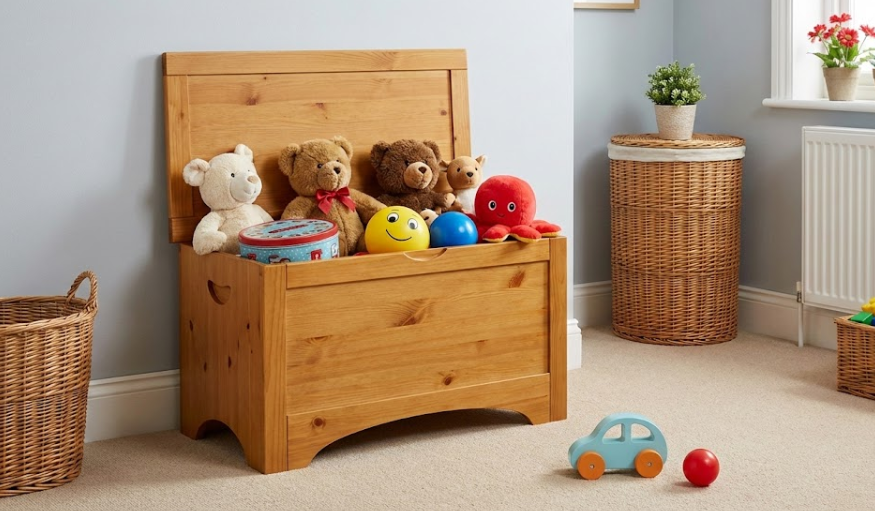
Remember to place wood glue first before drilling the screws in for the toy chest. I also recommend adding wheels to the bottom to make it easier to move the toy chest if needed.
Materials: Wood planks, wood glue, wood screws, and four heavy-duty wheels.
Steps:
- Measure and cut your wood planks to create the base and four side panels.
- Apply a layer of wood glue to all joints before assembly to ensure a permanent bond.
- Drill wood screws through the glued joints to secure the frame of the toy chest.
- Flip the chest over and install wheels at each corner of the bottom for easy mobility.

- This item is a Franklin International 5003 Titebond-2 Premium Wood Glue, 8-Ounce
- Purpose of use for Hardware, wood-glues

(As an Amazon Associate, we earn from qualifying purchases.)
3. Toy Car Garage
This toy car “garage” would be great for your kid’s old collection of Hot Wheels — those already come with metal bottoms. If however, your kids have the new collections, all you have to do is stick on a thin magnet to the underside of the toy cars.
4. Customizable Storage Bins
I love how these storage bins are fully customizable. Plus, it only uses black masking tape as its DIY stickers. If you can’t find black masking tape, don’t worry. Simply go over your sticker designs with a black Sharpie.
Materials: Storage bins, black masking tape, and a permanent marker.
Steps:
- Categorize: Group toys by brand or set to keep like products together and sets complete.
- Tape: Tear off pieces of black masking tape to create your DIY labels.
- Mark: Write your categories on the tape (or directly on the bin) with a Sharpie for a fully custom look.
5. Under The Bed Train Table
The beauty of this train table is how it can be placed under a bed, making it an easy hack to clean a kid’s room.
Just remember to measure out the length of the bed, so you can make sure the table will fit underneath. You can even attach a handle on the side for an easier pull-out.
Bond with your little crafters over the weekend with these 10 easy wood projects for kids! https://t.co/YPg2JXEiJN pic.twitter.com/Njw43cbivr
— DIY Projects (@DIYProjectsCom) March 3, 2017
6. Hanging Fabric Storage
Have extra fabric left over from a previous sewing project? Why not turn it into hanging fabric storage for your kid’s toys!
Remember to leave a bigger space for the top and bottom seam allowances. You’ll be inserting dowel rods through the top and bottom seam allowances to help your DIY project hang well.
7. Cards Storage for Kids
Keep your kid’s favorite card games organized by placing them in plastic containers. You can even use the game’s original paper packaging as the label of the plastic container.
Materials: Small, clear plastic containers (like those from IKEA) and the original paper packaging from your card games.
Steps:
- Transfer your card decks into the plastic containers.
- Cut the title or logo out of the original paper packaging.
- Use that original artwork as the label for the new container
8. Dice Tin
Avoid losing dice by storing them in a mint tin can. Simply clean your used tin can, and pop the dice in.
If you’d like, you could also decorate the tin can with a piece of wrapping paper. One of the most brilliant toy storage solutions!
Materials: A used, cleaned mint tin can (like an Altoids tin) and a scrap piece of wrapping paper for decoration.
Steps:
- Thoroughly clean your used tin to remove all mint residue.
- Pop your dice inside the tin for secure storage.
- Optional: Decorate the exterior of the tin with a piece of wrapping paper.
9. Mounted Board Games
This board game hack allows you to mount your kid’s favorite board games on the wall, making it an extra piece of room decor. Just be sure not to leave too much room around the board’s borders to have a snug fit.
Materials: Your child’s favorite board games and mounting frames or brackets.
Steps:
- Measure the dimensions of your board games to determine your wall layout.
- Secure the mounting frames or brackets to the wall.
- Slide the boards into the mounts, ensuring the fit is snug around the borders so they stay put.
10. Stuffed Animal Swing
This stuffed animal swing idea is a genius idea! Don’t forget to tie knots both above and under the swing seats. Doing so will prevent the seats from falling out of place.
11. Hidden Storage Bins
These hidden storage bins can be attached to any table in your kid’s room. The secret lies in sticking velcro to your table’s underside and attaching the other velcro piece to your fabric bags.
12. Ikea Bins
The trick to utilizing these Ikea bins is to properly label each one, especially if you’re using them as toy boxes.
Divide your kid’s toys into different categories such as the brands they come from. That way, you keep like products together and keep complete sets.
13. Bucket Outdoor Toy Organizer
Store your kid’s favorite outdoor toys in buckets you can leave in the garage. If you don’t have stainless buckets, plastic ones will do just as well.
This is one of the best toy organization ideas around.
Materials: Stainless steel or durable plastic buckets, Outdoor-safe labels or markers.
Steps:
- Gather your child’s favorite outdoor toys and categorize them into groups.
- Assign each group of toys to its own designated stainless or plastic bucket.
- Label each bucket clearly so the kids know exactly where their gear belongs.
- Store the buckets in the garage or on the patio for easy access during playtime
RELATED: 30-Day House Spring Cleaning Challenge
14. DIY Wood Crate Toy Storage
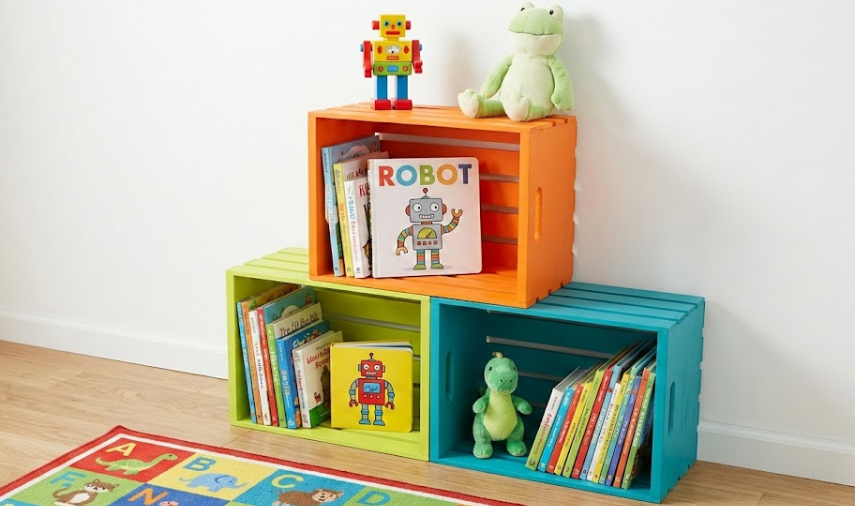
This wood crate storage can hold more than just toys. You can even fill some of the cubbyholes with your kid’s favorite books and coloring materials, making this project a great way to keep a room clutter-free.
- Materials: Multiple wooden crates and wall-mounting hardware.
- Steps:
- Determine your layout by stacking crates either horizontally or vertically to fit your space.
- Fasten the crates together to create a solid, multi-level cubby system.
- Mount the entire unit to the wall to prevent it from tipping over during use.
- Assign specific zones for different items, such as bulky toys in the bottom and coloring materials in the top.

- DETECT METAL STUDS AND FASTENERS: Magnetic stud finder efficiently detects metal studs and fasteners...
- POWERFUL RARE-EARTH MAGNET: Provides quick and precise stud identification
15. Shower Toy Caddy
Are your kids obsessed with their bathroom toys? Keep everything organized with this shower toy caddy.
Would you believe it’s only made from a metal hanging fruit basket?
16. Rolling Under Bed Wood Storage Cart
Just like the train table mentioned earlier, another way you can take advantage of your kid’s under bed storage is to place a wood storage cart.
If you have siblings sharing a room, you can even give them a storage cart each. Just don’t forget to stick labels on to avoid any fights.
17. Clear Storage Bags
What I love about these clear storage bags is how they have drawstring closures on the top, making it less likely for toys to spill over.
Need help attaching the pull string inside the top casing? Attach a pin to one end and use that to help get your string through to the other end.
18. Pickup And Play Mat
Clean up becomes so much easier with this pickup and play-mat. Remember to choose a sturdy fabric for this DIY project to make it resistant to any wear-and-tear that will inevitably happen along the way.
19. Fabric Lined Toy Box
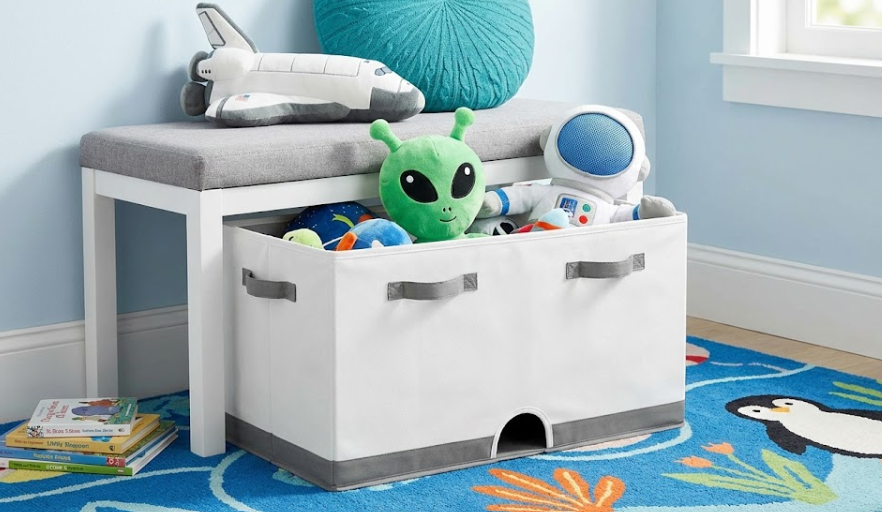
Make a wooden crate more child-friendly by lining it with fabric on the inside. The best pby lining it with fabric on the inside. The best part is you can simply attach the fabric in with the help of upholstery tacks.
Materials: Wooden crate, durable fabric, and a set of upholstery tacks.
Steps:
- Sand any rough edges on your wooden crate to prevent snagging the fabric.
- Measure and cut your fabric so it covers the entire interior floor and sides.
- Lay the fabric inside the crate and smooth it firmly against the wooden surfaces.
- Hammer upholstery tacks into the top edge of the fabric to secure it to the crate walls.
Short on time? Get this from Amazon.

- INCLUDES SIX CUBES: Keep your home tidy and organized with this set of six cloth storage cubes
- EASY PORTABILITY: Each collapsible fabric storage cube comes with one sewn-in fabric handles.
20. 5-Minute Rolling Storage
It’ll only take you 5-minutes to make this rolling storage project. Drilling isn’t even required because all you’ll need to attach the casters to the wire basket is a case of zipping ties.
21. Bird Nest
Give your kid’s room a DIY bird’s nest with this toy storage solution idea. All you’ll need are some tulle, wire hooks, ribbon, and a few rubber bands. That’s it!
22. Stuffed Animal Zoo
Keep all your kid’s stuffed animals enclosed in a DIY zoo. Avoid accidents by always maintaining adult supervision and making sure your kids don’t climb on this piece of DIY furniture.
23. Puzzle Pieces Organization
Is your kid a fan of puzzles? Keep everything neatly stored by placing each puzzle in a zip pouch. This hack makes for a nifty travel idea as well.
24. Toy Figures Organizer
Turn a shoe organizer into a home for your kid’s toy figures. This DIY hack is so simple, I can’t believe I didn’t think of this idea sooner!
25. Toy Canopy
Have a bed canopy your kids aren’t using anymore? Turn it into a toy storage solution by tying a knot at the bottom, and placing your kid’s stuffed animals inside.
Materials:
- An unused bed canopy.
- A sturdy ceiling hook (to ensure it doesn’t fall).
Steps:
- Prep: Locate a bed canopy your kids aren’t using anymore.
- Knot: Tie a secure knot at the bottom of the fabric to create a pouch.
- Secure: Install a ceiling hook to a joist to ensure the weight of the toys doesn’t pull it down.
- Fill: Place your kid’s stuffed animals inside the canopy.
Want to know more toy storage solutions? Press play on this video by A Happy Girl’s Home to see ways for storing your kid’s toys in the living room:
Mom and Dads, I sure hope you don’t forget to instill the habit of cleaning up to your kids. Teaching them the value of respecting these toy storage solutions will work wonders in their years to come.
Which of these toy storage solutions will you be trying soon? Let us know in the comments below!
FAQs
How can I create mobile toy storage without using power tools?
You can assemble a rolling storage bin in approximately five minutes by using zip ties to secure casters to the bottom of a wire basket.
What’s the best way to keep small puzzle pieces from getting lost?
Store individual puzzles in zippered pouches to keep all pieces together, which also makes them a great solution for travel.
How do I make a rugged wooden storage crate safer for a child’s room?
Make any wooden crate more child-friendly by lining the interior with soft fabric and securing it in place with upholstery tacks.
What are the best options for utilizing space under a child’s bed?
Maximize this unused area by building a pull-out train table with a side handle or utilizing a rolling wood storage cart.
How do I ensure a handmade wooden toy chest is durable enough for heavy use?
When assembling a toy chest, always apply wood glue to the joints before drilling in your screws to ensure a permanent and sturdy bond.
Up Next:
- 21 Easy Home Improvement Projects: Small Budget, Big Impact Upgrades
- 17 Awesome Bedroom Organization Ideas You Can Do Before Holidays
- DIY Small Space Storage: Maximize Your Small Space On A Budget
Editor’s Note: This post was originally published on July 2017 and has been updated in 2026 for quality and relevancy.









