
Last Updated: April 2026
At a Glance: How To Make A Macrame Lawn Chair
- Shows how to restore an old lawn chair by replacing worn-out webbing with a durable macramé-style cord weave.
- Uses paracord or similar rope to create a colorful, supportive woven seat and back.
- Demonstrates the weaving pattern step-by-step: securing the cord, creating the macramé knots, and tightening each row for stability.
- Explains how to finish the weave cleanly with trimmed, melted, or tucked ends to prevent fraying.
- Results in a sturdy, stylish, custom chair that’s perfect for outdoor use and far cheaper than buying new furniture.
Reviving an old lawn chair doesn’t require special tools or expensive materials, just a simple macramé weaving technique and some sturdy cord. This DIY macrame lawn chair makeover shows you how to replace worn-out webbing with a durable, stylish woven seat and back that stands up to everyday outdoor use. Whether you’re refreshing vintage patio furniture or adding a customized pop of color to your backyard setup, this project is beginner-friendly, affordable, and delivers a stunning result that feels brand-new.
RELATED: How To Design Your Home With Macrame Wall Hanging
DIY Upcycle: How to Make a Macrame Lawn Chair
I’ve been noticing a lot more macrame furniture out there lately. I love macrame, and a macrame lawn chair is one of those DIY crafts that I have always wanted to try!
In the spirit of getting my place cleaned up for spring, I decided to upcycle some of my lawn chairs that have seen one too many summers. The chairs have perfectly good metal frames and just need new webbing, making them the perfect macrame project candidates!
Watch this Video:
Supplies:
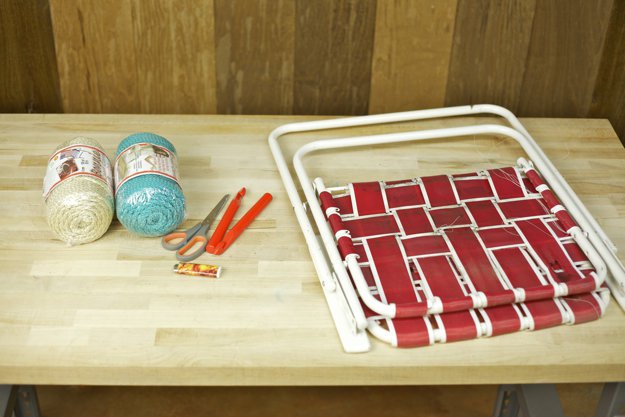
- 200 yards of 6mm macrame craft cord (I did 100 yds of each color)
- 2 19.00mm crochet hooks
- Metal lawn chair frame
- scissors
- lighter
First things first, you’re gonna need some really sturdy cord that can handle the elements. I’m a huge fan of this polypropylene braid because it’s weather-resistant and holds its shape way better than cotton. I always go for this item:
No products found.
(As an Amazon Associate, we earn from qualifying purchases.)
Let’s Get Started!
Step 1: Remove Fabric from Chair
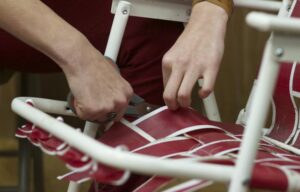
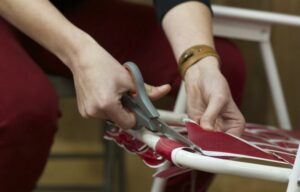
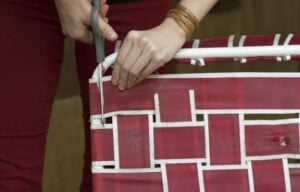
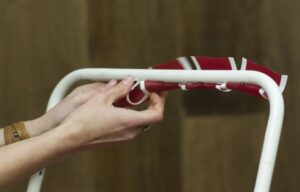
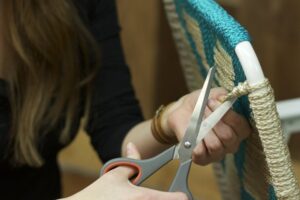
Using scissors, remove the webbing or fabric from your chair. Clean the frame.
Step 2: Start Weaving on Straight Parts of the Chair
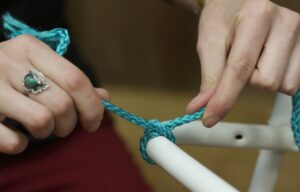
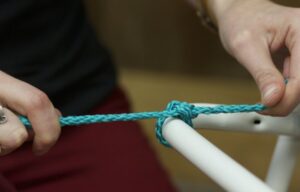
To start your chair, you’ll want to place your roll of macrame cord on the ground inside the macrame lawn chair frame. This is the easiest placement of the cord for the entire weaving process.
Starting on the seat bottom frame, make a double square knot, leaving about 6″ of slack at the end. Keep in mind that you are only going to weave on the straight parts of the chair frame, leaving the rounded edges bare.
Step 3: Continue Weaving Top of Frame

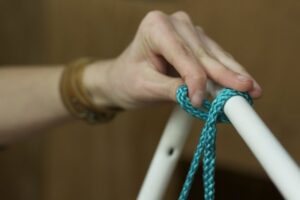
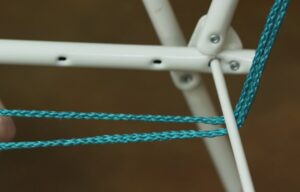
Now take your cord up, below the center bar, and up over the top of the frame. (See pictures below)
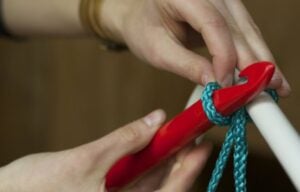
Then, loop the cord over the top of the chair frame and pull it around to the outside. Push your crochet hook through the loop you just made.
Be sure to pull the cord tight so the hook doesn’t fall out. Also, in order to make sure you will be able to get your hook through the next time around, make sure the loop is resting on the fattest part of the hook.
Trust me, this will make your life much easier as you continue!
See that red crochet hook I used? 19-20 mm ones are always out of stock at my local craft stores so I order mine online. It’s absolutely essential for pulling that thick 6mm cord through without losing your mind. Here’s the exact one I use for all my heavy-duty macramé projects:
No products found.
Step 4:
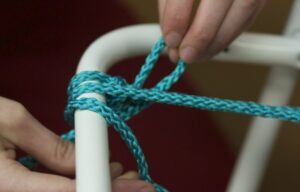
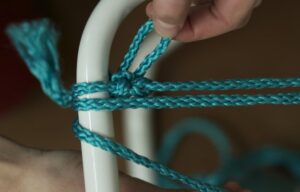
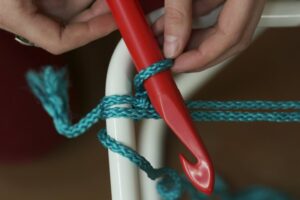
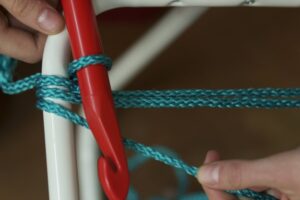
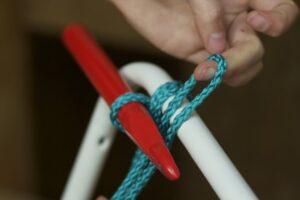
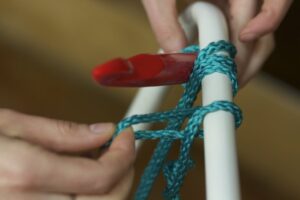
Bring the cord back down, underneath the center bar, and over the front of the seat frame. Wrap the loop over the frame and pull it under to the outside of the first couple of cords.
Just as you did before, push the crochet hook through the loop, having it rest on the fat part of the hook. Pull the loose cord tight and continue.
RELATED: How To Make Easy Macrame Patterns In 8 Simple Steps
Step 5: Work on the Chain Stitches
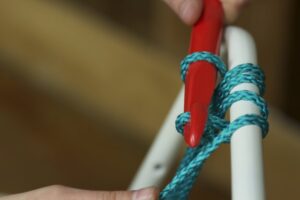

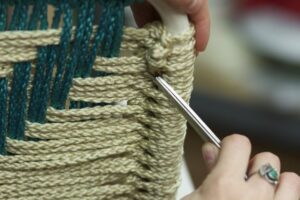
Now, bring the cord back up the chair just as you did before, underneath the center bar and up over the top of the frame. This time, pull the loop around the frame and back in between the cords.
Grab the new loop with the crochet hook and pull it through the first loop, making your first chain stitch.
Same as before, make sure this new loop rests on the fattest part of the hook. Pull the free cord tight and continue back down the chair frame.
You will repeat this same procedure across the frame until you’ve created enough cords. (For our this project, we needed 26 pairs)
Your first couple of chain stitches may have three cords; the rest will only have two. This is fine, just be sure to count the number of cords you need for your pattern correctly.
Oh, and if you’re eyeing this gorgeous turquoise cord, you better grab it while you can! This specific shade is super popular for summer projects and always seems to be running low on stock:
No products found.
Step 6: Secure the Vertical Weave
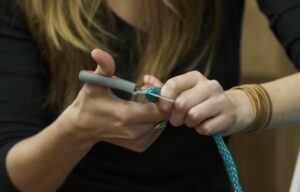
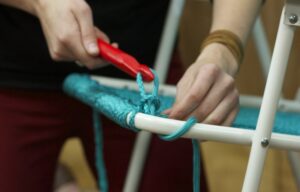
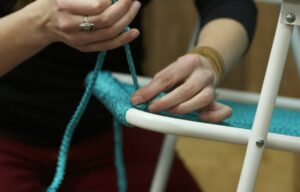
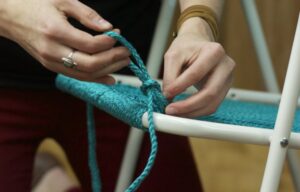
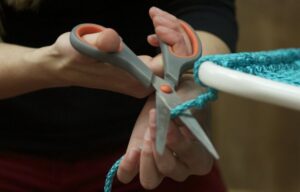
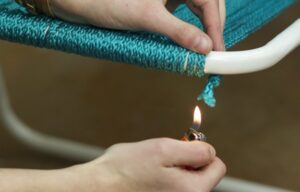
Once you’ve made it close to the end of the chair frame, it’s time to finish off and secure the vertical weave.
When it looks like you need to do one more pass, take your cord and measure out how much cord it will take to complete the last pass. Then add about 6″-8″ to that length and cut the cord.
Take the cord and continue your last weave just as you did before. When you get to where you make your chain stitch, pull the end of the cord all the way through the loop.
Make sure it’s tight. This may be where you are done. If so, skip to where we tie the cord off.
If you still have one more loop to make, take the remaining cord and continue on down the chair and make another loop.
Once again, pull the chain stitch all the way through with your hook. Pull the cord to make sure it’s tight, and make a double square knot super close to the base of the cord.
To seal off the cord, you have a couple of options.
You can take the remaining end and weave it back down the frame of the chair. Or, you can trip the cord and seal it with a lighter. This is completely up to you.
Starting the Horizontal Weave:
The steps for starting the horizontal weave are exactly the same as the vertical weave; the only difference is that this is where your chair comes to life! So you will be doing some extra weaving (and thinking) during these steps.
Some things to keep in mind as you start your horizontal weave are that you will start at the front seat of the chair and have your roll of cord either to the left of you or underneath the center of the frame, as you did before for the vertical weave.
You will start on the bottom seat and work towards the back, and finish it off just as you did the vertical weave. Then you will start the back of the seat frame as a separate weave.
Step 7: Start the Horizontal Weave
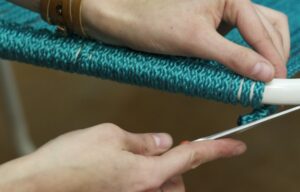
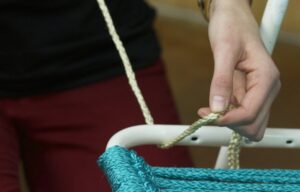

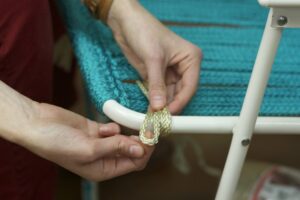
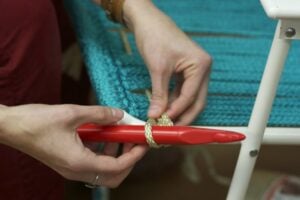
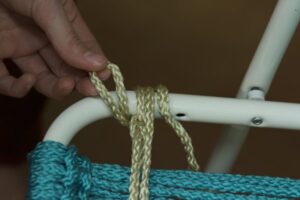
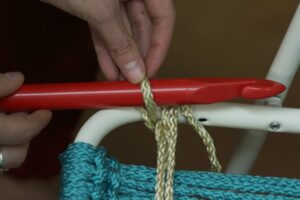
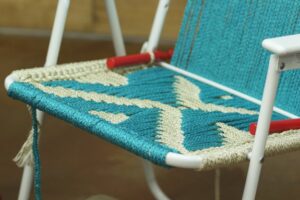
Start the horizontal weave on your macrame lawn chair just as you did before by tying a double square knot to the frame, leaving about 6″ of slack. This is where you start, so weave your loop under and over across the chair until you get to the other side of the frame.
Just as you did before, take the loop over the frame and to the outside of the cords. Push the crochet hook through and pull the cord to keep it tight.
Because you are weaving your cord, the other end of the cord is already back on the side you started.
Make a loop and pull it over and around the chair frame to the outside of the cords. Push your crochet hook through and pull the cord tight.
Start your next weave going back across to the other side of the frame. This is where your chain stitches start, just as they did on the vertical weave.
Pull your loop around the frame and back in between the cords. Grab the loop with your crochet hook and pull it through the loop, creating your first chain stitch.
Continue back to the other side and do the same.
Work across the bottom of the chair until you’ve come to the end of the bottom frame. When you finish, end it like you did the horizontal cords by cutting the end and singeing.
Step 8: Weave the Back of the Seat
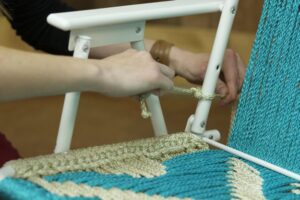
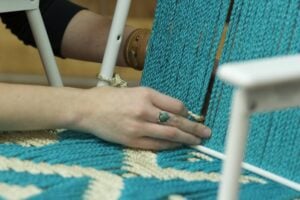

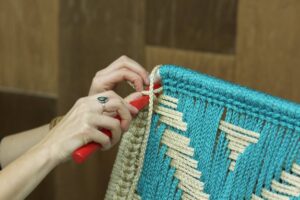
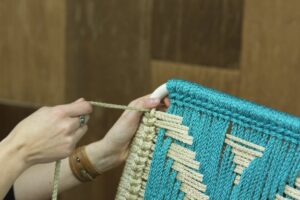
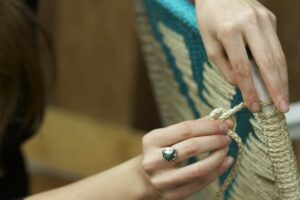


Start the back of the seat just as you have the bottom seat and the vertical weave. You will start this part from the base of the chair, rather than the top of the chair.
Finishing the top of the chair is the same process as before.
And that’s it! The weaving can be confusing in the first part of this DIY.
Also, you’ll want those colors to stay bright! This is my secret weapon for outdoor furniture. It blocks those nasty UV rays to keep your custom patterns looking fresh all season long.
No products found.
Enjoy Your Newly Restored Macrame Lawn Chair
With a bit of cord, patience, and creativity, your worn-out lawn chair can be transformed into a comfortable, eye-catching piece of outdoor décor. The macramé pattern adds both strength and style, giving your chair a completely new life while saving you money and reducing waste. This simple weaving technique can be applied to multiple chair styles, so once you master it, you’ll be ready to upgrade your entire patio set.
Ready to keep the DIY momentum going?
👉 Try experimenting with new cord colors and patterns to match your outdoor aesthetic.
👉 Browse more upcycling and outdoor furniture tutorials to spark your next creative project.
👉 Share your finished macramé chair; your results might inspire someone else to revive theirs!
FAQ
1. What type of cord works best for a macrame lawn chair?
Paracord, nylon rope, or polypropylene cord works best because they’re durable, weather-resistant, and easy to knot.
2. How much cord do I need for one Macrame lawn chair?
Most chairs require 200–400 feet of cord, depending on chair size and the density of your weave.
3. Can I use cotton cord instead?
Cotton can be used, but it’s less weather-resistant and may fade or deteriorate in outdoor conditions.
4. How long does it take to re-weave a macrame lawn chair?
Beginners typically spend 2–4 hours, depending on the weaving pattern and the complexity of the chair frame.
5. Is the macramé weave strong enough to support weight?
Yes, properly tensioned macramé cord creates a strong, supportive seat comparable to commercial webbing.
6. Can I mix different cord colors for patterns?
Absolutely. Multi-color patterns are a great way to customize your chair and create unique geometric or striped designs.
7. How do I prevent the cord ends from fraying?
Melt nylon/poly cord ends with a lighter or tuck and knot them securely to keep them from unraveling.
Stay connected with us on Facebook, Pinterest, and Instagram!

QUICK POLL
Is keeping a lawn chair with busted webbing smart DIY thinking or borderline hoarding?
Cast your vote, then head to the comments and make your case!