


Create these beautiful salt dough ornaments with 3 ingredients and a dash of creativity. They’re so simple, you can have the kids help out.
RELATED: 22 Awesome DIY Christmas Gift Tags For The Gift-Giving Holiday
Three-Ingredient Salt Dough Ornaments
What You Need:
For the salt dough:
- 2 cups all-purpose flour
- 3/4 warm water
- 1/2 cup table salt
Tools:
1. Combine Your Salt Dough Ingredients

Add your salt and flour in a large bowl. The salt acts as a preservative that prevents your salt dough ornaments from forming molds over time.
Slowly add your warm water and mix well until your ingredients have completely incorporated. Add more water if your dough’s too dry and add more flour if too sticky.
Note: Make sure to pre-heat your oven to 250˚F before starting this tutorial.
2. Knead, Flatten and Cut the Dough

Once you get the desired consistency, knead your dough until it becomes smooth.
Use a rolling pin to flatten your dough to around 1/4 inch thick. Some recipes suggest using parchment paper, but we find that the dough that comes out of this recipe doesn’t stick too much to the cutting board or the rolling pin.
Once you got your desired thickness, cut out some shapes using your cookie cutters. Repeat the process until you run out of dough.
3. Punch a Hole on Top
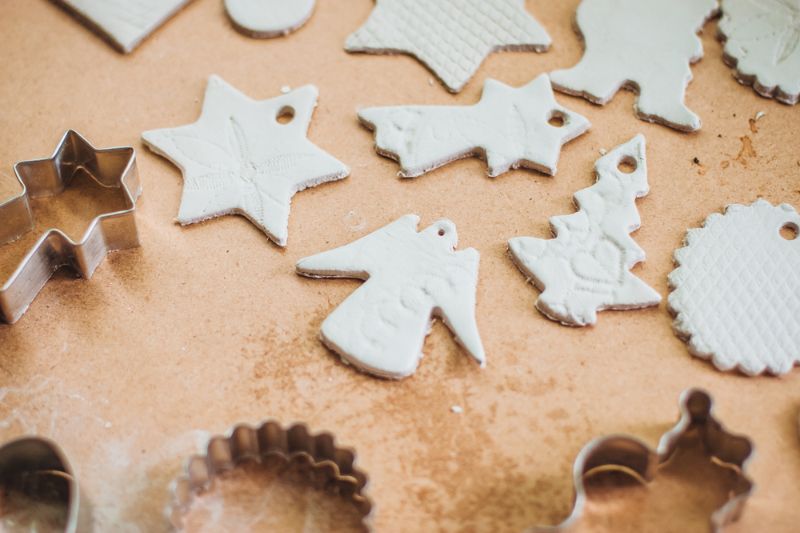
Punch a small hole on top of your cookie cutter shape using a drinking straw or wooden skewer. Make sure not to punch too close to the top so that your ornament doesn’t break.
RELATED: 24 Stunning Homemade Christmas Ornaments You Can DIY On A Budget
4. Polish Out Your Ornaments
At this point, you can smooth out the edges of your ornaments for a cleaner finish. You can also use some letter stamps to form some words or phrases and use various tools to add some designs before you bake your ornaments.
No products found.
5. Bake Your Salt Dough Ornaments
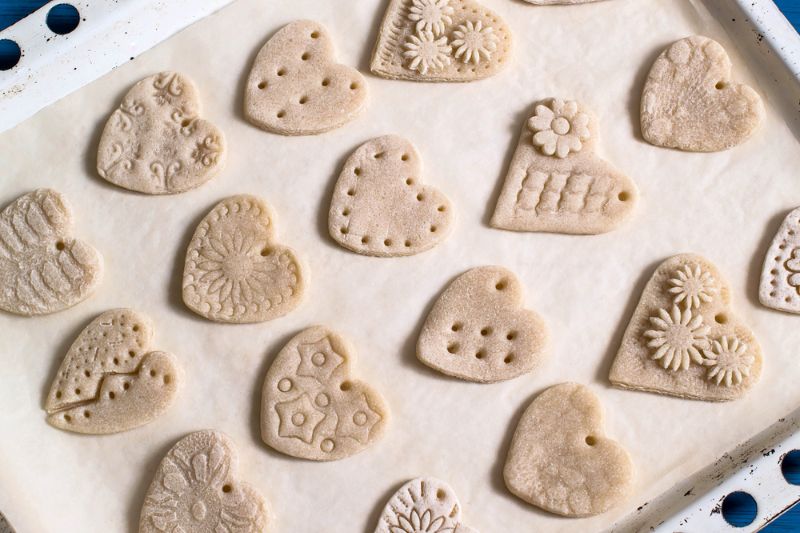
Lay your salt dough ornaments on a baking tray and stick them in the oven for 1 ½ to 2 hours, or until your ornaments are completely dry.
If you don’t have an oven, you can leave them to air dry. If you chose this option, flatten your shapes into the thinnest you can make them and leave them out to dry for at least 4-7 days.
6. Decorate and Paint Your Ornaments
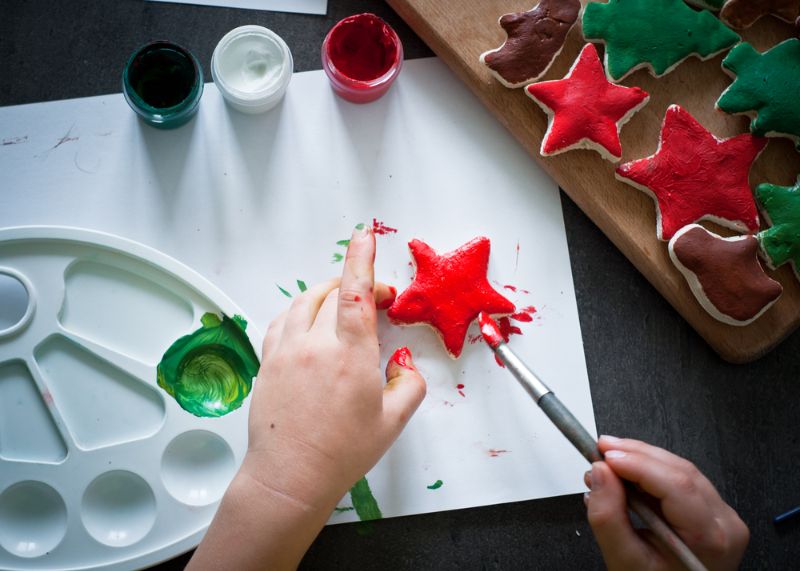
Once your Christmas ornaments have completely dried and cooled down, we go to the fun part of this project: Decorating them!
It should look like this:

Here are some ideas for personalizing your salt dough ornaments:
- Paint your ornaments with acrylic paint in the color that you want. Make sure to wait at least 15 minutes between coats to make sure it’s completely dry.
- Apply a little bit of Mod Podge and sprinkle some glitter on top.
- For a lustrous finish, paint some gold leaf paint on top. Do this in a well-ventilated area away from children.
- Dress up some shapes with a little fabric and some googly eyes.
Watch this video from Kelsey and Family for other salt dough ornament ideas:
The sky’s the limit when it comes to these salt dough ornaments. Whichever way you make them, it’s 100% sure to be one of a kind.
Have you made some salt dough ornaments for Christmas? Share your creations in the comments section below!
Up Next:
- DIY Projects And Creative Crafts To Keep You And Your Kids Busy At Home
- 25 DIY Outdoor Fireplace Ideas To Combat The Winter Chill
- A Beginner’s Guide To Lawn Mower Repair
Calling all crafting DIYhards, DIY Projects needs YOU! Click here if you want to write for us.
Don’t forget to stay connected with us on Facebook, Twitter, Pinterest, and Instagram!


