


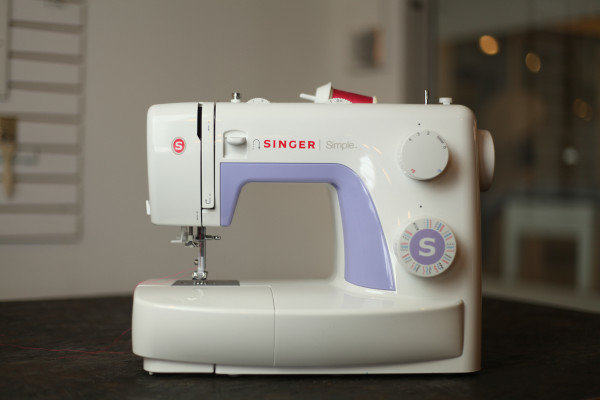
Threading a sewing machine is as easy as 1 2 3, literally, because the faceplate is typically numbered with the steps you must follow as you guide your thread through the machine. This example uses a modern Singer Sewing Machine, but all machines follow the same basic principles.
How to Thread a Sewing Machine:
Video Tutorial:
Supplies you will need to thread a Singer sewing machine:
- Sewing Machine (Singer or practically any other model)
- Thread
- Bobbin
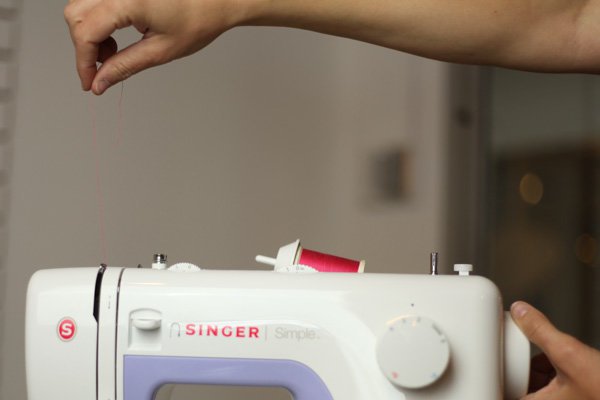
Step 1: Place Spool on Sewing Machine
Place your thread over the spool pin (the stick on the top of your machine).
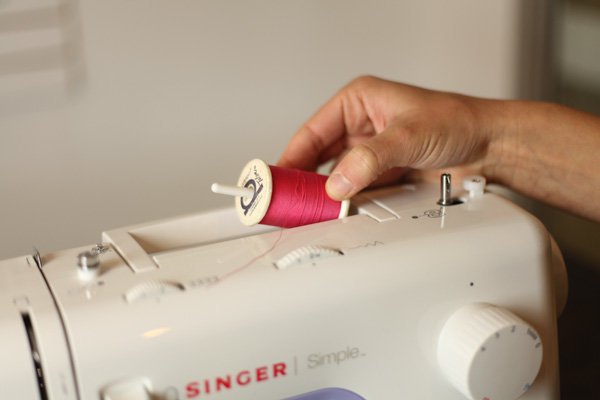
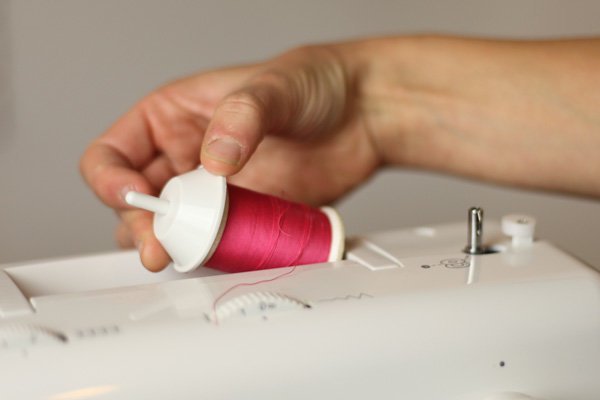
Step 2: Place Cap over Spool
If your spool pin comes sideways or at an angle, place the spool cap over it so it stays in place. You can find the spool cap inside of the storage compartment on your sewing machine. If your spool pin sticks straight up, this step is not necessary.
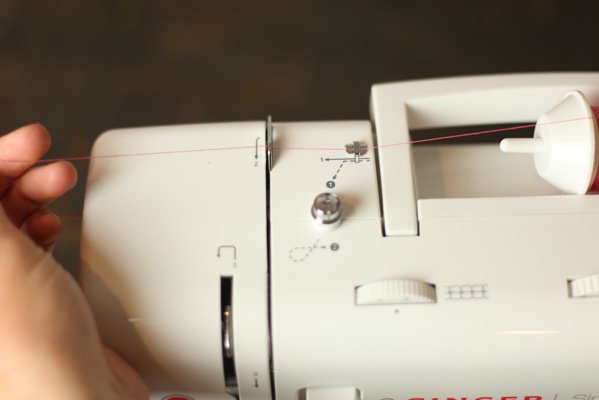
Step 3: Thread Sewing Machine by Following Numbers
Follow the numbers on your sewing machine as you guide the thread through the tabs. These tabs are called thread guides. If there are no numbers that’s ok, it’s still very simple.
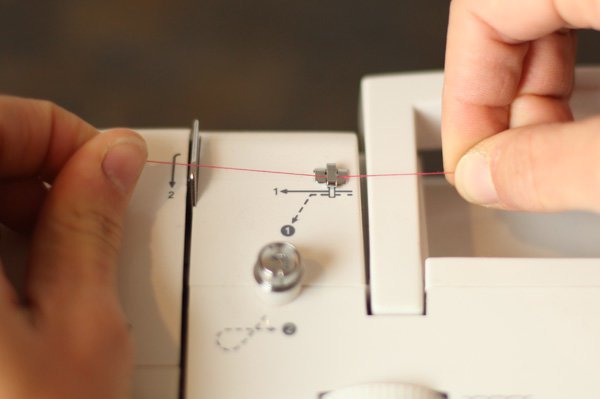
Step 4: Begin Threading Sewing Machine
Bring your thread through the first and second guides, across the top of your sewing machine.
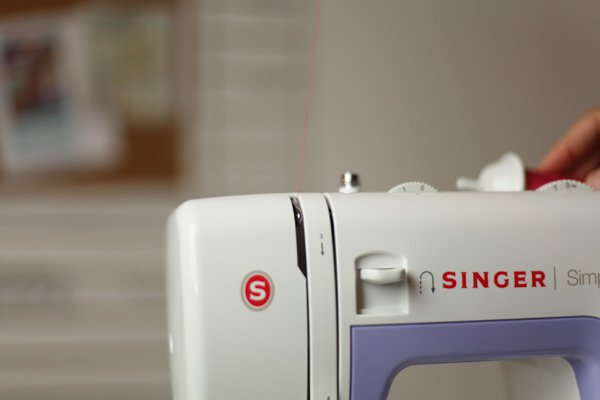
Step 5: Thread Down Front of Sewing Machine
Bring your thread down the front of the sewing machine, through guide number 3 which is the vertical groove on the front .
Step 6: Thread Back Up The Sewing Machine
Bring the thread under and around guide 4 and up to the top of the machine again, It will lay in the vertical groove, to the left of guide 3.
Step 7: Bring Thread through the Thread Takeup on the Sewing Machine
Once you’ve reached the top of your machine again, place the thread through the 5th guide, also known as the thread take up. If you don’t see your take up, you can rotate the hand wheel on the right of your machine. This wheel turns the lever that lifts the thread and needle up and down. Place the thread through the small groove inside of the lever.
Step 8: Bring Thread Back Down Sewing Machine
Pull the thread down through the thread take up. It will go back through the same groove as before with guide 4, but this time come out through the bottom of the machine.

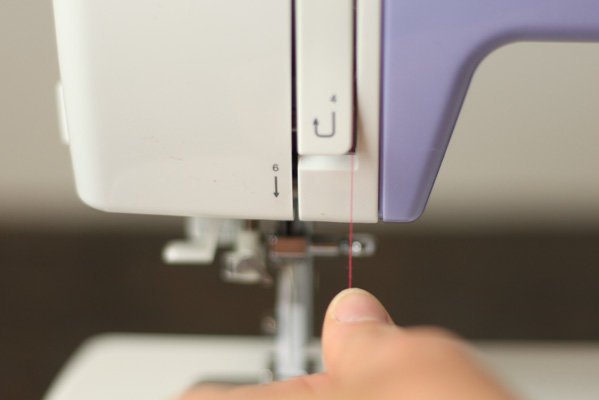
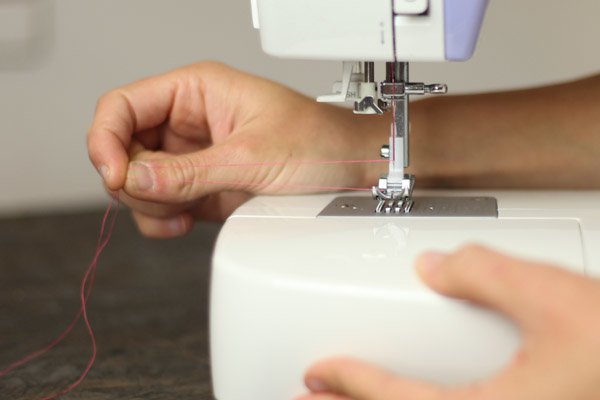
Step 9: Place Thread Behind the Guide Above the Needle
Place the thread behind guide 6, your last guide, which is the small tab just above the needle.
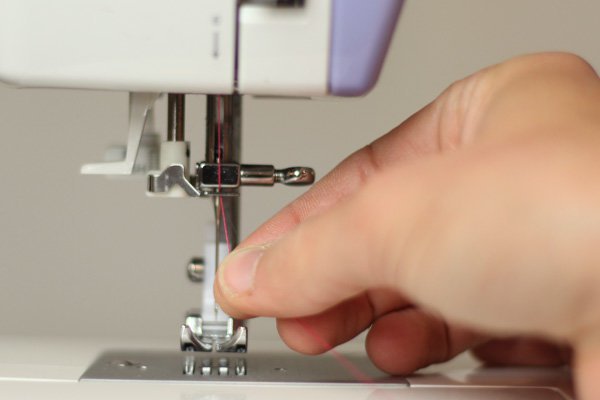
Step 10: Thread the Sewing Machine Needle
Now poke your thread through the eye of the needle on the sewing machine, from the front of the machine to the back, leave at least 6″ of thread hanging to the left side of the machine. Wetting the thread, or snipping it at a sharp angle might help if you are having difficulty passing the thread through the very small eye.
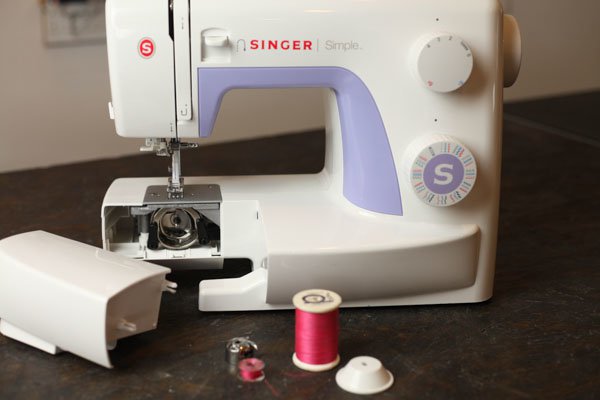
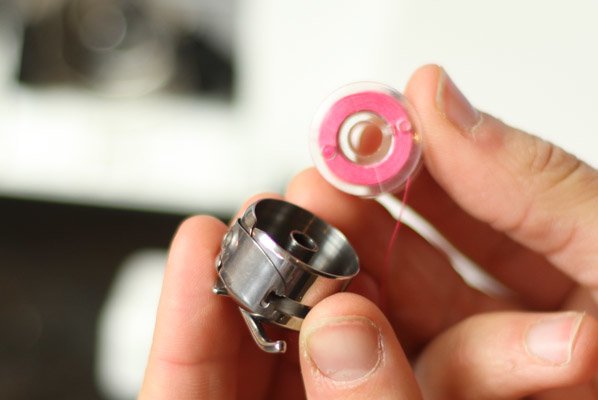
Step 11: Thread the Bobbin
Now that you have the top of your machine threaded, you also need to thread the bottom. Have your bobbin thread and bobbin case in hand. The bobbin case came with your sewing machine, you can find it either in the bobbin compartment or storage compartment.
Step 12: Remove the Bobbin Case
To remove the bobbin case from your sewing machine, just pull the lever on its exterior.
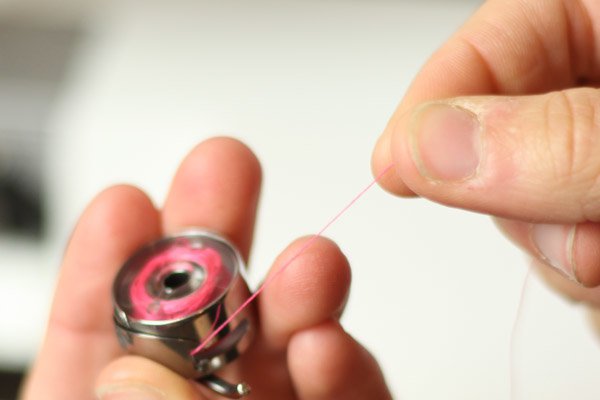
Step 13: Place Bobbin Clockwise into Bobbin Case
Take your bobbin and insert it counter clockwise into the bobbin case. Hold the loose end of thread out with one hand so it does not get lost.

Step 14: Pull Bobbin Thread Through the Case
Pull the bobbin through the case by wrapping it under the small catch and pulling it out where the gap is. Pull out about 8″ of thread.
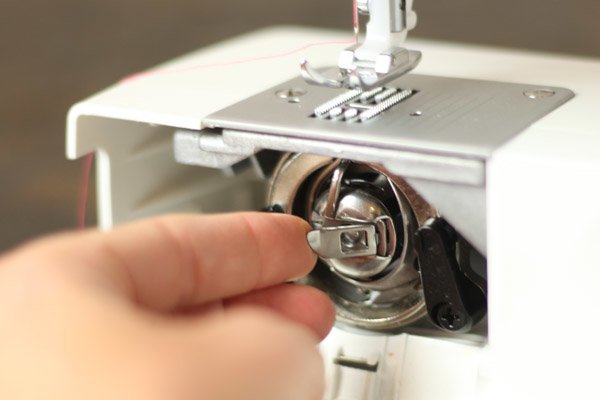
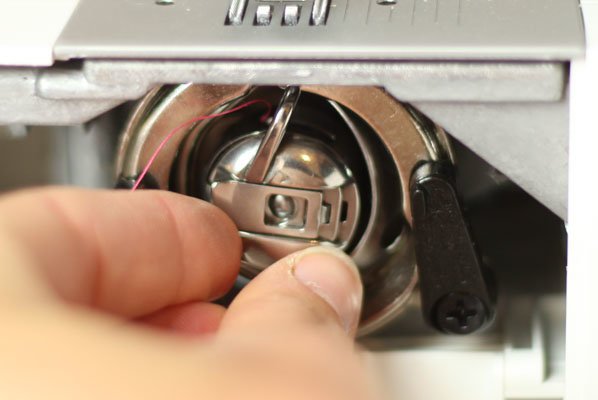
Step 15: Insert Bobbin Case into Machine
Insert the bobbin case into the machine with the shuttle hook facing up, the shuttle hook is the skinny knob sticking out over the bobbin case. You’ll see there’s a small inset for it in the bobbin chamber of the sewing machine. You will hear a snap when the bobbin case is secured in place.
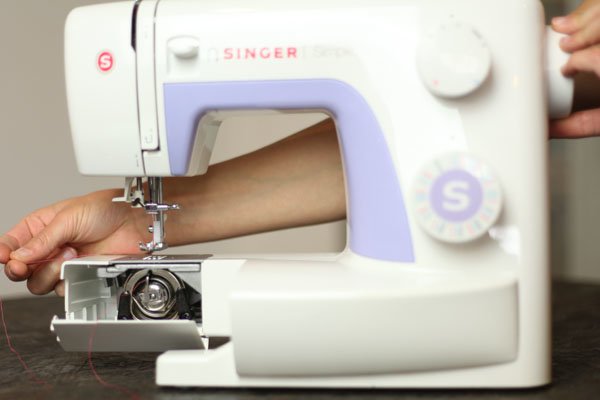
Step 16: Lift Bobbin Thread to the Surface
To get the bobbin thread up to the surface of the machine, hold onto your top thread with your left hand and pull it taught. Now with your right hand turn the hand wheel. As the needle goes down and back up it will catch the bobbin thread and pull it up.
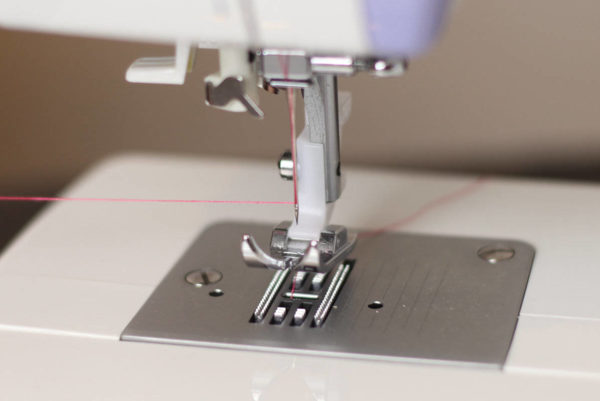
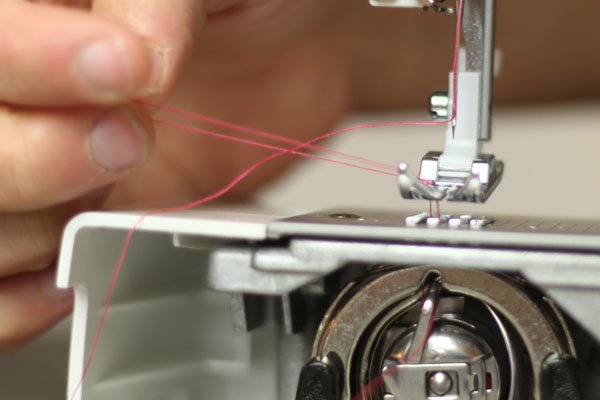
Step 17: Pull the Thread Out to the Left of the Sewing Machine
Use your hand to grab both of the threads, pull them underneath the presser foot and lay them to the left side of the sewing machine. Always leave at least 6″ of thread to the side so they don’t come out while the machine is in motion.
Step 18: Close the Bobbin Case
Close the flap covering your bobbin case, and enjoy your fully functioning sewing machine.
Remember:
If your machine ever has any issues, it is most likely that your thread has come out of one of its guides. The key here is to re-thread your machine before you start fussing about it being broken. Similarly to how you restart a computer when it’s having issues, re-threading your machine properly will save you a lot of headache in the long haul.
The most common issue I come across is having the thread catch down in the bobbin chamber while sewing. The best way to prevent this is to always lift up your needle a full rotation with the hand wheel before lifting your presser foot to end your stitch. Remember, before you sew, always start with a clean work area free of loose threads, and adjust your dials appropriately.
Like This Post?
Check Out
 Try out your perfectly threaded sewing maching and make your very own curtains


