
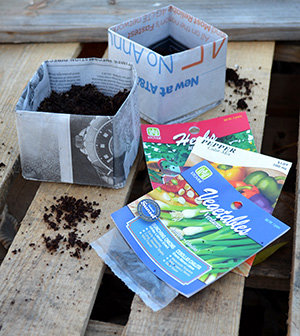


Especially in winter, I try to find ways to continue to enjoy gardening. I like to start seeds so that I have tomatoes and other vegetables ready to go when there is no longer a risk of frost. For many years, I purchased little seed starter pots, but that became quite expensive. This project allows you to recycle newspaper to make biodegradable seed pots that are ready to plant. If you need smaller pots, you can reduce the size of the newspaper page. If you need sturdier pots, you just double the thickness of the paper.
This is also a great project for kids. It is really just a simple origami project.
How to make a newspaper seedling pot:
These simple newspaper plant pots take no time at all to make and would be a great weekend project. The best part about using newspaper is that you don’t have to remove the seedling before putting it in the soil! The newspaper will decompose in the soil naturally. What more can you ask for?
Supplies you need:
- Newspaper
- Scissors
- Potting Soil
- Seeds or Seed Cuttings
Step 1:
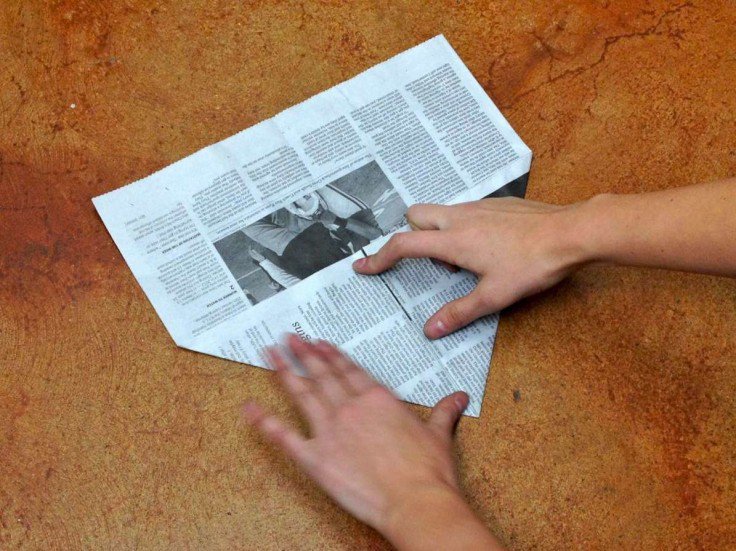
Take one full page of newspaper and cut it in half lengthwise along the fold. You will only be using one half of a page for each cube planters.
Now take that first sheet and fold it in half making sure the ends meet up evenly. You may struggle a bit to fight the preexisting fold in the paper. Be sure to make it a crisp clean fold.
Cut a full newspaper page in half so you are left with one piece.

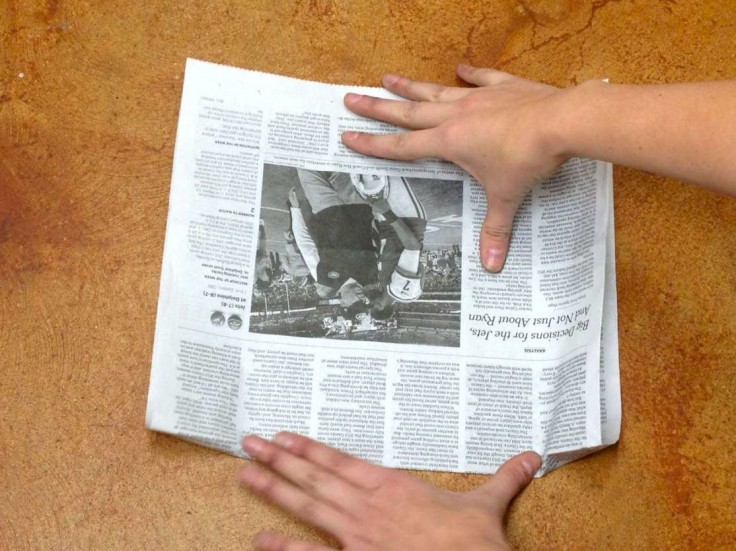
Fold it in half so the edges meet.
Step 2:
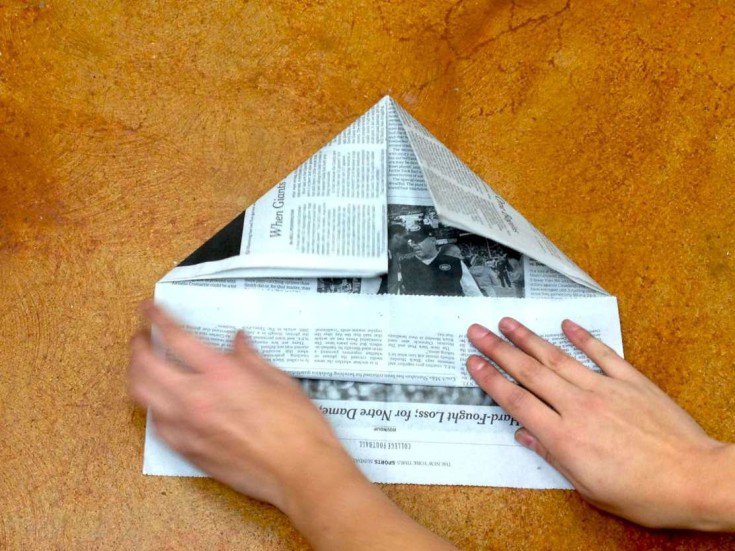
Keeping the paper folded, fold it in half again along the vertical axis.
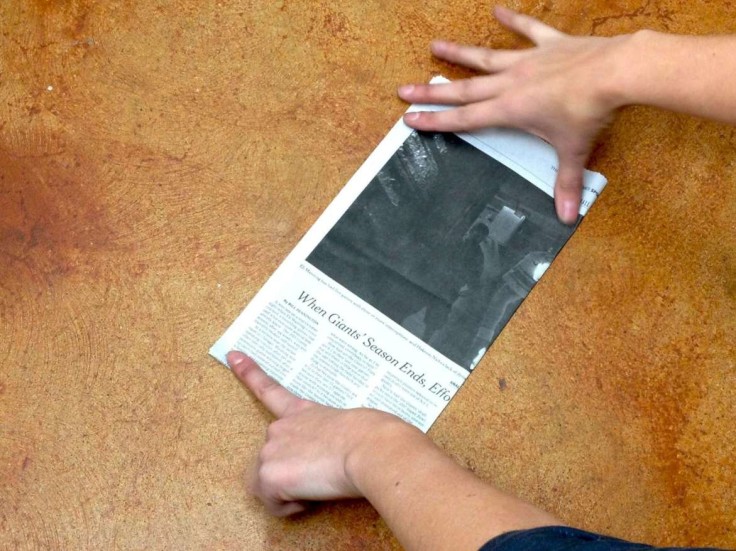
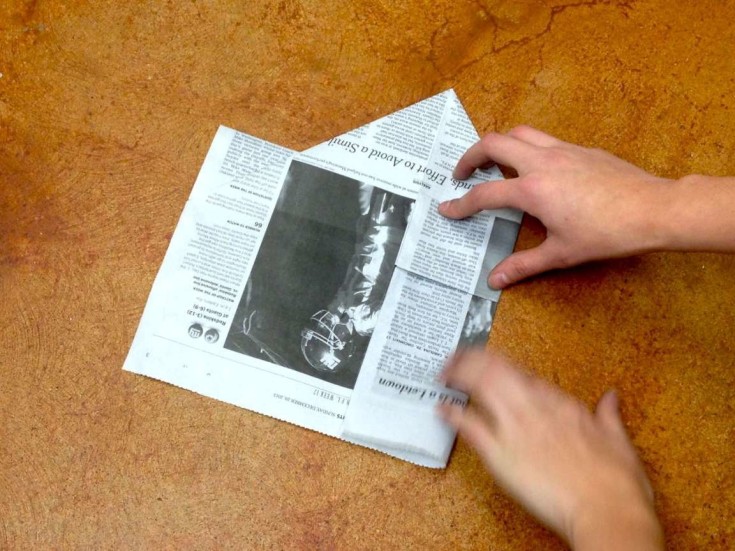
Step 3:
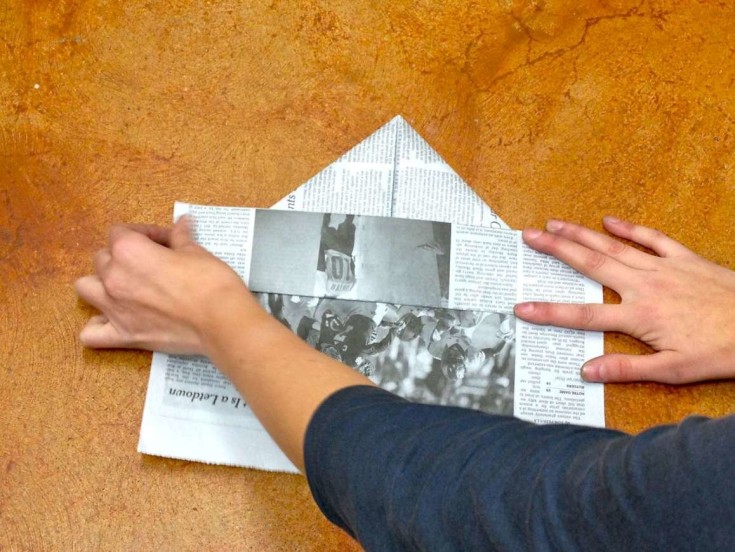
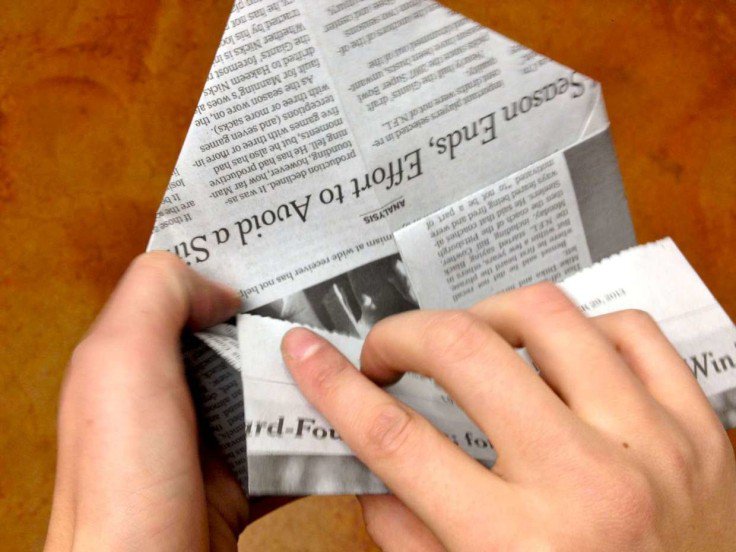
Now release the second fold and grab the bottom right corner. (Make sure it’s the folded side) Fold it so the edge aligns with the center crease. Do the same thing for the left corner.
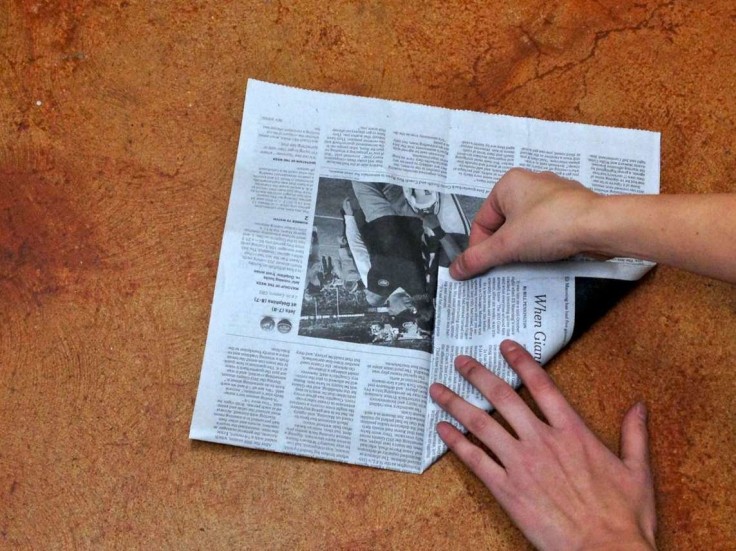
Step 4:
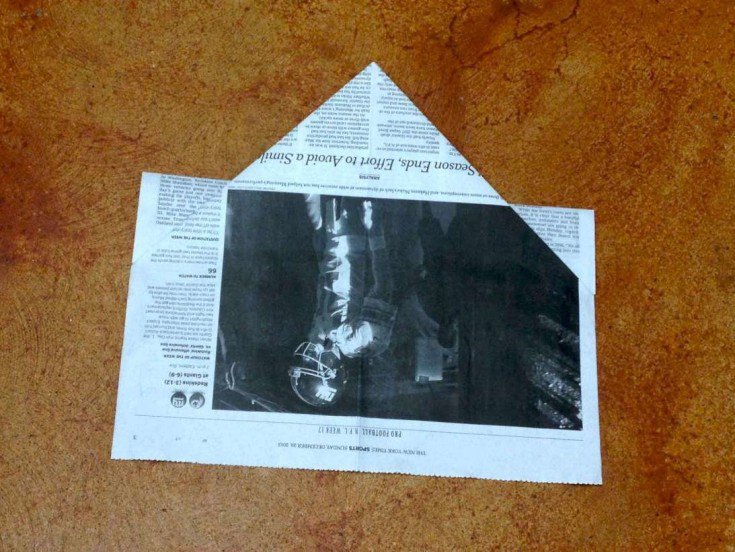
Next, grab the top flap of the open edge and fold it up so the edge meets the bottom edges of the triangle folds you just made.
Step 5:
Keeping that fold crisp, fold it one more time so it overlaps the triangle folds.
Step 6:
Now flip the paper over so we can work on the other side.
Start by grabbing the right edge and fold it so it lines up with the center crease. Repeat on the left side.
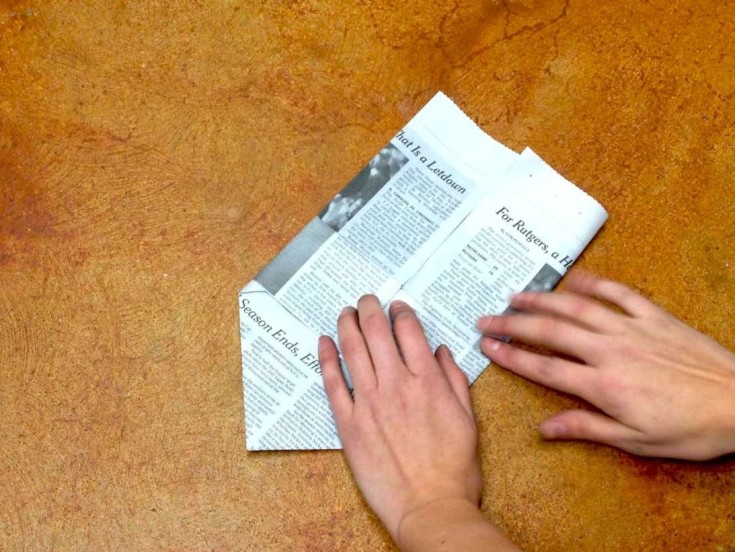
Step 7:
Staying on the same side, grab the bottom edge and fold it up once so the edge meets the first set of flaps. Keeping it folded, fold it one more time up along the edge you just created.
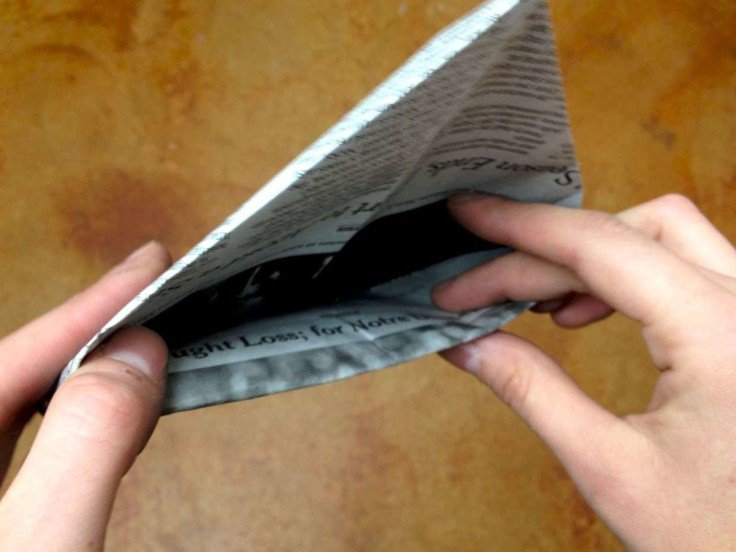
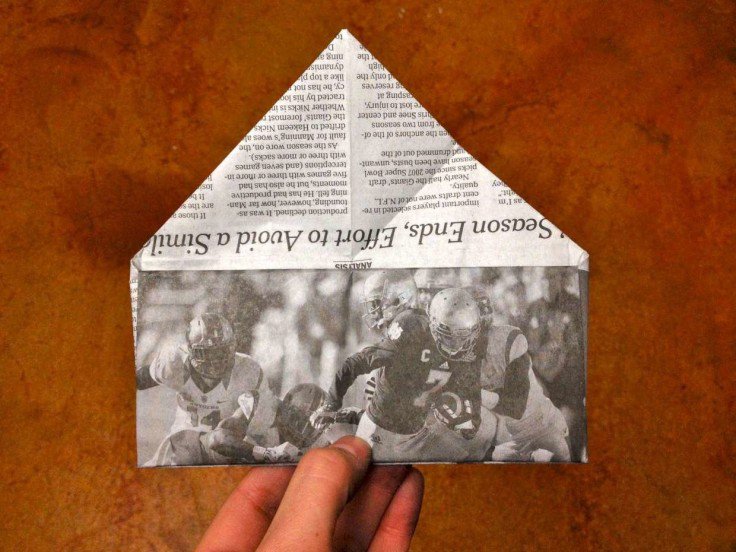
Step 8:
Releasing the last fold, take the top flap and fold it into the pocket.
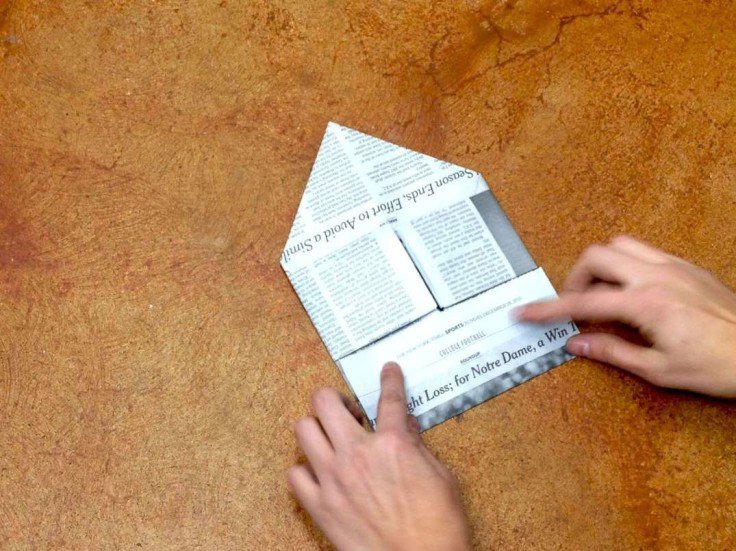
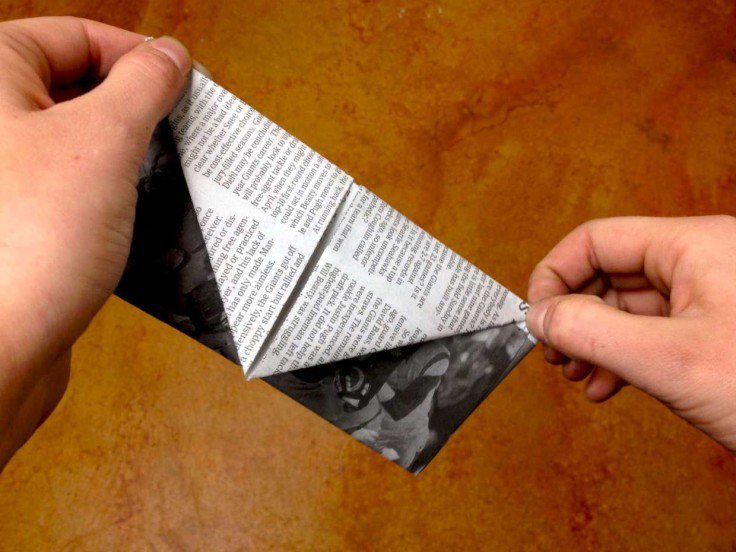
Step 9:
Making sure all the folds are crisp, take the top pointed flap and fold it crisply forwards then backwards along the top of the pocket edge you just created.
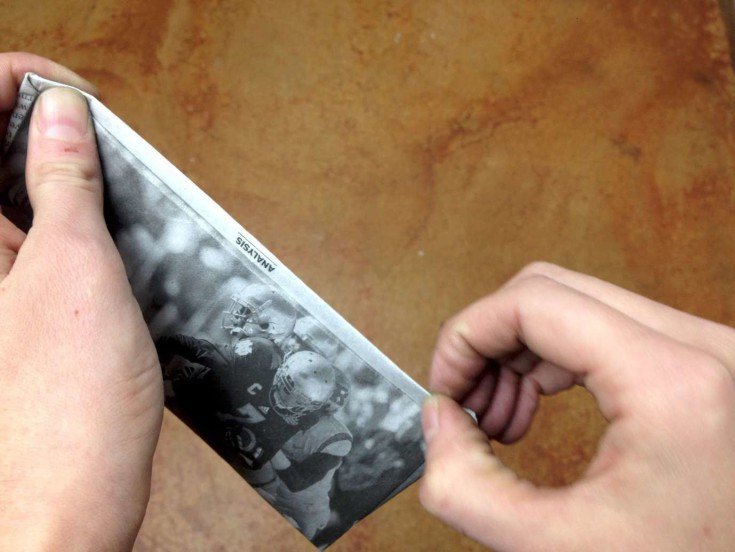
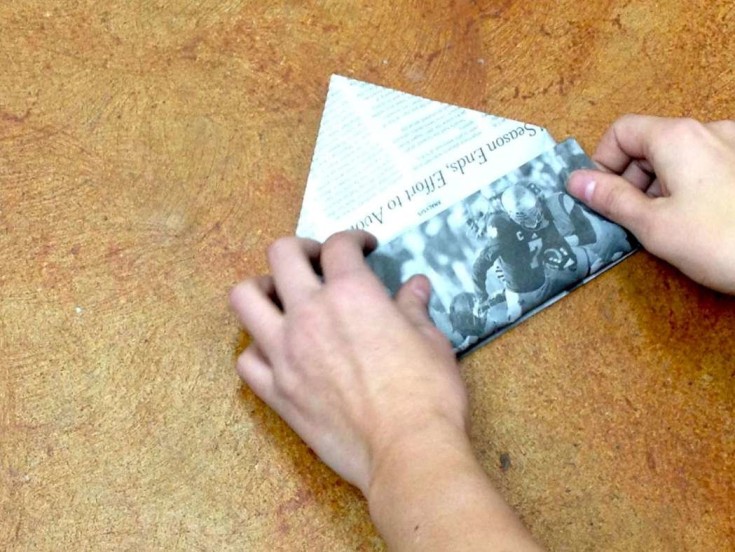
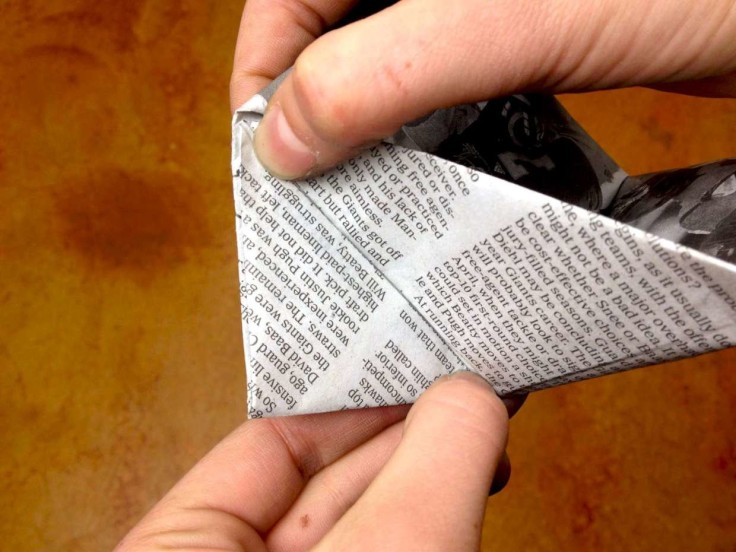
Step 10:
Take the pointed flap and fold the point until it meets the left corner at the opening of the pocket. Only crease the fold until you meet the opening of the flap. This fold aids in the bottom of the box taking it’s shape easily. (See the photo below for how the crease should look)
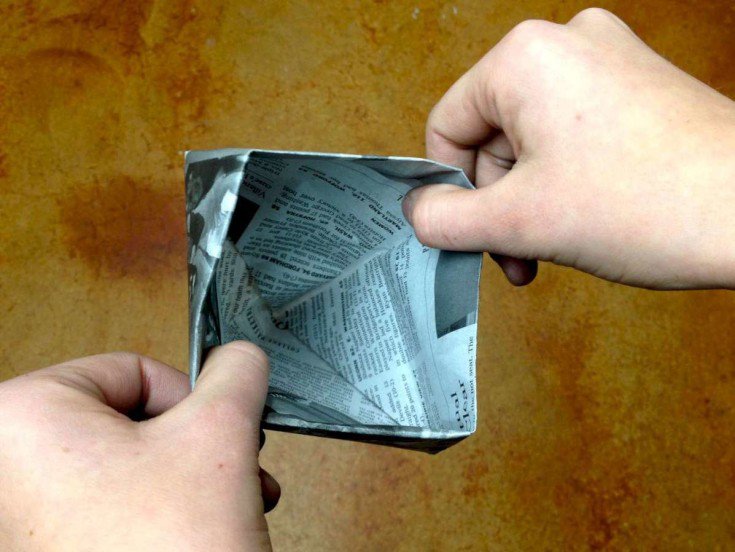
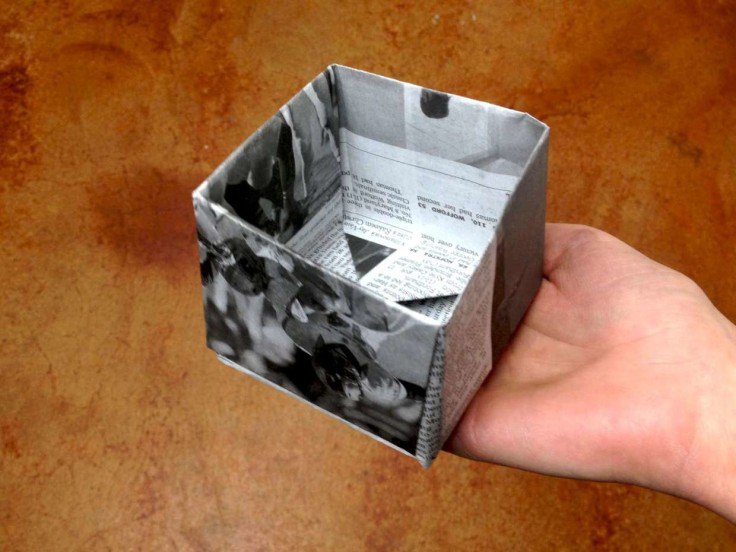
Step 11:
Grab the sides of the bottom opening and begin to pull them in opposite directions. The box will begin to take shape on its own. Go back over each edge and make crisp folds. Now your planter is ready for seed cuttings or seeds!
Like this post?
Be sure to like us on Facebook (button below) so you can be the first to know about latest project updates as well as great DIY articles.
Let us know what you think in the comments below! Your feedback matters. The more interest we get in posts, the more likely we are to do more like that.


