

Want to know how to make a yarn wrapped DIY bracelet? If you need some inspiration for your next craft project, try making your own DIY bracelet. This is a great project to add to your DIY jewelry collection.

How to Make Yarn Wrapped DIY Bracelet
I've been subconsciously buying into the monochrome trend recently. So when I dug up these wooden bangles from the bottom drawer, I thought they'd be perfect for a little updating. I wanted to create a not to monochrome rather than go all out. Plus I really like to look and feel of the wood and the way it contrasted with this delicious pearl cotton yarn. The finished effect is a subtle and stylish not to one of the season's hottest trends.
What you'll need for your DIY bracelet:

- Wooden bangle
- DMC Pearl Cotton #5 in Black and Off White
- Yarn Needle and Thread
- Snips/Scissors
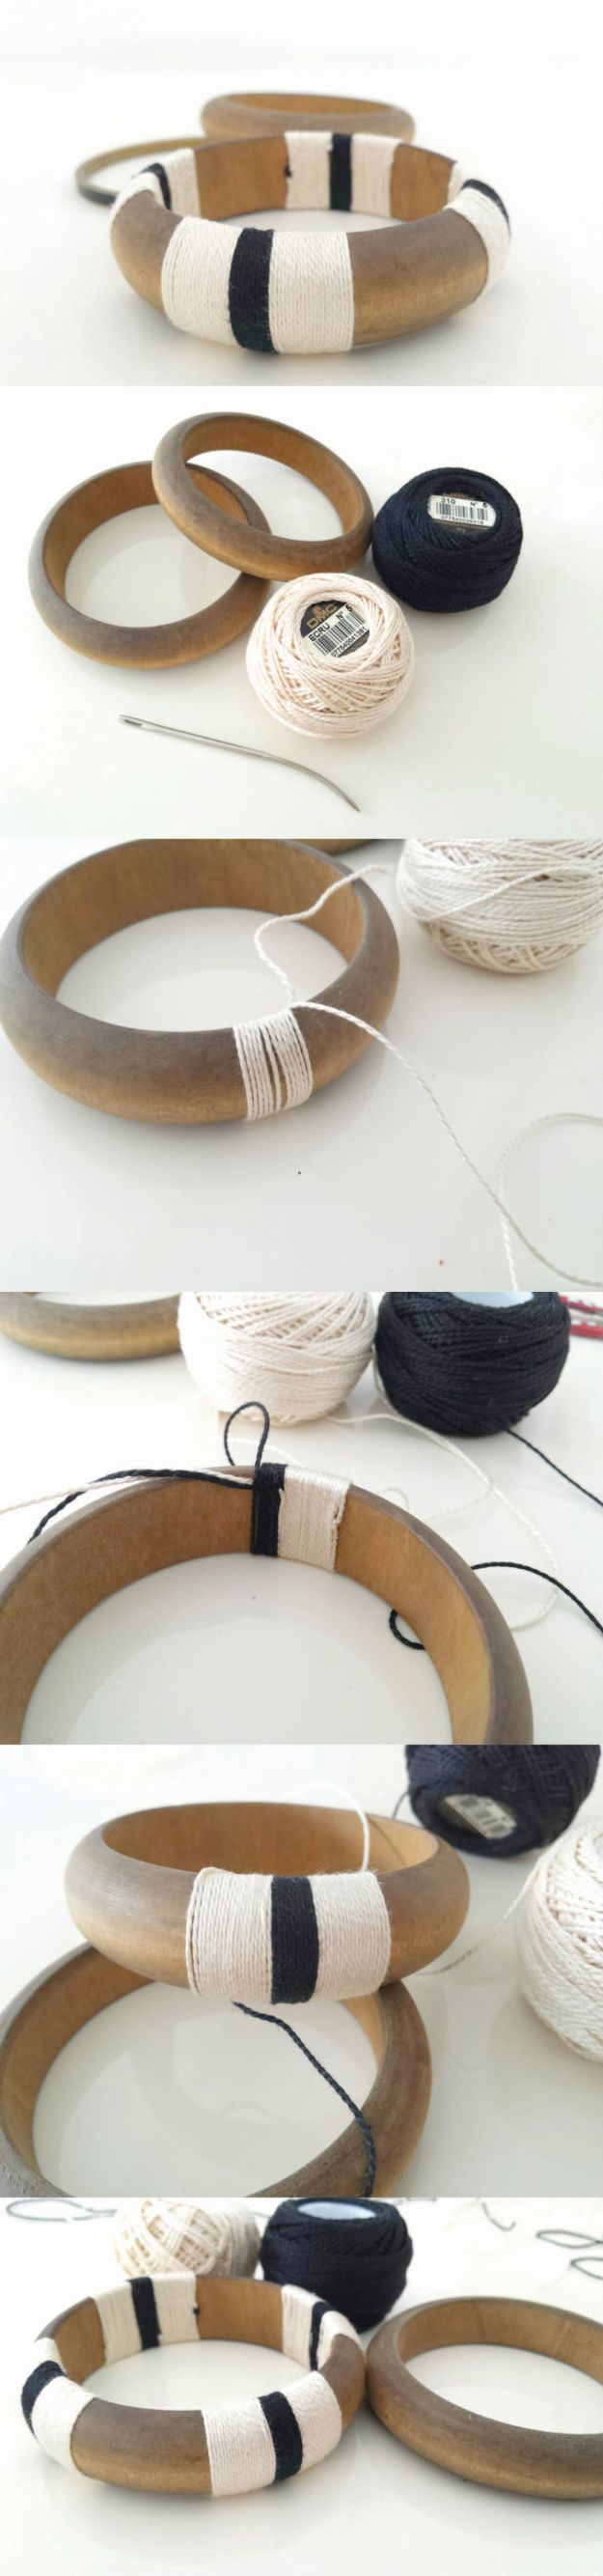
Step 1

Start by tying a slipknot around the bangle using the white and snug it up against the bangle. (You're not cutting off a length of yarn, but wrapping straight from the ball.) Leave a tail of about 2″.
Step 2

Flip the knot around to the inside.
Step 3

Make a few wraps by passing the ball of yarn through the bangle. Keep it under a really firm tension and wrap over the loose tail end of the yarn to secure it as you go.
Step 4

To get a nice even wrap without any gaps like this; stop every 6 or 7 wraps.
Step 5

And snug the wraps up against each other with your nail.
Step 6

When you get halfway along, pull the yarn tail taught and snip off, then continue wrapping.
Step 7

When you're ready to add your black, don't cut off the white! We're going to carry the white yarn across behind the black so we can use it for the second band of white. So just secure it by tying it off at the back but leave it attached to the yarn ball. Then tie on your black with a slipknot as before. Leave a 2″ tail of black.
Step 8

Wrap the black in the same way as you did the white. This time you're wrapping around the tail of the black AND the white yarn that you're carrying across. Snip off the black tail about halfway through your black band; then continue with your black, with the white yarn running behind it.
Step 9

When you're done with the black tie off and cut. Pick up your white yarn again and wrap exactly as before. Wrapping over the black tails as before. When you're done, knot off and cut the white leaving a long tail.
Step 10

Thread the white yarn tail onto a yarn needle and pass under the wraps at the back/inside of the bangle. Pull through tight and snip off.
Step 11

Repeat all that three more times at equal intervals around the bangle!

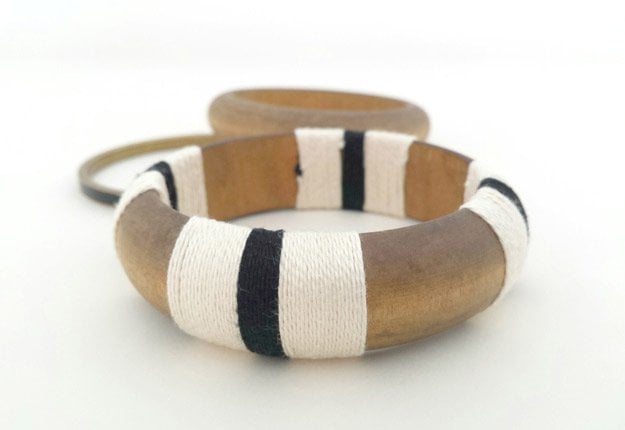
I wanted to add just a few subtle touches to my bangle (I also liked the wood so much I didn't want to obscure it totally).

But you could wrap the whole thing. You can use any color yarn and any type of yarn. As long as it is strong (because you'll need to wrap tight and keep it under tension!) there's no limit to the color combinations here!

Did you our tutorial on how to make a yarn wrapped bracelet? Let us know in the comments section below what your thoughts are on this DIY bracelet. Do you have any other craft projects you’d like to share? Share it with us and we’ll give it a try. We love doing cool DIY projects by making craft projects, home decor projects, upcycling ideas, recipes, tutorials and anything you can do yourself. That’s why we created this site, we want people to be more in touch with their creative side and realize that there’s a lot of things that they can do themselves. We’d love to hear from you and create a community of DIY enthusiasts where any project is just a click away. Stay connected with us on Facebook, Twitter, Pinterest and Instagram!
Want more cool DIY projects to try? Check out more of our posts:
DIY Beaded Bracelets You Bead Crafts Lovers Should Be Making
How To Make Paracord Bracelets
16 Cool DIY Bracelets
Click it to Pin it!