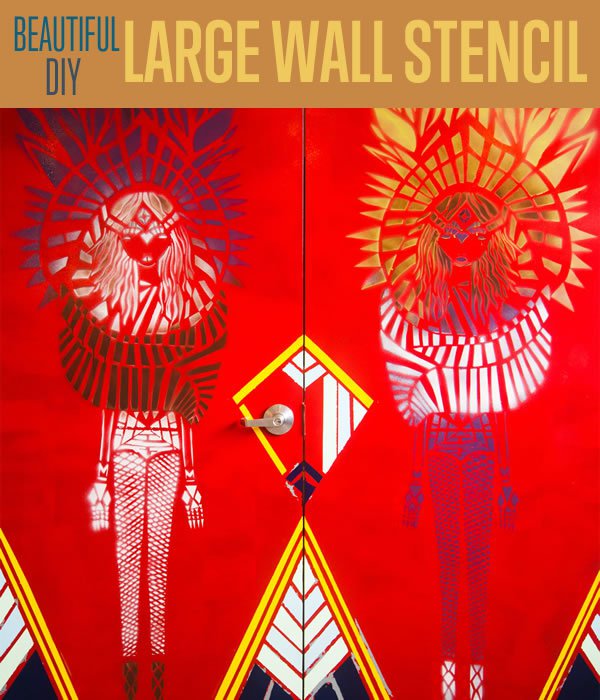
Have you been thinking about making cool wall art by using a large stencil, but don’t know where to start? Fine artist (and DIY Projects master photographer) Teresa Flowers walks you through the steps to painting a wall stencil with a twist.
How To Make Wall Art With A Large Stencil | Wall Stencil Tutorial
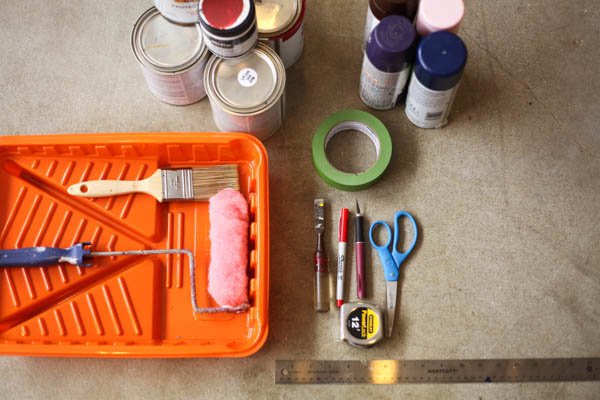
Supplies to make DIY wall art:
- Exacto knife and a few replacement blades
- Ruler
- Sharpie
- Painter’s Tape
- Paper
- Spray paint
- House paint
- Cutting board
- Ruler
- Scissors
- Measuring Tape
- Clear Masking Tape
- Plastic Gloves
- Painter’s Mask
- Gloves
- Painter’s or Dust Mask
- Tape Burnisher (Optional; a metal tool that affixes tape to prevent any paint bleed-through)
Step 1:
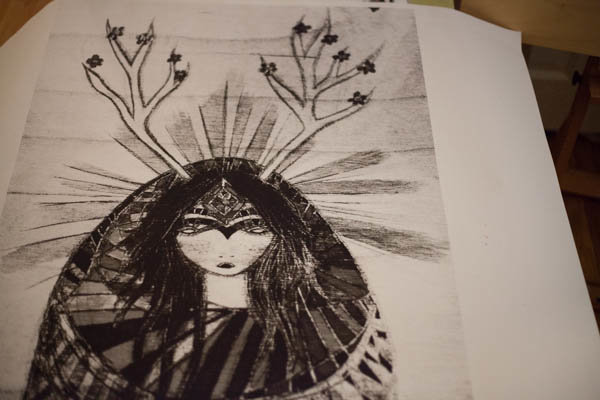
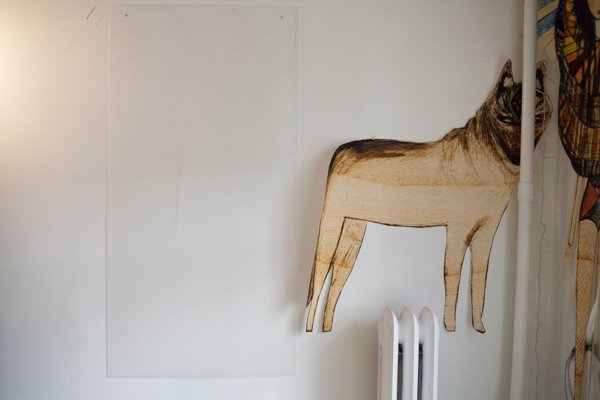
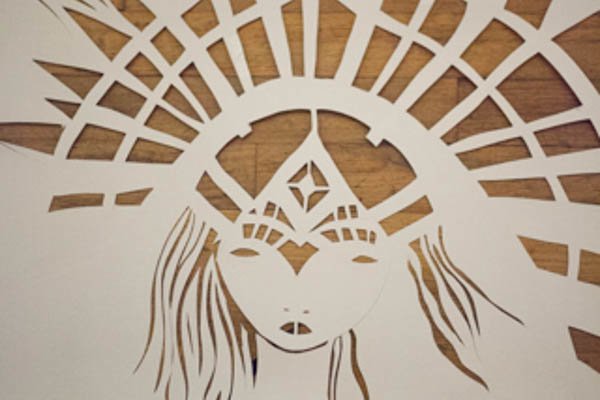
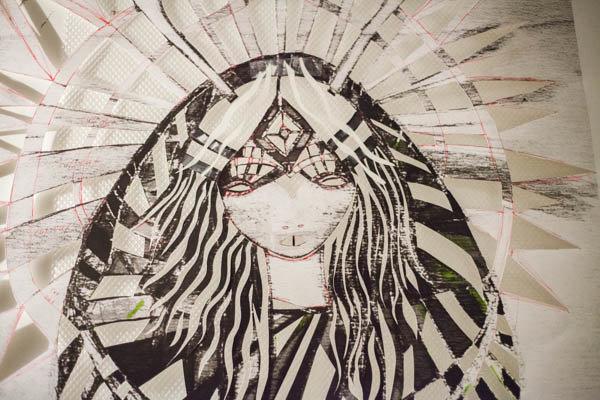
Pick out the artwork you would like to use. I recommend something graphic, black and white, and not with a lot of detail. Try to keep it simple if this is new to you.
Step 2:
Go to your local print shop and print a black and white print of your image the size you would like your stencil to be.
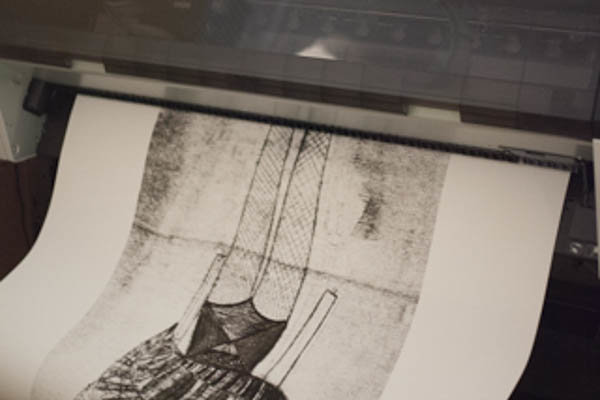
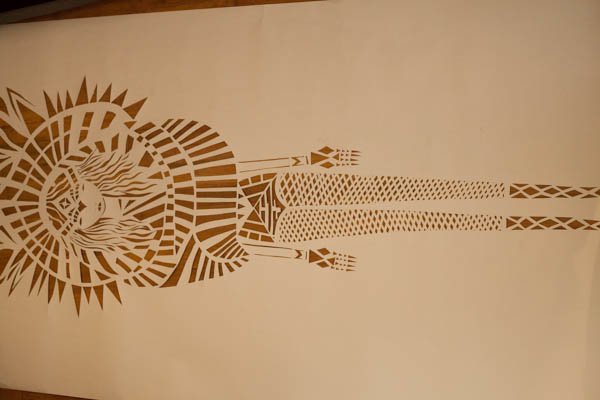
I choose a medium weight paper so it was easier on my hands to cut out, but sturdy enough for longevity. My stencil is 6 feet tall and I wanted it to be as easy as possible to cut.
Optional:
You can also just draw one out on paper. This costs less money but takes extra time.
Also Lamination helps with longevity. To do this you would need to go to your local print shop and have them put two pieces of lamination (as big as your print) through the machine to melt them together. Then trace your image onto the lamination. I choose not to do this because I was eager to get started and it is harder to cut through. It would be easier to cut it with a box cutter, instead of an exacto knife, but my stencil is too detailed to use a box cutter. So use your best judgment. But I do recommend it on simpler designs for people who also have strong hands. It helps protect your stencil long term.
Step 3:
Start by figuring out your set up for cutting out the image. You need something behind your stencil to protect the surface of what you are cutting on.
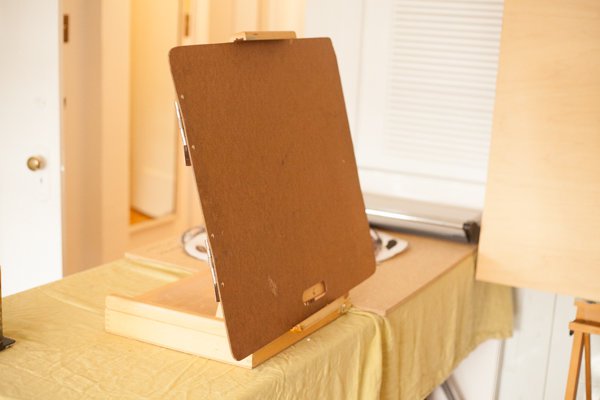
You can use the back of a drawing board for smaller pieces, or even just a large piece/pieces of cardboard and put it on the ground.
I just bought a plastic board that was on sale at the local hardware store and nailed it into the wall.
It took me over a week to cut out my stencil and I wanted to be able to stand for comfort and to protect her from having to be folded over.
Step 4:
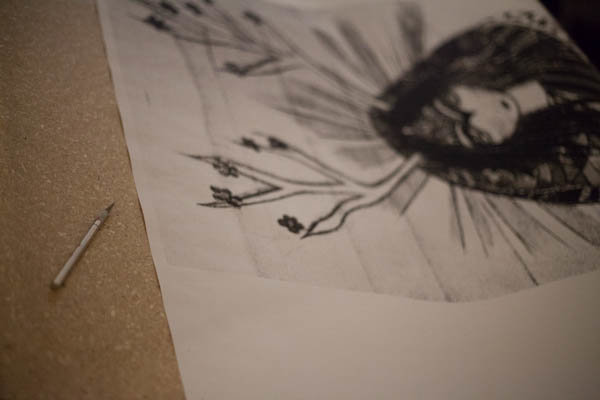
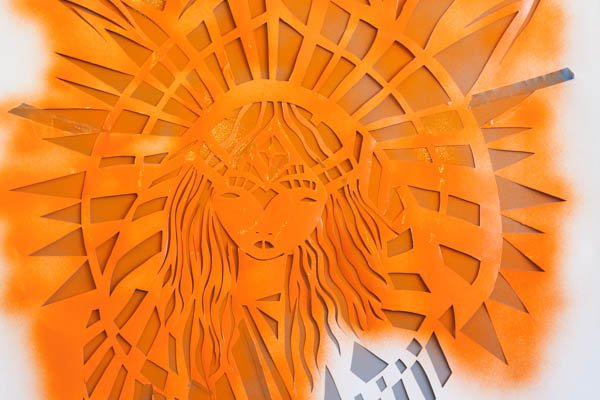
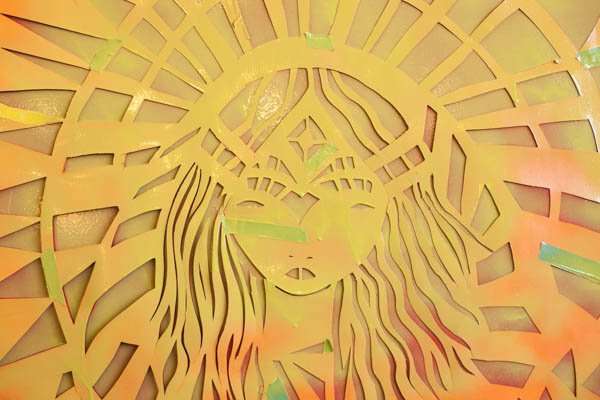
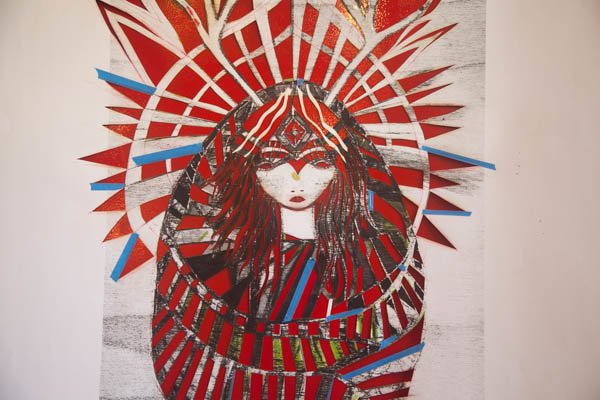
Mark the places you will cut with the exacto knife. I marked mine with a red sharpie to make it obvious while cutting. Any mistakes you can tape together (this is not ideal but mistakes do happen). My stencil is very detailed so it took sometime to plan the cuts. I generally went with cutting out the dark parts of the image, but the key is to not remove too much of the stencil in any given area. Otherwise the stencil will be weak and risk falling apart.
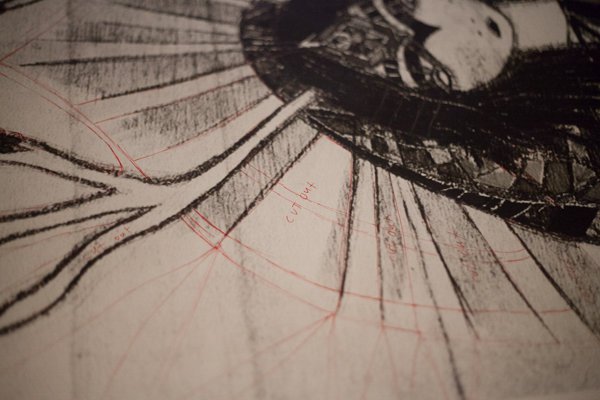
As you work, you can always flip over your piece (the side without the drawing) to see what it will look like.
Optional:
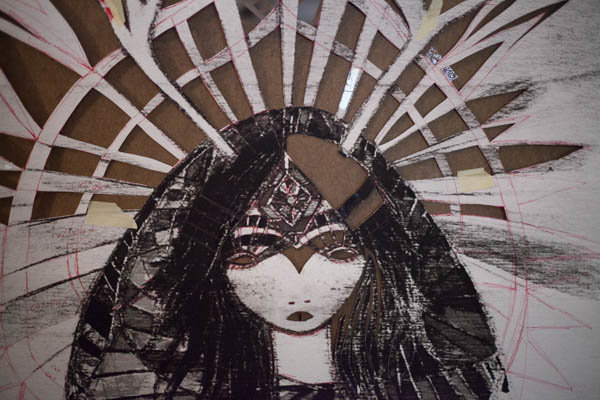
Adding details with cut paper. Cut out paper any shape and size you like to add details to your image.

I am a very detailed person and love lines. I wanted the illusion of her wearing fish net stockings but found this impossible to cut out with an exacto knife.
I wove the paper over the leg and taped it down with clear masking tape.
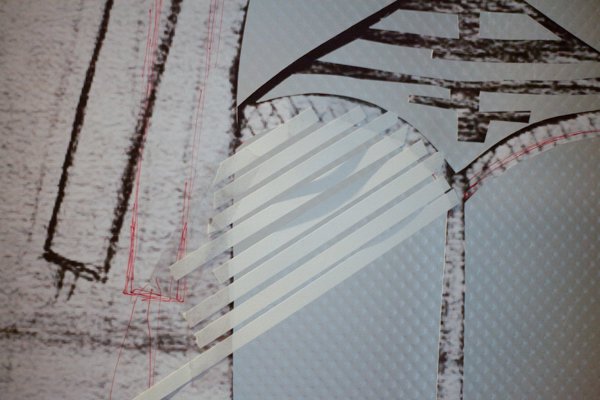
Next I wove another layer going in the other direction.
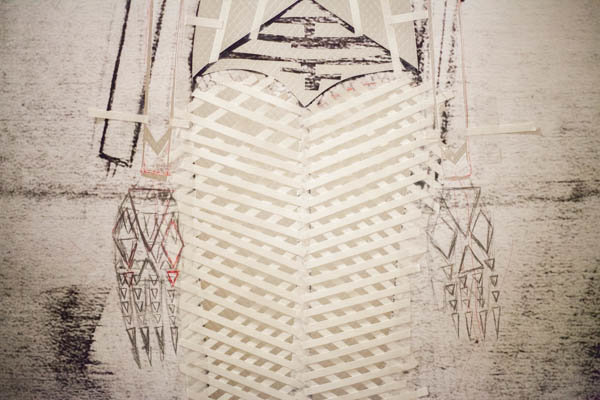
I also messed up and cut out to much of her hair so I decided to add some highlights in by cutting out paper then taping it in place.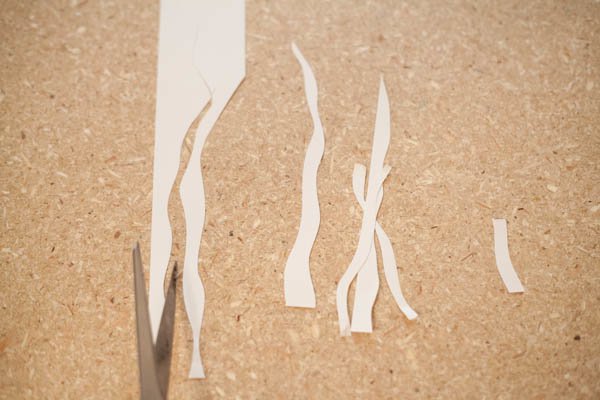
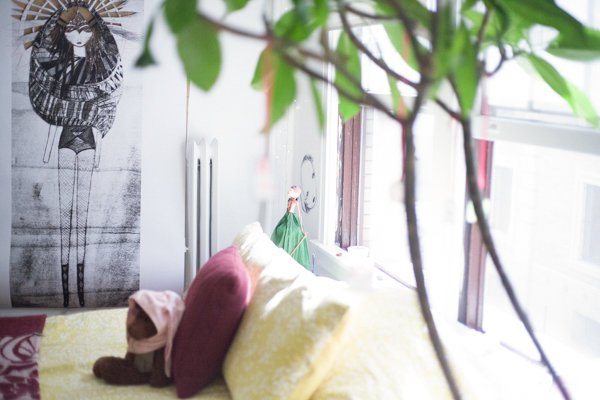
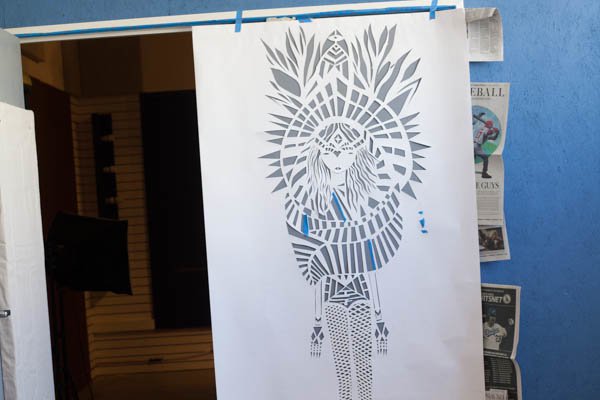
Now your stencil is finished and ready! I recommend storing your stencil flat so it lays flatter to the surface you are spraying, to avoid under spray.
Step 5:
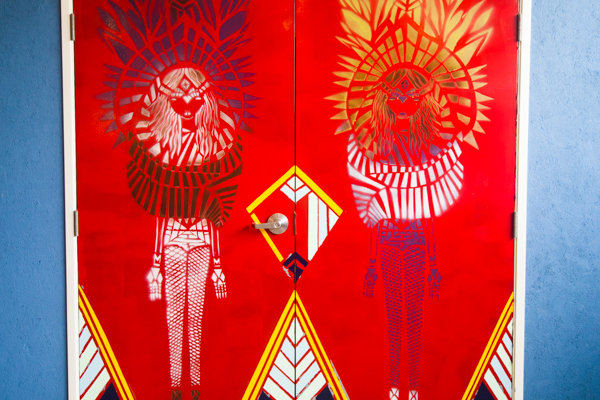
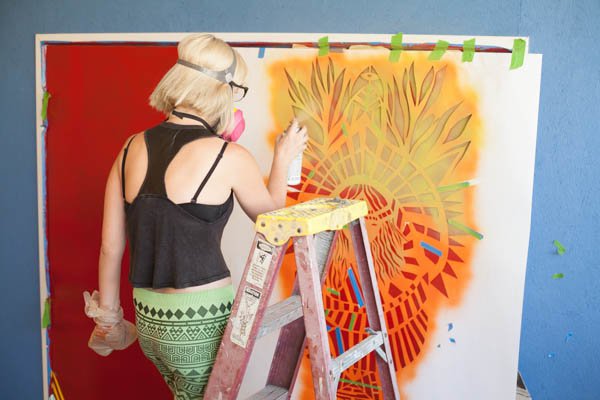
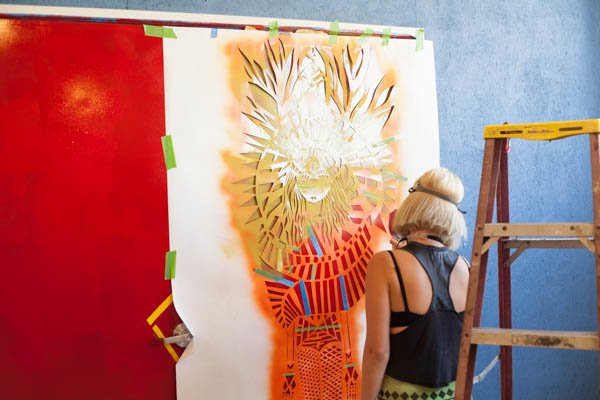
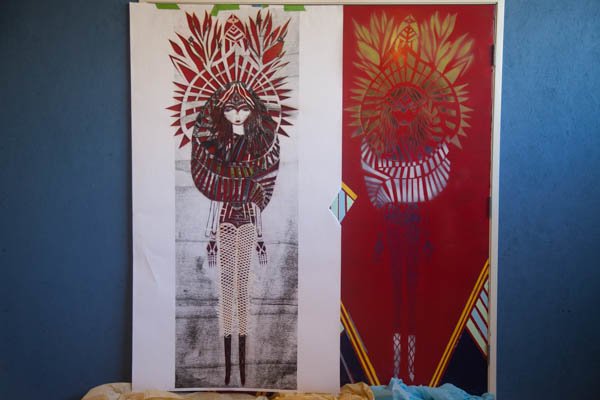
Prep your surface for painting. I was excited to be able to paint the doors at the DIY Projects Headquarters!
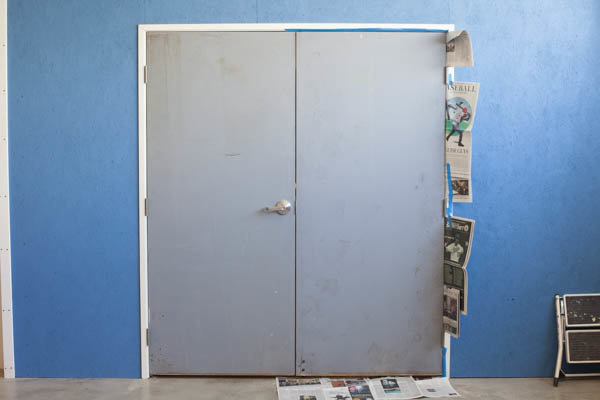
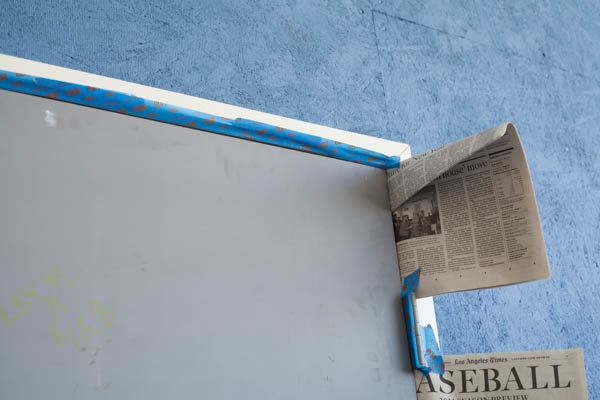
I took painter’s tape and taped all areas I wanted to protect.
Step 6:
I did a test run before I painted the door to see what my stencil would look like. Attach your stencil to the place you want your stencil located. I did this with painter’s tape. I also taped other areas within the stencil to make sure it was flat as can be to avoid under spray. This helps in keeping nice crisp lines with as much detail as possible.
Step 7:
Spray! I recommend using nicer spray paint. I used some cheap spray paint and it is was either too runny or too globby.
Tip:
Make sure you are holding the spray can at the same distance away from the door through your sprays. I recommend 10-12 inches away and keeping your sprays even and consistent while holding your can parallel with the stencil.
Yay! your first spray! What an accomplishment after all that work!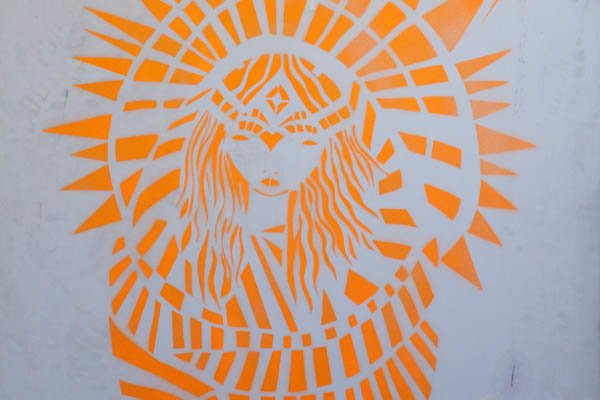
Tip:
I hung my stencil up to dry in the middle of the room so it would not get paint on the floor. Also wearing plastic gloves and a mask to protect you from the fumes of the paint is smart and healthy.

Now you can look at your stencil to see what you can do to improve when you make your lasting spray. I noticed places that needed to be cut out a little more and places I needed to tape down to be flat against the door. It also helped me get my placement spot on. I wanted it centered perfectly on the door.

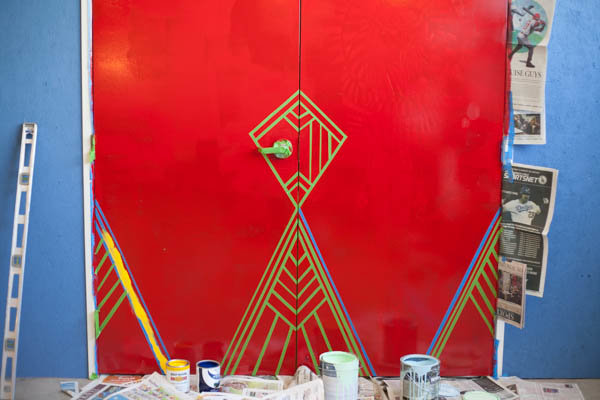
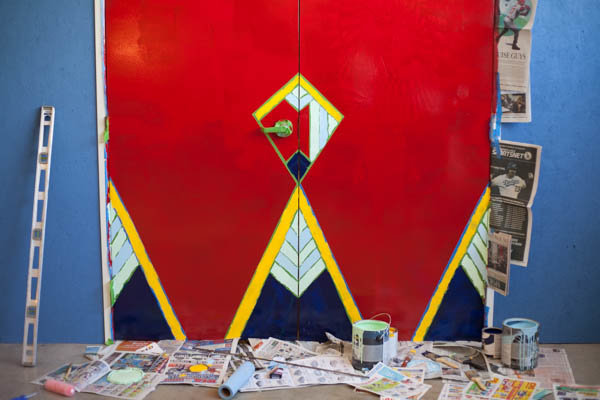
Step 8:
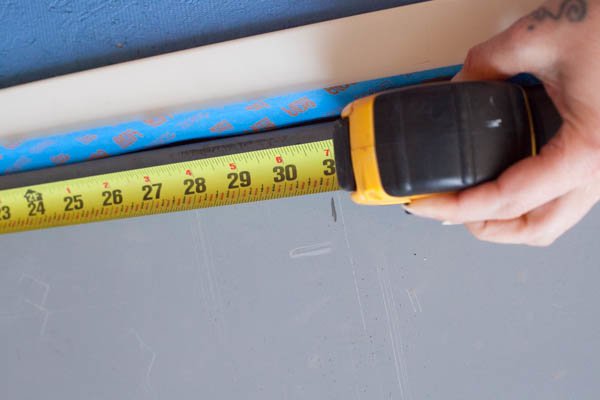
I measured out the places I wanted to add lines before I covered up the stencil by painting the door.
Step 9:
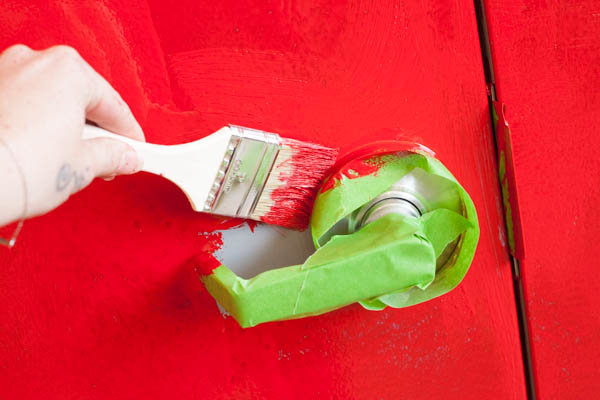
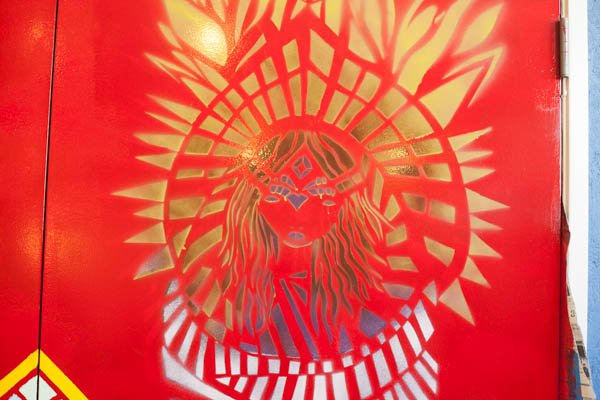
Paint the door! I used a roller for the majority of the door and an oil-based Fire Engine Red paint we had lying around. I like red.
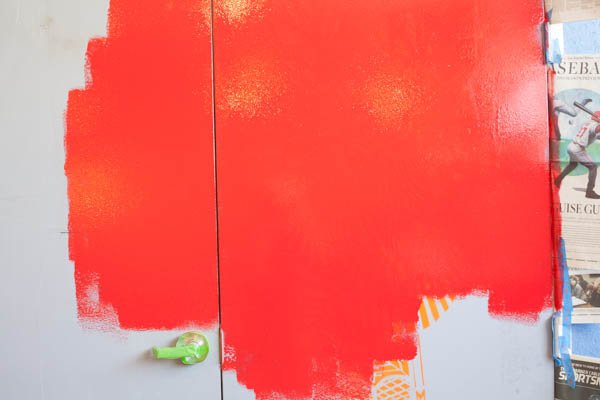
I used a brush for working the details around the door handle and close to the edge of the door.
Optional:
You can do a double coat. I choose not to do so because I liked the texture. I knew I was mostly painting over it and was excited to move on. 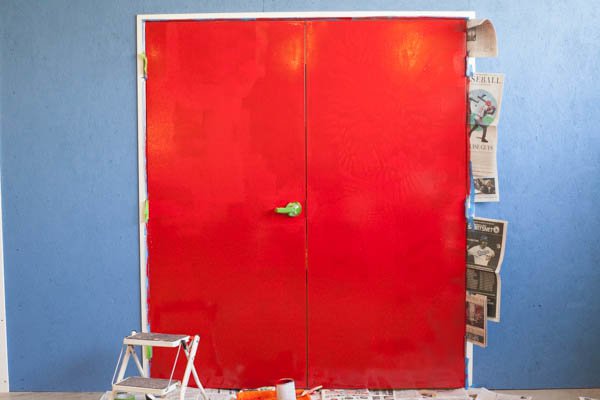
Step 10:
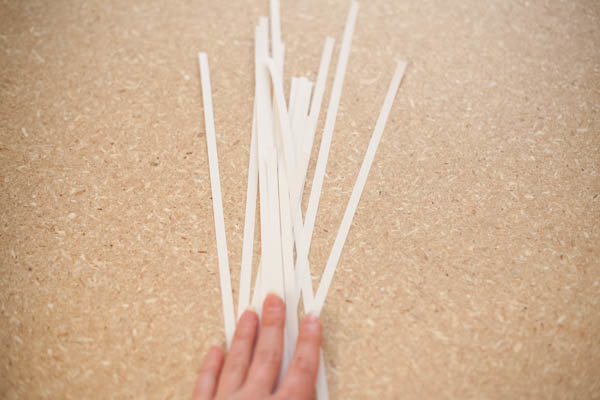
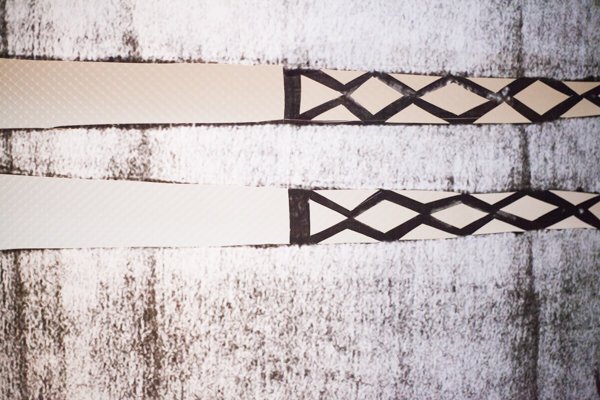
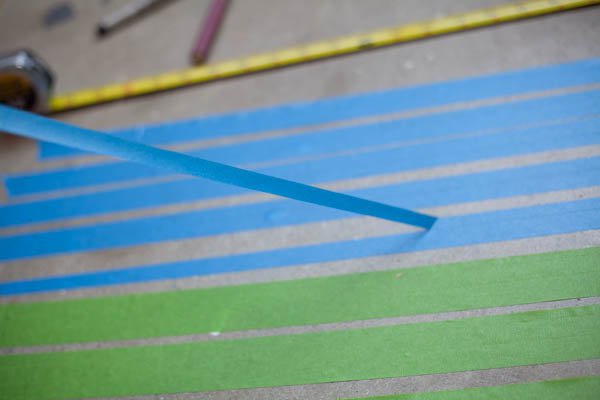
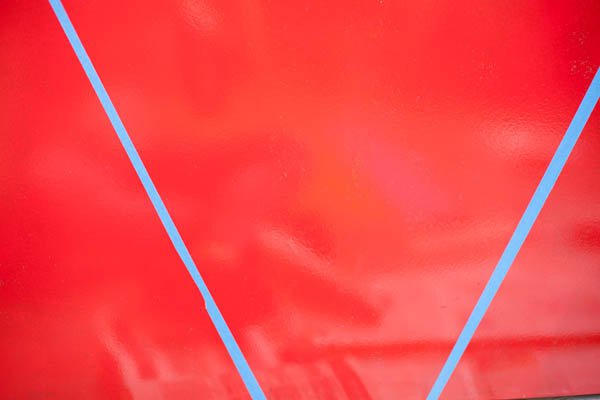
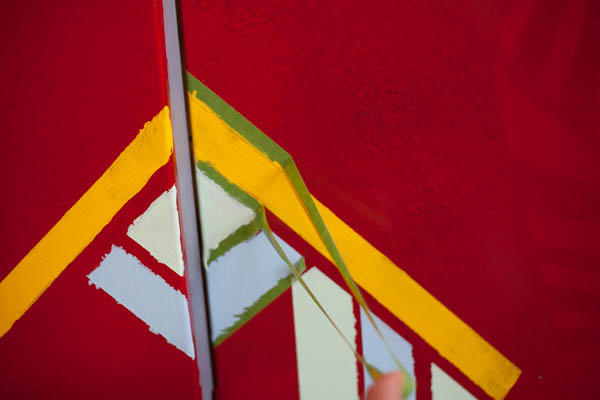
Adding fun lines to your mural. I took painter’s tape and marked it every half-inch with a ruler.
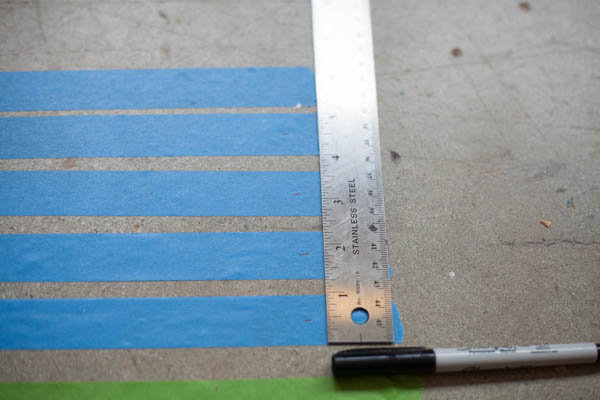
While using a ruler, I cut with an exacto knife down the middle of the tape to make smaller lines. 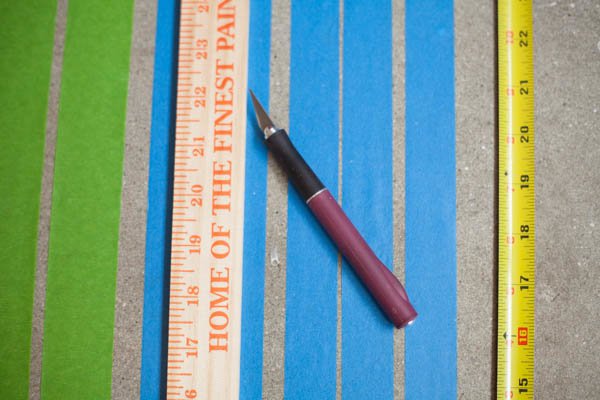
Step 11:
Apply the tape to the door in fun patterns.
Optional:
One mistake I learned the hard way is you should also burnish the tape to the wall so the paint doesn’t leak under the tape and ruin the crispness of the lines. A burnish tool is just a small flat piece of metal or plastic that you can buy at any art supply store and most hardware stores. It helps press the tape down really firmly into the surface to paint cannot bleed through. I did not do this and my lines were not as crisp as I would have liked.
Step 12:
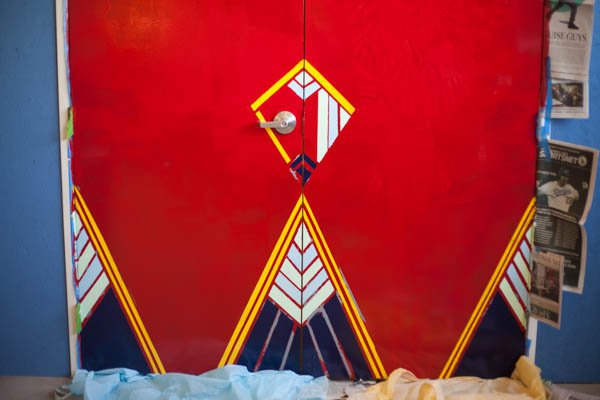
Paint over the tape with a brush. Use fun colors in a color scheme that inspires you.
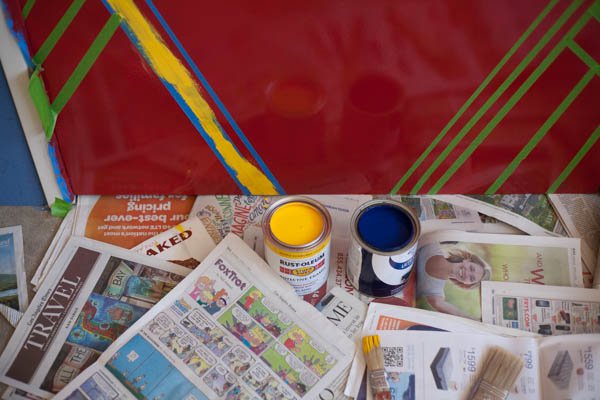
Step 13:
When the paint is almost dry, pull the tape off. I find that when the paint is totally dry it makes it harder to pull off, so I usually remove the tape about an hour before the paint instructions say it will be dry. So, for example, if the can says the paint will be dry in four hours, I remove the tape in three.
Step 14:
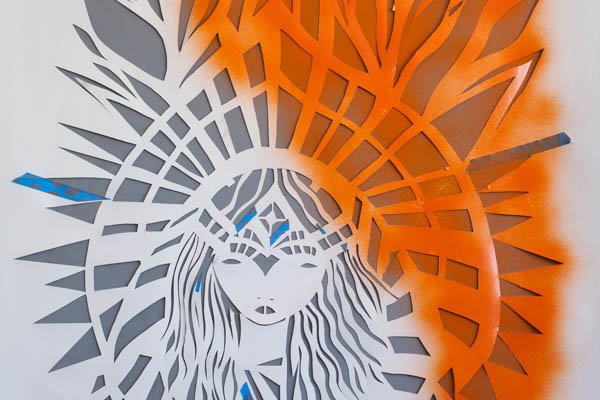
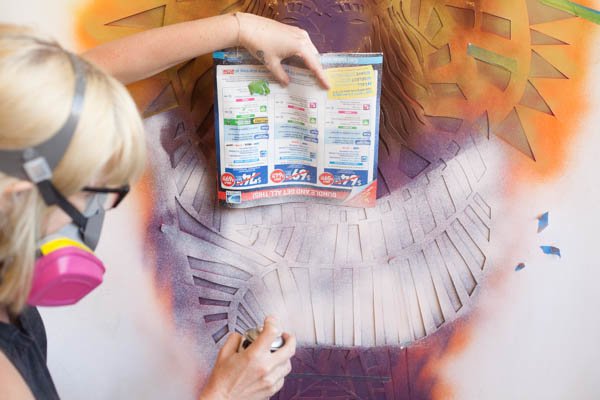
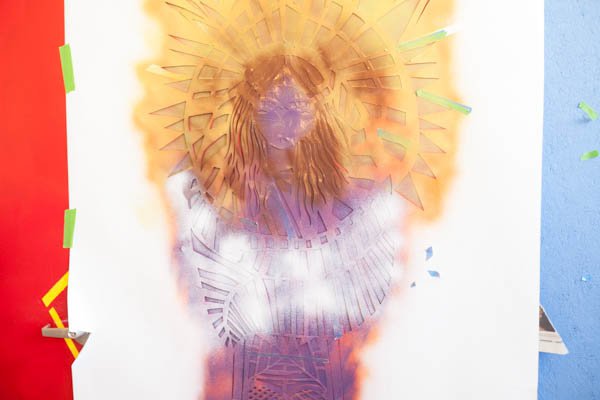
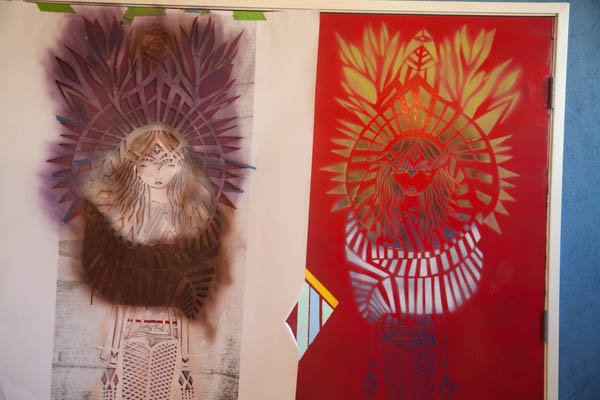
Do step 6 and 7 again, but now lets layer some colors!
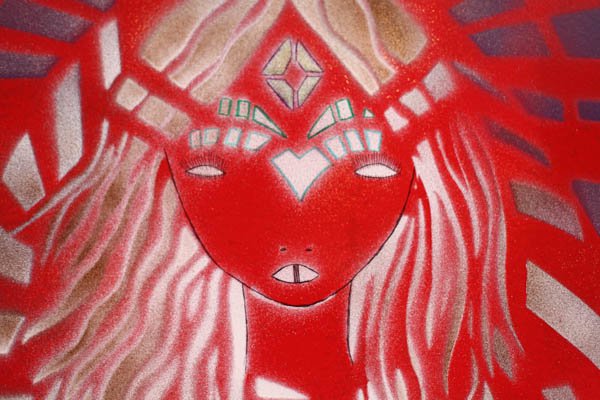
I started with a green spray paint.
I added a layer of purple then went over with brown on the hair area for depth.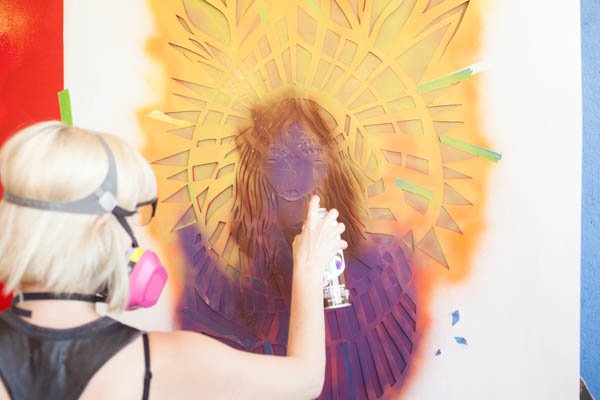
Tip:
Use some newspaper to help protect areas of your mural from the other colors you are using. 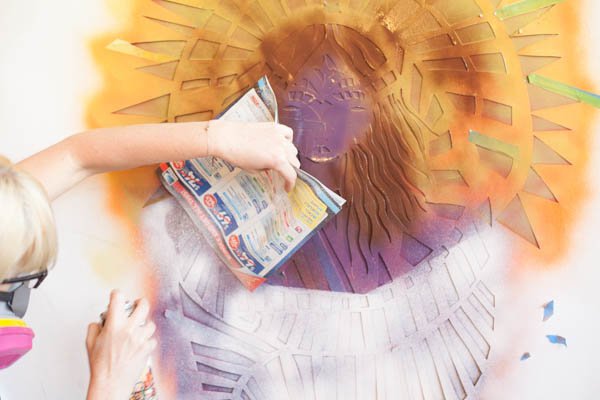

Step 15:
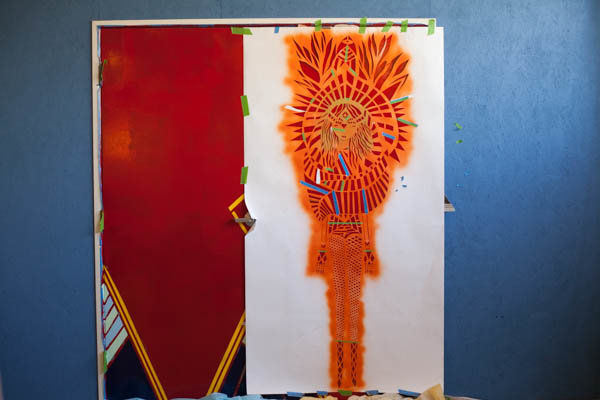
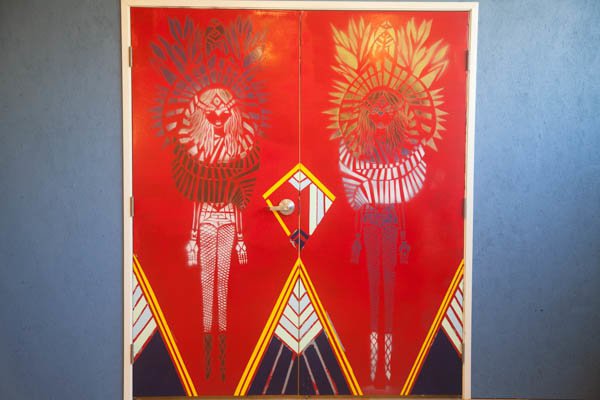
After the stencil is dry, I repeated on the other door. I went for a mirror effect by flipping the stencil over and using the other side. You can obviously do the same thing on a wall or other large surface.
Optional:
Use markers to add a touch of detail to your stencil. I just added some line-work to their faces.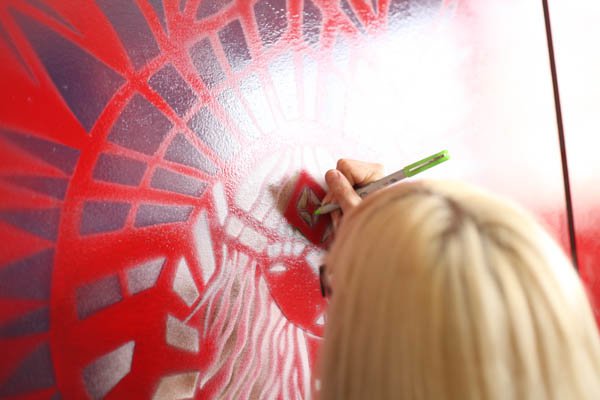

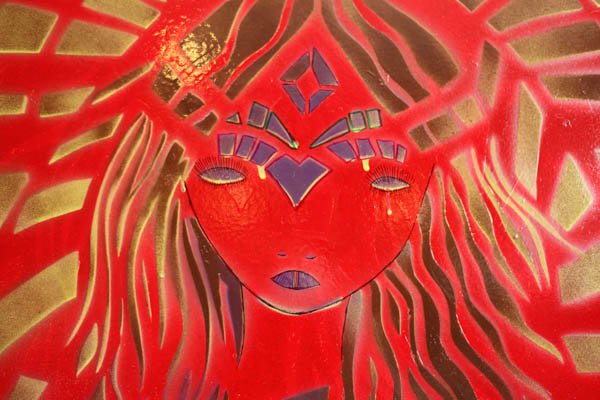
Now you are finished and have a beautiful mural for all to see!