


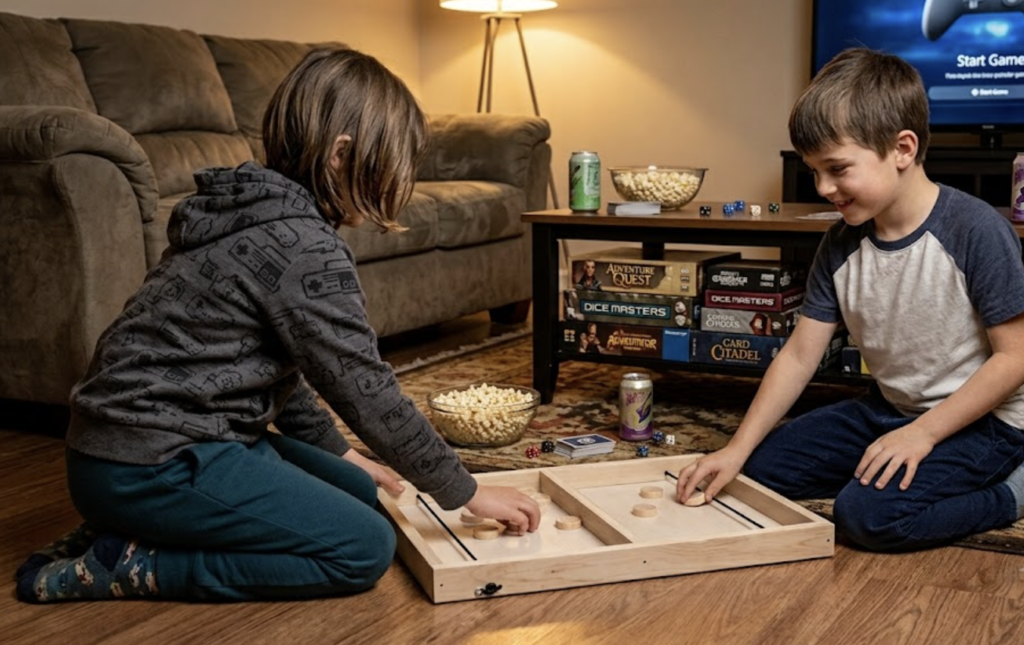

Project At a Glance: DIY Pucket Game Woodworking Project
- Skill Level: Beginner (Perfect for adult-kid collaboration!)
- Time Investment: 2 to 3 Hours (plus finish dry time)
- What This Guide Features: Step-by-step task delegation, exact dimensions, and pro tips for maximum “puck glide.”
⚠️ Safety Reminder: Wear PPE (gloves, goggles, ear protection, dust mask). Use sharp tools responsibly. For load-bearing projects (decks, sheds, barns), check local building codes (e.g., Round Rock, TX regulations) and consult pros. Work in ventilated spaces; minimize dust with eco-friendly practices.
RELATED: 3 Easy Summer Woodworking Projects You Can Complete In a Day (Free Build Plans)
It’s 7:00 PM on a sticky summer evening. The kids are staring blankly at tablets, the dreaded “I’m bored” chorus is starting up, and you’re staring down another night of digital distraction. We’ve all been there. Finding a screen-free activity that actually holds a kid’s attention can sometimes feel like a Herculean task.
Enter the DIY Pucket Game (also known as Sling Puck).
This lightning-fast, highly addictive tabletop game is as much fun to build as it is to play. The concept is simple: use an elastic bungee to fling all your pucks through a tiny “gate” (the opening in the center divider) into your opponent’s territory. The first player to clear their side wins!
This project is specifically designed to get your kids off screens and into the workshop. We’ve structured the build so that the kids get safe, highly rewarding tasks, while you handle the heavy cutting and power tools. Let’s turn a pile of scrap wood into a family game night heirloom!
Materials
- Frame & Divider Wood: 1 piece of 1×2 select pine board, 8 feet long (Actual dimensions: 3/4″ x 1-1/2″ x 96″)
- Bottom Panel: 1 piece of 1/4″ thick plywood or hardboard, cut to 16-1/2″ x 20″
- Pucks: 1 piece of 1-1/2″ diameter wooden dowel, at least 12″ long (to cut 16 pucks)
- Bungee Cord: 2 pieces of elastic bungee/shock cord (approx. 1/8″ thick), each 16″ long
- Fasteners: Wood glue and 1-1/4″ brad nails (or small finish nails/hammer)
Tools Needed
- Miter saw, hand saw, or miter box (great for kids!)
- Jigsaw or coping saw (for the center gate)
- Power drill and a drill bit matching your bungee thickness (usually 5/32″ or 3/16″)
- Brad nailer or a lightweight hammer
- Sanding block with 120 and 220-grit sandpaper
- Tape measure and pencil
📐 The Complete Cut List
Refer to this quick-reference cut list to prep your wood before assembly.
| Component | Quantity | Material | Dimensions |
| Sides (A) | 2 | 1×2 Pine | 3/4″ x 1-1/2″ x 20″ |
| Backboards & Center (B) | 3 | 1×2 Pine | 3/4″ x 1-1/2″ x 15″ |
| Bottom Board (C) | 1 | 1/4″ Plywood | 16-1/2″ x 20″ |
| Pucks | 16 | 1-1/2″ Dowel | 1/2″ thick |
🛠️ Step-by-Step DIY Pucket Game
This project is organized by color-coded task roles:
- Kids/Collab Task: Safe, fun, and highly engaging for young helpers.
- Adult Task: Requires power tools, sharp blades, or extra precision.
Phase 1: Measuring & Cutting (Zero Guesswork!)
Step 1.1: Measuring and Marking
- Kids/Collab Task: Grab the tape measure and pencil. Help the kids measure and mark the cuts on your 1×2 board: two lines at 20″ and three lines at 15″. Use a square to draw straight lines across the wood.
- Adult Task: Use your saw to make clean, straight cuts along the marked lines.
Step 1.2: Preparing the Center Gate
- Note on the blueprint math: The center divider is 15″ long. To center the 2-1/4″ x 3/4″ opening perfectly, the distance from each inside wall to the opening must be exactly 6-3/8″ (since 6-3/8″ + 2-1/4″ + 6-3/8″ = 15″).
- Kids/Collab Task: On one of your 15″ pieces, measure in 6-3/8″ from one end and draw a line. Measure in another 2-1/4″ and draw a second line. Shade in the 3/4″ deep area to show what needs to be removed.
- Adult Task: Secure the board and use a jigsaw (or hand-operated coping saw) to cut out this notched “gate”.
Phase 2: Drilling and Layout
Step 2.1: Locating the Bungee Holes
- Kids/Collab Task: On the outside face of the two 20″ Side pieces, measure and mark a spot exactly 2-3/4″ in from both ends. Make sure the mark is exactly 1/2″ up from the bottom edge of the board.
- Adult Task: Drill a hole straight through those four marked points using a drill bit slightly wider than your bungee cord.
Phase 3: Assembly
Step 3.1: Framing the Box
- Kids/Collab Task: Apply a thin layer of wood glue to the butt ends of two 15″ backboard pieces.
- Adult Task: Sandwich the two 15″ backboards between the two 20″ side pieces to form a perfect outer frame. Secure the corners together using 1-1/4″ brad nails or finish nails.
Step 3.2: Setting the Center Divider
- Kids/Collab Task: Draw a centerline on the inside of the frame exactly 10″ from either end. Apply glue to both ends of your center divider (the notch should face down towards the table).
- Adult Task: Align the divider perfectly with the 10″ marks and nail it in place through the outer side walls.
Step 3.3: Attaching the Bottom Panel
- Kids/Collab Task: Flip the frame upside down. Let the kids run a continuous line of wood glue all along the bottom edges of the frame and center divider. Place the 1/4″ x 16-1/2″ x 20″ bottom plywood panel on top, aligning all the edges flush.
- Adult Task: Nail the bottom panel securely to the frame using brad nails spaced roughly every 4 inches.
Phase 4: Making the Pucks & Final Setup
Step 4.1: Cutting the Pucks
- Adult Task: Using your miter saw, carefully slice sixteen 1/2″ thick discs from your 1-1/2″ dowel. (Tip: Clamp a scrap block of wood 1/2″ away from your blade to act as a physical stop so every puck is sliced identically!)
Step 4.2: Sanding & Tuning
- Kids/Collab Task: Give the kids pieces of 220-grit sandpaper and let them sand all 16 pucks. They need to be incredibly smooth on the flat faces so they glide across the board like air hockey! Also, sand down any sharp edges on the main frame.
Step 4.3: Threading the Bungee
- Kids/Collab Task: Push one end of your 16″ bungee cord through a side hole from the inside to the outside. Tie a tight, secure double-knot on the outside.
- Adult Task: Pull the bungee across to the opposite hole. Pull it taut so it has good springiness (but not too tight, or it will pull the frame inward!), and tie a second knot on the outside. Repeat this on the other side of the board. Trim any excess bungee.
Maximize your materials by cutting your pucks from a fallen tree branch (like oak, maple, or birch) in your backyard instead of a store-bought dowel! It adds a beautiful, rustic “live edge” look to the pucks and reduces wood waste.
FAQs DIY Pucket Game
1. What is the best wood to use for the frame?
Select pine or poplar are fantastic, budget-friendly choices that are straight and easy to work with. If you want a more premium, durable board that can take a beating, hardwood like oak or walnut is perfect.
2. How do I make the pucks slide faster on the board?
First, ensure the bottom plywood board is sanded up to 220-grit. For lightning-fast gameplay, apply a light coat of paste wax to the playing surface and the bottom of the pucks. Alternatively, a tiny sprinkle of baby powder or cornstarch works wonders!
3. What if I don’t have a miter saw to cut the puck dowels?
If you don’t want to cut your own pucks, you can buy pre-cut 1-1/2″ wooden toy wheels or craft coins online or at your local craft store. Just make sure they are roughly 3/8″ to 1/2″ thick.
4. How tight should the bungee cords be?
They should be taut enough to snap back quickly when pulled, but not so tight that they pull the sides of the pine frame inward. Test-fling a puck to check the tension before tying your final knots!
5. Can I make this game board larger?
Absolutely! You can easily scale this up to a 24″ or 30″ length. Just scale your bottom board accordingly, increase your bungee cord length, and maybe add a few extra pucks for a chaotic, high-energy match.









