

DISCLAIMER: DIY Projects does not endorse zip ties as a substitute for tire chains, so use with caution and for emergency purposes only. Laws change by state/province/country and conditions, so always check local laws before installing.
Quick Summary: Snow Chains Made From Zip Ties
- DIY emergency snow chains: The article shows how you can build makeshift snow chains for car tires using only zip ties and scissors, a cheap, quick-fix alternative to traditional steel tire chains for added traction in snow/ice situations.
- Materials list: For one tire, you’ll need long zip ties (e.g., 36 in), shorter zip ties (e.g., 12 in), and scissors; quantity depends on your wheel’s rim openings.
- Assembly steps: Attach several small zip ties along a long one to form a “chain,” trim excess lengths, then repeat to make enough chains for your tire.
- Installation: Thread each finished chain through the wheel openings and tighten so the smaller zip ties grip the tire tread.
- Use note: These DIY zip-tie chains can help with traction in snow and ice, but aren’t a durable replacement for proper snow chains; they may break if driven on pavement.
No products found.
(As an Amazon Associate, we earn from qualifying purchases.)
RELATED: 17 Clever Winter Gear Organization Ideas
In this article:
A Quick Emergency Traction Hack
Driving in snow or icy conditions without proper traction can be dangerous, especially if you’re caught unprepared. While traditional snow chains are effective, they’re not always available when you need them most. That’s where DIY zip tie snow chains come in.
This simple emergency hack shows how everyday zip ties can be used to create temporary snow chains for your tires, helping improve grip on snow and ice when you’re in a pinch. It’s not a permanent solution, but it can get you unstuck or safely off a slippery road when conditions turn bad unexpectedly.
Best DIY Snow Chains for Tires
Usually made from steel, snow chains are attached to car tires to provide maximum traction in the snow, making the process of driving less of a headache. While every resident who lives in a snow-filled community probably has at least one set of snow chains, that doesn’t mean that it’s not a good idea to know how to build your own snow chains and how to put on snow chains in case of an emergency.
But you might be surprised that you can make your own chains…with just zip ties. Not meant as a replacement for actual snow chains, but these DIY models from Instructables’ user movemaine can provide some quick traction in an emergency.
What You Need
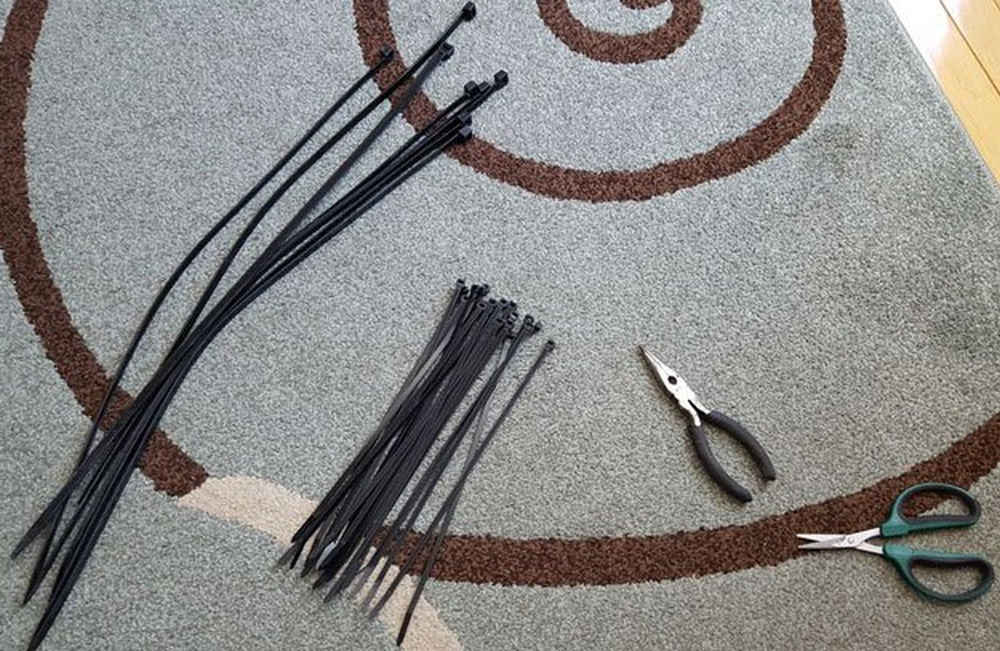
For One Tire
- Six 36 in. zip ties
- 24 12 in. zip ties
- Scissors
- 6 in. snow
Before You Start
Make sure to check how many openings your rims have. One “snow chain” will go through each opening, so if you have six openings, you’ll need six chains.
If you have more or fewer openings, simply adjust the number of zip ties you use, but the process will be identical for all types of rims.
No products found.
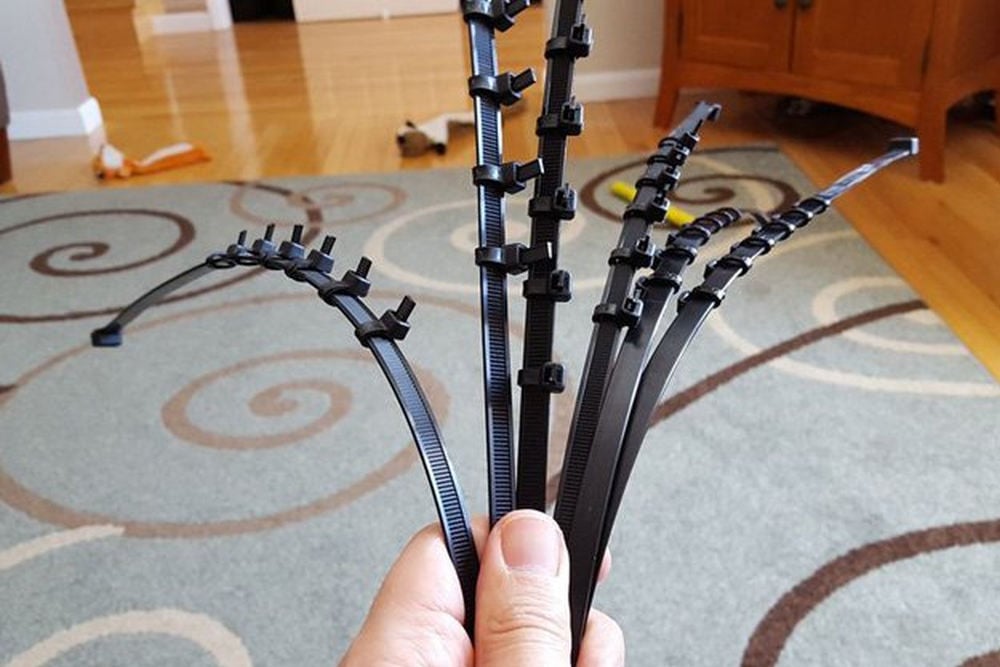
1. Tying the Zip Ties
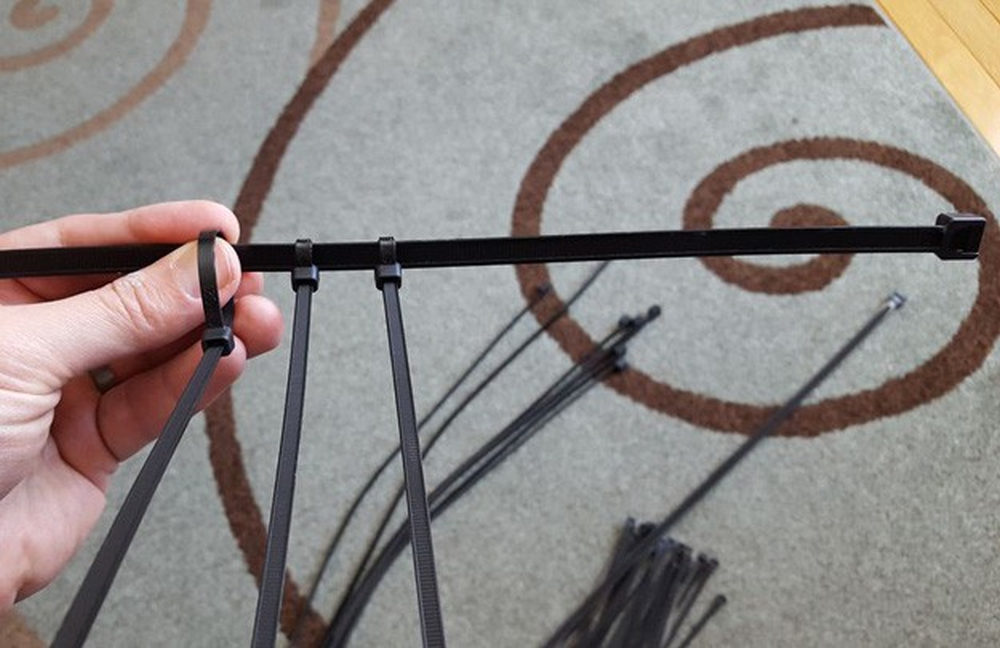
Start by tying a small zip tie to the long zip tie (which we’ll call the chain) about 6 to 8 inches away from the head. Tighten the small zip tie as hard as possible without damaging it.
Add a second small zip tie about an inch away from the first small zip tie. Continue this pattern until you’ve got six small zip ties attached to your chain.
2. Trim the Zip Ties
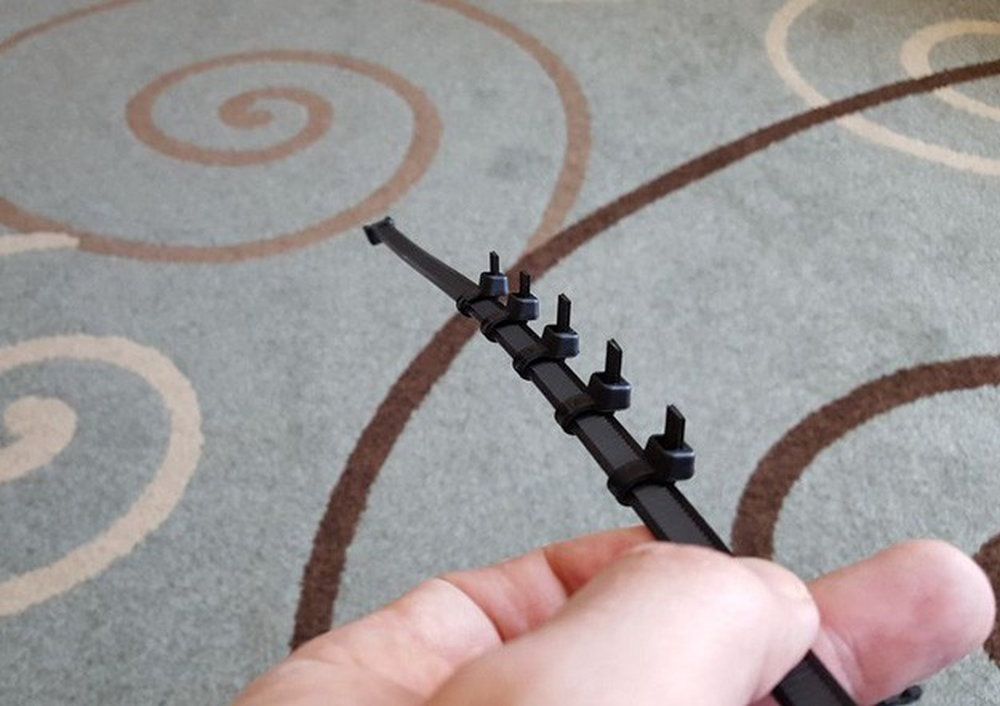
Using a pair of scissors, trim the small zip ties to about 1/4 of an inch in size. You would not want some excess zip ties to be stuck and in the way of making driving complicated.
No products found.
3. Repeat Steps
Repeat these steps to complete as many snow chains as needed. Do this on all others and make sure every zip tie is trimmed properly.
RELATED: How Zip Ties Can Help You Bike Through a Blizzard
4. Attach to Tires
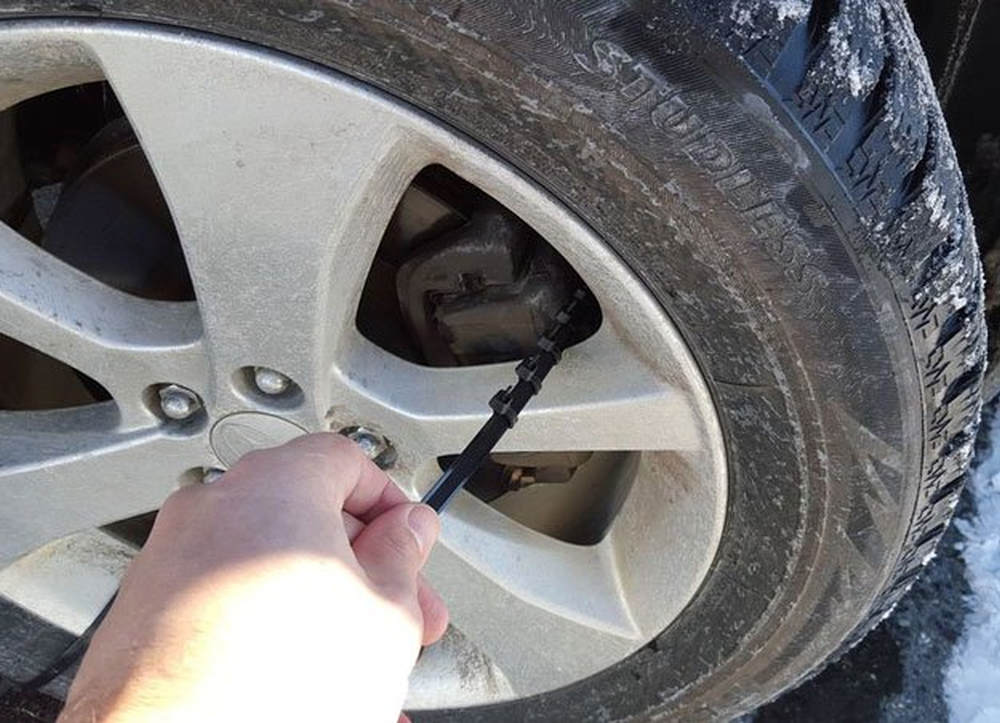
Once all your chains are finished, it’s time to attach them to your tires.
As a tip, turn your wheel all the way to the right. This will make the entire process much easier.
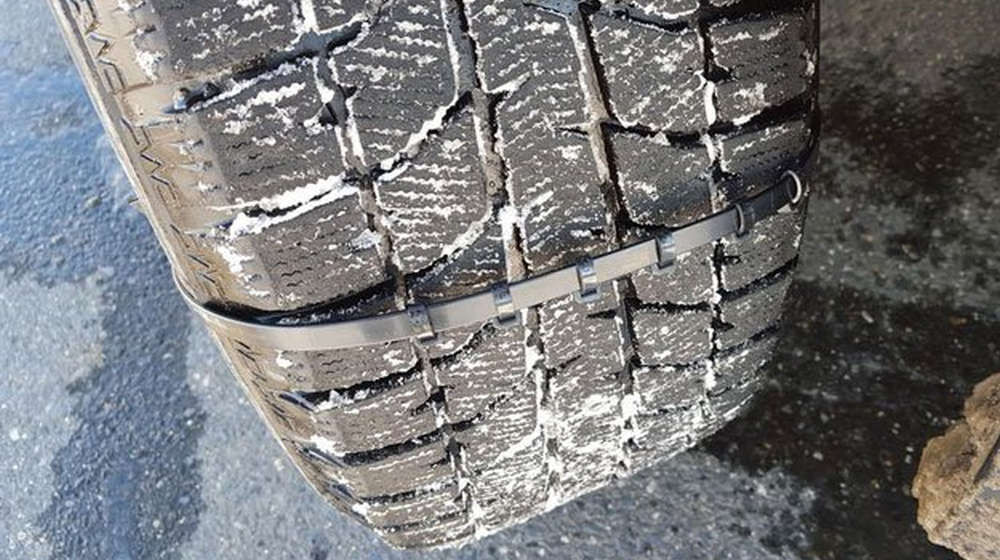
Now insert your chain through any of the openings of the rim, with the head in first, and then pull it around the other side of the tire, back to the front. Pull the chain towards the end of the opening so that it naturally slides over to help prevent it from moving around.
No products found.
5. Tighten the Zip Ties
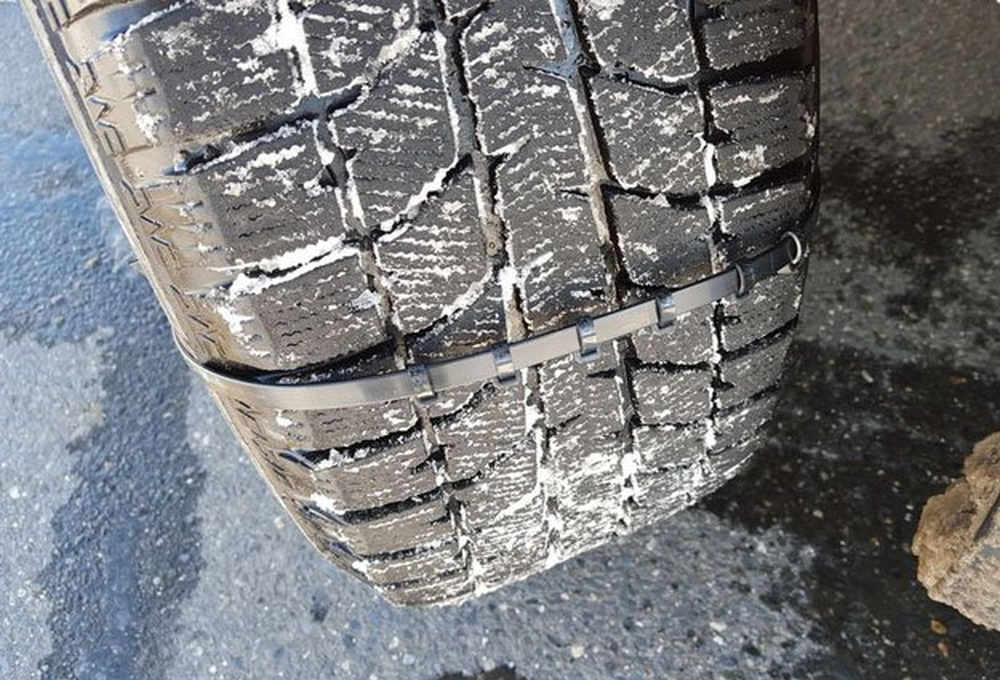
Connect the zip tie and tighten it, all while keeping the smaller zips (which are the grip) on the tread of the tire. Once they’re set, tighten the chain as best as you can.
6. Repeat the Process

Repeat this process for all the openings on the tire. Around 5 to 6 zip ties will work for each tire of your vehicle.
They will stay on your tire when driving with snow chains through snow and ice, but they will likely break off if you drive for a long period of time on concrete alone.
When (and When Not) to Use Zip Tie Snow Chains
DIY zip tie snow chains are best viewed as an emergency traction solution, not a replacement for real tire chains or winter tires. They’re inexpensive, lightweight, and easy to assemble, making them a smart backup to keep in your car during the winter months.
However, they’re designed for short-distance, low-speed use only. Driving on bare pavement or at higher speeds can cause them to snap quickly. Used correctly, though, they can provide just enough traction to help you regain control, get unstuck, or reach a safer location.
Preparation Makes All the Difference
Save this guide, keep a pack of heavy-duty zip ties in your glove box, and share this DIY tip with friends or family who drive in snowy areas. You never know when a simple hack like this could help you (or someone else) get home safely.
Go ahead and watch the video provided by Jason Day and see how the zip tie snow chains are being used in a 6-inch snow field:
FAQ: DIY Zip Tie Snow Chains
- What are zip tie snow chains?
Zip tie snow chains are temporary, DIY tire traction aids made by fastening zip ties around a tire’s tread to improve grip on snow and ice during emergencies. - Do zip-tie snow chains actually work?
Yes, for short-term emergencies. They can help increase traction enough to get unstuck or drive a short distance on snow or ice, but they are not as durable or effective as real snow chains. - Are zip-tie snow chains safe to use?
They are safe only at low speeds and on snow or ice. Driving on dry pavement can cause zip ties to break and potentially damage your vehicle. - How fast can you drive with zip tie snow chains?
It’s recommended to drive under 10–15 mph and only long enough to reach a safer area. These are not designed for extended driving. - What kind of zip ties should I use for snow chains?
Use heavy-duty, industrial-strength zip ties, ideally 36 inches or longer, made from thick nylon. Thin or lightweight zip ties will break quickly. - How many zip tie chains do you need per tire?
Most setups require 6–10 zip tie chains per tire, depending on tire size and rim openings, to provide evenly distributed traction. - Are zip tie snow chains legal?
Laws vary by location. In many areas, zip ties are considered an emergency traction aid, not a certified snow chain. Always check local winter driving regulations. - Can zip tie snow chains replace real snow chains?
No. Zip tie snow chains are strictly a temporary emergency solution. For regular winter driving, proper snow tires or certified tire chains are strongly recommended.
Did you enjoy our post? Let us know your results in the comments section below!
UP NEXT:
- 10 Valuable Winter Storage Ideas You Need On Chilly Days
- 11 Awesome Wood Crafts to Beautify Your Home This Winter | DIY Projects
- Best Christmas Cookie Recipes | 16 Favorite DIY Christmas Cookies
We love getting feedback; it helps us improve the site and choose which topics to cover. We love doing cool DIY projects by making craft projects, home decor projects, upcycling ideas, recipes, tutorials, and anything you can do yourself.
That’s why we created this site: we want people to be more in touch with their creative side and realize that there are a lot of things that they can do themselves. We’d love to hear from you and create a community of DIY enthusiasts where any project is just a click away.
Stay connected with us on Facebook, Twitter, and Instagram!
Editor’s Note: This post was originally published on January 18, 2016, and has been updated for quality and relevancy.


